Database

The activity database allows managers and students to create, view and search entries. The format and structure of these entries is almost unlimited and includes images, files, links/URLs, numbers, texts as well as much more. Creating databases is similar to using Microsoft Access or Filemaker.
You can think of a database essentially as a table. The individual columns of the table are data fields of a particular data type, e.g. text, number, file, etc. You can create as many such tables as databases in the course. The entries can be linked in other tables and in all working materials in the course if you have activated automatic linking (similar to the glossary).
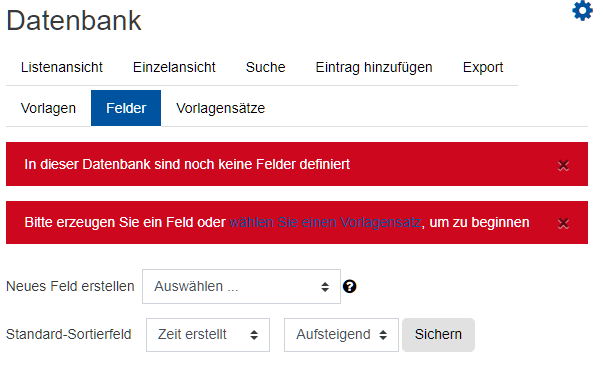
After creating the Database activity, you must first define fields. Then you need to create a template. This determines the display of the database entries.
Please also note our netiquette and general rules of conduct as well as our information on anonymity in RWTHmoodle when using the Database activity.
For this activity, you can use Tagging (Tags).

1. Create database in the course room
To add a database, proceed as follows:
- Switch the course page to the edit mode using the button at the top right.
- In the section where you want to see the Open Forum, click "Add an activity or resource".
- Under "Activity", select "Database".
- You will be automatically redirected to the settings page to configure the database.
2. Configure database
You can now make some configurations of the database:
- General
- Give the database a name and optionally a description.
Entries:
Approval required? If this option is activated, managers have to confirm entries made by students before they are displayed in the database.
Comments: Enables / disables the possibility to make comments on database entries.
Required entries before viewing all data: This option allows you to specify that a student must first create a selected number of entries before accessing the other entries in the database.
Note
If you enable this option, you should disable autolinking of entries. Autolinking allows access to database entries even without reaching the required entries.- Maximum possible entries: With this setting you can limit the maximum number of possible entries that can be created by a single student.
Availability:
- Available from/until: Define a time period during which students may access the database.
- Lock editing from/until: Define a time period in which the database may be edited.
By clicking on "Save and go to course" you create the database.
Configuring the database fields
After creating the database, you need to configure the fields of the database.

To do this, proceed as follows:
The following database fields are available to you in RWTHmoodle:
- Image: Use this field if you want students to upload image files. In addition to the field name and description, you can define here what size the image should be (width / height) in single and list view. You can also define a maximum image file size.
- File: Here students have the possibility to upload any file and insert it into the database. If it should be an image file, the field type Image is more suitable.
- Date: Here you provide students with the option to have a specific date selected from individual drop-down lists.
- Single choice: Provide students with the ability to make exactly one selection among multiple options. If the person does not select an option, they will be made aware of this fact and will not be able to save the entry until they make a selection. If you have only two opposite options (True/False, Yes/No), you can also use a single multiple choice. Checkboxes are not selected by default, and so students can save their entry without actively choosing one of the options. However, this way is not always the most practical and useful.
- Geographical data: Users can enter a geographic indication, specified by the latitude and longitude of the location, into the database. For example, the RWTH skin building is located at 50.777858N 6.077565E. The coordinates must be entered in decimal format. A possible website to determine decimal coordinates would be e.g. Coordinates Converter. When the entry is viewed in the database, this information is automatically linked to geographic services such as Google Earth, OpenStreetMap, GeaBios, Mapstars, and others. Managers can choose which of these links to use.
- Multiple selection: Here you can add one or any number of checkboxes for multiple selection. Each line in the text box represents one possible checkbox. The text you enter here appears next to the checkbox and then also represents its value, e.g. "valid" for something that can be valid or invalid. This word appears next to the entry's checkbox and then when the entry is viewed, if that value is selected. If you want to ensure that users select only one option from several, use single-selection instead.
Multiple selection can be used for example in movie databases if you want to select from horror, comedy, western etc. and at the same time you want to provide the option that a combination is possible, e.g. western comedy. The Menu Multiple Selection field type presents the same functionality, but clicking on multiple checkboxes is the more intuitive way.
- Menu: The texts you enter in the options field are provided as a drop-down list from which students can choose. Each line becomes a selection option.
- Menu (multiple selection): The texts you enter in the options field are provided as a drop-down list from which students can choose. Each line becomes a selection option. Holding down the Ctrl or Shift key allows multiple selections. However, only a few users are aware of this option, so it is often more advisable to use checkboxes (multiple selection) in these cases.
- Text area: Here students can enter formatted text. The way it works is very similar to when you post in a forum.
- Text line: Students can enter text up to 60 characters long in this field. For longer text or text that needs formatting (bullets, etc.), please use the Text area field.
- URL: Links to websites (URLs) can be captured and saved here. If you select the option Automatic linking of URL, the entries are automatically converted into a clickable link. If you assign a title in the Force name entry for link input field, this will be used for link generation instead of the plain URL text. You can choose whether the web page is opened in a new window.
Example of use: You want to create a database about authors and ask your students to write an entry for individual authors. At the same time, you also want to enter the URL to the author's website. If you now enter the term "Homepage" in the field Force name entry for the link, all links for the authors will be uniformly displayed with the title "Homepage", and a click on it will lead to the author's website.
- Number: This field stores any comma number, e.g. -1000, 0, 0.123.
Create templates
Templates for databases allow you to have full control over the appearance of database entries when viewing them in a list or individually, but also when entering the entries. This functionality is similar to the mail merge functions of popular word processors. You use placeholders that are later replaced by the actual entries.
To create the different templates, proceed as follows:
- Open the database activity. Now click on the Templates tab.
- A page appears where you can edit the template.
- Creating your own templates requires basic knowledge of syntax. In the simplest case you will use the default template provided and just click the Save Template button.
Note
View database
The database offers different views:
- List view - several entries are displayed per page (the number per page can be set)
- Single view - each entry is displayed on its own page
- Search - on this page you can search the database according to certain criteria
- Add entry - on this page you can create a new database entry
List view
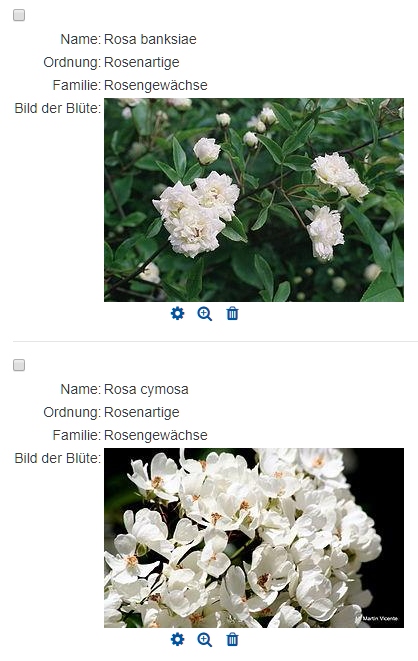
In the list view all records or entries of the database are displayed in an overview. The entries can be displayed in an abbreviated form. With the setting Entries per page you can define how many entries should be displayed per page.
Below the individual entries you will see icons for the respective entry (single view), for editing the entry and for deleting the entry (for editing and deleting you must have the appropriate permission).

Single view
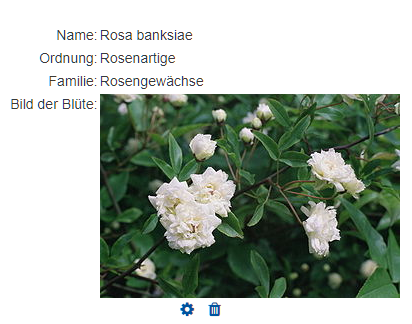
The single view shows you only one entry of the database per page, but with all information available.
Above and below the entry, a page navigation is available: You can select any page or, for example, click Next to go to the next page to see the corresponding entry.
Below the entry you will again find the icons for editing or deleting (if you have the permission to do so).

Comment database entries
You can comment database entries if you have activated this function in the activity settings.
- Click the database in the course room. The view page of the database appears.
- On the database view page, click the Single View tab and click the entry you want to comment on.
- On the left below you will find a link Comments - click on it.
- An input window will open - write your comment here and then click on the Save comment link.
All comments appear as a list with author and creation date below the database entry.
Add database entry
To create a database entry, proceed as follows:
- Click the database in the course room. The view page of the database appears.
- On the database view page, click the Add Entry tab.
- Fill in the fields of the database entry.
- Click the Save and View button to view the entry individually or the Save and Add More button to create the next database entry.
Check database entry
If the corresponding option is activated in the database settings, database entries of students will only be released for viewing by all after a check by the managers.
- Click the database in the course room. The view page of the database appears.
- On the database view page, click the List View tab and click the entry you want to check.
- A release icon
 appears below the entry - click it to release the entry for publication.
If you want to withdraw an already released entry, then click on the reject icon of this entry.
Entries waiting for review are highlighted: for you as the manager and for the person who created the entry.

For more information:

