Course restore

The content and structure of a course room can be restored in whole or in part, provided that a backup file is available for this purpose. All users with the role of manager can independently create course backups of their RWTHmoodle course rooms, download them and, if necessary, restore them in other Moodle systems. In RWTHmoodle, they can accordingly restore backup files from other Moodle systems in order to reuse the backed up content.
To reuse content from RWTHmoodle course rooms in RWTHmoodle no course backup and course restore is necessary. Managers can use the course import for this purpose.

A course backup can be restored in any course room, where you have the appropriate rights. During the course restore, you can choose to merge the content with another course or to overwrite all content of an existing course. Course backups can be restored in the moodle-internal format *.mbz as well as in the cross-system format *.imscc.
Note
To restore a course, proceed as follows:
- Go to the course page.
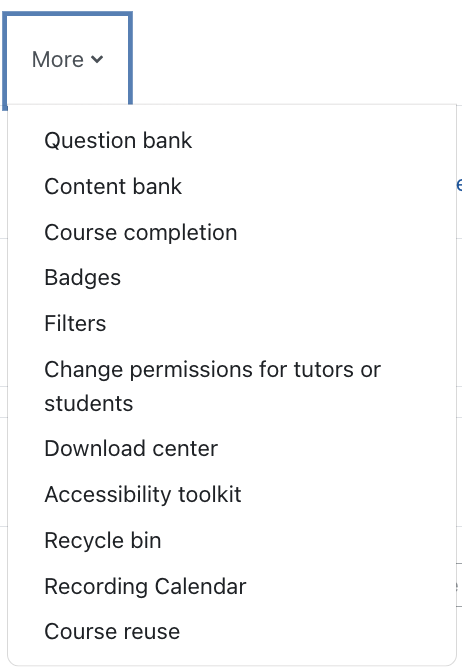
Click "More" in the center menu guide and select "Course reuse".

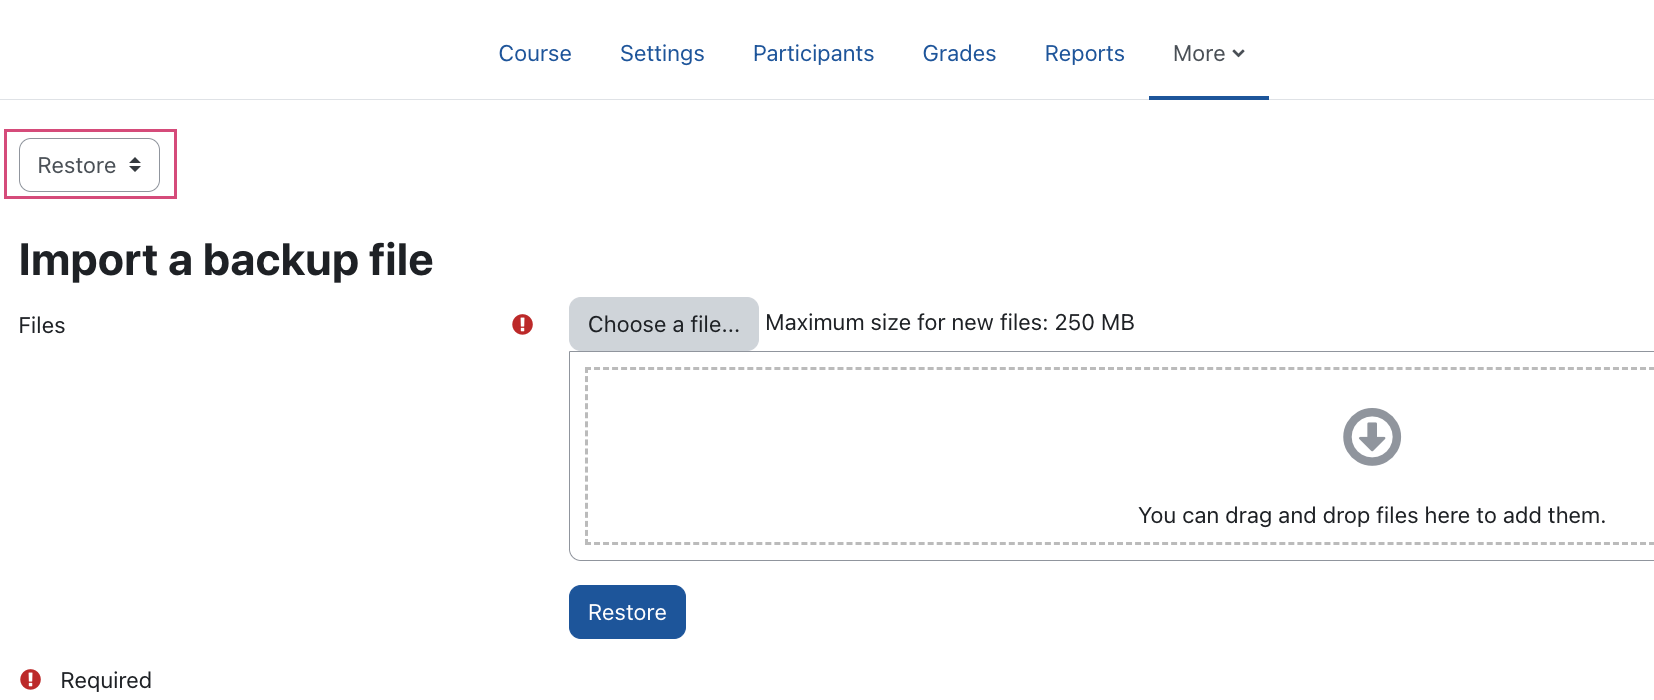
Select "Restore" from the drop-down menu.

- In the import Backup File area, select or drag-and-drop a course backup file into the Upload window and click the Restore button.
If you want to restore an already existing course backup file by mouse click, click on the corresponding link "Restore" below the upload window in the "User private backup area". This option is particularly useful if you have already created course backups in an existing course room and now want to restore an earlier state of the course room in this way.
- Check if all data is correct. Selected backup settings are marked with a green check, unselected settings are marked with a red cross. These backup settings were defined by the system or by the user in the course of creating the course backup and cannot be changed here. They are therefore for your orientation only.
Under Course details you will see all content elements (activities, resources, etc.) that were included in the course backup and that will now be restored. Since only course structures and no student data (e.g. forum posts, glossary entries, grades, etc.) are saved during course backup, no user info can be restored. Therefore, all elements of the column "Userinfo" are marked with a red cross by default. For example, an assignment is restored with all user configurations, but without any grades or solutions submitted by students.
Note
Only course structures (configured activities, provided work material, etc.) can be saved in the course backup by managers, but no student data (e.g. forum posts, glossary entries, ratings, etc.). Therefore, no user data is included in the course restore. - Go to the bottom of the page and click the "Continue" button.
- Select whether to restore the course to the current course room or to another existing course room. If you want to restore the course room in the current course room, select whether you want to merge the content with the current course or delete all the existing content of the current course. If you choose "Merge...", the restored content will be inserted below the existing content in the current course. Then click on “Continue”.
- You will now be shown once again the settings made at the time of the course backup, which will now be applied for the course restore. As a manager, you can no longer change these, as all backup settings are marked with a padlock icon.
- By clicking on "Continue" you will be shown the course name, the course short name, the date of the course start as well as all course sections with the corresponding content elements. Again, you do not have the option of selectively choosing elements for course restore. Click the "Continue" button.
- Now verify once again that all the data to be restored has been entered correctly. Confirm the entries by clicking the "Perform restore" button.
- Click on the "Continue" shadow area to complete the course recovery.
- Once the process is successfully completed, the message "The course was restored successfully, clicking the continue button below will take you to view the course you restored."
- Clicking on "Continue" will take you back to the course with the restored content.

Read more about this:

