Add activity Interactive Content (H5P)

As of Moodle 3.9, H5P quiz activities offer an Attempts Report in addition to a grade. Grades and attempts can be viewed by managers and students. Managers can see the attempts and grades of all students, while students can only see their own attempts and grades.
When you create a new H5P activity, you access the Content bank and link the H5P content stored there to the Activity. Alternatively, you can upload a *.h5p file directly as the content of the activity. This file is not stored in the Content bank, but only in the context of the H5P activity.
For this activity, you can use Tagging (Tags).
1. Adding an H5P activity
To add an H5P activity, follow the steps below:
- Switch the course room to edit mode using the "Edit mode" slider next to your name in the upper right corner.
- Click "Add an acticity or resource" in the section where you want the H5P activity to appear.
- Select the "Interactive Content (H5P)" option.

The H5P Activity is created. You will be redirected automatically to the settings page to add the content and configure the activity.
2. Configuring an H5P activity
2.1. General Settings

- Name - Give your new H5p activity a descriptive name.
- Description - Describe what the students can expect in the H5P activity.
- Display description on course page - If this box is ticked, the description will appear on the course page.
2.2. Add H5P Content
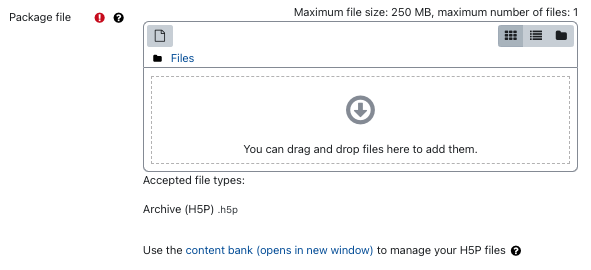
In the file upload field at "Package file" add the H5P content. There are three possible ways to integrate the H5P content into the H5P activity:
- Upload an H5P file
- Access H5P content in the Content bank
- Create a whole new H5P content in the Content bank
2.2.1. Upload the H5P file
You can upload a *.h5p file directly as the content of the activity in the upload field. This file is not saved in the Content bank, but only in the context of the H5P activity. However, this makes it difficult to edit the H5P content, as it can only be edited in the Content bank. Therefore, before editing H5P content, it must first be uploaded to or recreated in the Content bank.
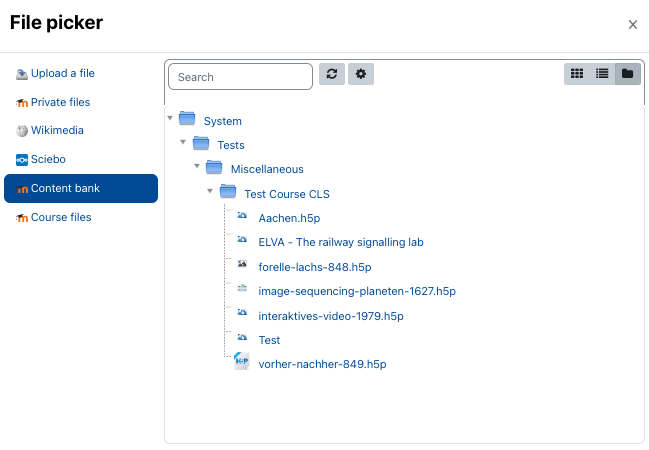
2.2.2. Getting H5P content from the Content bank
- Click on the page icon (= Add) in the top left corner of the file upload field. This opens the Content bank.
- Select the appropriate H5P content in the Content bank.
- In the new window, select how the content should be transferred:
- Make a copy of the file - The H5P content is copied from the Content bank and saved in the context of the activity.
- Create an alias/shortcut to the file - Link file from the Content bank. Changes made in the file of the Content bank are automatically applied to the activity. Please note: If you include content from the Content bank of other courses via an alias/link, the content will no longer run if the course being referenced is deleted.
- Enter the names of the authors and choose the appropriate license.

- Click "Upload this file" to include the file in the activity.
2.2.3. Creating new H5P content
If the Content bank is still empty, you can also create new H5P content:
- Click on the Link "content bank (opens in new window)" link below the upload field. The Content bank will open in a new window.
- Create the desired H5P content and save it.
- Return to the window where you are editing the H5P activity. Follow the steps described in 2.2.2. above.
2.3. H5P Options

Select here which buttons will later be displayed to students under the H5P content:
- Allow Download - Allows users to download H5P content as *.h5p files for reuse in other contexts.
- Embed button - Displays an embed code that allows the H5P content to be embedded in other contexts. The embed code cannot be used outside of RWTHmoodle as a login is required to view the content.
- Copyright button (recommended) - Displays the license terms for the H5P content as a whole and any third party content used in it
2.4. Grade
2.4.1. Grade

Select here the type of grading for this H5P activity. You can either assign points (default) or use a scale. This allows you to assign non-numerical gradings.
If you want to assign points, enter the maximum number of points that can be achieved for the H5P activity in the "Maximum grade" field.
If you choose the "Scale" type of grading, choose an appropriate scale. You can create your own scales via the grader report of the course room and use them here.
If you don't want to assign grades for the H5P Activity, select "None" as the type of grading.
2.4.2. Grade category
Select the grade category in which the H5P activity grades are placed in the gradebook.
- Grade categories serve to summarize graded activities.
- Each grade category has an aggregated overall grade, which is calculated from the individual grade items belonging to the category.
- Predefined calculation formulas are available for the calculation. Alternatively, you can use your own grade calculations.
- Each course room has a main evaluation category by default, which has the same name as the course room itself. If you do not create any other categories, all grade items belong to this main category.
2.4.3 Grade to pass
Enter here the required minimum grade for passing the activity. The value is used in activity and course completion. In addition, pass grades in the gradebook are highlighted in green and fail grades in red.
Regardless of this grade to pass, the students' view shows whether they have passed an H5P activity or not after completing it. However, the grade to pass has no influence on this, as the information on whether you have passed an H5P activity or not is made in the settings of the H5P content.
2.5 Attempt options
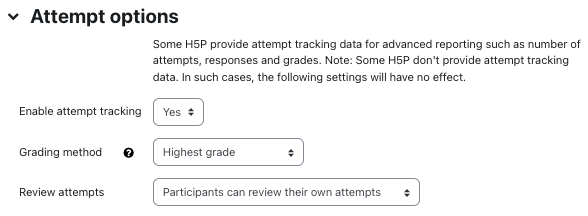
H5P quizzes provide attempt tracking data. For both managers and students the advanced reporting provides number of attempts, responses, and grades. To enable attempt tracking, set the option "Enable attempt tracking" to "yes". Please note that attempt tracking is not supported for all content types, but for Interactive Video and Course Presentation.
With "Grading Method" you can specify which attempts should be used to assess the activity. You can choose between:
- Highest Grade
- Average Grade
- Last attempt
- First attempt
- Don't calculate a grade
2.6. Common module settings
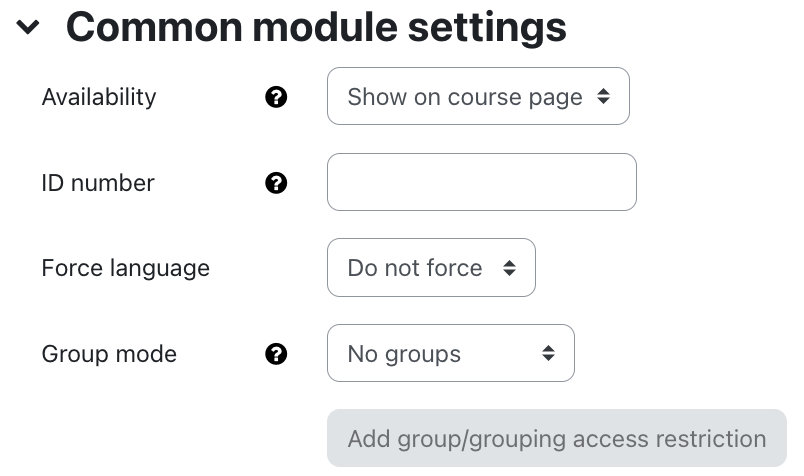
- Availability - Choose whether the H5P activity is immediately visible to students or hidden from them.
- ID Number - The ID number is used to assign a label that can be used in the gradebook for purposes such as overall grade calculation or custom reporting. If the H5P activity is not needed for grade calculation, the field can be left blank.
- Group mode - There are three different settings for Group Mode: No Groups - Separate Groups - Visible Groups.
- [Grouping - Select whether the Group Mode should only include the groups of a specific grouping.]
2.7. Restrict access
Here, managers can control the visibility and availability of the resource or activity to students according to certain conditions. Please read the article Restrict access.
2.8. Activity completion
Activity completion allows the teacher to set completion criteria or conditions when an activity is considered completed (i.e.: successfully processed). You can find detailed information in the article Activity completion settings.
2.9. Save

Clicking on "Save and go to course" will return you to the course page.
2.10. Notification about content change
The settings for the activities can be reached after creating them within the activity via the central menu navigation. Here you will find activity-specific settings and you can also save the activity directly individually.
If you subsequently make changes to the settings, activate the checkbox "Send notification of content change" to inform all participants about the new or changed activity. All participants who can access the activity receive the notification.