Add and configure Margic

When configuring a Margic, you can specify when students can submit entries, whether these can be subsequently revised and which error types should be available for the annotations. There is a range of predefined error types to choose from, which can be subsequently adapted and supplemented as required if they are not suitable for the intended purpose. For this activity, you can use Tagging (Tags).

Contents
To create a Margic, proceed as follows:
- Switch the course room to edit mode using the "Edit" slider next to your name in the top right-hand corner.
- Click on "Create activity or resource" in the section where the Margic should be visible.
- Under "Activity", select the "Margic" option.
- A new Margic has now been created. You will be automatically redirected to the settings page to configure the Margic.
2.1. General information
- Give the Margic a suitable name.
- Write a description. This can, for example, consist of a task or a request for action.

2.2. Error types
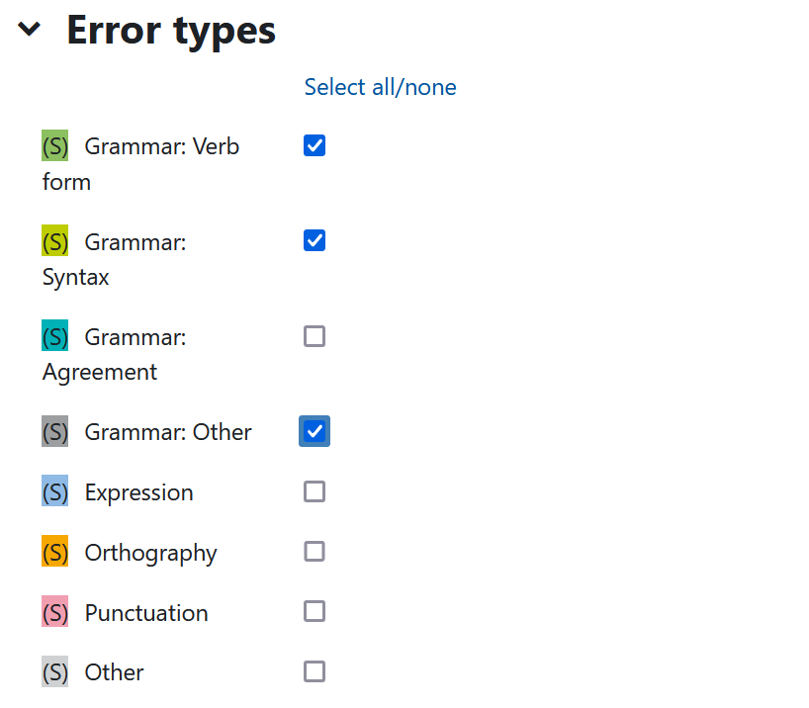
Select the error types you want to use with a mouse click. Each error type has its own color to visually distinguish the annotations from one another. The predefined colors are selected so that the font retains sufficient contrast against the colored background and thus accessibility is maintained.
The predefined error types are aimed at language teaching. You can customize their names and colours at any time to suit your needs. If the default selection is not suitable for your intended use, first select the required number of error types and then rename them. Read section 3 in the instructions for using Margic (lecturers).
Alternatively, you can also save the Margic without selecting predefined error types in order to then manually create your own error types and assign them a color. However, as the coloring of the predefined error types guarantees accessibility, we recommend adopting existing error types. This means keeping the coloring, and then only adapting the names of the selected error types in the second step.
2.3. Availability
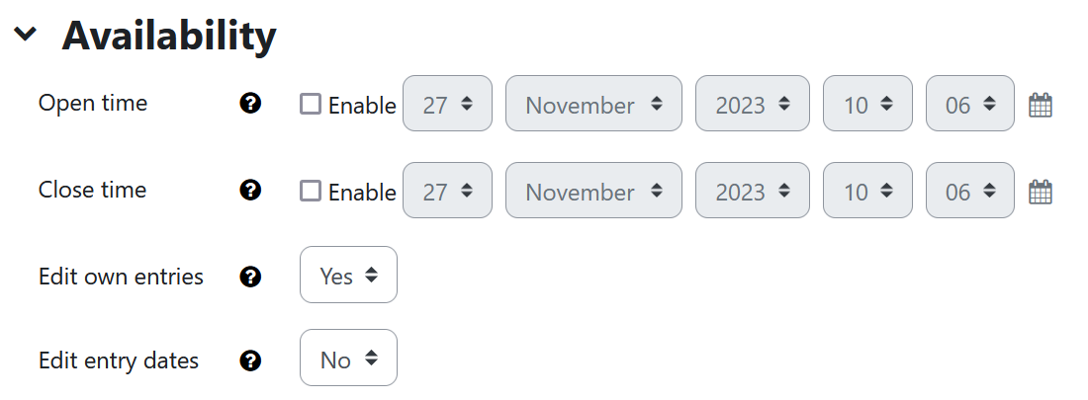
- Open and close time: Here you can optionally limit the time frame in which entries may be created or edited. By default, the start (open) and end (close) times are not enabled, i.e. students can submit entries without any time restrictions. Note: The start and end times only refer to when and until when entries may be created or edited. Submitted and already annotated entries are permanently visible regardless of the setting chosen here.
- Edit own entries: By default Students can edit their own entries until the close time has been reached - provided that one has been enabled. This also applies to entries that have already been annotated. This allows students to use the feedback they receive to iteratively improve their entry. A revised entry is created for each edit and clearly marked as such. Existing entries are therefore not lost or overwritten. If you do not want to allow editing of existing entries, set this setting to "No".
- Edit entry dates: Change this setting to "Yes" if you want students to be able to change the submission date of new entries. This makes it possible, for example, for students to set a future date for a submission.
2.4. Appearance

Here you can set the width of the annotation area as a percentage. The annotation area is displayed to the right of the entries. The wider the annotation area, the smaller the width of the entries:
2.5. Outcomes
If you have defined outcomes for the course room, assign them to the activity.
2.6. Ratings

In the default setting, the entries annotated by lecturers are not graded. If you would like to assign a grade that is transferred to the gradebook like all other assessable activities, select the desired calculation method (average value, number of grades, maximum value, minimum value or sum of grades). You must then specify the assessment type (point value or scale) and select a maximum number of points or one of the available scales. You can also optionally define a threshold for a pass.
2.7. Common module settings
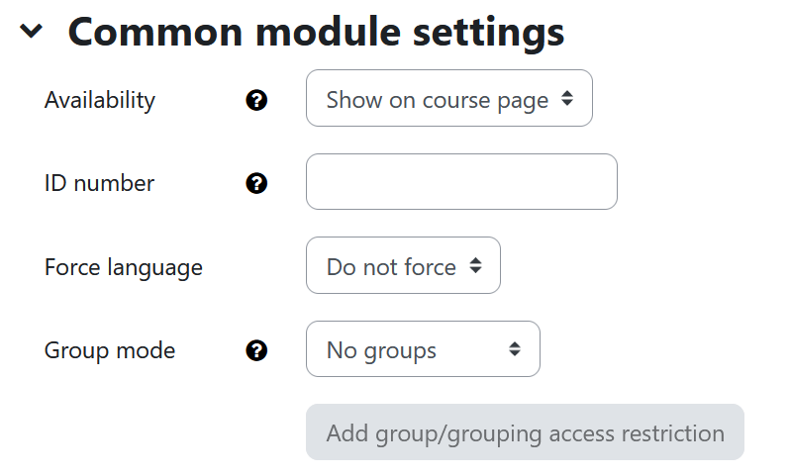
- Availability: Select whether the Margic should be displayed to students immediately or hidden from them.
- ID number: The ID number is used to assign a designation that can be used in the "Assessments" area when calculating overall assessments. Assigning an ID number is optional and can be added later.
- Group mode: There are three different settings for the group mode: No groups - Separate groups - Visible groups.
- No groups: Default setting. Lecturers cannot filter the text entries submitted by students on the overview page according to group affiliation.
- Separate groups and Visible groups: Lecturers can filter the text entries submitted by students on the overview page according to group affiliation. This is helpful in course rooms with many participants if the lecturers want to restrict the displayed entries to a subset of the students.
Note
In the context of the Margic activity, group mode is only relevant for lecturers and is limited to filtering entries by group membership. Group submissions, in which students submit an entry together, are not possible with the group mode.- Grouping: A grouping is a set of groups. Select a grouping here if required. The groups that are assigned to the selected grouping are then taken into account for the selection in group mode.
2.8. Restrict access
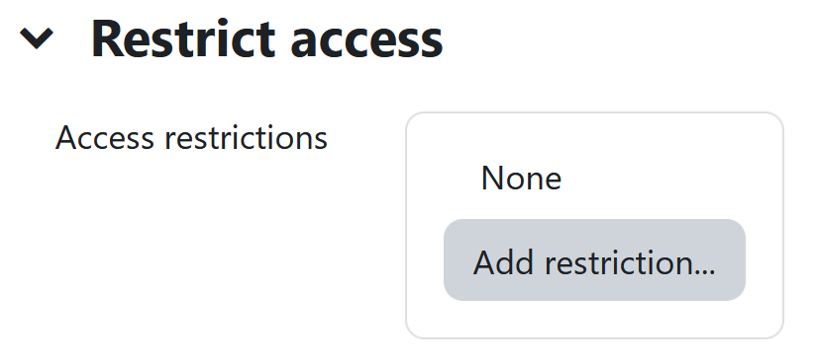
With these settings, you can link the visibility and availability of the Margic for students to certain conditions. Read the article Restrict access (requirements) for more information.
2.9. Activity completion

With these settings, you define criteria or conditions for when the Margic is considered completed. You can find detailed information in the article Activity completion settings.
2.10. Saving the settings

Click "Save and return to course" to save the settings and return to the course page. Click "Save and display" to save the settings and open the Margic to edit it further. Click "Cancel" to discard the changes and return to the course page.
2.11. Content change notification
The settings for the activities can be accessed via the central menu navigation after creating the activity. Here you will find activity-specific settings and can also save the activity individually.
If you subsequently make changes to the settings, activate the "Send notification of content change" checkbox to inform all participants of the new or changed activity. All participants who can access the activity will receive the notification.
![]()

Further information:

