Add Time Slots

The activity "Scheduler" allows teachers to plan and manage appointments, for example for supervision times, oral exams or exam reviews. The creation is done in two steps: first the scheduler is created, then appointment slots are added.

Contents
1. Add slots
1.1. Slot details
1.2 Manually assigning students to slots
1.3 Comments and notes for appointment
2. Schedule overview
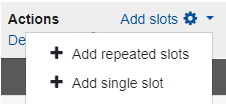
- After you have created the scheduler, click on "Add slot" in the "My appointments" tab.
- Then select whether you want to add a single or a repeated slot. In case of several appointments to be created, whose date and time follow a certain scheme, the "Add repeated slot" option is generally recommended. The following explanations refer to the case when you want to add recurring appointment slots. The procedure for creating a single appointment slot is comparable, but offers fewer setting options.

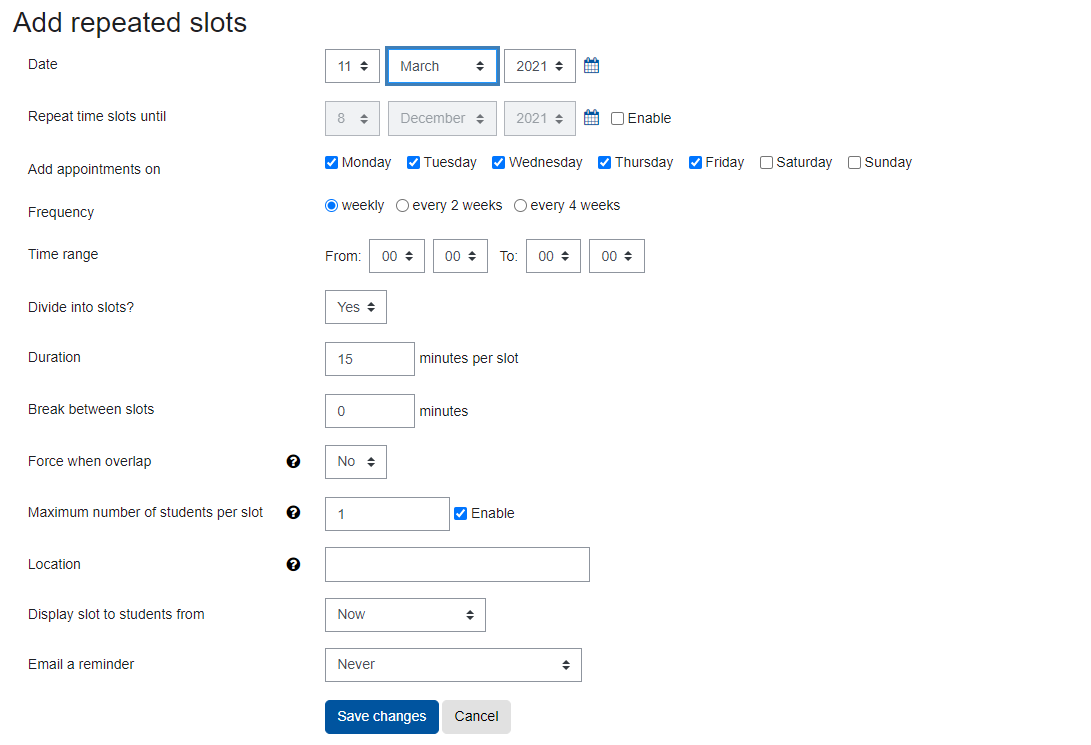
On the "Add new appointment slots" page you can make the following settings.
- Date - set the date of the first appointment slot to be created.
- Repeat time slots until - Specifies the end date of the recurring appointments.
- Add appointments on - Specifies the days of the week on which time slots for recurring appointments will be created. By default, the "Saturday" and "Sunday" weekdays are disabled and the remaining days are enabled.
- Frequency - Defines the time interval at which recurring appointment slots will be created.
- Time range - Defines the times within which appointment slots are created.
- Divide into slots? - Select "Yes" if the specified time range is to be divided into several appointment slots. This setting is necessary if you want to provide more than 1 time slot per day.
- Duration - Specifies the duration of the appointments. All specified time slots will be divided into slots of this length. Remaining time from a time slot will not be used for appointments.
- Break between slots - Determines the interval between two appointments, which can be used for a short break or as a buffer, for example.
- Force when overlap - Specifies how to handle new time slots if they overlap with other existing time slots. If "Yes", the existing overlapping time slot will be deleted and the new time slot will be created; if "No", no new time slot will be created.
- Maximum number of students per time slot - Determines the maximum number of students who can participate in the appointment. If the checkbox is unchecked, a time slot can be booked by any number of students. In group mode, the maximum number is always limited to one group.
- Display time slots to students from - Define the time period in which the appointment slots will be shown to students. With the default setting "Now", newly added appointment slots are displayed to students immediately after they are created.
- Email a reminder - Determines how many days before students will receive an email reminder of the upcoming appointment. By default, students will not receive a reminder email (set to "No").
 -
-
Note
If you have activated "Booking in groups" in the settings options (see section "2.1 Options - Booking in groups" in the instructions for creating a scheduler), you must base the "Maximum number of participants per time slot" on the group sizes with the largest number of participants, otherwise the time slot cannot be booked by all groups.
For example, if you have 10 groups with 5 participants and 1 group with 7 participants, you should set the "Maximum number of participants" to 7 if the time slot is only to be booked by 1 group. If, on the other hand, you limit the "Maximum number of participants" to e.g. 10, several groups (i.e. 2 groups with 5 participants each) can also register for this appointment. If the checkbox remains unchecked, however, any number of groups can register for an appointment. In order to avoid such possibly undesirable multiple bookings of a time slot, it is therefore recommended to pay attention to an equal distribution when selecting the group sizes. When "booking in groups", students also have the option of booking an appointment as an individual despite their group membership.
1.2 Manually assigning students to slots
If you have selected the option "Add single slot", you have the possibility in the section " Appointment 1" to assign a student to the appointment already at the time of its creation. If you want to assign the same appointment to several students, add more students by clicking on "Add another student". The students you have selected are then automatically registered when the appointment is created. In this case, manual booking on the part of the students is no longer necessary, but the students can log out of this time slot until managers have marked it as "Seen".

Note
 in the appointment overview to go to the detailed view of the appointment slot and make the necessary adjustments. You then also have the option to move the appointment.
1.3 Comments and notes for appointment
You can use the “Comments” option to store notes on the appointments that should be visible to students before booking. In addition, you can also store "Notes for appointment" (e.g. feedback after appointment completion) for specific students. Both pieces of information appear in the “Comments” column of the appointment overview for students. To store this information, you have two options.
- When you add a single time slot, enter the desired information in the “Comments” field and/or- if you add participants to the appointment in advance- in the "Notes for appointment (visible to students)" field.
- If you are adding repeated slots, complete the creation of the slots and then open the respective appointment slot in the appointment overview by clicking on the gearwheel
 and then enter the required information in the "Comments" and/or "Notes for appointment (visible to participant)" fields.

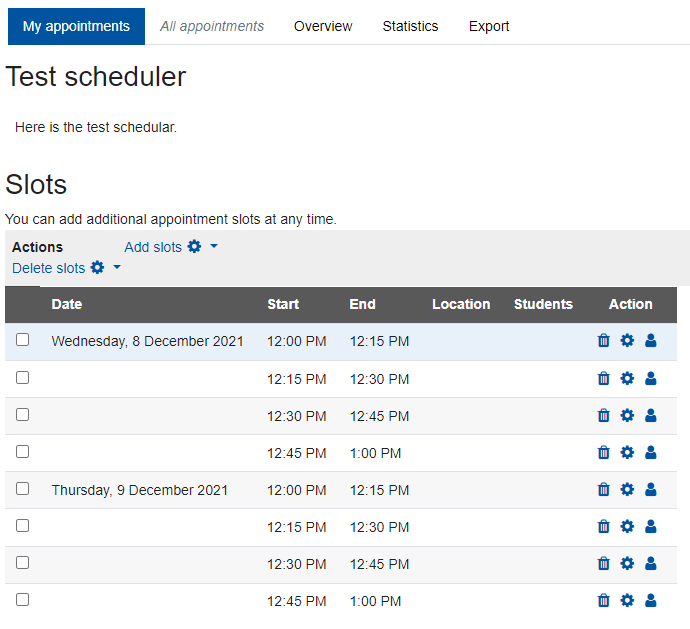
After saving the newly created appointments you will get to the appointment overview. The table shows you all appointments, all appointment bookings and allows various actions. These are explained in the tutorial using the scheduler.


Read more:

