Quickmail

With Quickmail you can send e-mails to all persons in a course room, to various user rights groups, other groups, and selected persons. Since students do not have access to the Quickmail module, e-mails that have already been sent are not visible to students in the course room itself. Therefore, we recommend using Announcements rather than Quickmail. Announcements are automatically sent as notification emails to all course participants and are always visible in the course room. They can also be addressed to single groups.
Quickmail can be used to send selective bulk e-mails. It enables the use of
- (multiple) attachments
- drafts
- signatures
- Filter according to roles
- Filter according to groups
- Scheduled email sending

Contents:
1. Send emails
2. Drafts
3. Scheduled emails
4. View history
5. Create a signature
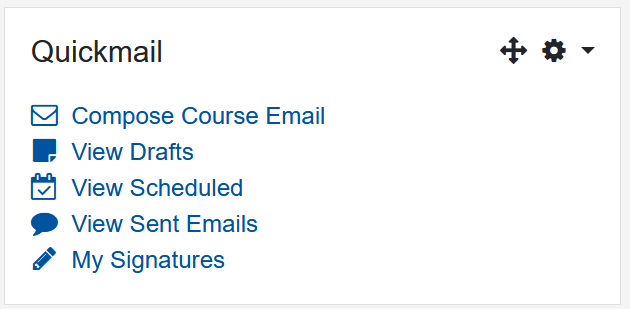
Quickmail is displayed as a block on the right side of your course room. It is automatically added to a new course room upon creation.

Sending emails is possible in a few steps:
- In the course room, click on "Compose Course Email" in the Quickmail block on the right-hand side.
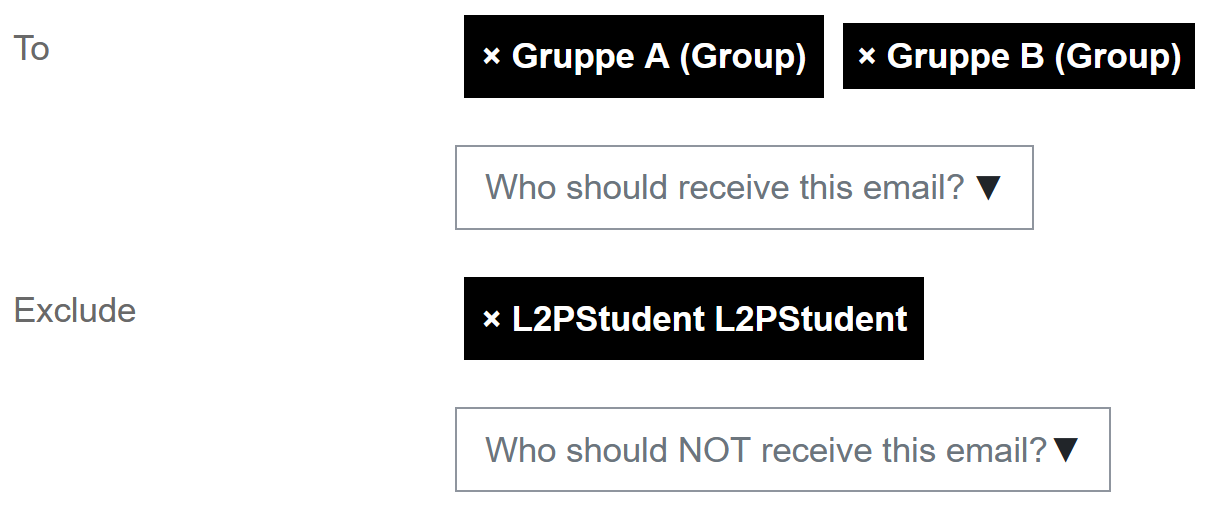
- Select the desired recipients in the search window.

You have the following options for the selection:
- Text input: Enter the name (first and/or the last name) of the person or group in the search window "Who should receive this email?". If the person or group is contained in the course room, a hit list containing the name you are looking for will be displayed as soon as you enter the first few letters.
Select the searched person or group by mouse click. They will be moved to the area above the search window and displayed with a black box in white letters. If you clicked the wrong way, you can delete a selected hit from the selection by clicking the cross icon in front of the name.
If you want to add several recipients, repeat this process until all persons and/or groups are displayed above the search window. Alternatively, when the hit list is displayed, press and hold the CTRL key to select multiple people and/or groups from the list as well (e.g., if you want to select multiple groups). - Dropdown list: By clicking on the arrow symbol

on the right side of the search window "Who should receive this email?" you can display all persons and groups contained in the course room as a list. Select the person or group you are looking for by clicking on it and it will be displayed above the search window with a black box in white letters. By pressing and holding the CTRL key you can select several persons and/or groups. These will appear above the search window after they are selected.
Note: Since the drop-down list can become very long for course rooms with many participants, it may be advisable to use the text input option in such cases.
If you have selected one or more groups as recipients and would like to exclude certain members of these groups from receiving emails, you can do this in the search window "Who should Not receive this email? The procedure for selecting people is the same as the procedure for selecting recipients described above.
- Text input: Enter the name (first and/or the last name) of the person or group in the search window "Who should receive this email?". If the person or group is contained in the course room, a hit list containing the name you are looking for will be displayed as soon as you enter the first few letters.
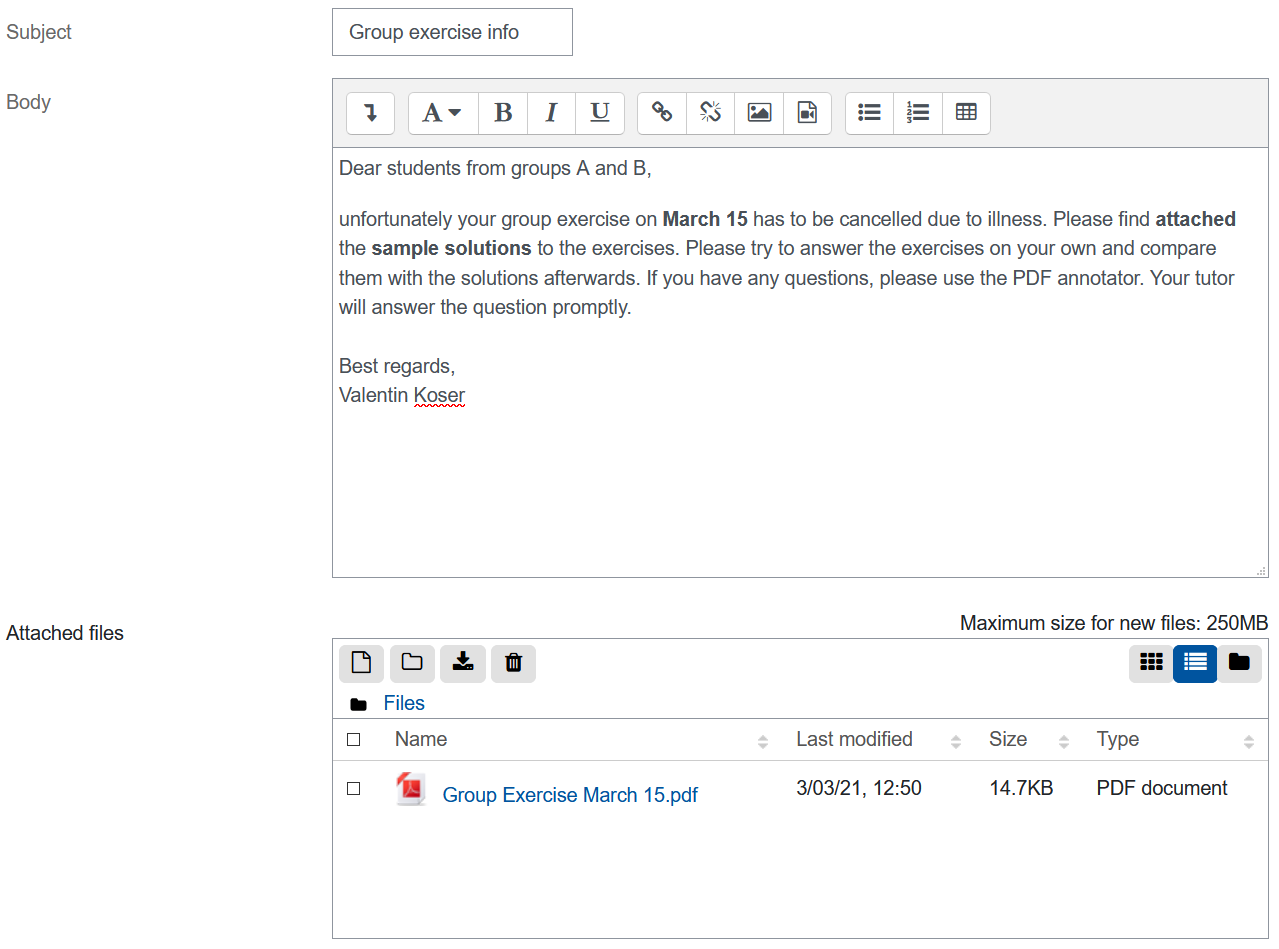
- The next step is to give your email a subject.
- Then write the text of the email. To do this, you have a wide range of options for formatting your mail text using the editor (toolbar) or inserting audio and video files. Optionally, you can add file attachments via "Attached files".
- Optionally, you can add file attachments via "Attached files".

- If you have created one or more signatures in advance, you have the option to select a signature here.
- If you want your e-mail to be sent at a later time, specify the day and time under "Send at" and activate the checkbox. You can also have a copy of the sent email sent to you.
- Click on "Send Email" to send the e-mail or, in the case of scheduled sending, to prepare it for sending. Unless you have enabled scheduled sending, the email will be sent without a time delay. Note: In the case of occasional high server load, it is possible that the e-mail dispatch is triggered only after a delay of several minutes. If you do not yet have a precise time to send the email and would like to edit it again at a later time, you can also save it as a draft. To do this, click on "Save draft".

If you have created a draft (see above), you can send it at a later time. To do this, proceed as follows:
- In the course room, click "View Drafts" in the Quickmail block on the right-hand side.
- Click on "Edit" to return to the draft email view and use it to send the email.
- You can also "Duplicate" or "Delete" the draft at any time. To do so, click on the corresponding button.

If you have prepared emails for scheduled sending (see step 8 in section 1. Send emails) and their sending time is in the future, you can display them under "View Scheduled".
- Click on "View Scheduled" in the Quickmail block on the right side of the course room.
- By clicking on "View" you can view the content of the email. Editing is no longer possible at this point. If you still wish to do so, click on "Duplicate" in this case. A copy of your email will then be placed in the "View Drafts" folder for editing. You should now "Unqueue" the previous email because it will still be listed in the "View Scheduled" at the originally scheduled time of sending.
- You can unqueue the scheduled email at any time or release it for immediate sending by clicking "Send now" at any time.

In history, managers can view all their own emails sent through via the course room. Quickmals in the same course room sent by other managers are not visible.
- Click on "View Sent Emails".
- You will then see the e-mails you have sent yourself.
- If necessary, select another person whose email history you wish to view from the drop-down menu above the table.
You can create a signature for your e-mails in Quickmail as follows:
- In the course room, click on "Signatures" in the Quickmail block.
- Give a title to the signature.
- Create your signature in the signature field.
- You can choose the signature as default.
- By clicking on "Save changes" your signature will be saved.

For more information:

