


Managing time slots for attendance

Managers can create a course or group appointments in the Attendance activity for which attendance is to be recorded digitally. Attendance is recorded by instructors or by students themselves. Managers can set various security measures for recording attendance to prevent fraud.
Managers can also modify the predefined statuses in which attendance is recorded and add their own status definitions as needed. If attendance is assessed, scores awarded per status can also be customized.
A report provides a structured overview of attendance behavior at the course. The report can also be exported and used offline.
1. Creating sessions
1.1. Add session
1.2. Multiple sessions
1.3. Student recording
2. Edit or delete sessions
1. Creating Sessions
After you have added an "Attendance" activity, you must first add one or more sessions in the "Add session" tab.
- On the course page, call the attendance activity you have already created.
- Click the "Add session" tab to create a new session or series of sessions.
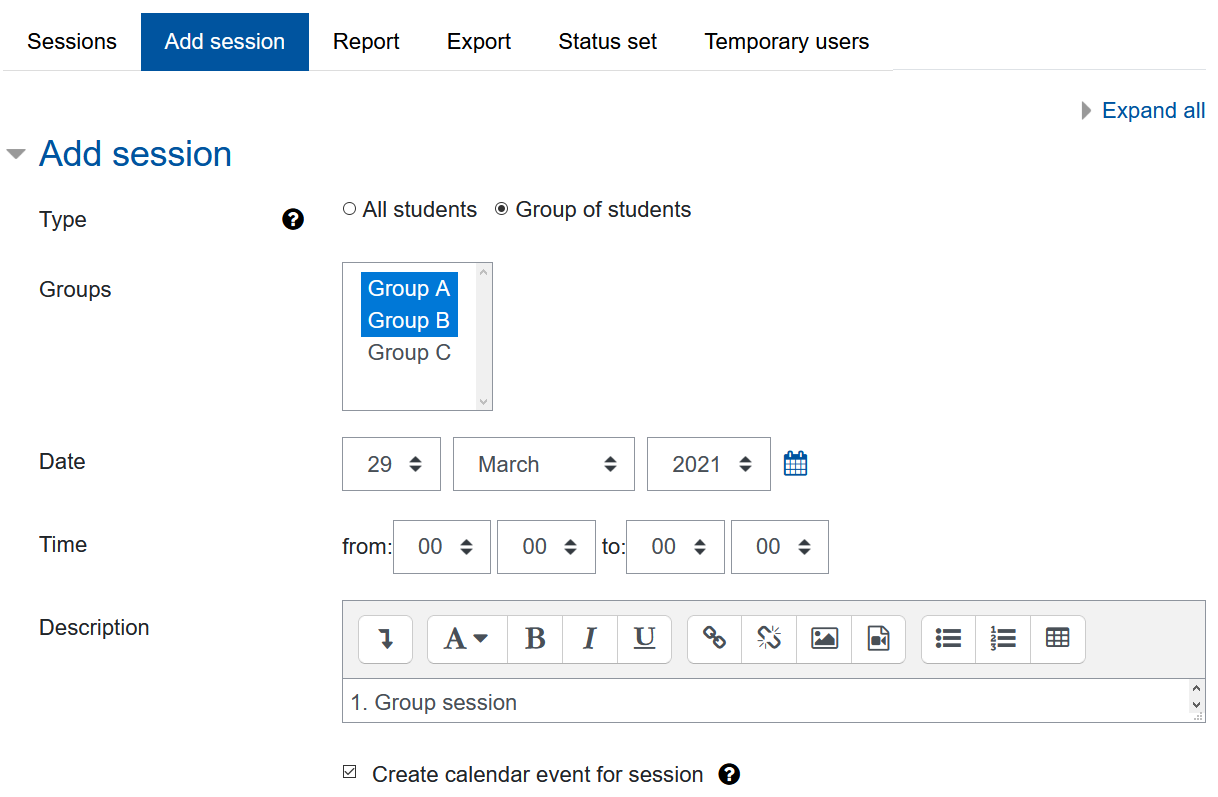
1.1. Add Session
- Under "Type", specify whether the sessions should be for all participants of the course room or for one or more groups. The option "Group of students" and the list for selecting the desired groups will only be offered to you if you have activated the group mode in the activity settings under "Common module settings".
- Set the date and time of the session.
- Optionally, write a description (course name, lecture hall, etc.).
- The option "Create a calendar event for this session" creates a corresponding entry in the course room calendar for the selected session.
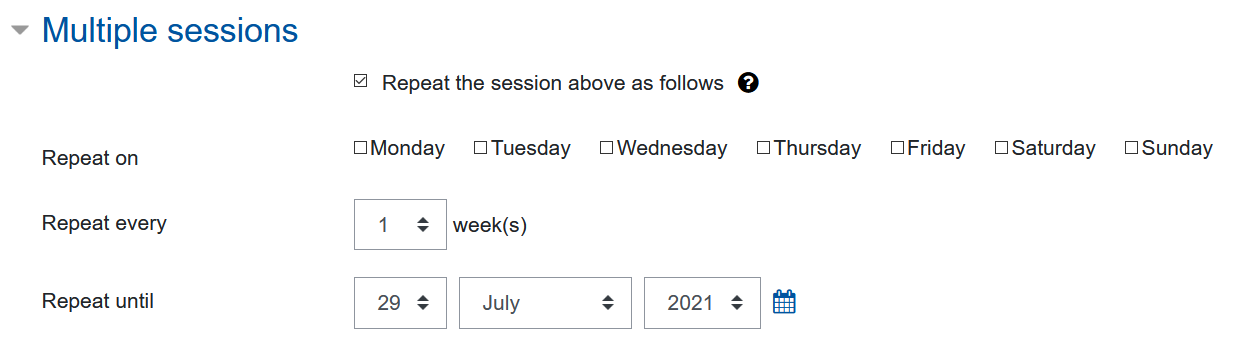
1.2. Multiple Sessions
If the session you have just created has one or more subsequent sessions at the same time, you can specify the day of the week, the time period, and the recurring cycle (e.g. every 2 weeks) at which the session is to be repeated under "Multiple sessions".
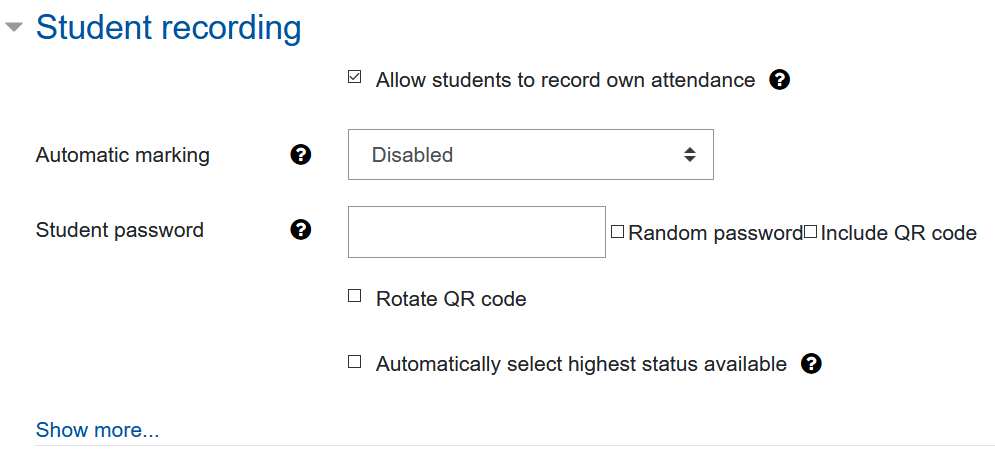
1.3. Student recording
By default, attendance is recorded by the course room managers. If you want to allow students to record their attendance themselves, activate the checkbox "Allow students to record attendance themselves" in the section "Student recording".

Note
Student recording is only possible within the time slot specified by you in which the session takes place. You as a manager, on the other hand, can record attendance at any time, i.e. also before and after the session, and correct it if necessary.- Under "Automatic marking" you can determine whether the status should automatically be set to "unmarked" for students who have not yet recorded their attendance by the end of the session.
To restrict access to attendance recording and thus make it more difficult for students to deliberately make incorrect entries, you can define a password that students must enter when recording attendance. The password must be communicated to the students in advance, for example at the beginning of the course. Unfortunately, it is not possible for RWTHmoodle to send the password automatically.
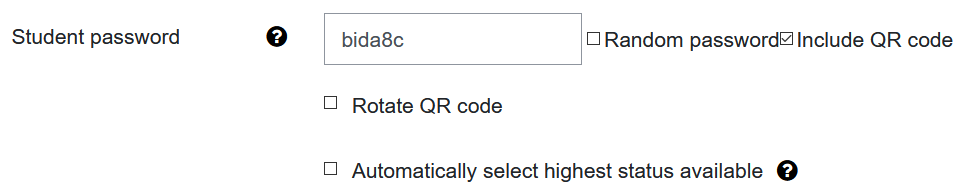
Either enter a user-defined password in the "Student password" field or have a password generated automatically via "Random password".
Note
A user-defined password is initially set for all multiple sessions. Therefore, if there are several subsequent sessions, unwanted access to the attendance recording may only be insufficiently restricted. However, you can subsequently individualize the passwords for individual sessions after all sessions have been added.
If you select the "Random password" option, on the other hand, an independent randomly generated password is created for each session as soon as it is created, so this alternative is generally recommended for multiple sessions.
- Via "Include QR code" you can generate a QR code that makes it easier for students to record attendance. When scanning the QR code with a smartphone, the current session for which the attendance is to be recorded is called up directly. If the QR code is combined with a password (see step 3 above), then the corresponding field on the page accessed via QR code is pre-filled with the correct password. The QR code must be made available to the students in a suitable way, for example by displaying it via screen or printout.
- With the option "Rotate QR code" you can make it more difficult to forward the QR code to students who are not present. In this case, the QR code is only valid for 15 seconds and is then automatically regenerated. A password is then no longer required, but also not possible.
- With the option "Automatically select highest possible status available" you define whether the highest status should be preselected when the entry page is called up, by default this is the status "present". The attendance then only has to be saved.
Managers can later generate this view of the QR code with or without an integrated password that students can scan: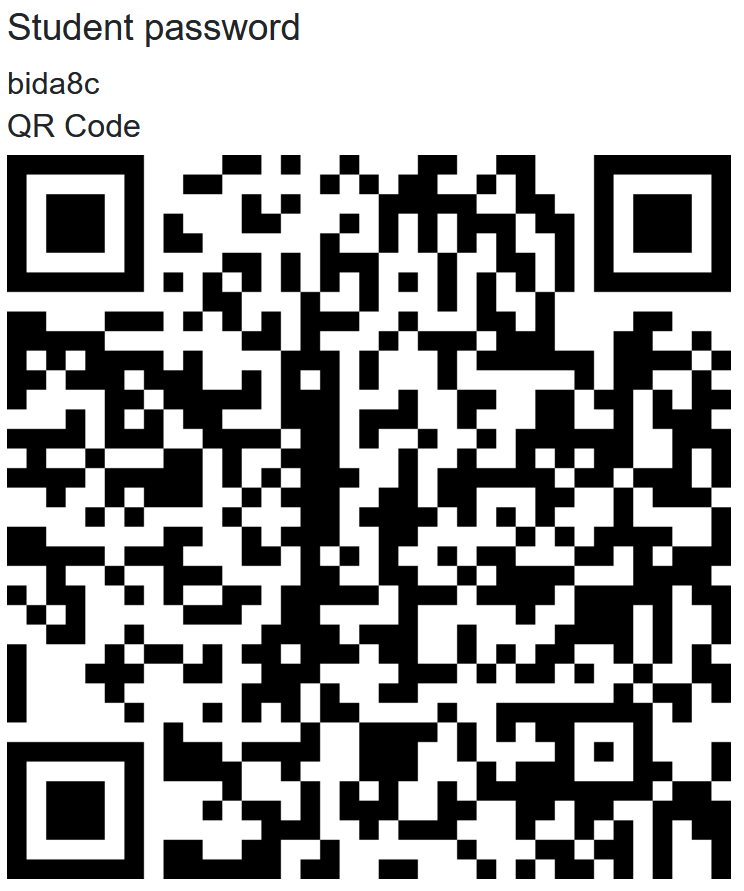
- After clicking on "Show more...", you can make settings to restrict IP addresses, which can be used to regulate access to record attendance.
- If all end devices from which a student recording is to be carried out can be clearly delimited on the basis of IP addresses (e.g. all PCs in a computer room), you can enter a comma-separated list of complete or partial IP addresses. To do this, deactivate the "Use default" checkbox under "Require network address". You can then enter the IP addresses in the text input field that appears.
In principle, students can log in one after the other from a device using the access IDs of students who are not present and enter them as the present. To prevent this, you can set that only one attendance can be recorded from one IP address.
To generally exclude the recording of a second attendance for an appointment via the same IP address, select the "Yes" option under "Prevent participants from sharing IP address". If you select the option "Set time in minutes to release the IP again", enter the blocking time in the field to the right of it.
Note
If this option is selected to prevent multiple logins from one IP address, the IP address is stored in the database for this purpose and compared with the IP addresses of the subsequent login attempts. The IP addresses stored in the database are only read out for comparison purposes but are never explicitly displayed to the users. Upon completion of the attendance recording, all IP addresses are deleted within 24 hours.
- Then click on "Add" to create the session or multiple sessions with the configurations you have made. They will then be displayed in the "Sessions" tab.
2. Edit or delete sessions
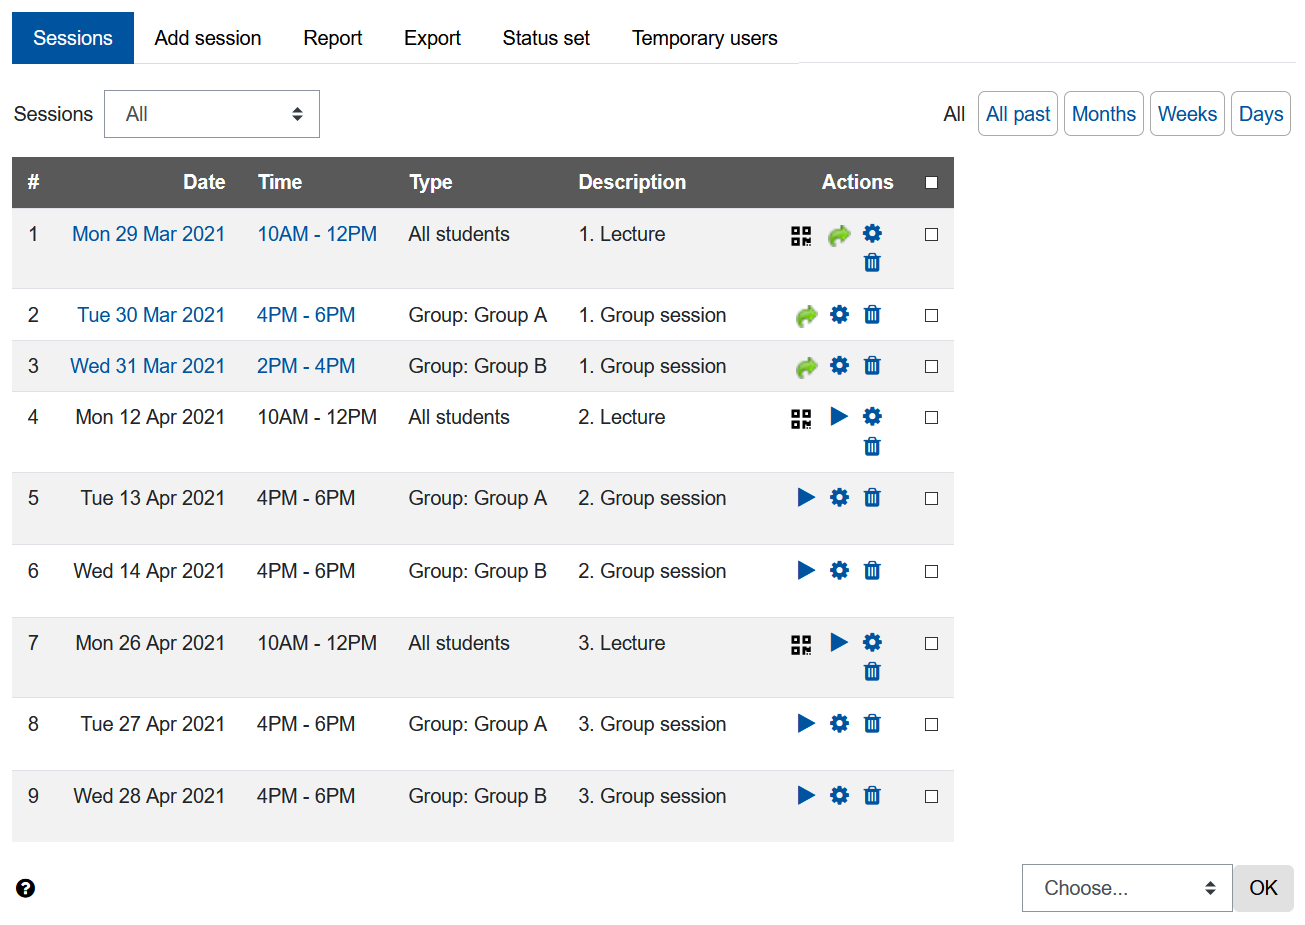
In the "Sessions" tab you can see an overview of the sessions created so far, filterable by all sessions, all past appointments, months, weeks, or days. You can edit the sessions at any time, for example, to assign an individual password for sessions or to adjust descriptions, dates, and times.
- To edit a session, click the gear icon
 of the corresponding session in the "Actions" column. You will then be taken to the settings page for the session and can make the desired adjustments.
 - To change only the duration of one or more sessions at a time, check the corresponding checkboxes to the right of the sessions. Then select "Change duration" from the "Select" drop-down menu at the bottom and confirm with "OK". On the following page, enter the new end time for the selected sessions and confirm with "Change".
- To delete a session, click on the trash can icon
 and confirm the following message with "Next". The session will then be permanently removed from the attendance recording.
 - To delete multiple sessions at once, select the corresponding checkboxes to the right of the sessions. Then select "Delete" from the "Select" drop-down menu at the bottom and click OK afterward. After confirming the security request with "Next", the selected sessions will be permanently deleted.
If you have allowed participants to self-report, you can click on the key icon
 or QR code
  at the corresponding session to display the password and/or QR code and then communicate them to the students.
Additional information:
- Attendance settings
- Overview page for Attendance
- Register attendance (Lecturers)
- Viewing and self-recording Attendance (students)
- Attendance report
- Editing the Status set
