


Add activities or resources

Users with the function "Manager" can fill the course room with various resources and activities. Files can also be provided via Drag&Drop.
Individual resources can already be uploaded beforehand and marked as visible at a later time.
- Add activities or resources
- Change the settings for activities or resources
- Control visibility of activities and resources for students
- Editing activites or resources directly on the course page
1. Add activities or resources
To add resources or activities, you need the role "manager" in the course room. Proceed as follows:
- Set the course page into edit mode using the "Edit" switch at the top right of the page.
- Scroll to the appropriate topic section in which you want to add the activity or resource. To do so, you have two options:
- If activities or materials already exist, hover with the mouse over the top center edge of an existing activity tile above which you want to add the activity or resource in the topic section. A plus sign appears. Click on it.
- If no activities or materials are available yet, click on "Add an activity or resource" in the topic section.
- The dialogue for the selection of activities will open. It lists all available activities and resources.
- By clicking on the info icon
 a short description of the purpose of the respective activity will appear. If you click on "More help" in the short description, you can access the official Moodle documentation for more info.
 - By clicking on the white star icon
 next to an element, you star the item as a favorite. The star turns blue and the element additionally appears in the "Starred" tab. This allows you to add frequently used activities more quickly to the course page.
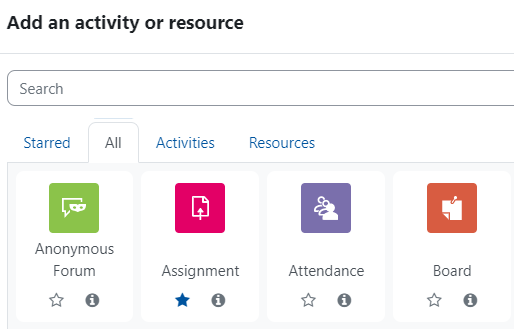
- By clicking on the info icon
- Simply click on the appropriate element to add it to the course page. You will automatically be directed to the settings page of the new element. Here you can choose its settings.
2. Change the settings for activities or resources
You can change the settings for activities and resources at any time.
- Set the course page into edit mode using the "Edit" switch at the top right of the page.
- Click the three dots next to the activity or resource you want to edit.
- Select "Edit settings" in the context menu to make the changes.

3. Control visibility of activities and resources for students
You can make all elements of the course page visible or hidden for students individually.
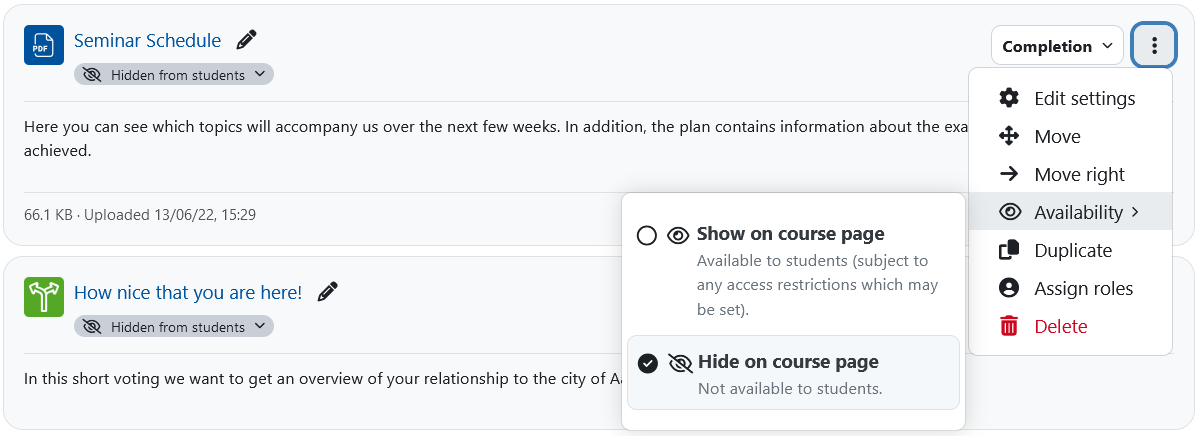
- Click the three dots next to the element.
- Select "Availability" in the context menu and click on the option "Hide on course page". The item will then be marked as hidden in the managers' view and will disappear from the students' view. Select "Show on course page" in the context menu to make it visible again.
In the settings of each element, you can define conditions for visibility via "Requirements". For example, elements can only be called up for an activity from a certain date, only for a certain group, or only after a certain rating has been reached. Read more on this in the manual Restrict access.
4. Editing activities or resources directly on the course page
You can edit the conditions for activity completion and restrictions directly on the course page via an activity card: In the drop-down menu "Completion" and via the link "Edit restrictions", the corresponding edit options are available to you. If an activity is hidden, i.e. not available, the status can also be changed directly on the course page via the "Hidden from students" label.
