


Checklist settings (Lecturers)

When configuring the checklist, you can specify, among other things, whether students or managers should check off the elements of the checklist. The checklist can also be configured in such a way that students and lecturers together mark the successful completion of list elements. Furthermore, you define whether the list should be filled with activities and work materials/resources of the learning room or whether it should only consist of user-defined entries. If list elements contain activities of the learning room, you also define whether the entries in the checklist should be automatically checked off as soon as the associated activity has been completed in the course.
For this activity, you can use Tagging (Tags).
1. Create a checklist
To add a checklist, proceed as follows:
- Switch the course room to edit mode using the "Edit mode" slider next to your name in the upper right corner.
- In the section where you want to see the checklist, click Add Activity or resources.
- Under "Activity", select the "Checklist" option.

- A new checklist is now created. You will be automatically redirected to the settings page to configure the checklist.
2. Configure checklist
2.1. General
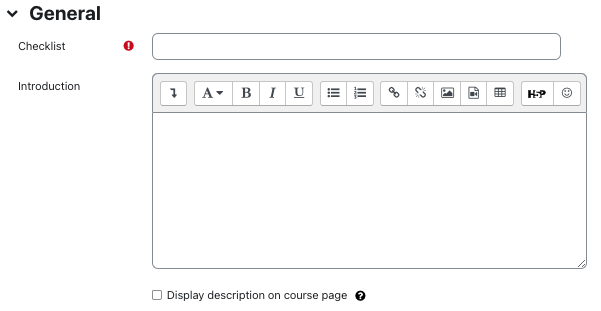
- Give the checklist an appropriate name.
- Optionally, write a description for the introduction. In it, give students some instructions on how to use the checklist and, if necessary, explain the purpose of the checklist and what elements it contains.
2.2. Settings
The following setting options are available, which are explained below:
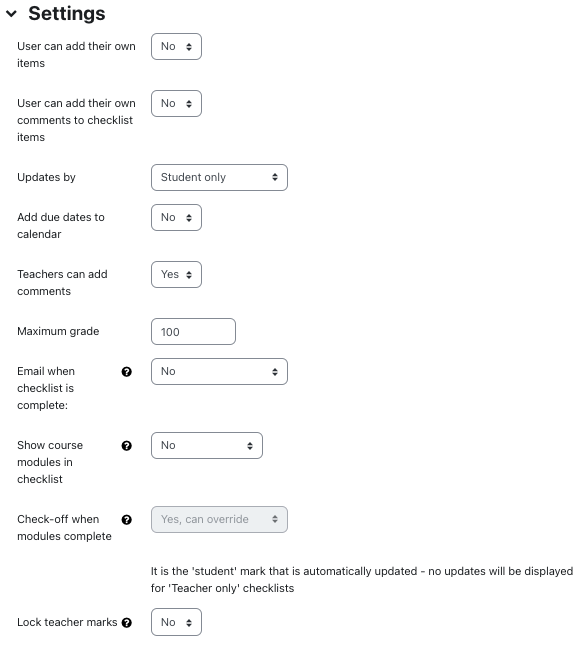
- User can add their own elements - Select "Yes" if students are allowed to add custom elements in addition to the elements you have specified. These are then only visible to the person who added the elements.
- Updates by - Here you have 3 different options to choose from:
- Student Only: With this option, only students have the ability to mark items (for example, a specific activity) as completed. Managers can only view which items have been marked as completed, but cannot independently set, remove, or overwrite markers. Note: Please select this option, because only in this setting the checklist can be edited by the students!
- Teacher only: With this option, only managers can mark the successful completion of items (for example, a specific activity). Students can only see which items have been marked as completed, but cannot overwrite or remove them. Note: Do not select this option, because in this setting the checklist cannot be completed by the students!
Student and teacher: With this option, the successful completion of elements can be marked by both students and managers. Markings made by managers are visually different from the marking made by students. For each element in the checklist, a separate box is therefore listed by managers and students, which can be marked in the respective role as manager or student. Therefore, markings made by students or managers cannot be changed by each other. The marks set by the students remain permanently visible, However, only the markers set by the managers are evaluated for the course progress. Therefore, the elements of the checklist must be marked by managers in any case since the markings by students only serve as orientation, but have no binding force. Note: Do not select this option, because in this setting the checklist cannot be completed by the students!

Note
The options "Teacher only" and "Student and teacher" are selectable but cannot be applied. Since lecturers are not allowed to see the learning and editing progress of students for privacy reasons, you as a manager also do not have the option to mark the completion of elements of the checklist for students. Therefore, leave the setting at "Student only" in any case. If you choose one of the other two options, the checklist cannot be marked by managers due to the visibility restrictions and therefore the progress list cannot be edited and completed by students.
- Add due dates to calendar - If dates have been set for certain elements, they will be transferred to the calendar and displayed when due.
- Teachers can add comments - If this option is set to "Yes", managers can add an optional comment for each element in the assessment list. This is then displayed to students next to the corresponding element.
- Maximum grade - A rating can optionally be assigned for the checklist. Each mandatory element (i.e., all elements except student-added custom elements) is considered equally for scoring here. For example, if 100 points can be earned and the progress list contains 10 mandatory elements, students will receive 10 points for each element marked as completed. If the progress list is not to be scored, enter a "0". The progress list will then no longer be listed in the scorer overview.
- Email when checklist is complete - Once the checklist is done, a notification can be automatically sent to students and/or managers.
- Show course modules in checklist - Here you have 3 options to choose from:
- No - if you do not want activities or materials in the learning space (for example, a test) to be included in the checklist, leave the setting at "No". All elements of the checklist must then be created custom by you and are independent of the activities and materials in the learning room.
- Current section - if you want the activities and/or materials of the section where you added the "checklist" to be included in the progress list, select "Current section". After you have saved the configuration, you can use the "checklist" tab to hide certain activities and/or materials of the selected section in the progress list if you do not want to include all elements of a section in the progress list. Furthermore, there you have the possibility to create any user-defined elements in addition to the existing activities and materials.
- Whole course - If you want all the existing activities and/ or material of the whole course room to be included as elements in the checklist, select "Whole course". Note that for larger course rooms, the number of elements in the course room can become very large. After you have saved the configuration, you can use the "Checklist" tab to hide certain activities and/or materials of the selected section in the checklist if you do not want to include all activities and material in the progress list. Furthermore, you have the option there to create any user-defined elements in addition to the existing activities and materials.
- Check-off when modules complete - If you have selected the options "Current section" or "Whole course" under "Show course modules in progress list", you can select here whether an automatic transfer of activity completions to the progress list should take place.
- No - there will be no transfer of activity completions to the associated elements of the checklist. Regardless of whether an activity was marked as completed manually or automatically according to the completion tracking, the completion of the corresponding activity must also be done manually in the checklist. Thus, if this option is selected, it is possible that there is no completion according to the checklist, although all activities are considered completed according to completion tracking because the corresponding activity completions are not automatically synchronized with the checklist. In this case, the checklist must be maintained independently by students and/or managers.
- Yes, cannot override- There is a transfer completion to the associated checklist items. If an activity is considered completed according to the completion tracking, this activity is also considered completed in the checklist. Manual overwriting of the transferred activity completion is no longer possible in the checklist by students.
Yes, can override - activity completions are transferred to the associated checklist items. If an activity is considered completed according to the completion tracking, this activity is also considered completed in the progress list. Manual overwriting of transferred activity completions is possible in the checklist of managers and/or students.
Note
For detailed illustrated instructions on these settings, please refer to the Scenarios for checking off checklist items tutorial.
If, when selecting the "Yes, cannot skip" or "Yes, can skip" option, you have simultaneously activated the "Student and teacher" option under "Updated by", the activity completions will first be transferred to the participant's list and the corresponding elements will be automatically checked off there. Independently of this, you as the manager must additionally release all markers by manually checking the corresponding elements of the checklist. Otherwise, the progress bar will not be updated despite automatic synchronization of the activity completions. If you want the progress bar to be updated automatically without additional manual approval on your part, select the options "Student only" or "Teacher only" under "Updated by". If you select the "Teacher only" option, you still have the option to manually overwrite an automatically transferred activity completion, if required. If you choose the option "Student only" instead, the possibility of subsequent overrides remains reserved for the students. In doing so, students can place markers in the checklist as they see fit, regardless of whether the associated activity was actually completed. Since you no longer have the ability to intervene in this case, this option is generally not recommended if you prefer setting automatic activity completions.In addition, note that if the activity completions are transferred automatically, it is irrelevant whether the activity completions are set automatically or manually by the students. If students can manually mark the activity completions, they will also be automatically transferred to the checklist.
- No - there will be no transfer of activity completions to the associated elements of the checklist. Regardless of whether an activity was marked as completed manually or automatically according to the completion tracking, the completion of the corresponding activity must also be done manually in the checklist. Thus, if this option is selected, it is possible that there is no completion according to the checklist, although all activities are considered completed according to completion tracking because the corresponding activity completions are not automatically synchronized with the checklist. In this case, the checklist must be maintained independently by students and/or managers.
- Lock teacher marks- if this setting is active, teachers (= managers) will not be able to change a "Yes" tag once it has been assigned.
2.3. Common module settings
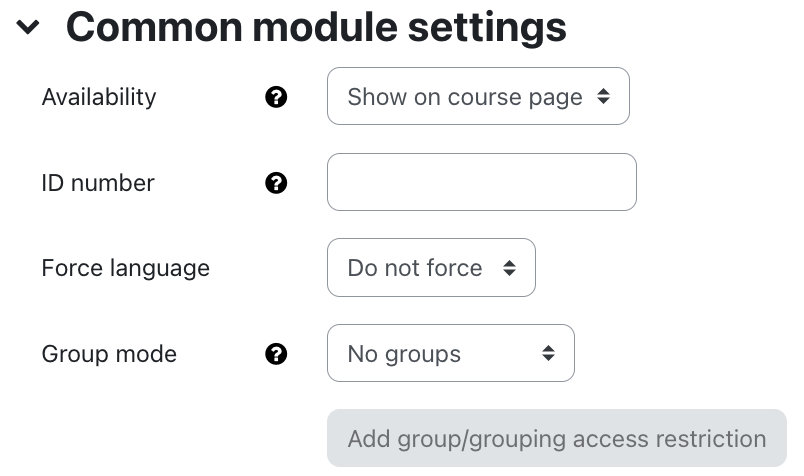
- Availability - Select whether the progress list should be displayed to students immediately or hidden from them.
- ID Number - The ID number is used to assign a designation that can be used in the Assessments section when calculating overall assessments. If the progress list is not needed to determine assessments, the field can be left blank.
- Group mode - There are three different settings for Group Mode: No Groups - Separate Groups - Visible Groups.
- Grouping - A grouping is a collection of groups. Select a grouping here if needed. The groups that are assigned to the selected grouping will then be taken into account for the group mode.
Note
2.4. Restrict access
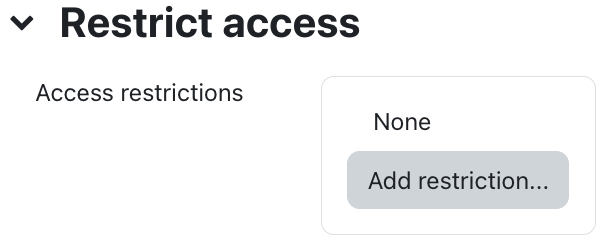
With these settings, you can link the visibility and availability of the progress list for students to certain conditions. In general, read the article Restricting access.
2.5. Activity completion
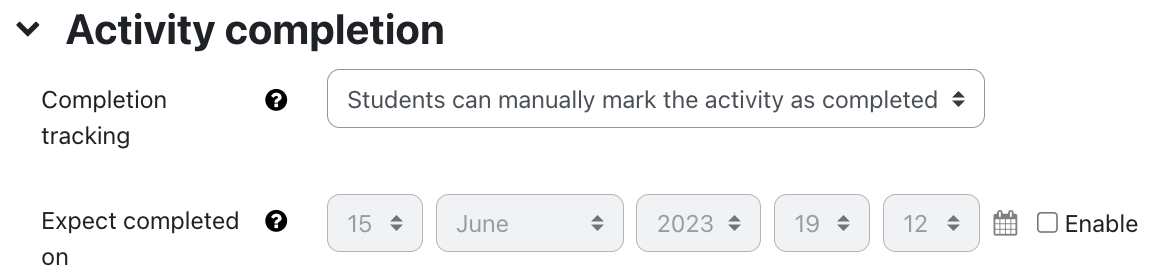
With these settings, you define criteria or conditions when an activity is considered completed (i.e.: successfully processed). For detailed information, see the article Activity completion settings.
2.6. Save the settings

With "Save and return to course" you save the settings and return to the course page. With "Save and display" you save the settings and open the progress list to edit them in the further course. With "Cancel" you discard the changes and return to the course page.
2.7. Notification about content change
The settings for the activities can be reached after creating them within the activity via the central menu navigation. Here you will find activity-specific settings and you can also save the activity directly individually.
If you subsequently make changes to the settings, activate the checkbox "Send notification of content change" to inform all participants about the new or changed activity. All participants who can access the activity receive the notification.

