


Course Sections

RWTHmoodle uses the course format "Topic Format" for the course page by default. In this course format, the course page is divided into course sections. All activities and materials are placed in these sections.
Managers can change the title, number, and various settings of the sections themselves.
1. Add Course Sections
If you want to add a course section:
- Switch the course page to edit mode using the slider next to "Edit mode" at the top right.
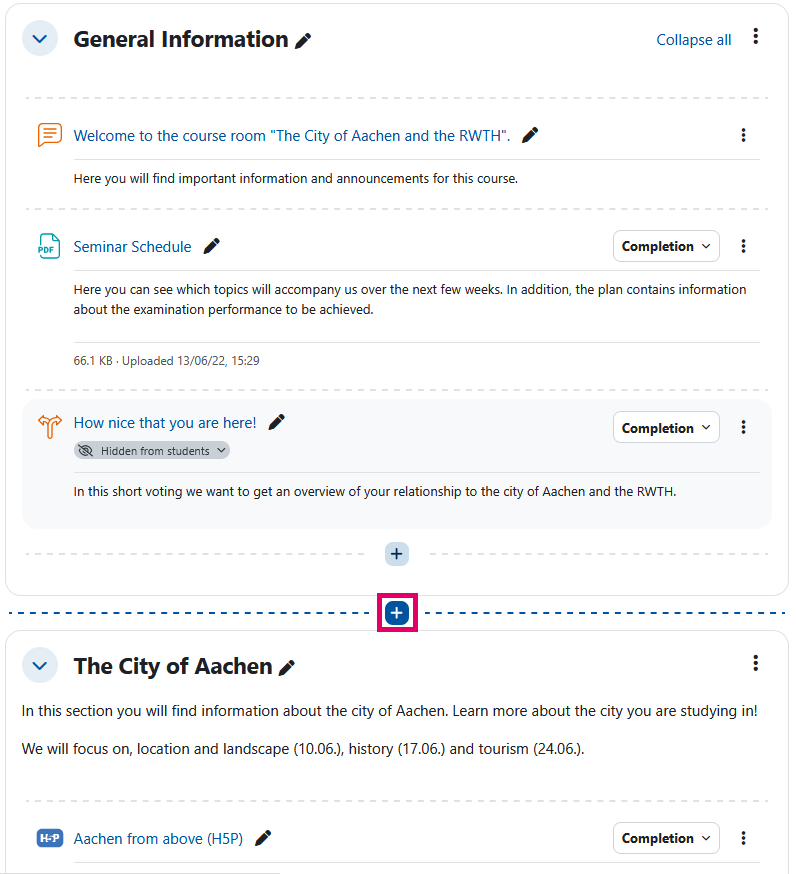
- Move the mouse to the place where you want to insert the section. A plus symbol and a dotted line will appear.
- Click on the plus icon. The new section will be created below the plus icon and the line.
2. Add subsections
If you want to add a subsection, proceed as follows:
- Switch the course page to edit mode using the slider next to “Edit mode” in the top right corner.
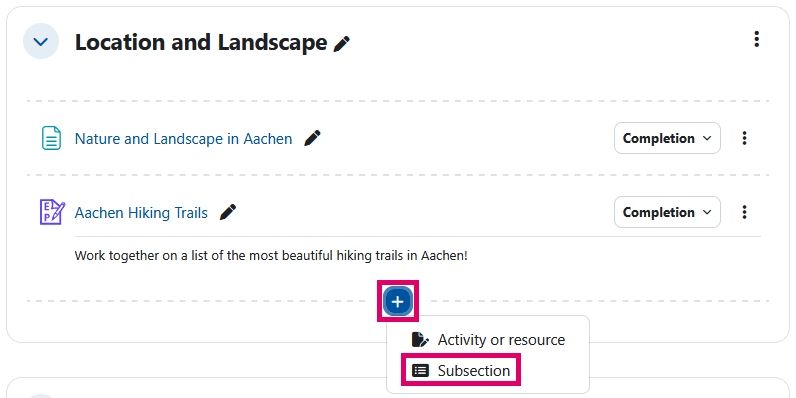
- Move the mouse to the place within the section where you want to insert the subsection. A plus icon and a dotted line will appear.
- Click on the plus icon and select the “Subsection” option. The subsection will be created below the plus icon and the line.
3. Edit Course Sections
If you want to edit a course section:
- Switch the course page into edit mode using the slider next to "Edit mode" at the top right. In each course section, an icon with three dots will appear on your right.

- In course rooms with the topic format, you will find these entries in that menu:
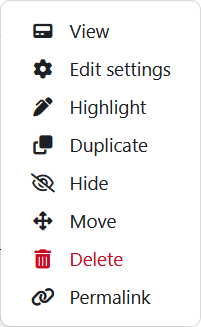
- View - Opens the section on a separate page.
- Edit settings - Leads to settings of that section.
- Highlight - Highlights a section to indicate that that section is currently important.
- Duplicate - Creates a copy of the section with all contents.
- Hide - Makes the section invisible to students.
- Move - Opens a window with all available sections in this course room to which the current section can be moved.
- Delete - Deletes the section including all content. This content cannot be restored.
- Permalink - Creates a link to the section of the course page.
To change the title of the course section click on the pen icon next to the title. Enter the new title in the editing field and confirm the change by pressing the Enter key.
Additionally, you can restrict access to a course section (including all working materials and activities) or tie it to certain conditions. These can be accessed by selecting "Edit settings" from the section menu.
4. Move Course Sections
To move a course section please proceed as follows:
- Set the course page into edit mode by clicking the button "Edit mode" in the upper right corner.
- Place your mouse on a section and move it to the desired place.
- Alternative 1: open the course index in the left column of the screen and move the section to the selected position.
- Alternative 2: Use the "Move" option in the menu described above.
5. Delete Course Sections
If you want to delete a course section select "Delete" in the corresponding section menu.
Please note that all contents of that section will then be deleted. These contents cannot be restored.
