


Exam creation and digital post-exam review via Exam Scan (pilot testing)

The Moodle plugin “Exam Scan” enables examiners to process electronic post-exam reviews for paper pencil exams via RWTHmoodle. The plugin is integrated into the assignment activity. It allows the managers of a course room to individualize an exam template with QR codes and reproduce it for printing.
Using the QR codes, the PDF file with the scanned exams is later split into individual files again. Using the option to provide a feedback file in the Assignment activity, students are then assigned their copy for the review which they can download and inspect. Before making it available, managers can insert a watermark into the viewing copies if necessary and set a password to make unauthorized disclosure to third parties more difficult. Prior to provision, the managers can add a watermark to the post-exam review copies if required and set a password to prevent unauthorized disclosure to third parties.
Together with the exam copy, managers can also provide a form that students can use to submit requests for reconsideration in writing. Students upload these directly to the assignment used for the review within the time window provided.
- Create a course section for the review
- Create a text page with legal notices
- Create and configure an assignment activity and provide an objection form
- Individualize exam copies with QR codes
- Upload and split scan file
- Add watermark and password and provide exam copy
- Manager View
- Student View
- Print Exams Single-Sided
In the scenario described here, preparing the digital review consists of three elements:
- A separate course section in the course room that contains all further elements required for the review.
- A text page with legal notices on copyright for students.
- An assignment activity through which students are provided with their individual exam copy. Written objections are also collected via this assignment.
To create these elements, you need the Manager role.
We recommend using a course room for exam preparation and follow-up for the review. In this course room, all persons registered for an exam date are automatically enrolled with the Student role. This makes it easier to individualize exam templates or generate label sheets with QR codes.
In principle, you can also use the course room of a lecture, seminar or similar. In this case, you must restrict access to the assignment activity to a group created specifically for this purpose. This can be the group of all students who took part in the exam or the group of all students who registered for the review.
1. Create a course section for the review
- Open the course room you want to use for the review.
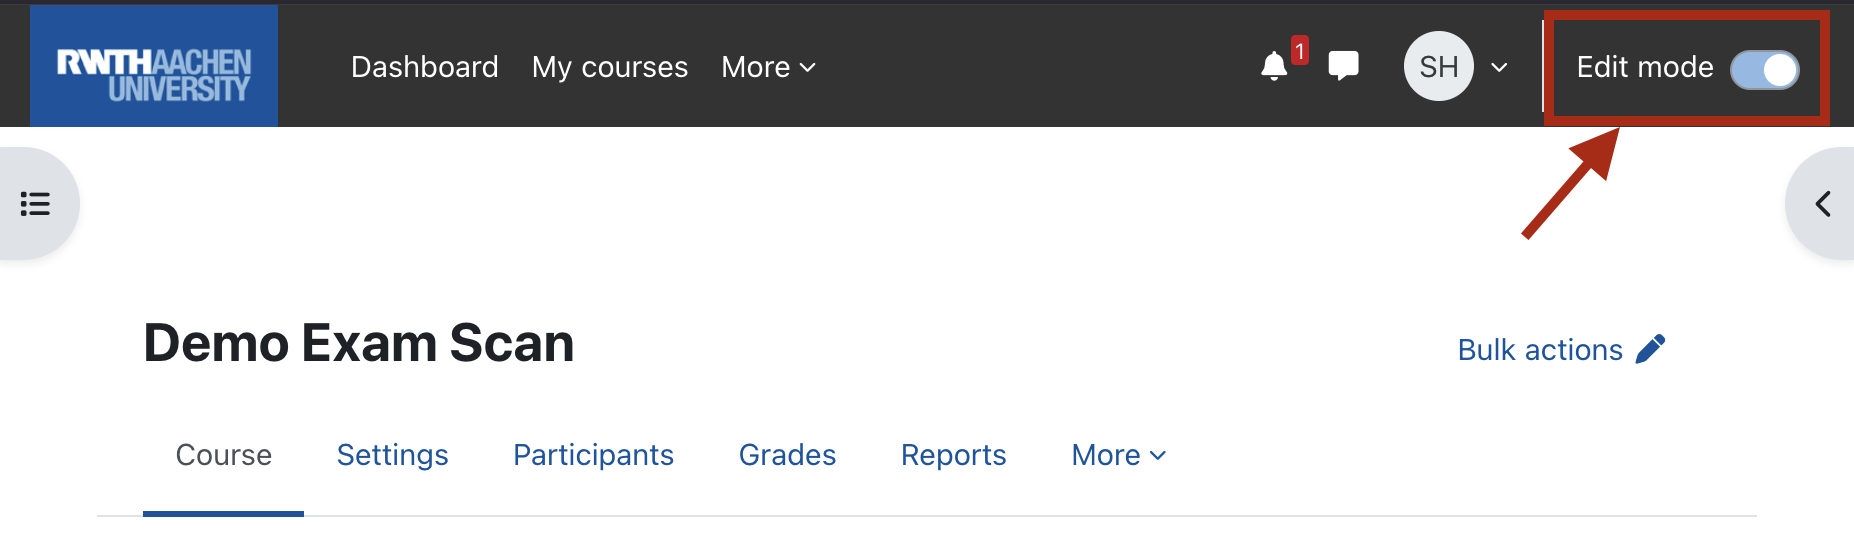
- Switch the course page to editing mode using the slider at the top right next to “Edit”.
- Now add a section in which all information for the review will be stored. To do this, click “Add section” below the existing sections.
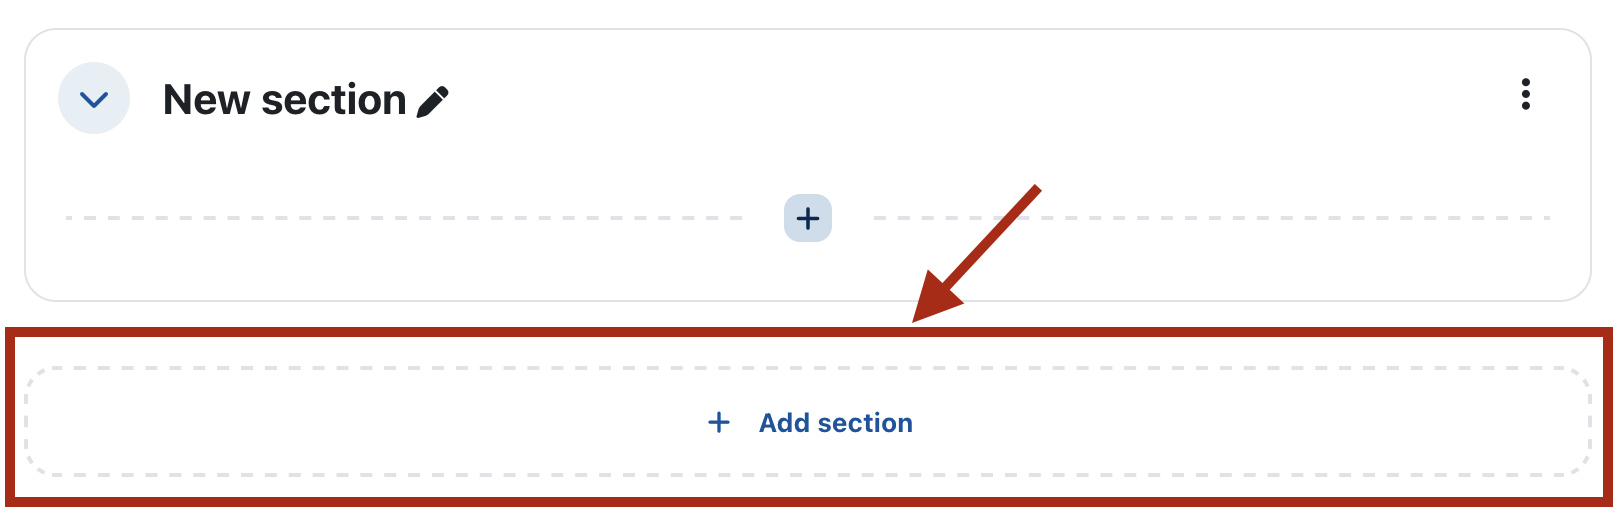
If the new section is to be created between two existing sections, hover with the mouse over the white space between the sections. A plus icon with the tooltip “Add section” appears, which you can use to add the desired section.
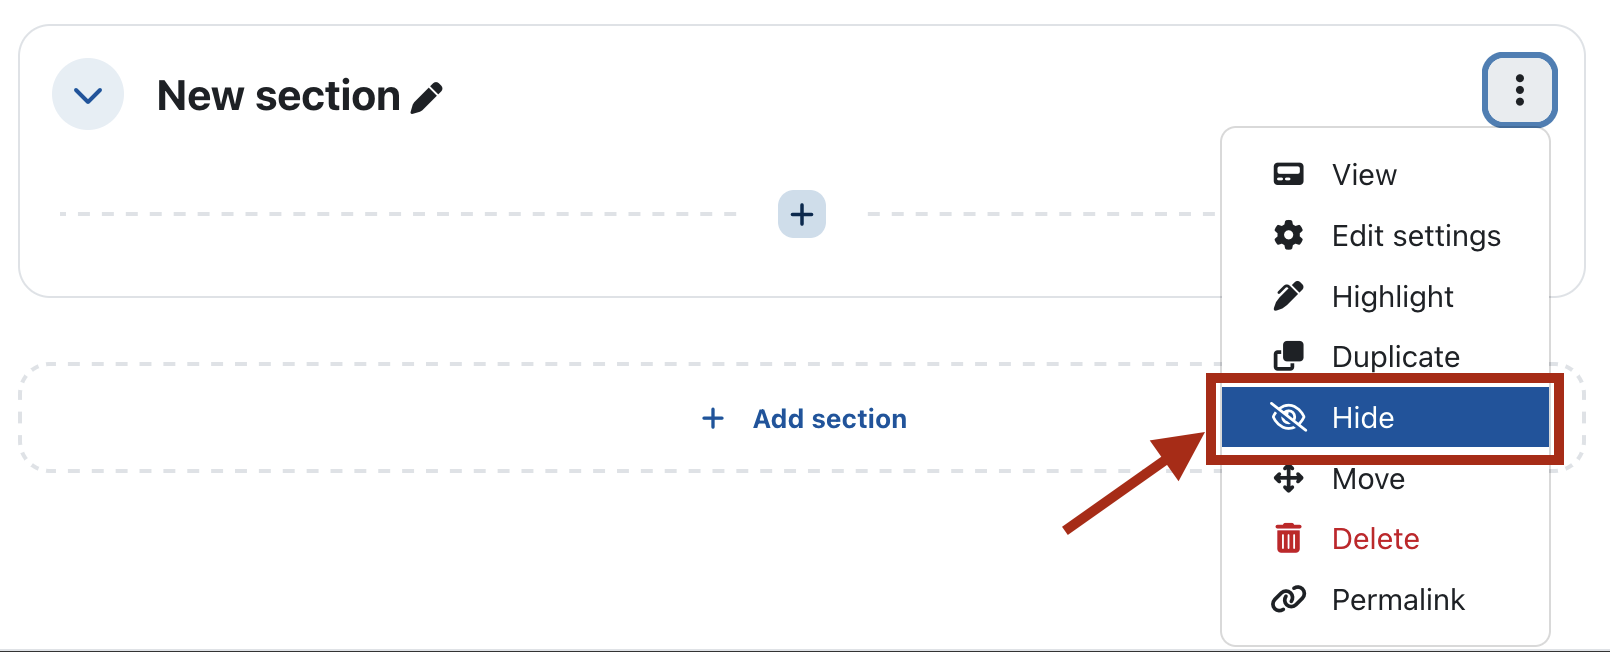
- Once the section has been created, click the three-dot menu in the upper right corner of the section and select “Hide”. This way, only the section title is shown to students, but no content. You can then complete all further preparations.
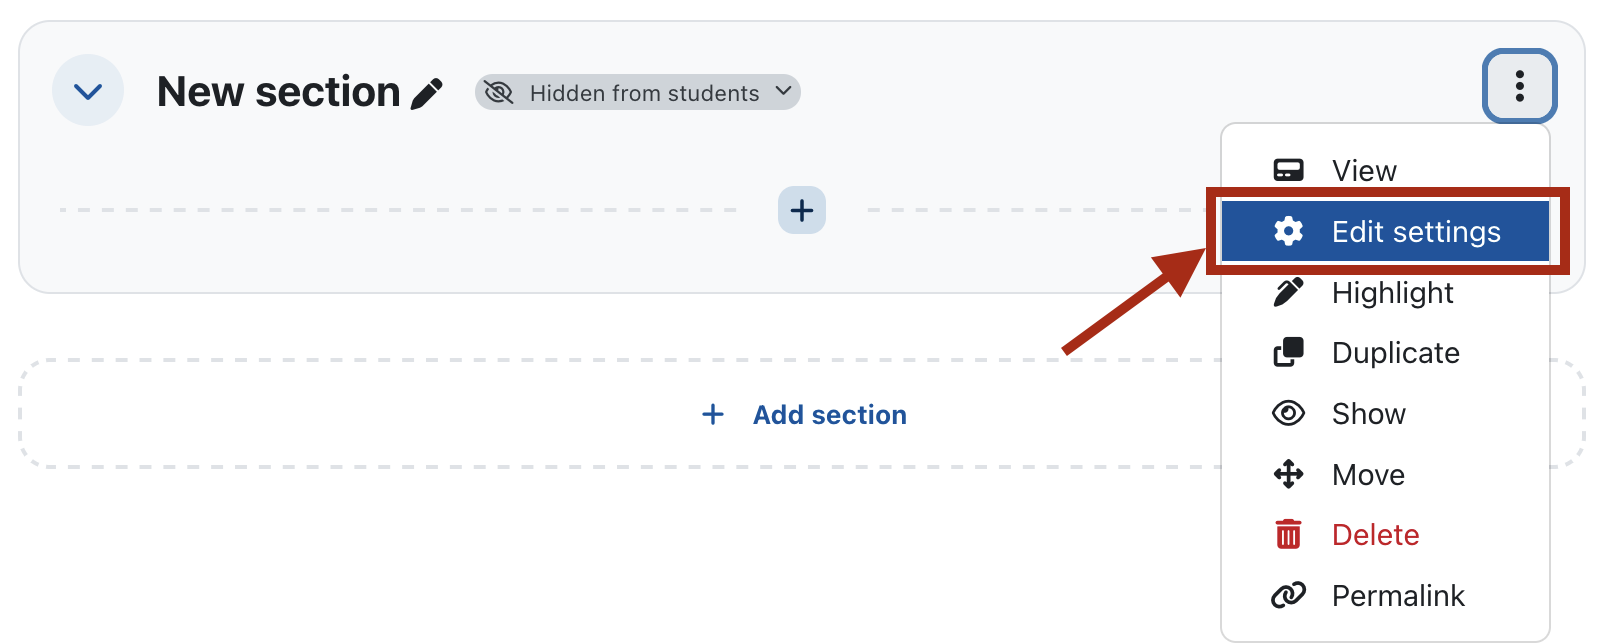
- Click the three-dot menu again and this time select “Edit settings”.
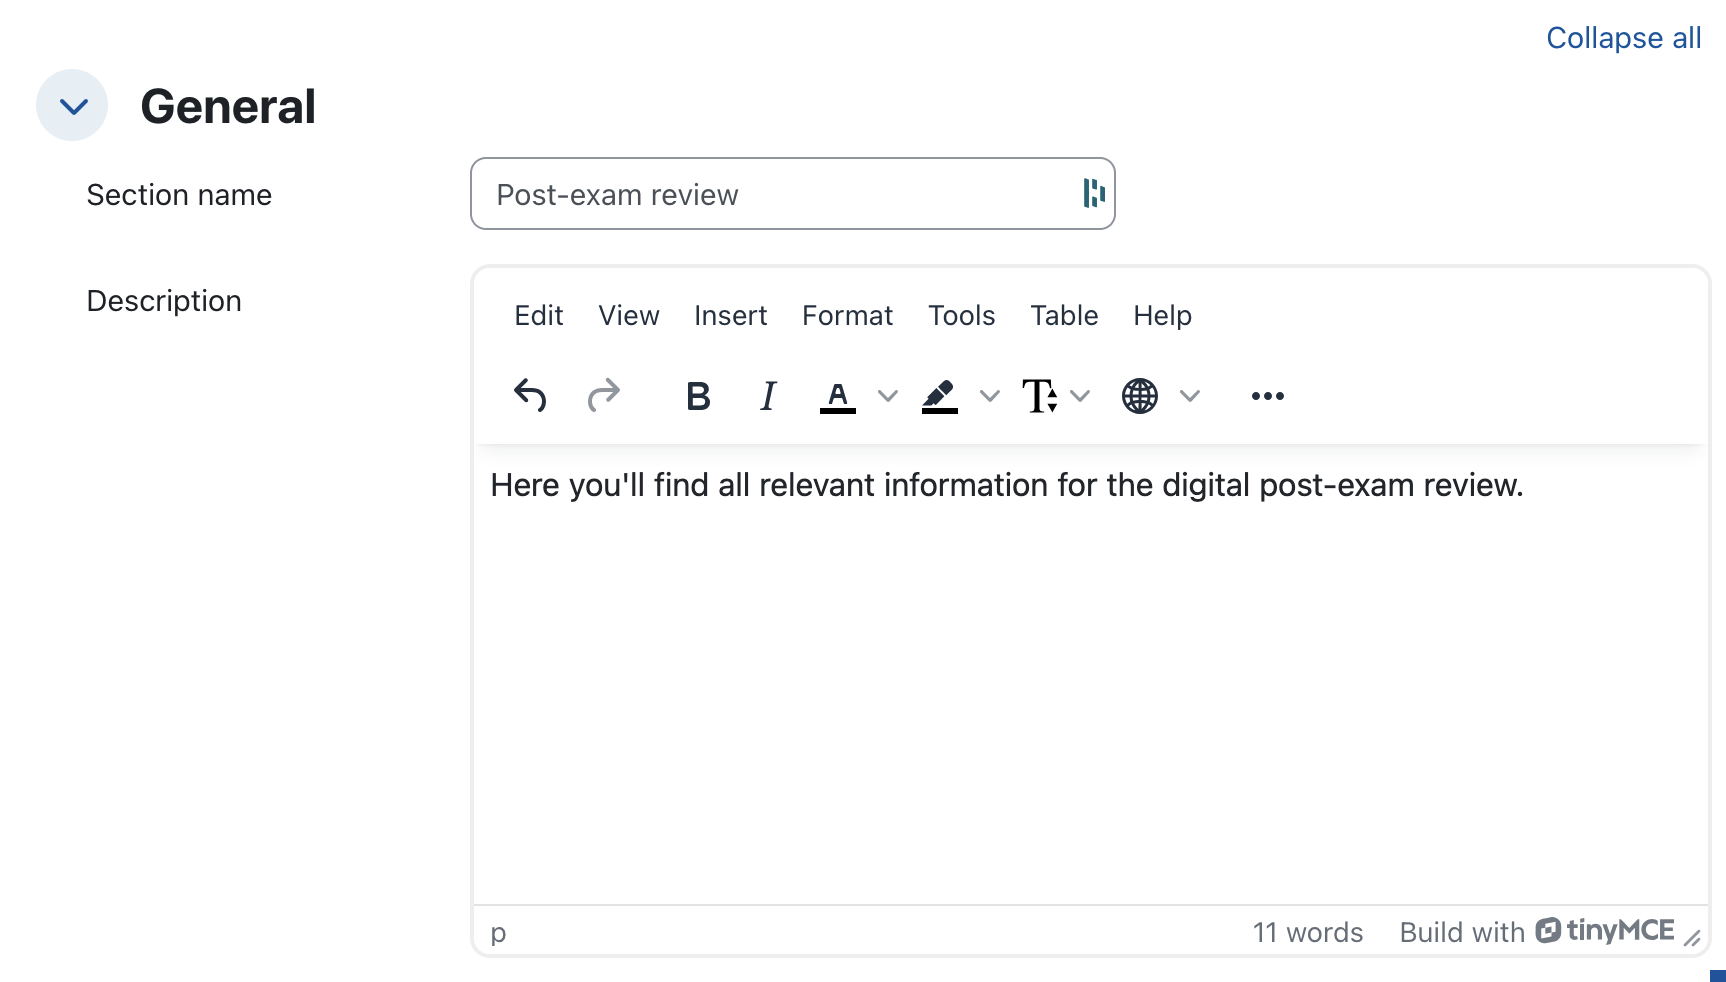
- Give the new course section a meaningful title. If required, fill the description field with appropriate information.
- If you use a course room for a lecture, seminar or similar for exam creation and review, it will likely contain students who did not take the exam. To prepare exam copies only for exam participants, create a group “Exam participants” via the participant management of the course room.
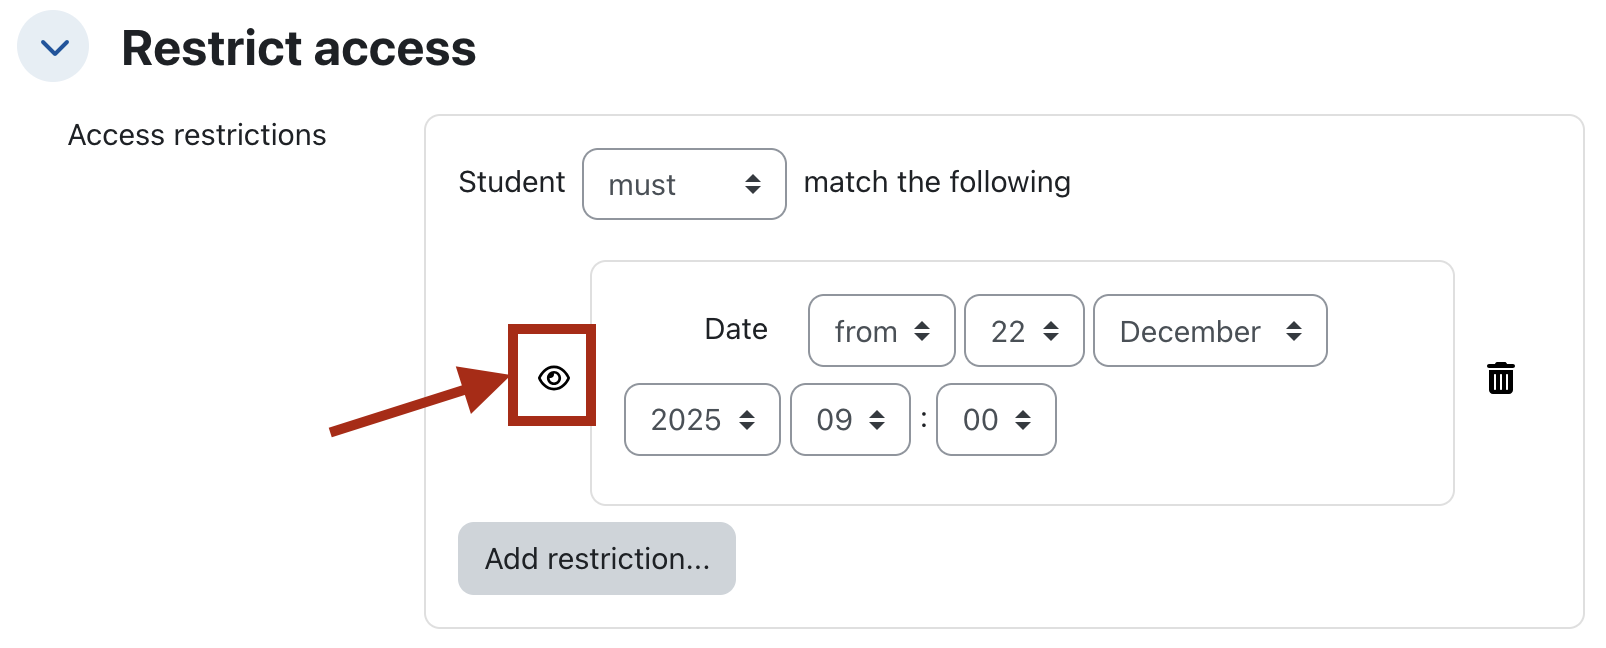
- Then add a condition of type “Group” under “Restrictions” in the settings of the new course section. Select the newly created group so that only this group has access to the course section. If the eye icon in front of the restriction is closed this means the element and the condition will not be shown on the course page to students that don't meet the condition.

- Save the changes.
2. Create a text page with legal notices
Copyright law prohibits students from unauthorized distribution of exam questions, exams or parts of exams, correction comments, or sample solutions. Violations of copyright law are legally prosecuted by RWTH Aachen University. To prevent copyright infringements, it is advisable to inform students about this legal framework via a separate text page.
You can additionally link access to the assignment activity used for the review to an automatically set activity completion. This forces students to at least open the text page with the notices. This is explained below.
However, it is not allowed to require students to sign a declaration of forbearance in order to participate in the review or to receive a copy of the exam materials.
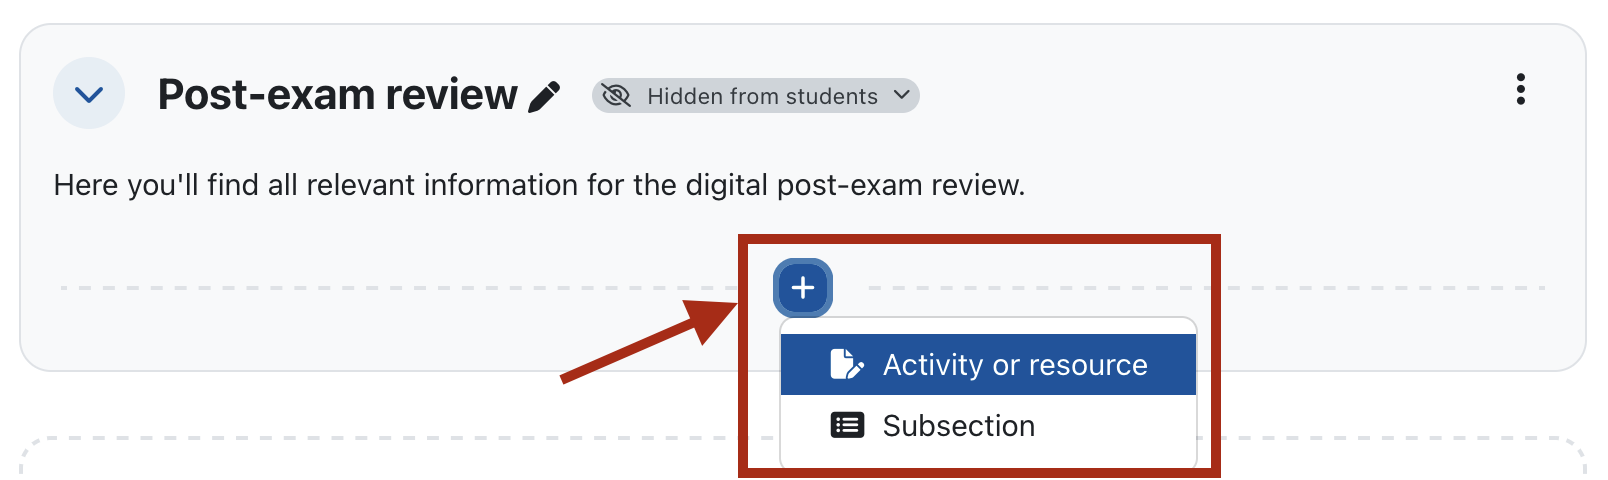
- In the prepared course section, click the plus icon and select “Activity or resource”.
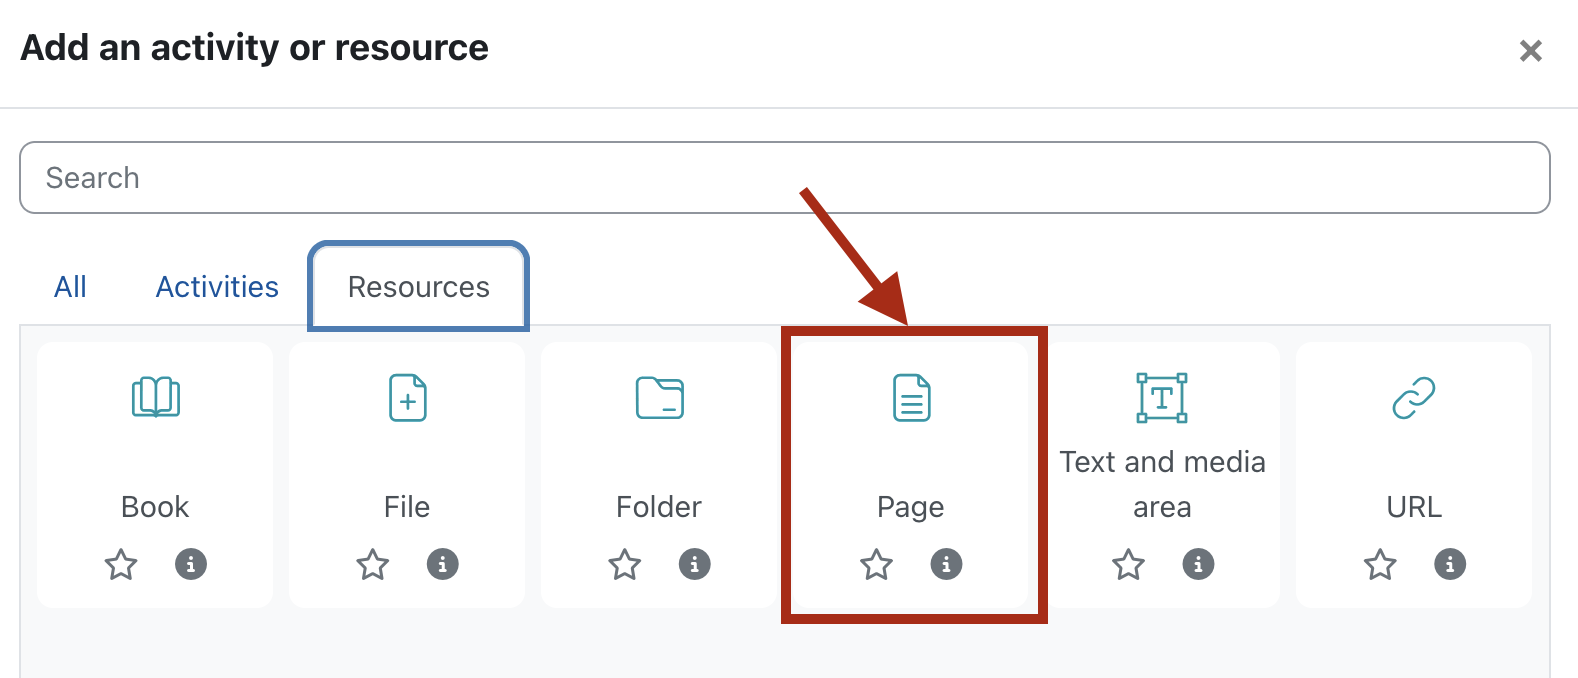
- In the activity chooser, click the “Resources” tab and then select “Page” to create a new page resource.
- Give the page an appropriate title, for example “Copyright notice”.
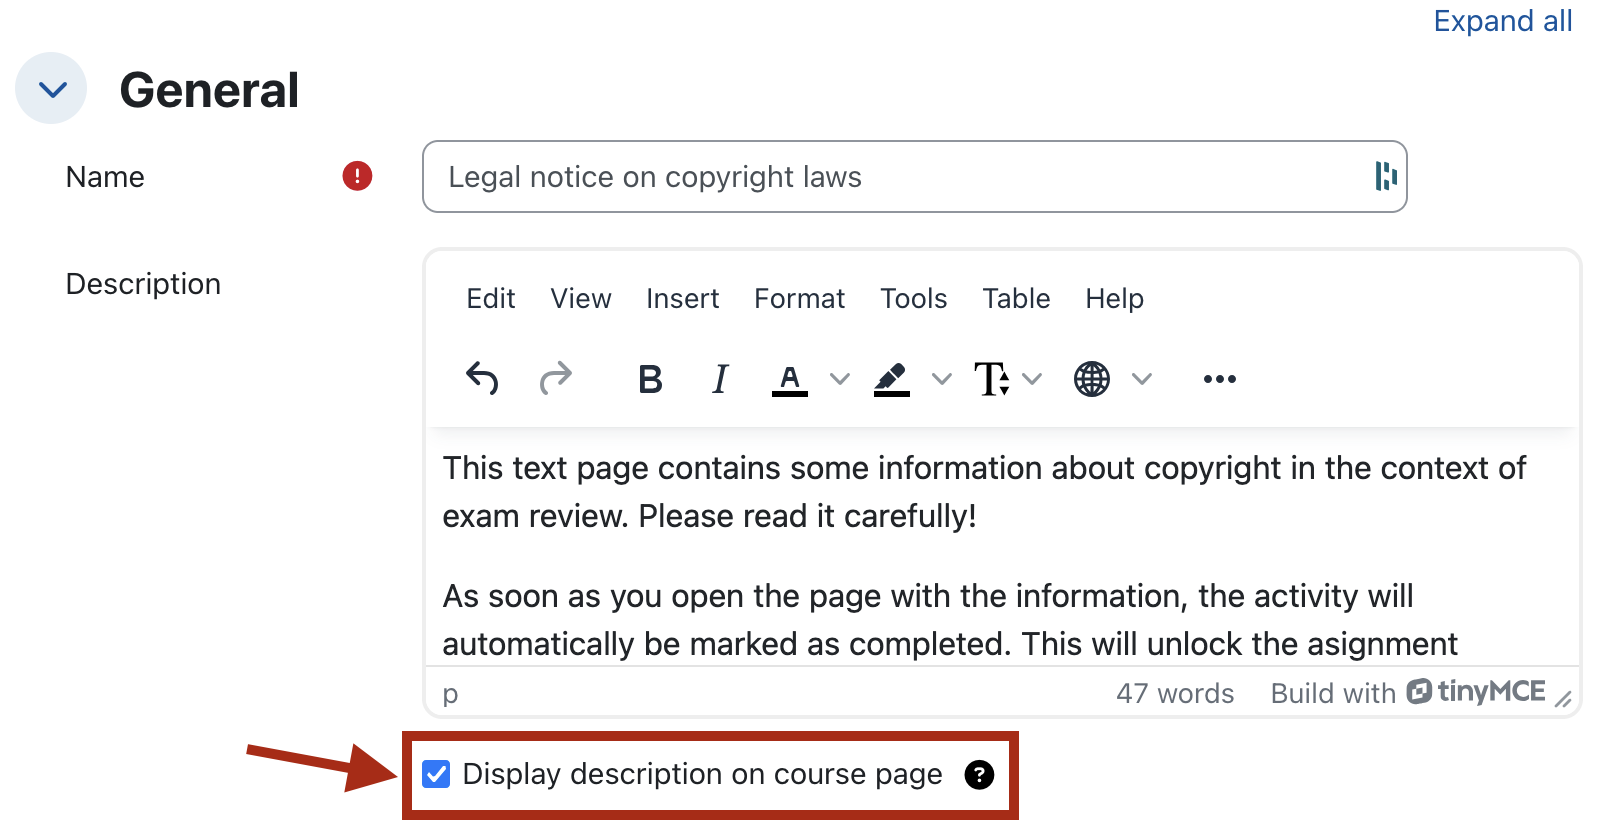
- In the “Description” field, provide brief instructions for students, for example: “This page contains important copyright information in the context of exam review. Please read it carefully! As soon as you open this page, the activity will automatically be marked as completed. This unlocks the assignment activity below with your exam copy.”
- Be sure to activate the option “Display description on course page”. Only then will students know how to access the assignment used for the review.
- In the “Content” field, enter the required copyright notices. The following sample text is based on page 8 of the handout on the subject of exam review from Department 1.1 - Academic Affairs, Examination and Higher Education Law. Please note that this translation done with DeepL only serves information purposes but is not an official, legally binding translation.
"Legal information on exam review
Please note that exam questions, exams, and exam papers, as well as the corresponding correction notes, are protected by copyright. If sample solutions are made available during the inspection, these are also protected by copyright. RWTH Aachen University prohibits any reproduction, distribution, and public disclosure of exam questions, the exam, and parts of the exam, as well as any sample solutions. In case of violations, RWTH will consistently enforce its copyright protection rights (§§ 97 ff. Copyright Act). RWTH has a right to information from platform operators on the Internet (e.g. “Studydrive”) if copyright-protected material belonging to RWTH has been uploaded there. You are not authorized to make any copies or photographs of the exam and parts of the exam, as well as their sample solutions, accessible to other persons with the result that they gain or can gain knowledge of their content. This does not apply to the relationship between the examination participant and a person authorized to inspect the examination, if applicable. Furthermore, tampering with the examination constitutes document forgery, which is punishable by law."

- In the “Restrict access” section, create a condition of type “Date” that defines when students may access the page. This should reasonably be the start date of the review. Keep the eye icon in front of the access restriction open so that the link to the page resource and the access restriction are displayed to students on the course page even if they cannot open the page yet as the defined date hasn't been reached yet.
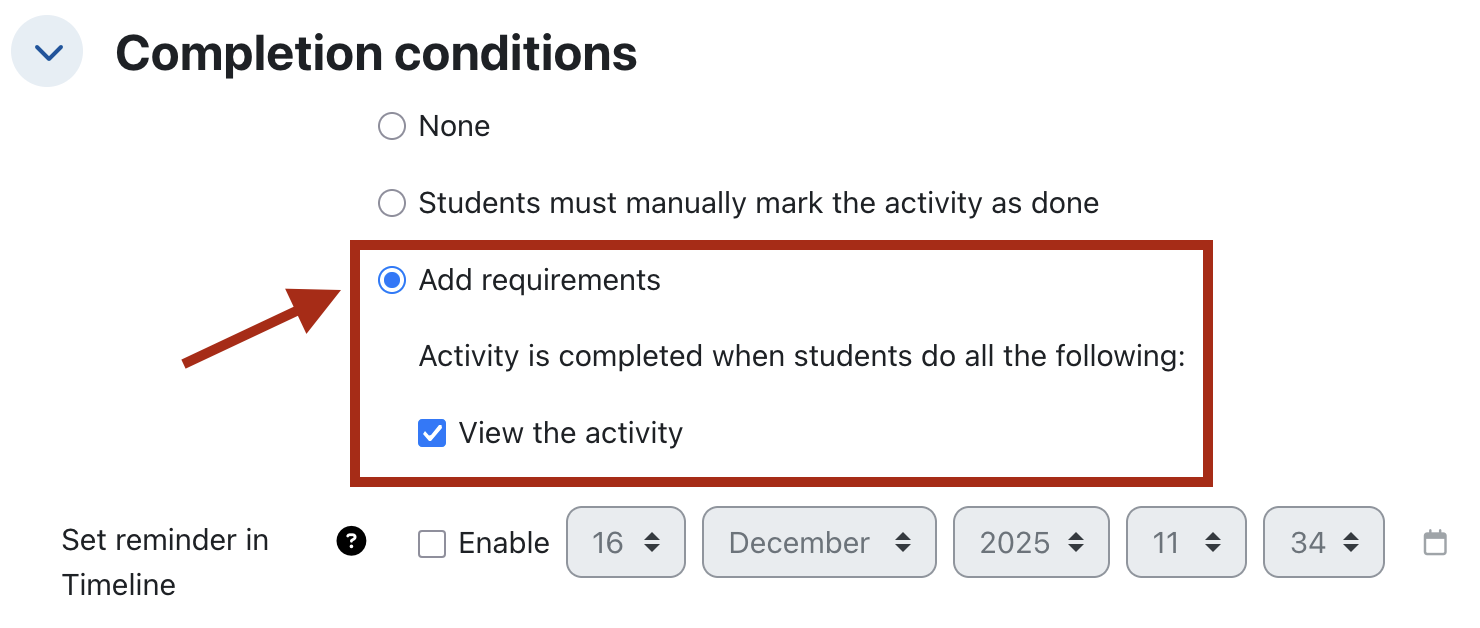
- Under “Completion conditions”, define when this activity should be considered completed. Select “Add requirements” and then choose “View the activity”.
- Save the changed settings for the page and return to the course page.
3. Create and configure an assignment activity and provide an objection form
In the next step, you can create the assignment activity. This is used to duplicate the individualized exam for printing and later to give students access to their individual exam copy.
- In the desired section, click the plus icon with the tooltip “Add content” and select “Activity or resource”.

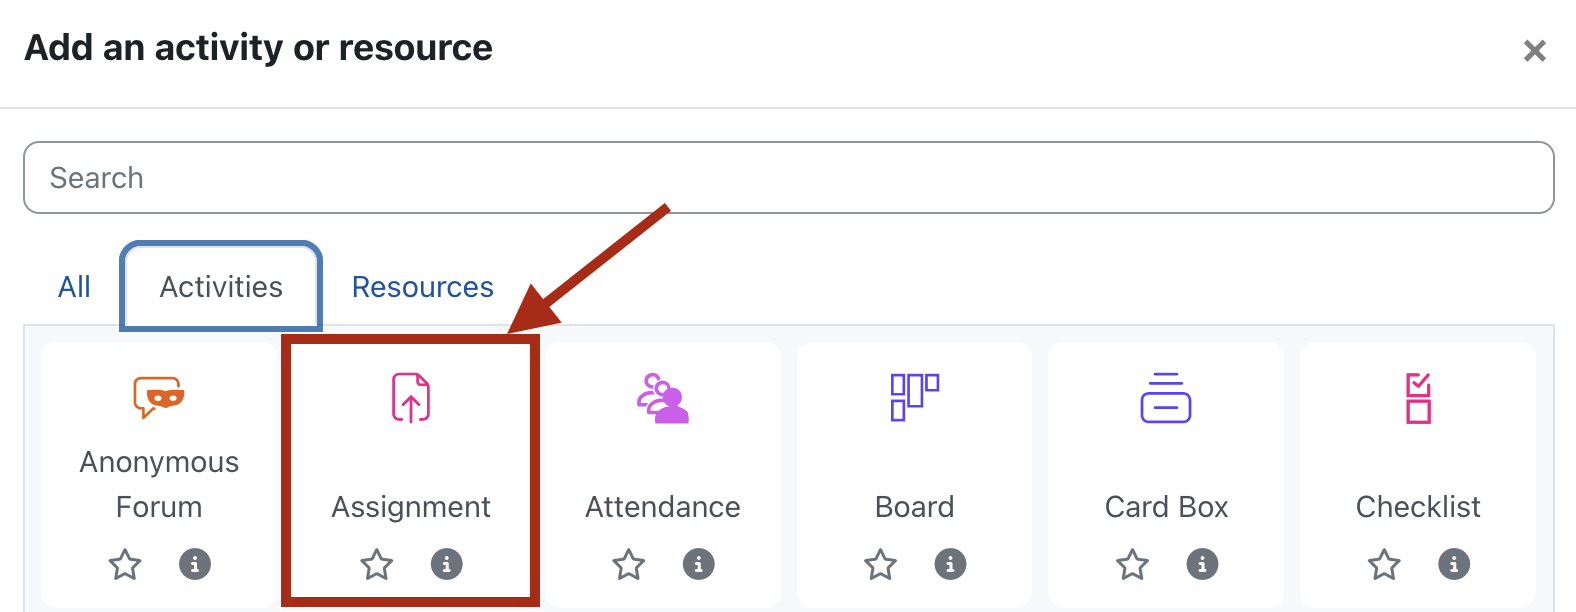
- In the activity chooser, click the “Activities” tab and then select “Assignment”. A new assignment is created.
- Give the assignment a suitable name.
- Under “Description,” enter all information that students need for the exam inspection, for example details on the duration of the inspection or the procedure for submitting objections. The field for the activity instructions can be left empty. It is preferable to include instructions on how students can ask questions or write objections in the “Description” field.


NOTE
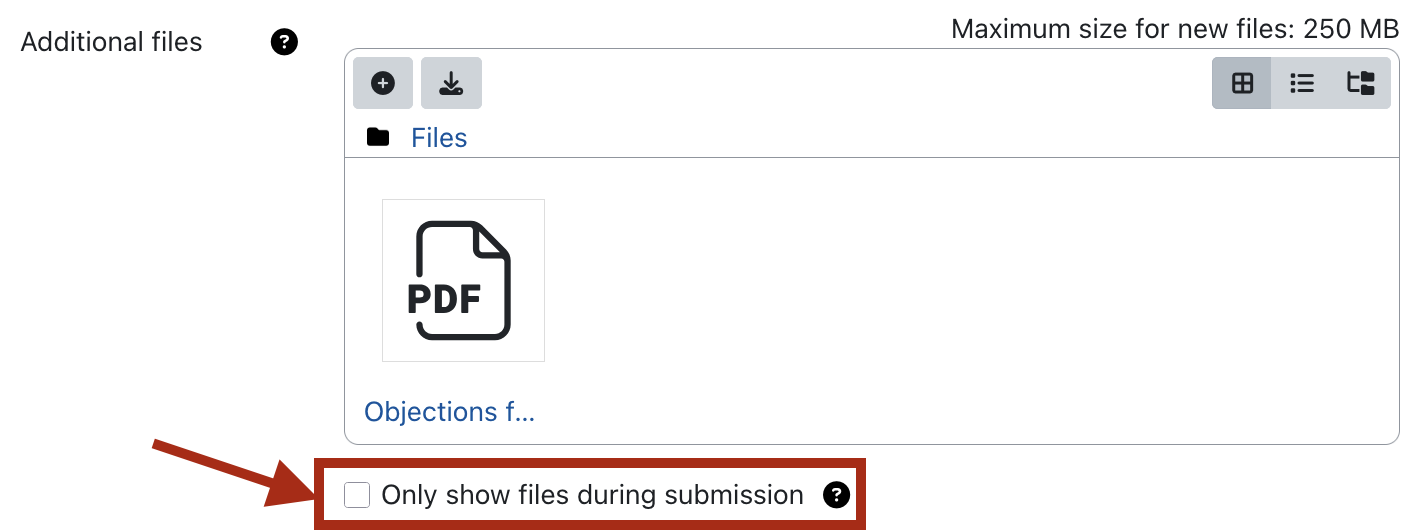
You can use the next field, “Additional files,” to provide forms for written objections. In this case, leave the option “Display description on course page” disabled. The link to the form will be shown when the activity is opened, together with the activity description. On the course page itself, however, only the description is displayed, not the link to the form. To avoid confusion, the description should therefore not be shown on the course page in this scenario.
- You can use the upload field for “Additional files” to provide a form for written objections. Leave the option “Display files only during submission” unchecked. This way, students will see the form together with the assignment description as soon as they open the activity, rather than only when creating a submission.
- If students are to submit their objections via the assignment, set the appropriate availability periods for submissions. Make sure that the due date and the last submission date are identical. The due date appears in the course calendar, but only the last submission date determines the latest possible time a submission can be made. Keep the setting “Always show description.”
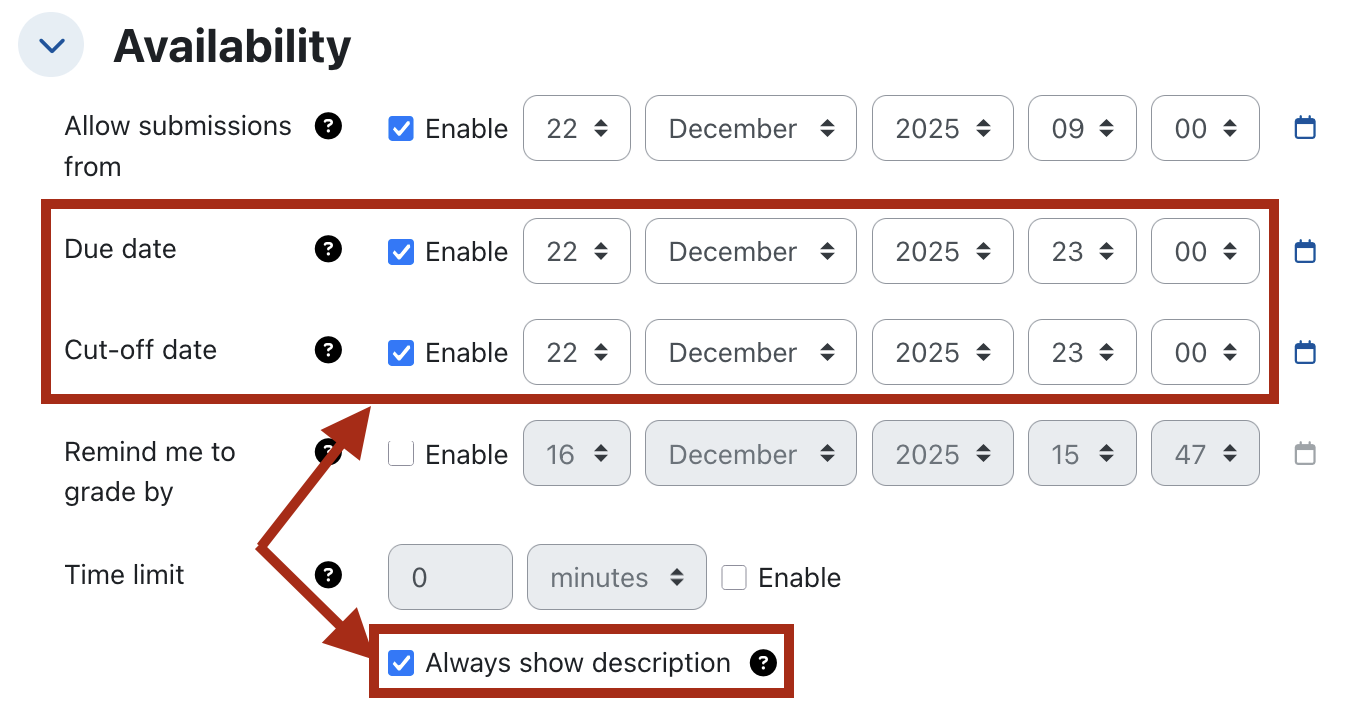
- If you collect objections via the assignment, enable file submissions under “Submission types” and restrict the accepted file types to “.pdf”.

- Under “Feedback types”, select the options “Exam Scan” and “Feedback files”. If the students’ inspection copies are to be protected with a password, also enable “Feedback as comment.”

- Keep the default settings for Submission settings, Group submission settings, and Notifications.
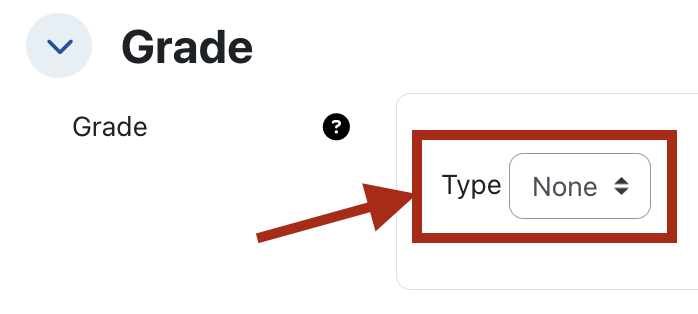
- Be sure to set the “Grade” option to “None”. Otherwise, issues may arise when displaying the exam copies, as Moodle expects a grade for a submission before students can view their exam. No grades are assigned during the inspection.
- Skip the Additional settings.
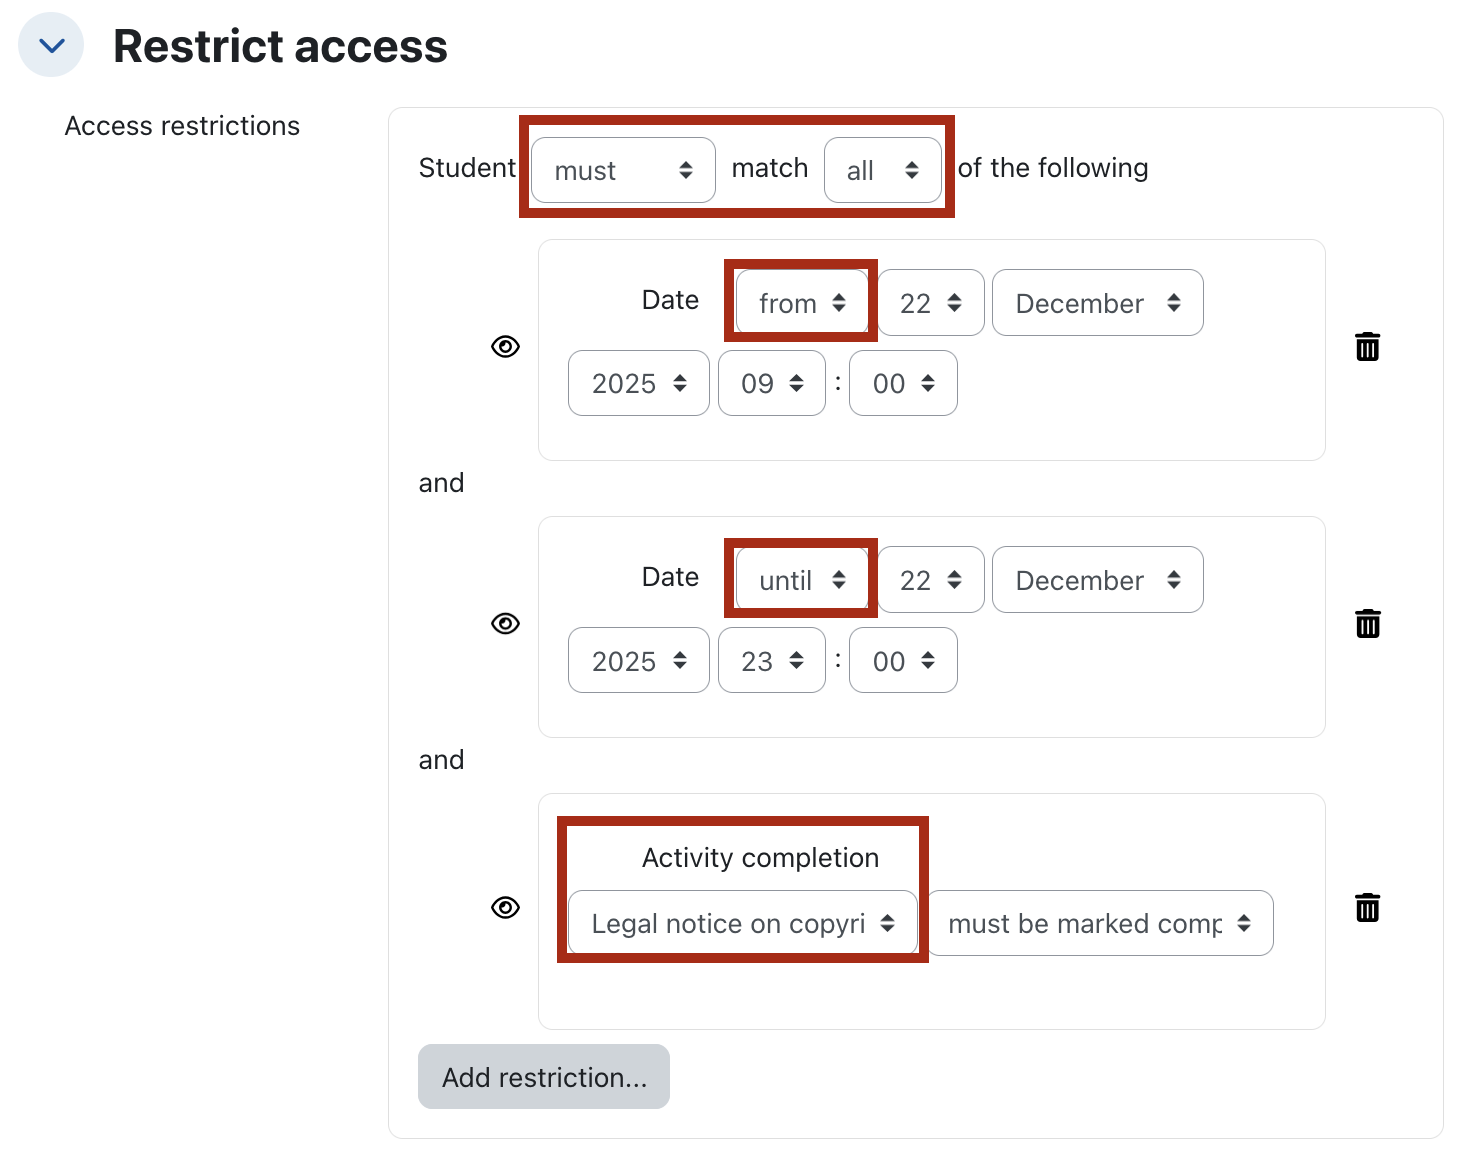
- Under “Restrict access,” set the inspection period, i.e., the time frame during which students can view, download, and, if applicable, upload an objection for their inspection copy. Students will only have access to the assignment within this defined period. Therefore, add a restriction of the type “Date.” Select the start date of the inspection period and make sure that the option “from” is selected in the dropdown menu before “Date.”
- Next, add a second restriction, also of the type “Date.” Select the end date of the inspection period or the deadline for uploading objections. Make sure that the option “until” is selected in the field before the date.
- Next, add a third restriction of the type “Activity completion.” Select the page resource containing the copyright information as the activity to be completed. This ensures that students can only access the assignment with their inspection copy after they have first opened the page resource.
- Also make sure that in the two dropdown menus at the top of the restrictions, it is set so that participants “must match all” of the restrictions.
NOTE
Ensure that the period in the Access restrictions is identical to the submission period for objections set earlier under “Availability.” Additionally, the start date should match the date set for the page resource with the copyright infos. - The configuration of the assignment is now complete. Save the selected settings and then open the activity.
4. Individualize exam copies with QR codes
Once the assignment activity for the review has been created, you can prepare the required exam materials. You can choose how the QR codes for the exam papers are provided. Two independent options are available:
Notes
When placing QR codes, leave sufficient space between them and the edge of the page. Some scanning stations crop the edges of the page when scanning, which can damage the QR codes and make them unreadable.
The option to provide QR codes using label sheets is currently in an early stage and has not yet been tested in the context of a digital post-exam review. Before using this option in a live post-exam review, it is recommended to thoroughly test the entire workflow in advance. The IT-ServiceDesk is happy to support you with the preparation and execution of test runs.
- Exam template with QR codes (Option A): Upload your exam template as a PDF, integrate a QR code on each page of the exam sheet, and start duplicating the template for all examinees.
- Labels with QR codes (Option B): Generate labels that you stick onto the cover page of the printed exam copies. Each label contains an individual QR code with the matriculation number.

The initial steps are identical for both options:
- In the course room, open the assignment activity that you prepared for the review.
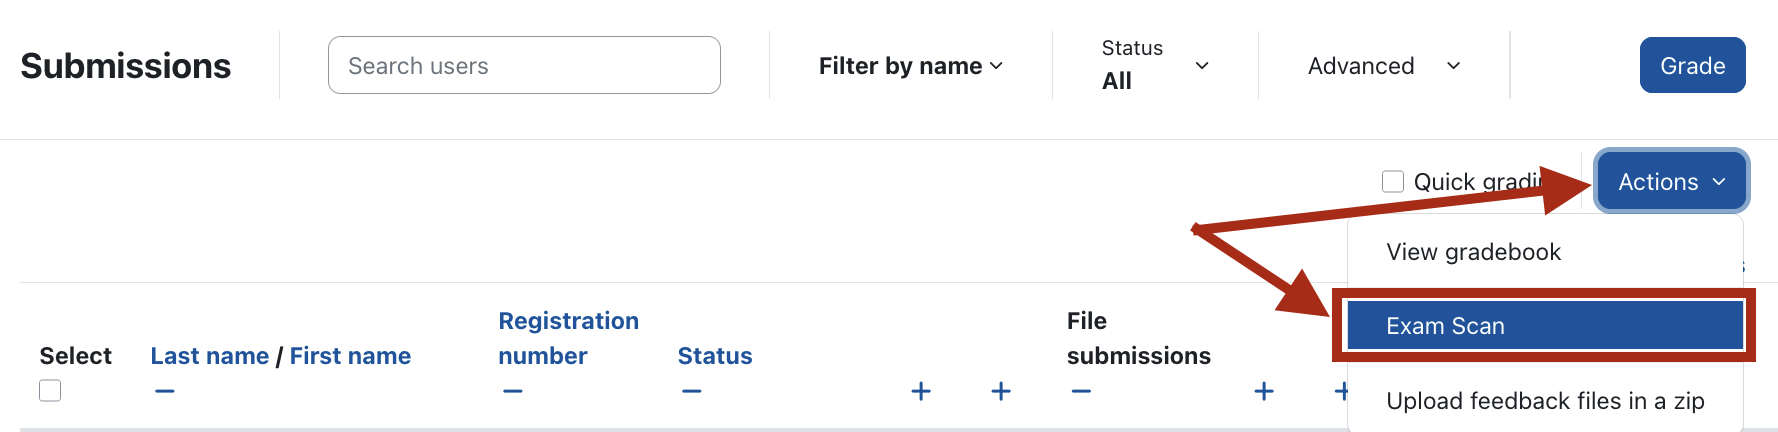
- Click on “Submissions”.
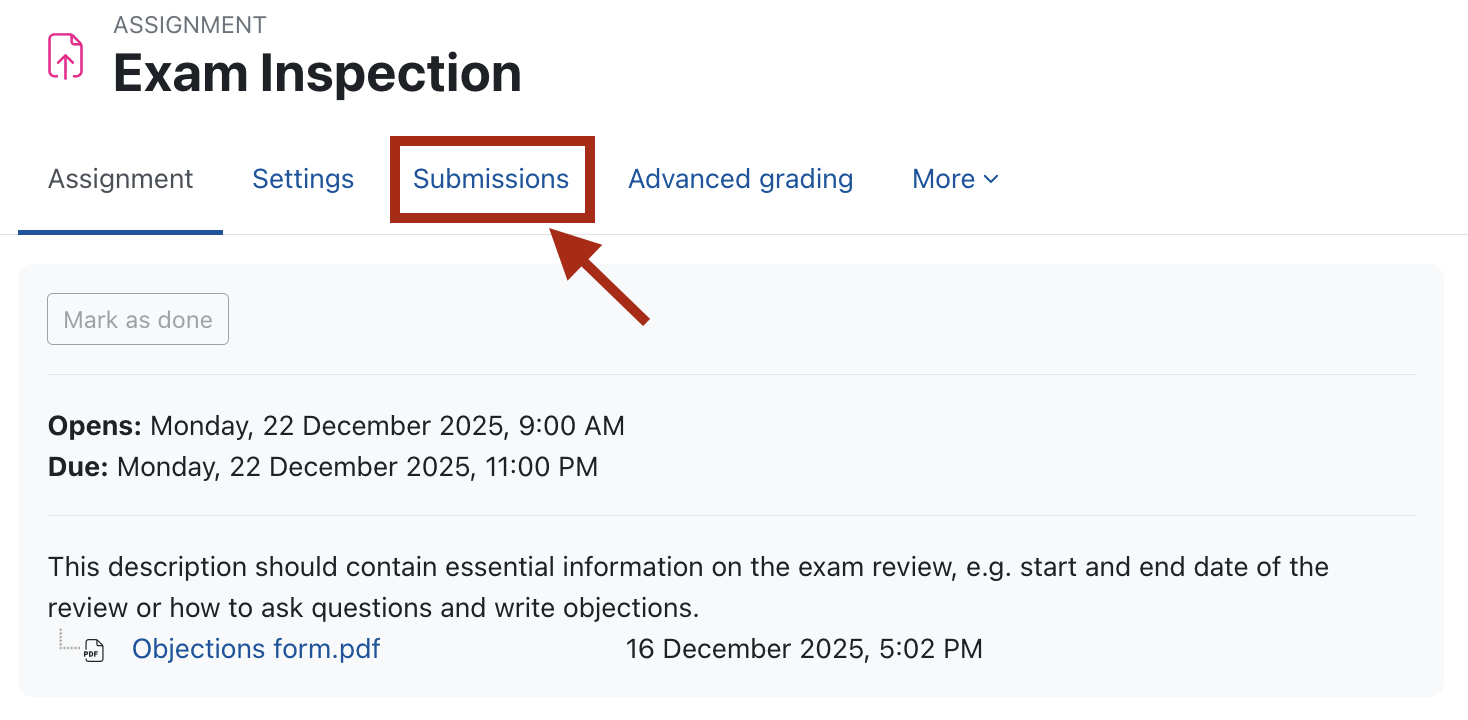
- Click on the “Actions” drop-down menu above the submission list and select the “Exam Scan” option.
- On the following page, you must choose one of the options listed. You will also upload the file containing the scanned exams to this page later in order to split them up and assign each examinee their individual copy.
4.1. Exam template with QR codes (Option A)
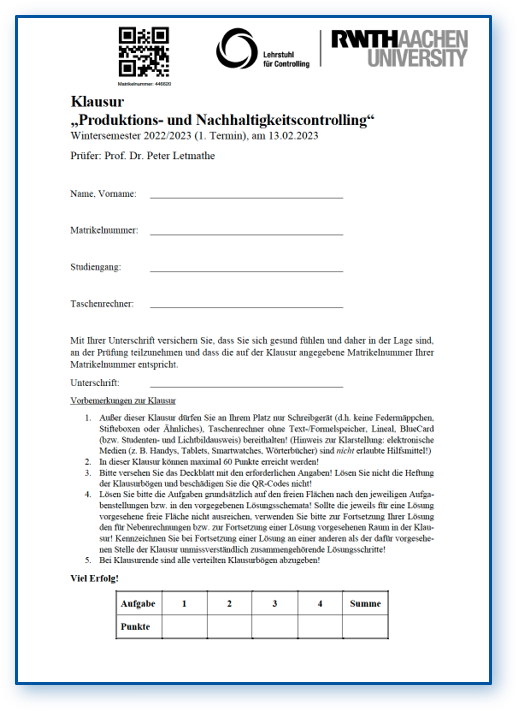
- For this option, first create an exam template in PDF format. Leave some space at the top of the page for a QR code. Place it in the center so that it will not be damaged later when stapling the pages.
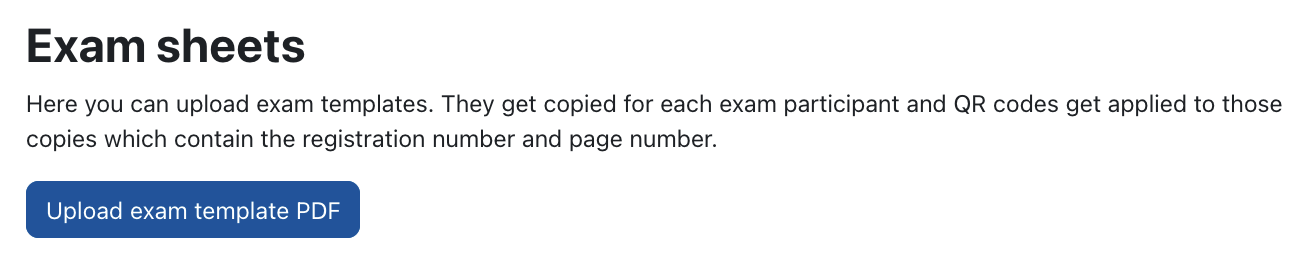
- Under “Exam sheets”, click on “Upload exam template PDF”.
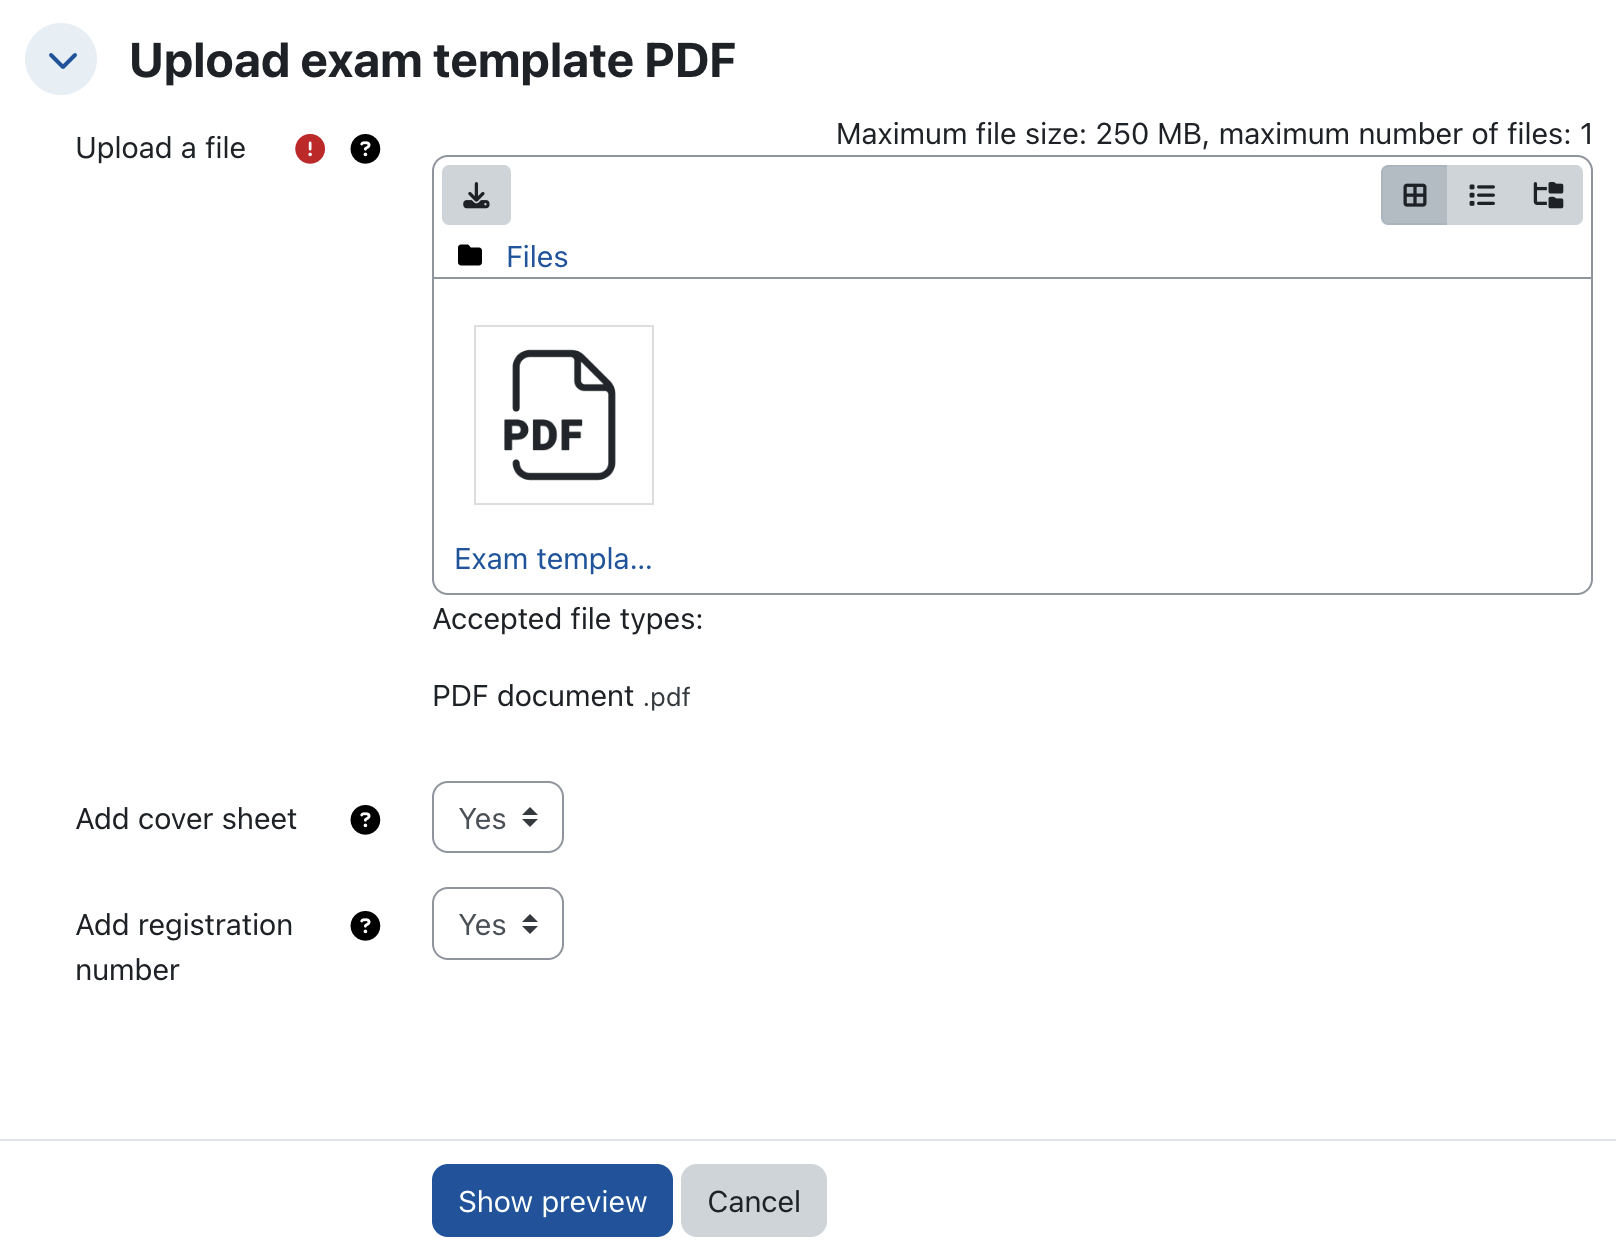
- Drag and drop the prepared PDF file with the exam template into the upload field or navigate to the appropriate file using “Browse”.
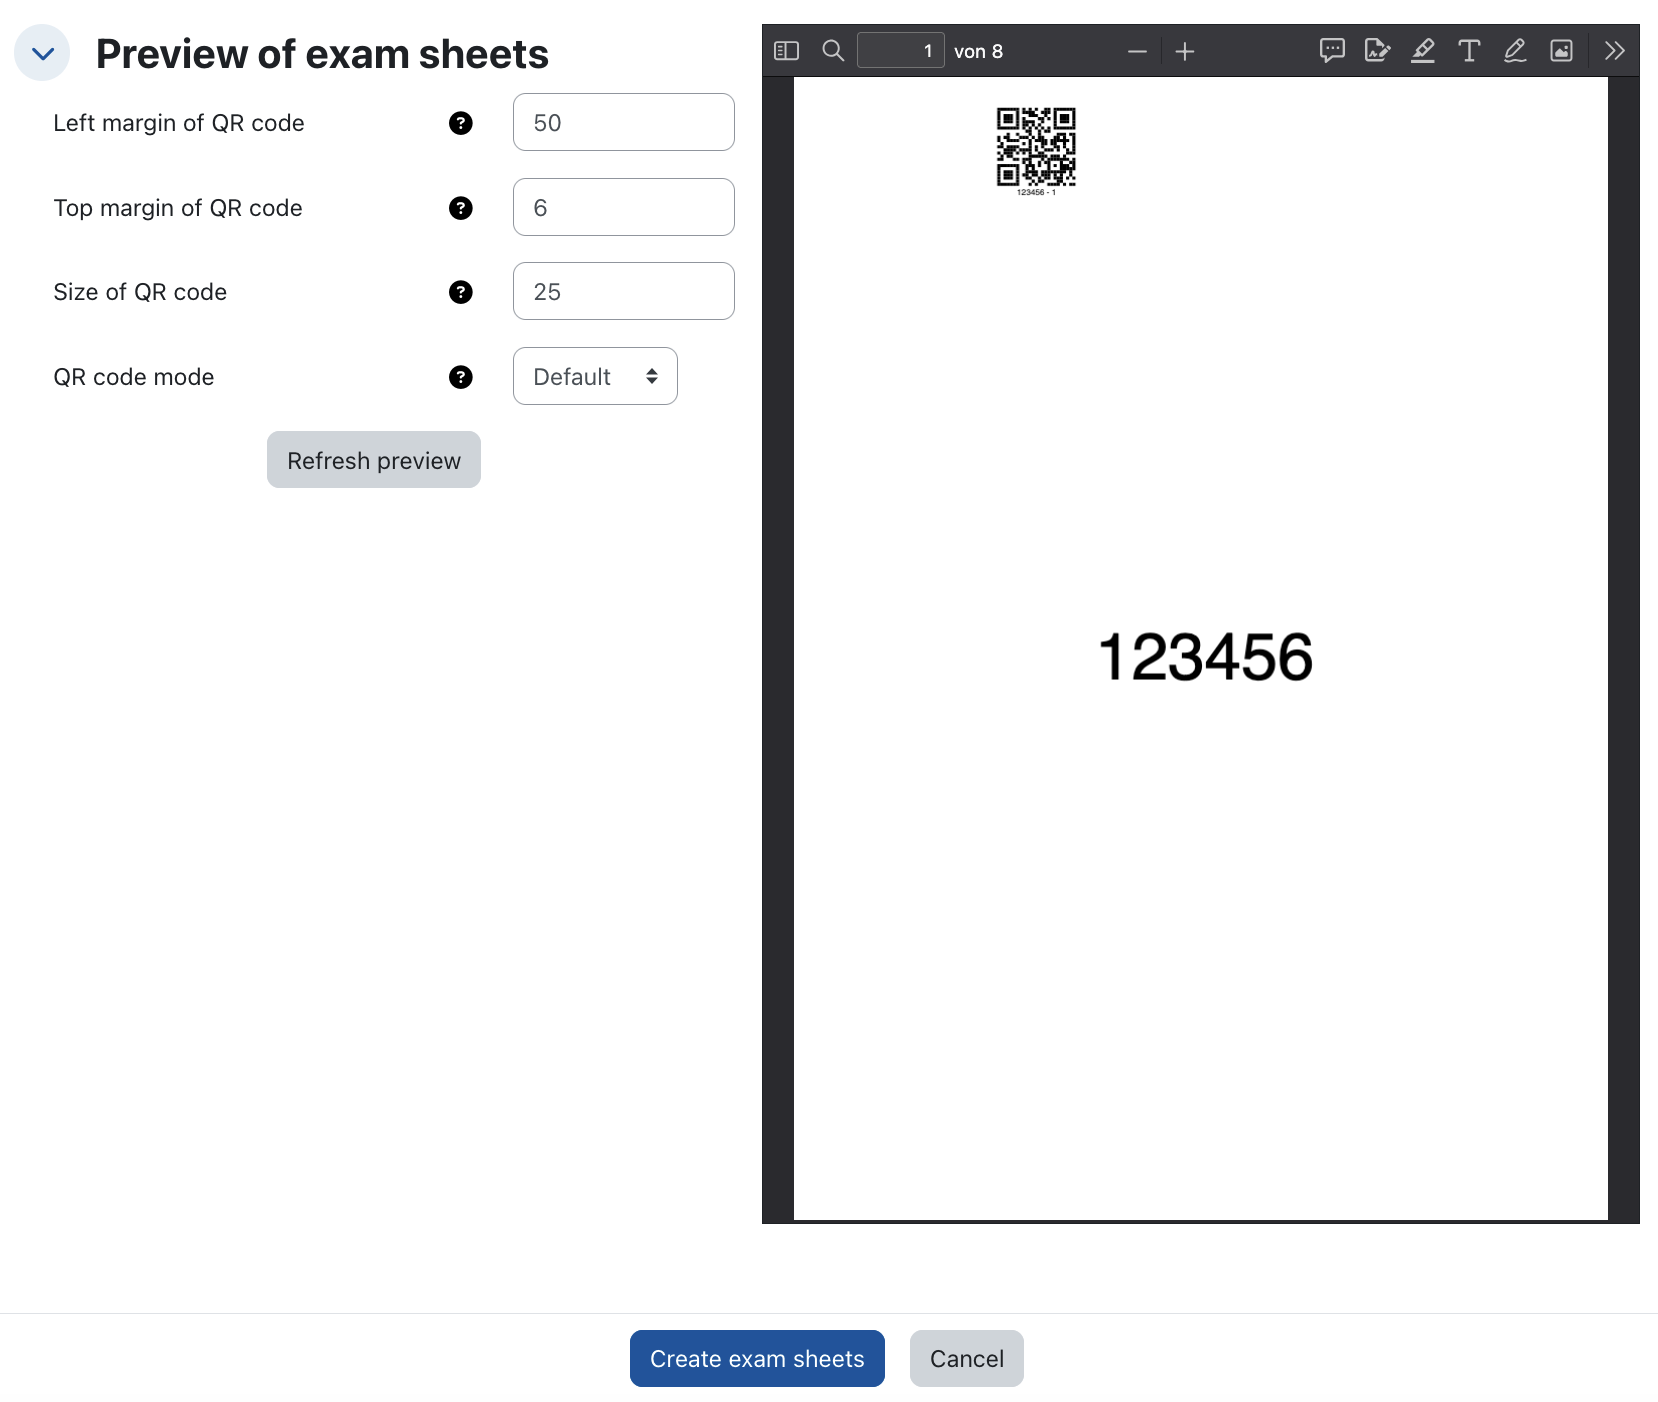
- Keep the settings for the cover sheet and registration number and click on “Show preview”.
- In the preview, adjust the size and position of the QR code and the QR code mode as desired in the print area of the page. The QR code contains the student ID number and the page number. The student ID number is also displayed in large print on the cover page.
- By clicking on “Create exam sheets,” RWTHmoodle duplicates your template for all students who have access to the prepared assignment. If you have restricted access to a specific group, copies will only be prepared for the members of that group.
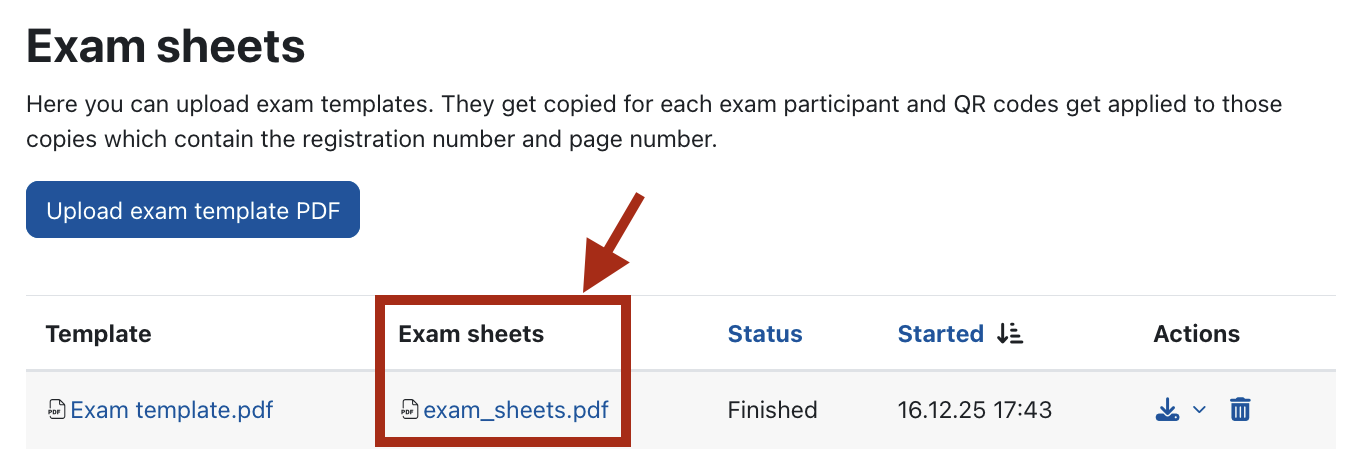
- The exam sheets are generated asynchronously which will take a few moments. You can check whether the process is complete by reloading the page. The “Status” column in the overview shows you whether the process is still running. Once processing is complete, a PDF file with the duplicated papers will appear in the “Exam sheets” column. Download the file for printing.
4.2. Labels with QR codes (Option B)
- Click on "Upload paper labels template PDF".

- You can either upload your own label paper template or use the standard template provided:
- Upload new label paper template: Drag and drop the prepared PDF template for the label paper into the upload field or navigate to the appropriate file using “Browse”. The template should reproduce the layout of the label paper to scale, i.e., it should contain all label frames and be created without scaling or additional margins. It is best to use a PDF template directly from the manufacturer or scan the label sheet and save it as a PDF. This allows you to position the QR codes precisely on the label sheet in Moodle. The template is used exclusively for position adjustment; in the end, Moodle generates the label sheets without the template.
- Use standard label paper template: Select the “Soennecken 70×42.3” option from the drop-down menu if you are using labels in this format. This is the standard 70×42.3 mm format with 3 columns × 7 rows, i.e., 21 labels per A4 sheet. Moodle provides a suitable template for this format, so you don't need to upload your own PDF file. The QR codes are automatically positioned correctly on the labels.
Note: Currently, “Soennecken 70×42.3” is the only standard template available; additional formats may be added in the future. The available format corresponds to the common Avery/Zweckform 3652 label format, so both are compatible.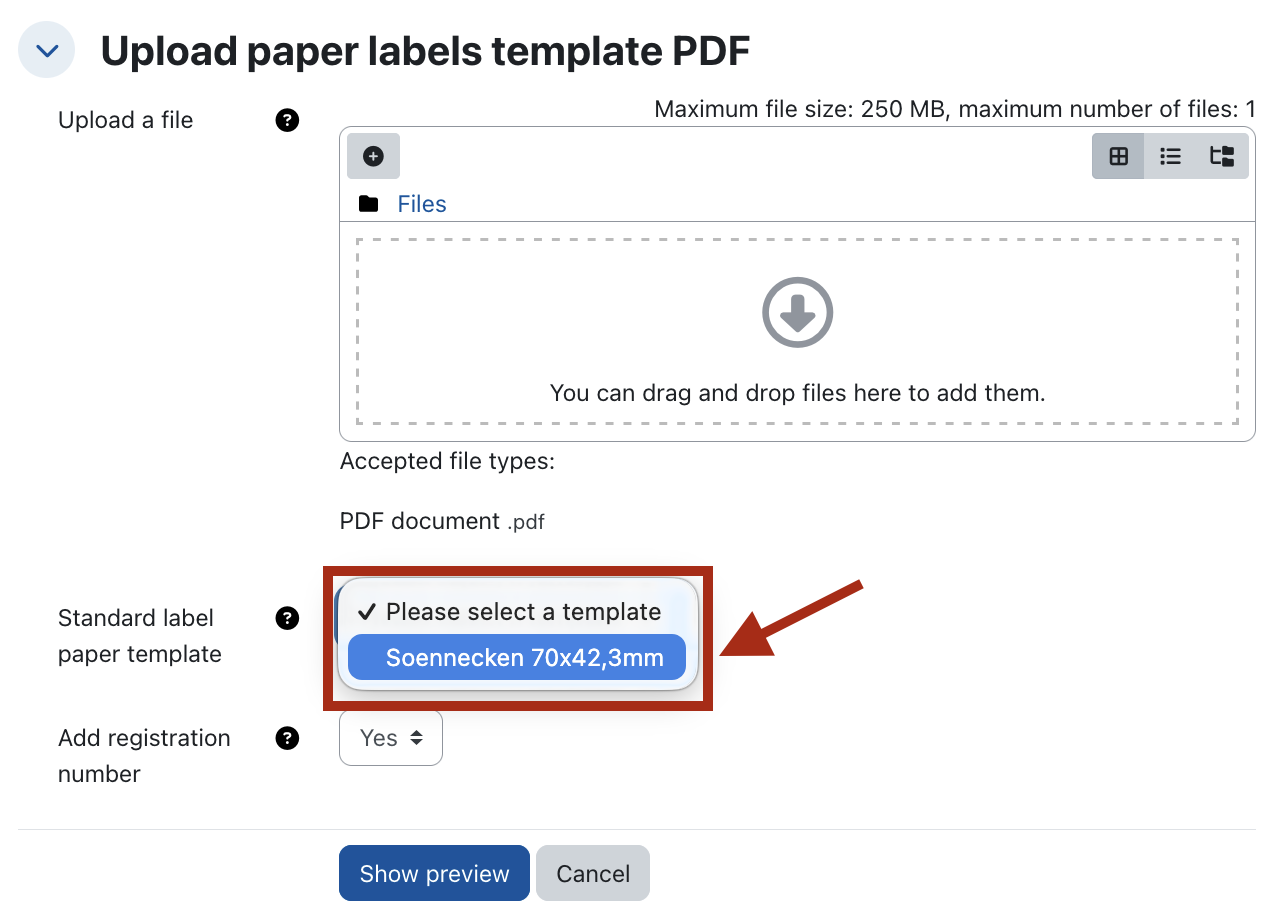
- Keep the settings for the registration number and click on “Show preview".
- In the preview, you can precisely position and adjust the QR codes on the labels. You can change the spacing, alignment, and size of the QR codes to ensure that they fit on the labels. Make sure that the codes are not too close to the edge and that there is enough space between them so that they are not cut off during printing or cutting. With the “Refresh preview” button, you can check how the adjustments look on the labels at any time before you create the final labels. Use this function until the QR codes are correctly aligned on all labels.

- RWTHmoodle uses “Create label sheets” to generate labels for all students who have access to the prepared assignment. If you have restricted access to a specific group, labels will only be prepared for the members of that group.
- The label sheets are created asynchronously and take a few moments to generate. You can check whether processing is complete by reloading the page. The “Status” column in the overview shows you whether the process is still running. Once processing is complete, a PDF file appears in the “Label sheets” column with the finished labels, which contain an individual QR code for each examinee. Download the PDF file and then print the labels on your label paper.
Note: The label with the QR code must be affixed exclusively to the first page of the exam sheet. When splitting the file with the scanned exam sheets into the individual copies for each student, Moodle automatically assigns all immediately following pages without a QR code to the same examinee until another QR code is recognized. Unlike option A (upload exam template), there are no specific requirements for the positioning of the label or QR code. The label can be placed anywhere - for example, at the top or bottom of the page or on the side. It can also be positioned at an angle. The only important thing is that the QR code is scanned in its entirety.
Once you have conducted the exam as usual in the lecture hall, you can either do the correction on paper and then scan the collected exam copies at the usual printing and copying stations and save everything as a PDF. RWTHmoodle will then continue working with this PDF. Or first scan the exam sheets, split the file up in RWTHmoodle and then download the splitted files to use them for digital correction processes.
- Open the prepared assignment activity for the review in the course room.
- Click on "Submissions".
- Above the submission list, click on the "Actions" dropdown menu on the right and select the "Exam Scan" option.
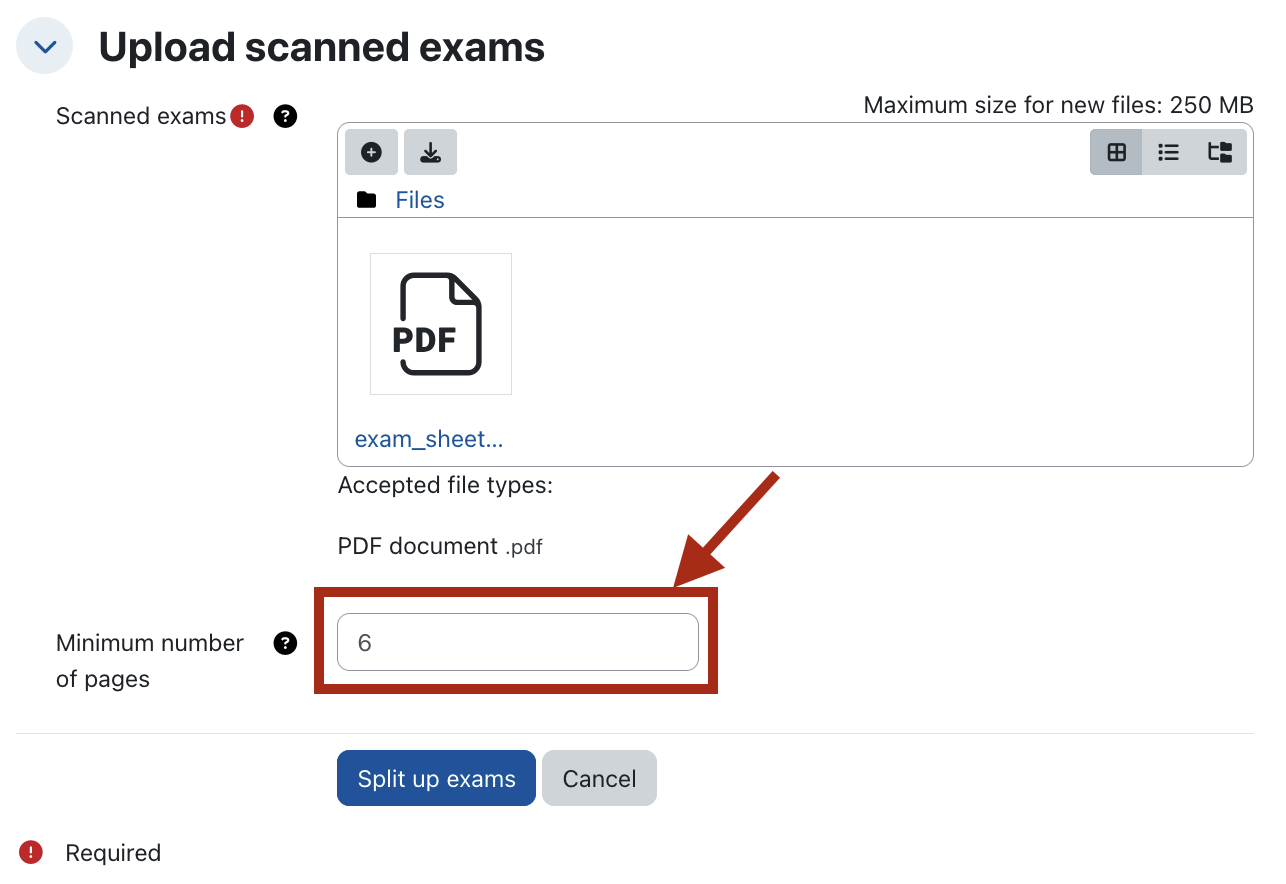
- Now click on "Upload scanned exam".
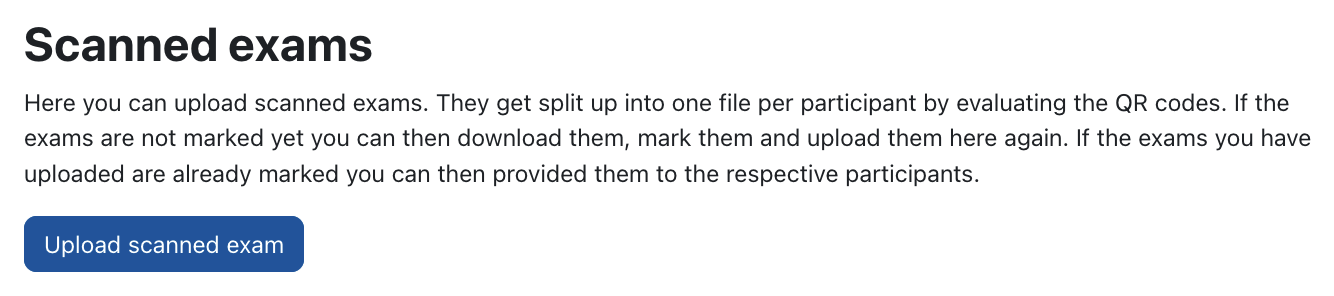
- Drag and drop the prepared PDF file with the exam scans into the upload field, or navigate to the appropriate file via "Browse". If scanning the exam resulted in more than one file you can upload all the files at once to the upload field. Optionally, you can specify a "Minimum number of pages" before clicking "Split up exams":
Option B (Label printing): Specifying the minimum number of pages is important here because the QR code is only placed on the first page of an exam sheet. Moodle uses the minimum number of pages to recognize complete exams. Example: If you enter "6", Moodle expects exactly six pages for each exam sheet. If only five or more than six pages are assigned to a QR code, the corresponding exam will later appear under "Processing Errors" where it can be checked.
Option A (Exam template): This specification is not required here, as each page contains a QR code.
- RWTHmoodle now splits the scan file(s) into a PDF per person based on the QR codes. This process is running asynchronously and will take a few moments. Please reload the page to check if the processing is complete. The "Status" column in the overview indicates whether the process is still running. Once processing is complete, the individual PDFs appear in the "Split exams" column. In the "Actions" column, the download icon opens a dropdown menu from which you can download the files if needed, e.g. to use them for digital correction outside Moodle. The file categories "Uploaded scans," "Split exams," and "Processing errors" are available for download.
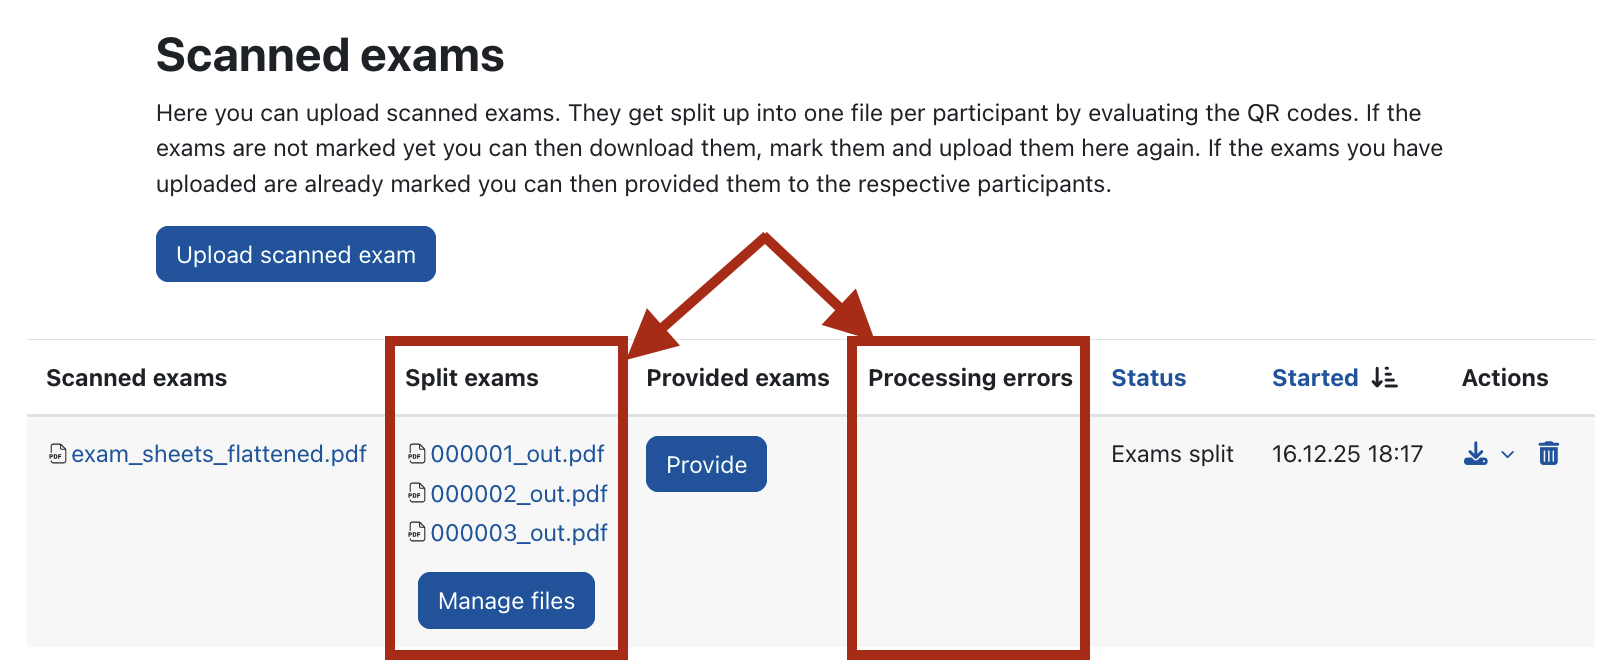
- The "Processing errors" column lists those exam sheets that could not be assigned due to unreadable QR codes or that do not match the set minimum number of pages (e.g., 5 instead of 6 expected pages). These exams must be checked and, if necessary, corrected before making them available. Using the "Manage files" button in the "Split exams" column, you can view all split exams. In particular, the exams marked as erroneous can be opened, checked, and replaced if needed.
Note: For a larger number of processing errors, it may be more effective to make corrections outside Moodle – for example, through a new corrected scan and subsequent re-import. In this case, you can use the trash icon ("Delete") to remove the entire faulty upload and then upload a cleaned or newly created PDF file again.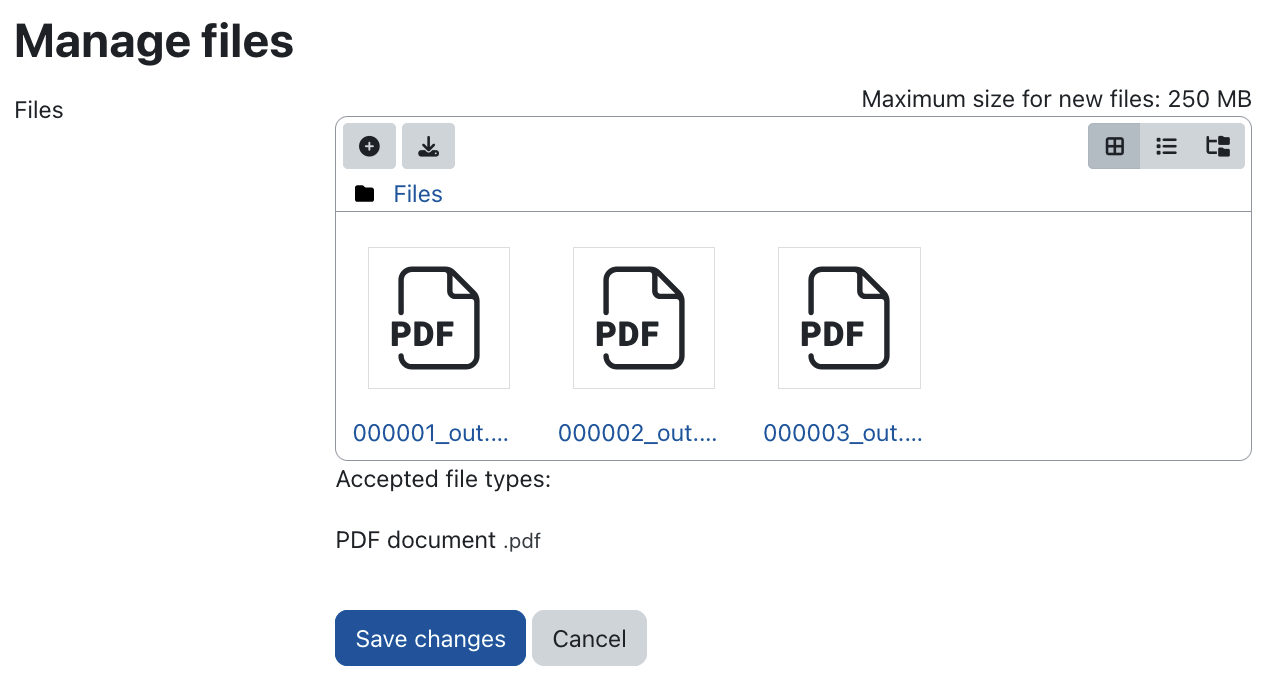
6. Add Watermark and password and provide exam copy
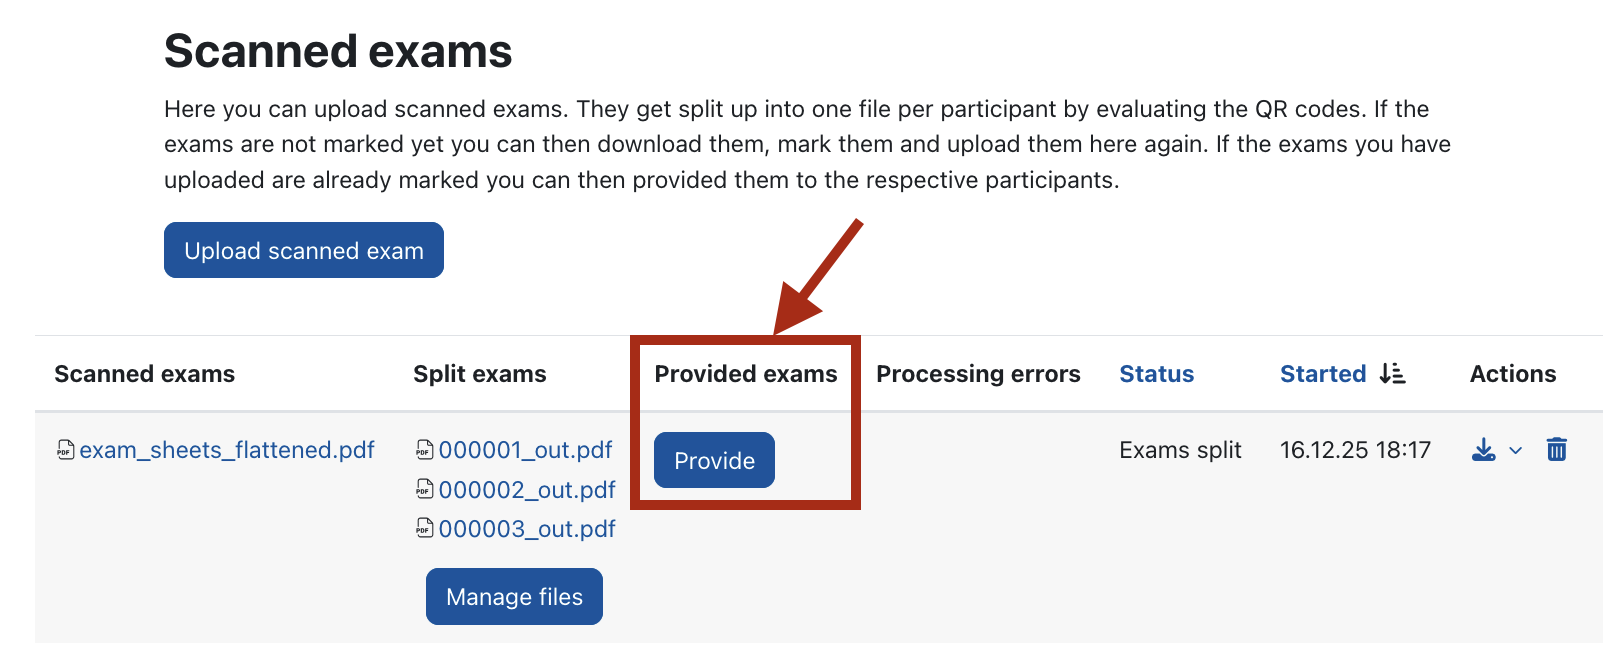
Once the file(s) with the scanned exams have been split into individual files, you can provide the exam copies to the students in the final step. To make uploading exams to platforms like Studydrive more difficult, you can insert a watermark into the PDF and assign a password during the release process.
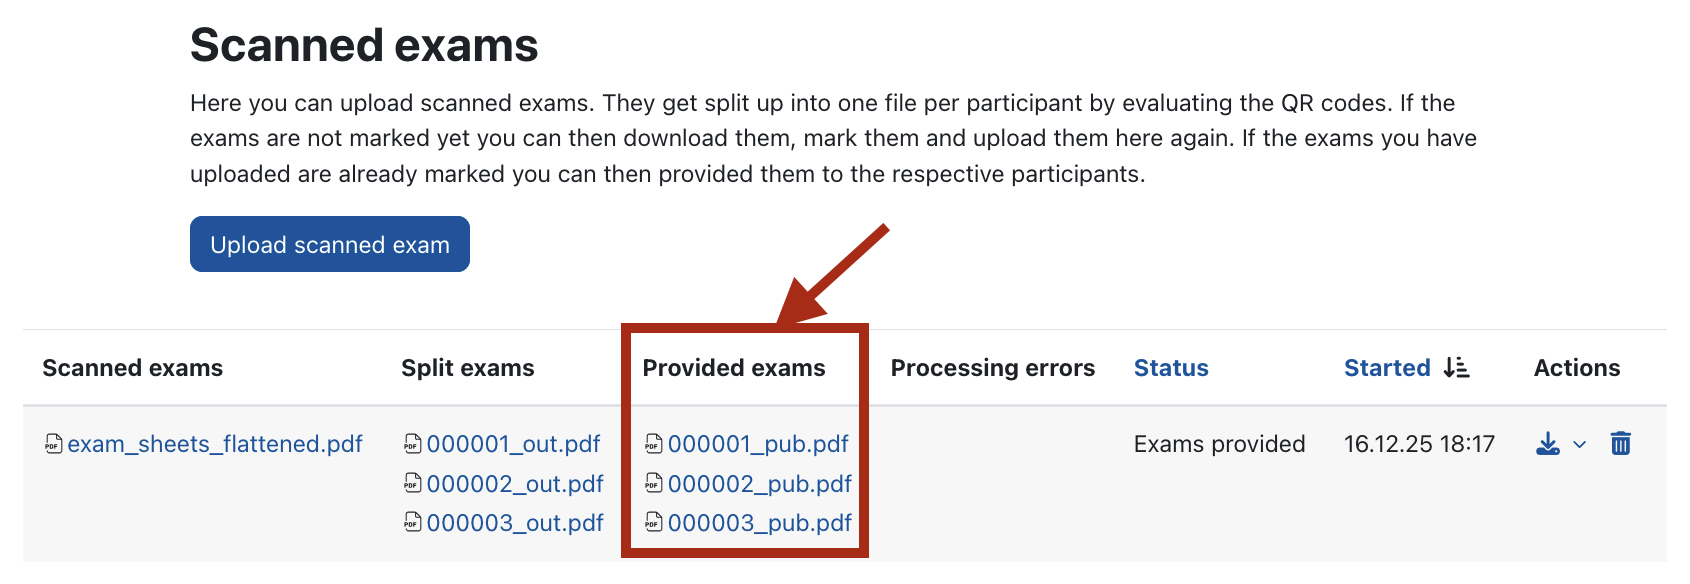
- Click "Provide" in the "Provided exams" column of the "Scanned exams" table to make the individual exam copies available to students.
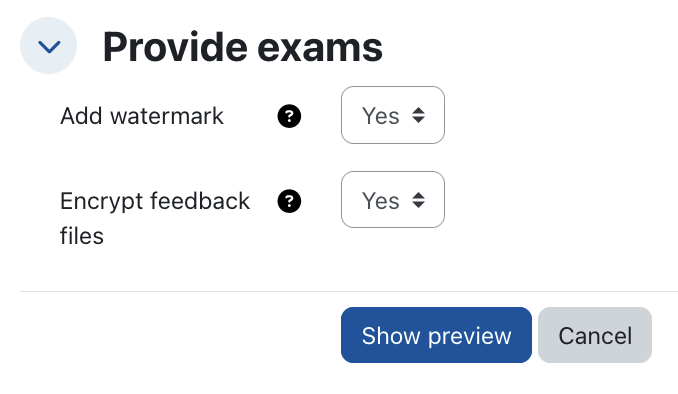
- Decide whether to insert a watermark and encrypt the exam copies, i.e., protect them with a password. In the following steps, we assume both options are selected.
- Click on "Show Preview".
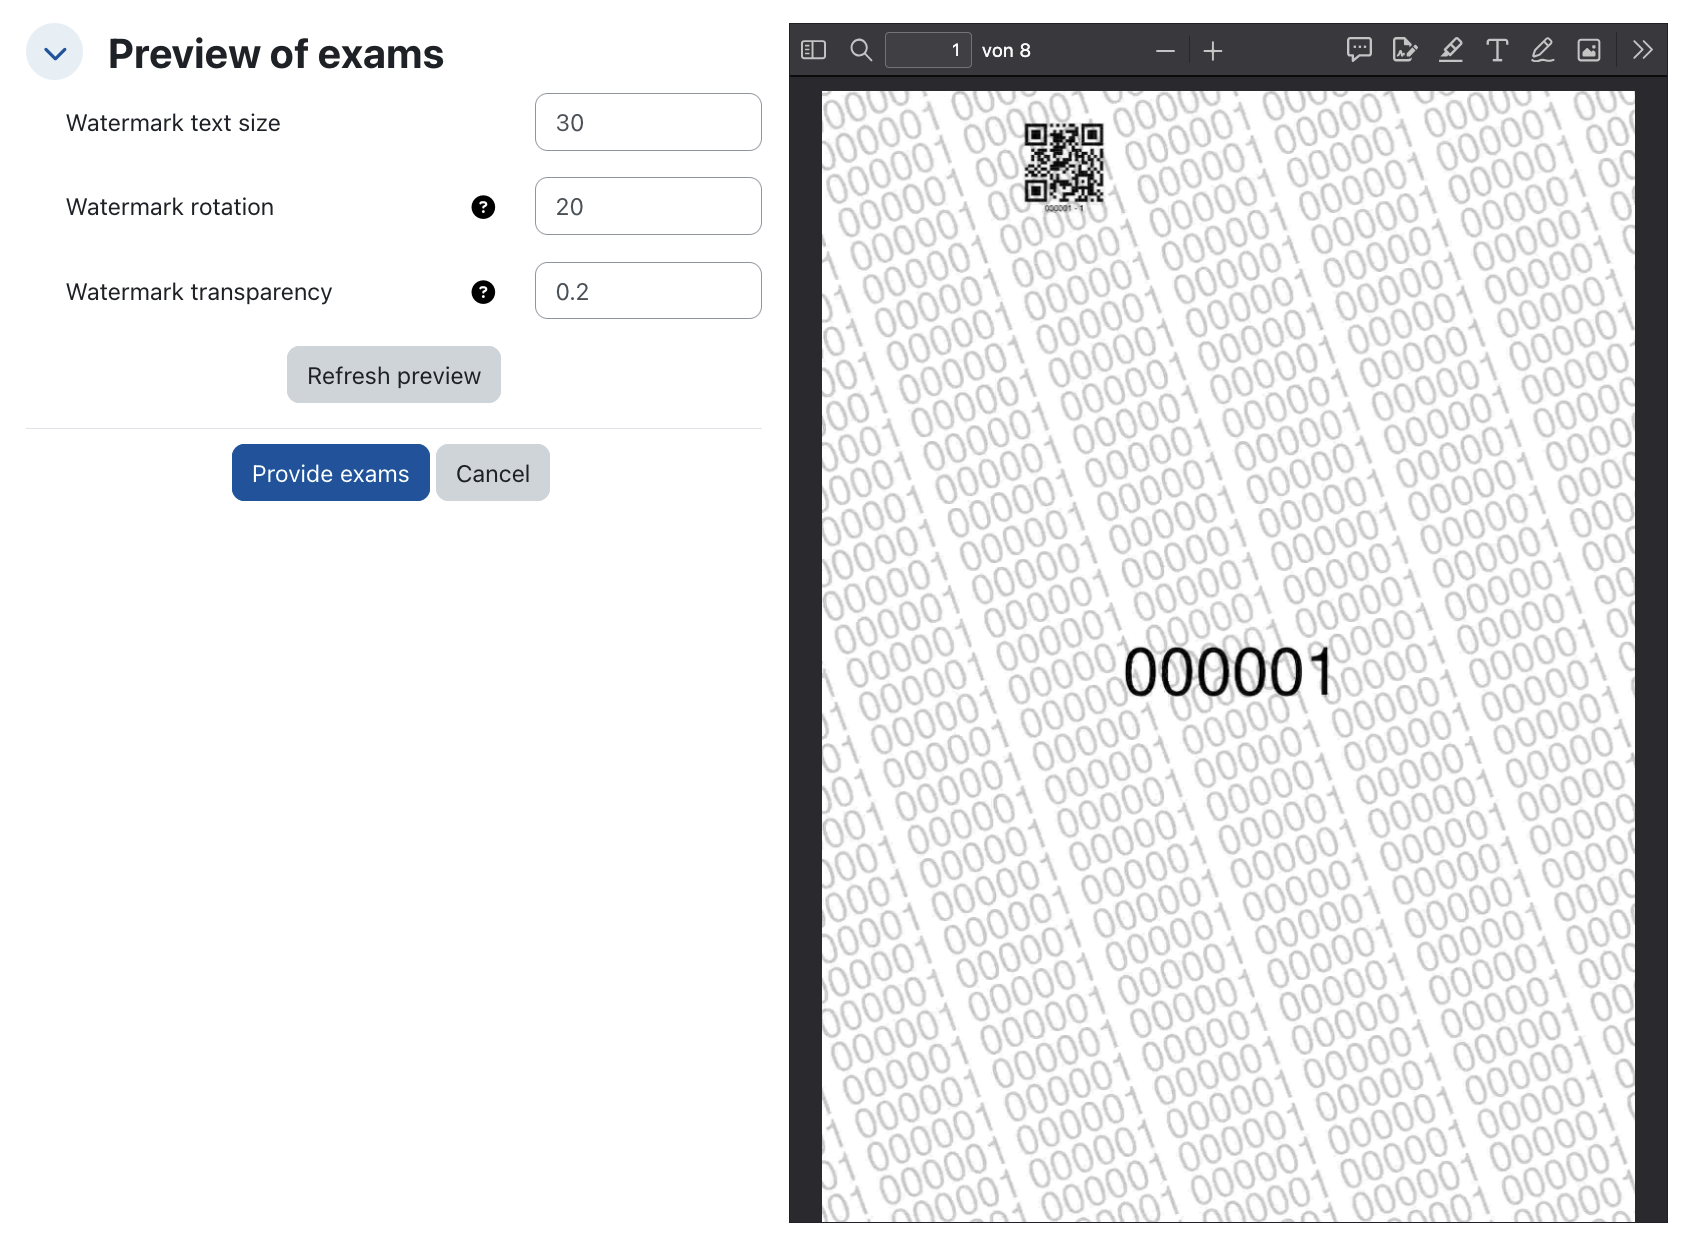
- Position the watermark in the preview and set the font size and transparency. Use "Refresh Preview" to see the effect of your changes.
- Once you have found suitable settings, click "Provide exams".
- Inserting the watermark, securing with a password, and providing the exams are asynchronous processes and take some time. Reload the page periodically until processing is complete. The "Status" column in the overview shows whether the process is still running. Once processing is complete, the PDF files that students will receive appear in the "Provided exams" column.
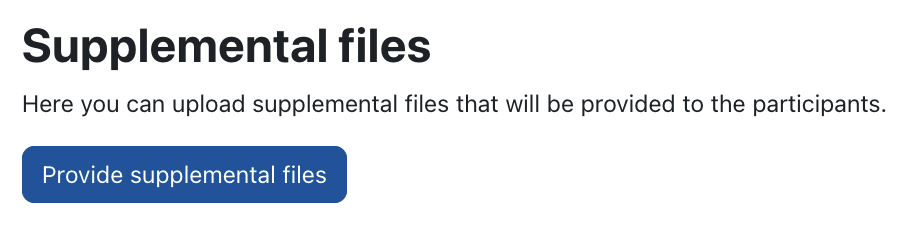
- If you want to provide additional files individually that are needed for the review, use the "Additional files" section.
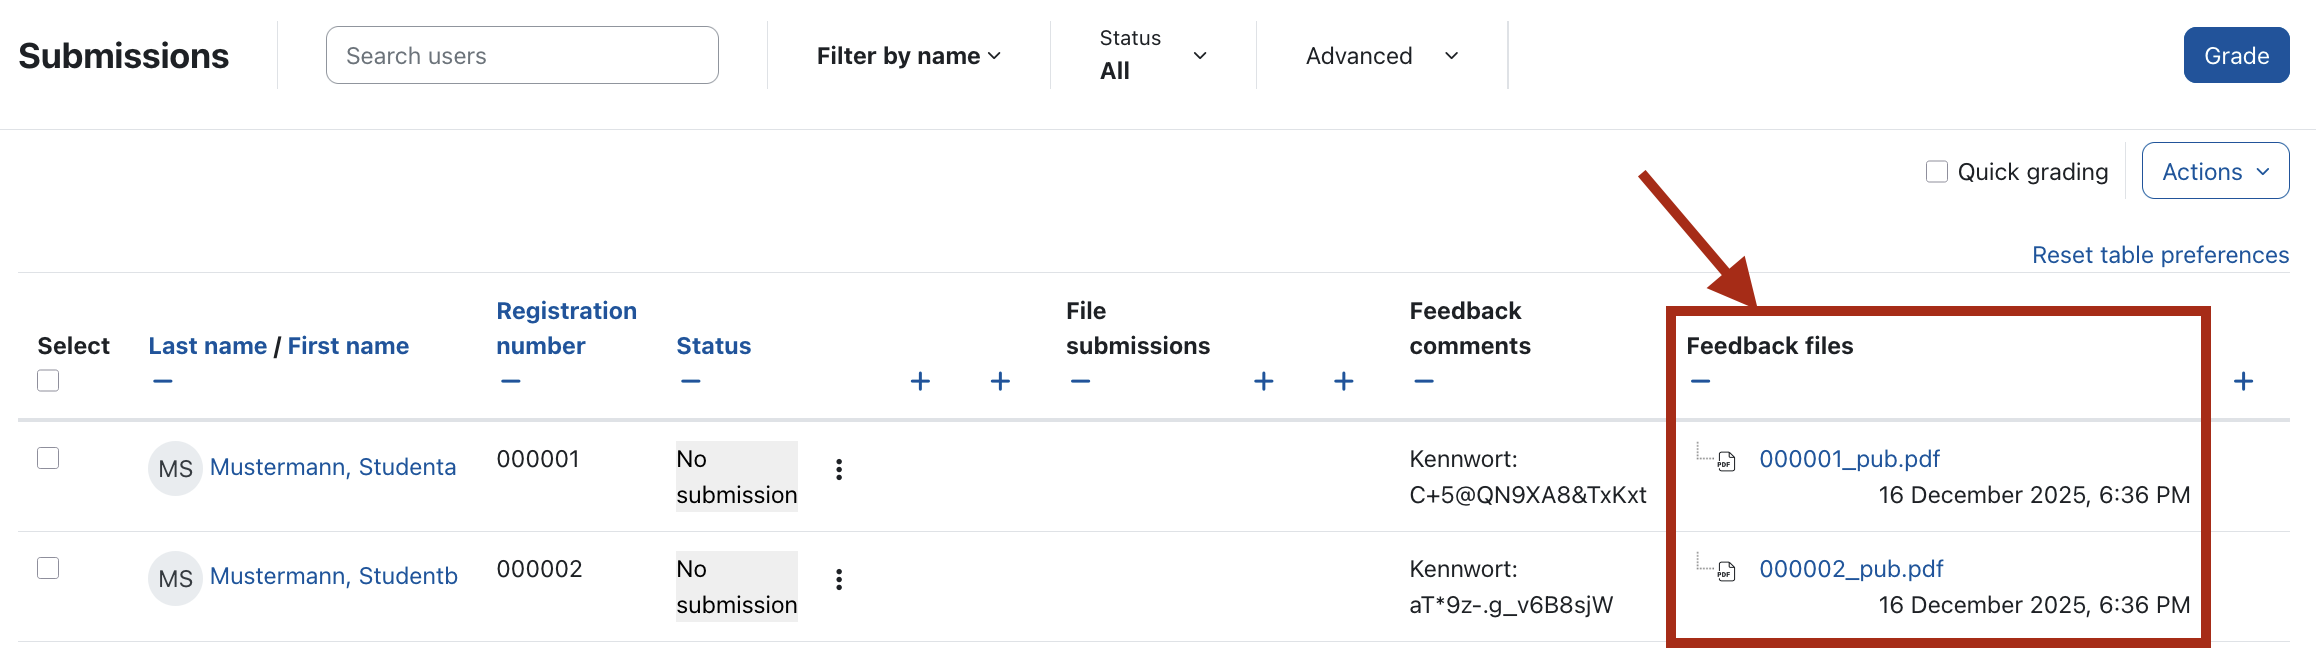
- Once the release is complete, use the "Back to submissions" link at the top of the page to return to the assignment submissions. The "Feedback Files" column contains the individual exam copies, and the "Feedback as Comment" column contains – if this option was chosen – the password protecting the file.
- Students can now access the assignment and their exam copy as soon as the date defined in "Restrict access" has been reached .
Note
If you selected the option "Hide on course page" under "Common module settings" when creating the assignment, you must remove this setting. Otherwise, students will not be able to see the assignment even when the date defined in "Restrict access" has been reached.
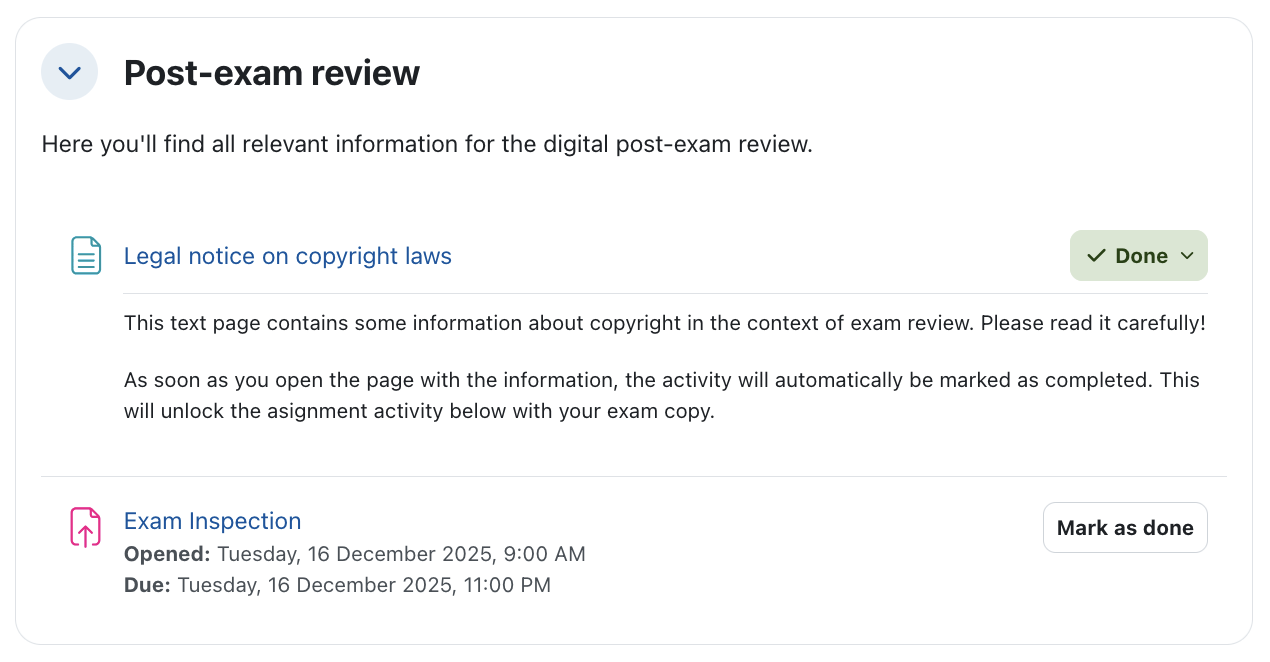
If the settings were chosen as described above, managers will see the course page as follows:
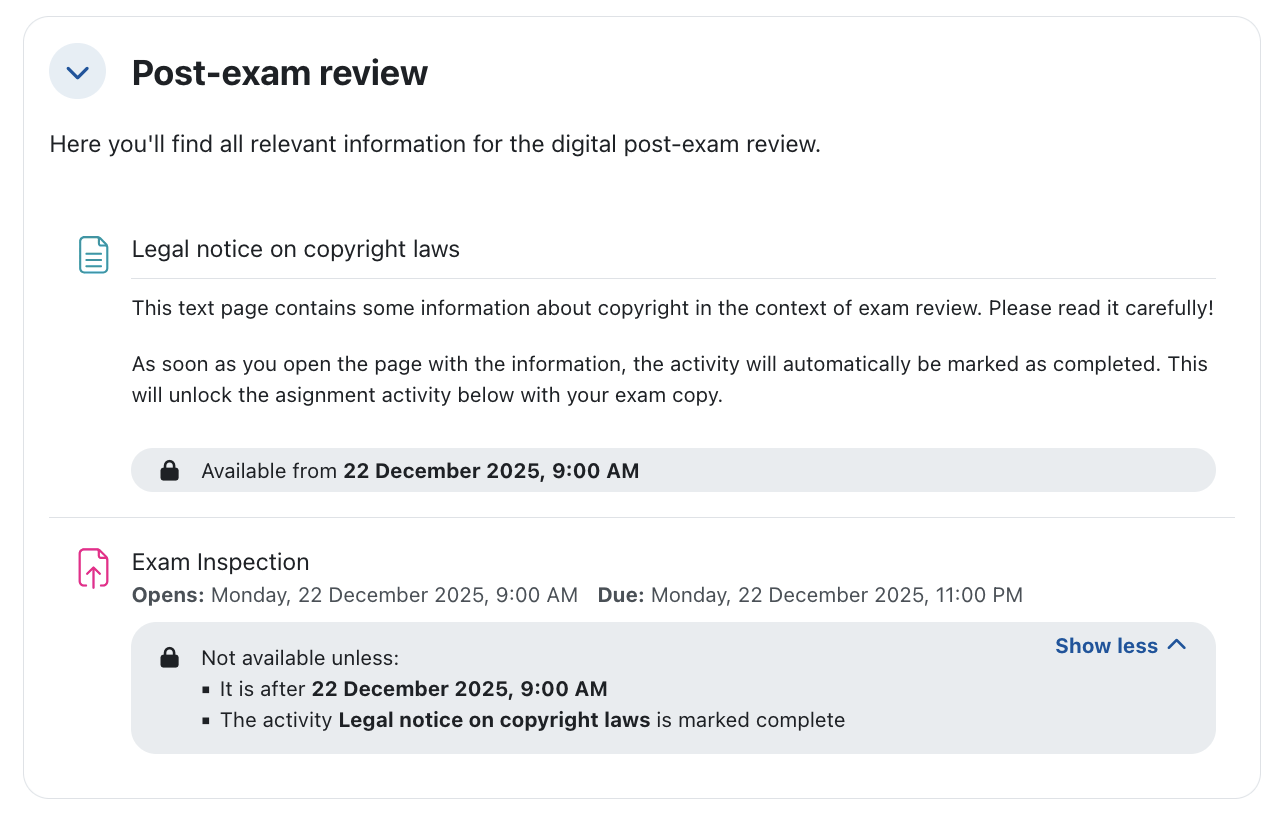
Before the review starts, students see the course page as follows. The course section and both activities, as well as the conditions for restricted access, are visible. However, the activities are not clickable.
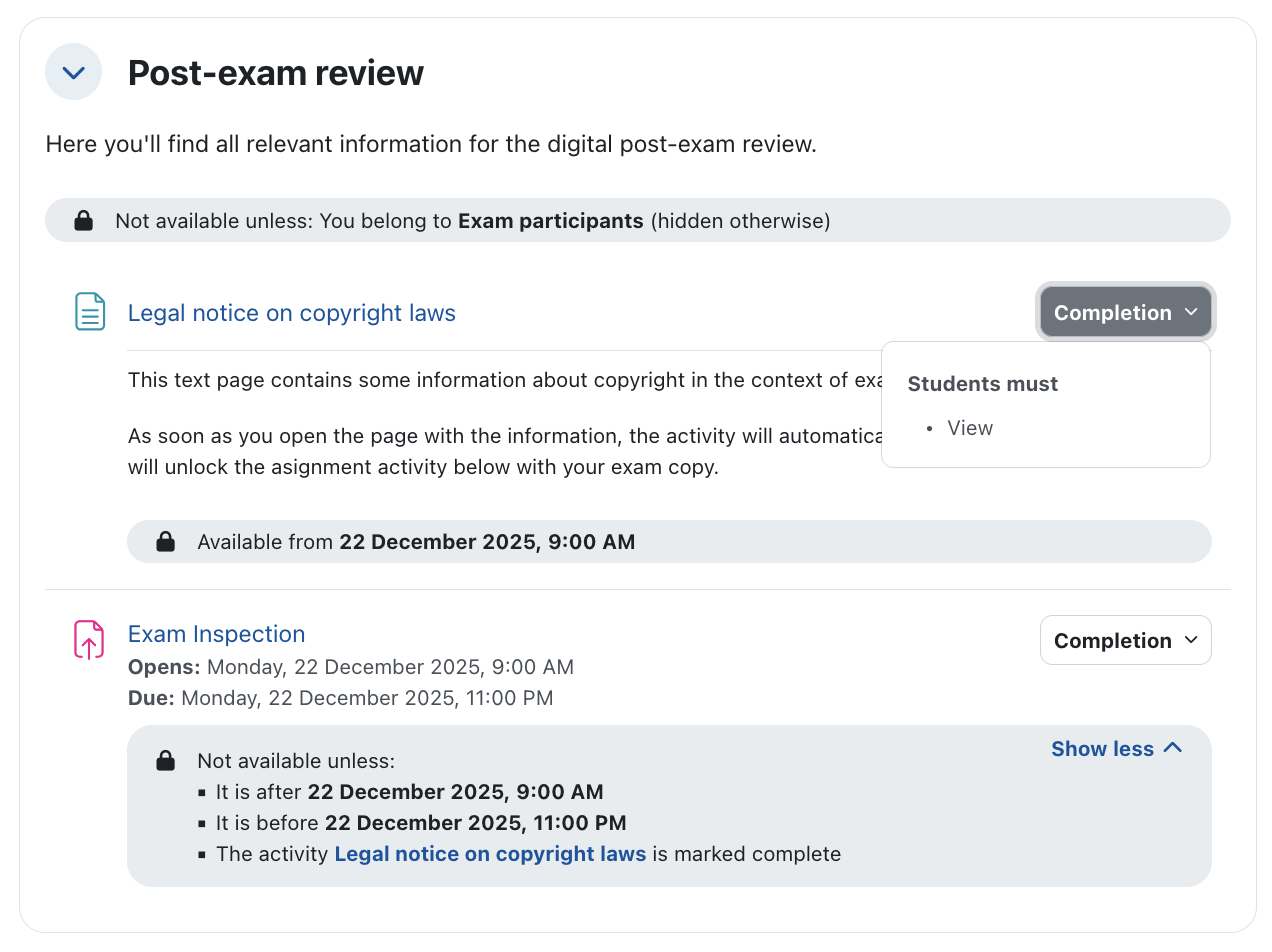
Once the review start date is reached, students can access the text page, and the completion requirement for this activity is displayed. For the assignment, the start and end dates for objections are shown, along with the access restriction that the text page activity must be completed before the assignment can be accessed.
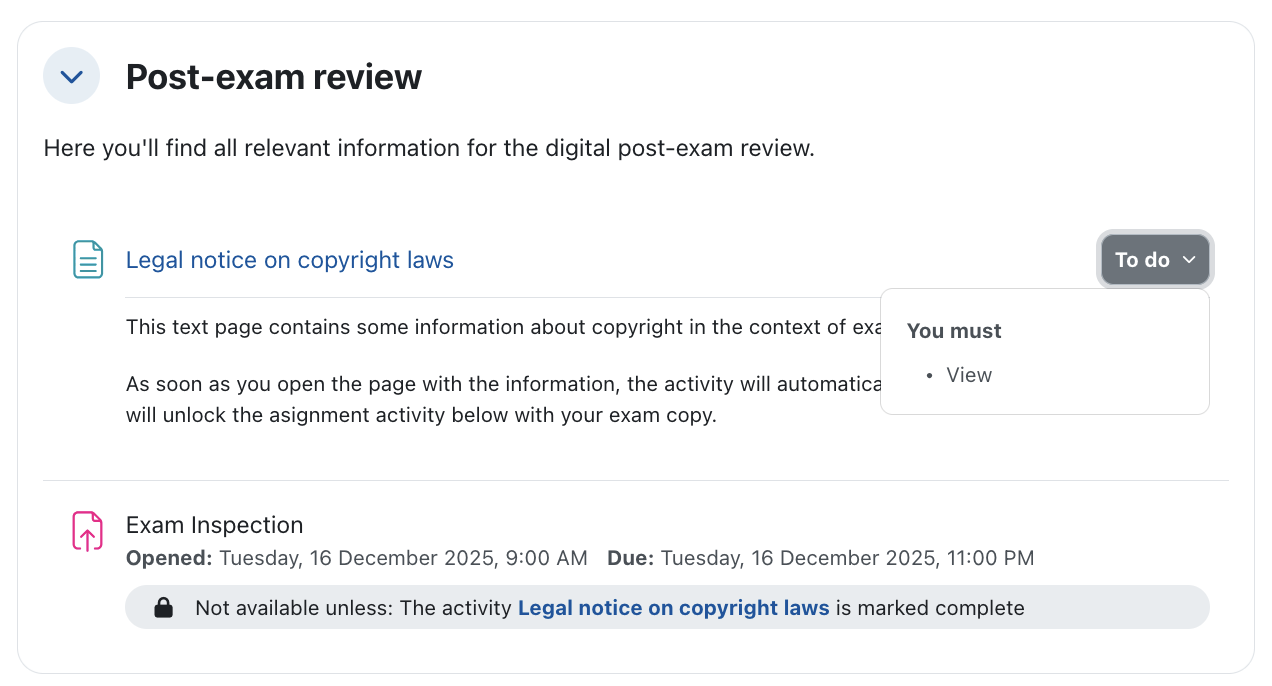
When students open the text page with copyright instructions, the activity is automatically marked as completed and the assignment is unlocked.
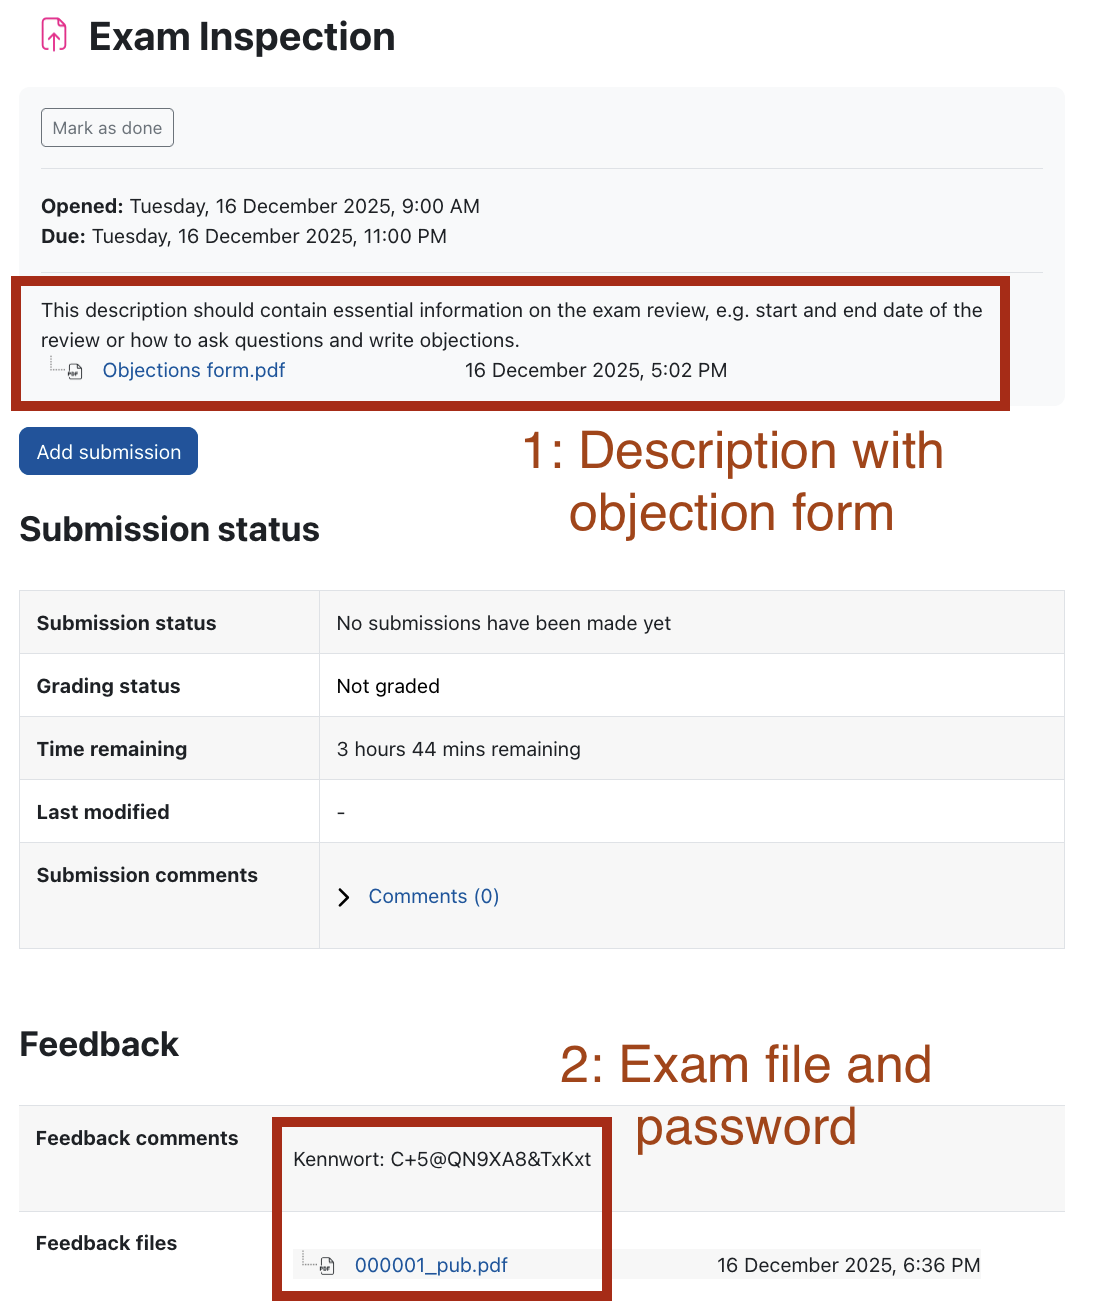
When students open the assignment, the following view is displayed. At the top, the assignment description appears with the link to the objection form. Below, in the "Feedback" area, the individually provided exam copy is available along with the password.
Many departments print exams single-sided. If you use Option A (Exam Template), however, Exam Scan expects a QR code on every page, so this scenario is currently not supported. If you create your template in LaTeX, you can use the command shown below to automatically insert blank back pages; the Exam Scan function in RWTHmoodle will then only add the QR code to these pages.
With Option B (Label Printing), this limitation does not apply. Here, a single QR code assigns all following pages up to the next QR code to one student ID, making single-sided printing fully compatible. If blank pages are created during scanning, they only need to be considered in the "Minimum number of pages" setting; for consistently single-sided printing and scanning, no adjustment is necessary.
LaTeX Command for Option A (Exam Template)
\documentclass{article}
\usepackage[a4paper,margin=0in,noheadfoot,right=0cm,left=0cm]{geometry}
\usepackage{pdfpages}
\pagestyle{empty}
\begin{document}
\includepdf[pages=1-$(LAST_EXAM_PAGE),pagecommand={\null\clearpage}]{$(EXAM_FILE_NAME).pdf}
\end{document}
Additional information:
- General Examination Regulations (GER) in the Official Announcements (full list of German GER documents with available English translations)
- Guidelines on Viewing Exam Scripts, part of the Handbook for Studying and Teaching, version 4.0, as of June 7, 2024, created by Division 1.1, Academic Affairs, Examination and University Law
