Using Margic (Lecturers)

All entries submitted by students are displayed on the overview page of a Margic. You can view, annotate and evaluate them. An error overview gives you feedback, broken down by error type and student, on how many and which errors were made in a Margic. You can also adjust the predefined error types or add new error types if required. For this activity, you can use Tagging (Tags).

Contents
- Overview page
- Customizing error evaluation and error types
- Adding predefined error types and creating new error types
- Displaying and sorting entries
- Annotating entries
- Rating entries
- Edited entries
A new Margic added to the course room does not yet contain any entries on the overview page:

The following two buttons are available on an empty overview page:
- Use the "New entry" button to create a new entry. Although new entries are usually made by students, managers also have the option of creating new entries. These are then only visible to you as a manager.
- The "Error summary" button takes you to the error overview.
2. Customizing error evaluation and error types
In the error overview, you can evaluate how many and which errors were made in a Margic for each student, differentiated by error type. You can also adjust the error types there if necessary.
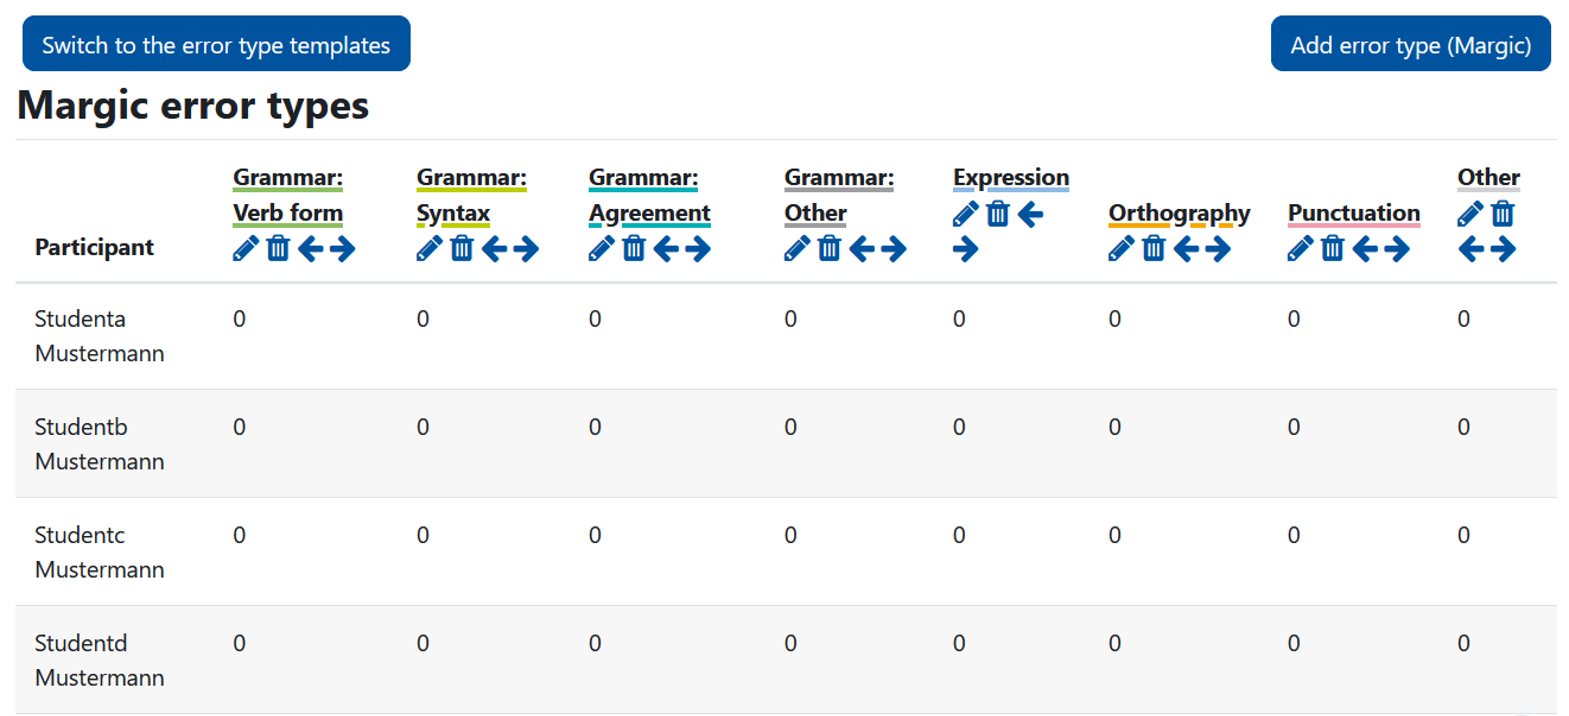
You can customize the displayed error types as follows:
 Edit error type: Click on the "pencil icon" if you want to rename an error type or assign it a different color.
 Remove error type: Click on the "trash can icon" if you do not need an error type and want to remove it from the error overview.
 Move error type: Use the arrow icons to adjust the position of an error type in the error overview. It is generally advisable to move those error types that are used particularly frequently to the front, as the selected order is adopted for the subsequent drop-down menu of annotations.
3. Adding predefined error types and creating new error types
Click on the "Error evaluation" button to access the error overview. There are two options to choose from above the error overview:
Add predefined error types: By clicking on the "Switch to error type templates" button, you can add predefined error types to the Margic, for instance if you want to add an error type to your Margic at a later date. Note: Please note that you can also add the predefined error types to the Margic more than once. To avoid confusion, make sure that there are no duplicates of error types in the error overview and rename the error types if necessary.
Create new error types: You can create new error types by clicking on the "Create error type (Margic)" button. Assign a name and specify a color for the error type to be created. For accessibility reasons, make sure that the chosen color can be easily distinguished from the colors of the other error types.
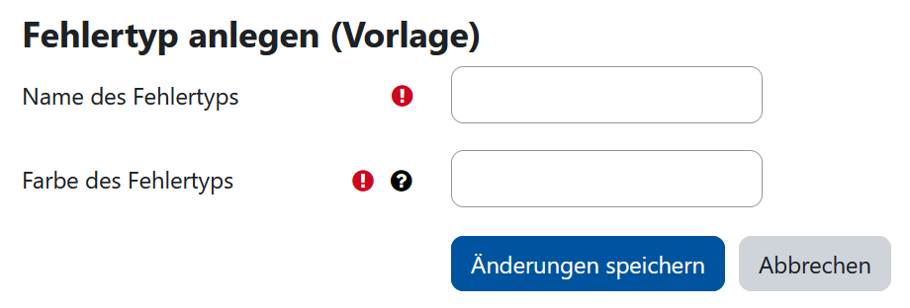
Note: The color of the error type must be specified as a hexadecimal value. This consists of exactly 6 characters (A-F and 0-9) and represents a color. The hexadecimal value of any color can be found under tools such as HTML Color Picker.
4. Displaying and sorting entries
As soon as a student has submitted an entry, it appears in the overview display: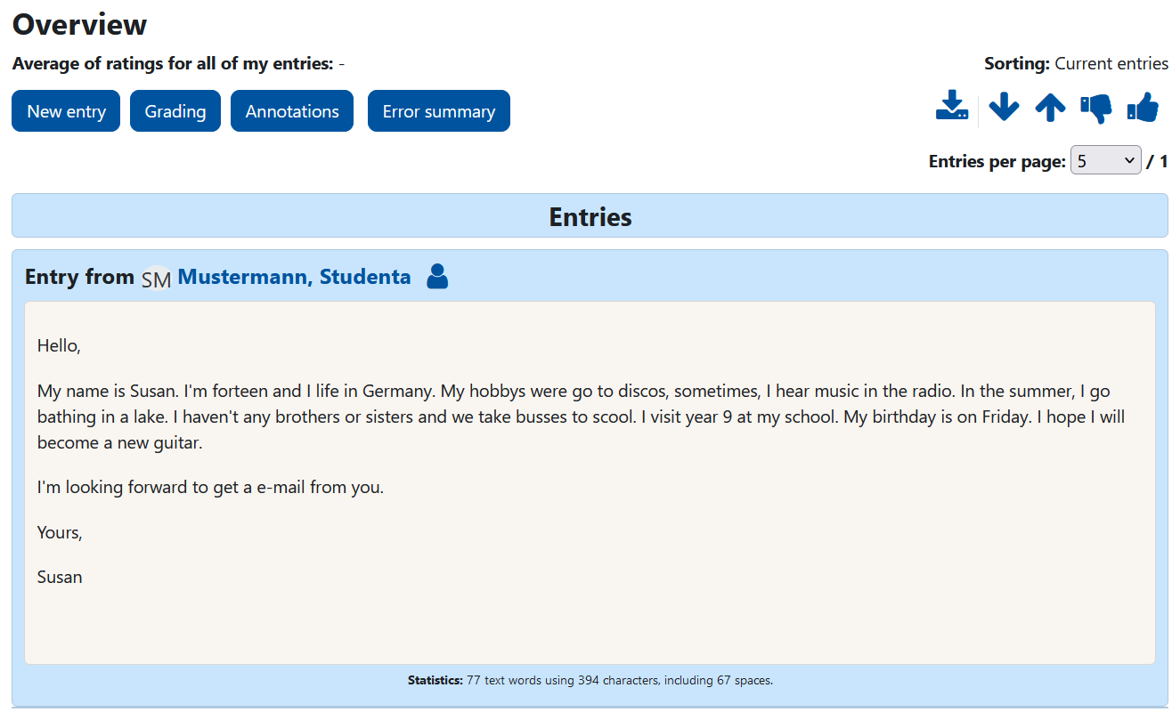
If there are several entries, you can change the order as follows with a mouse click:
 Use the arrows pointing upwards or downwards to show the posts from the most recent to the oldest or from the oldest to the most recent.
 Use the thumbs pointing up or down to show the contributions from the lowest to the highest rated contribution or from the highest to the lowest rated contribution.
The following options are also available to you:
 Use the download symbol to export all entries of the Margic to a CSV file.
 Click on the person icon to display all Margic entries for the selected person.
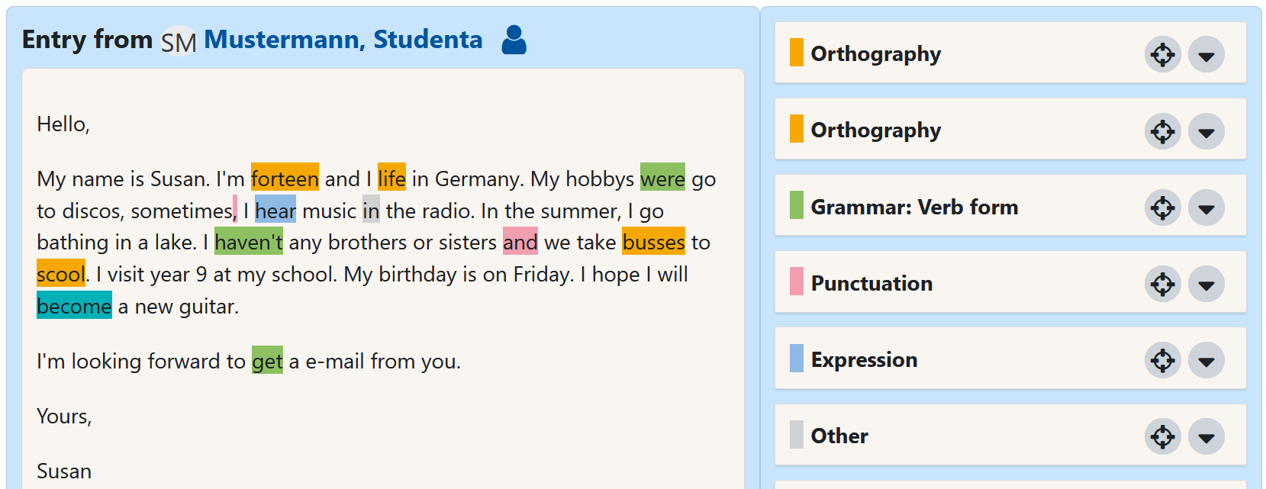
Click on the "Annotations" button to display the annotation area to the right of the entry. Hold down the left mouse button and select a text entry that you would like to annotate. The selected text entry then appears in the annotation area. Assign a suitable error type to the selected text and optionally enter a comment. Then click on "Save changes".
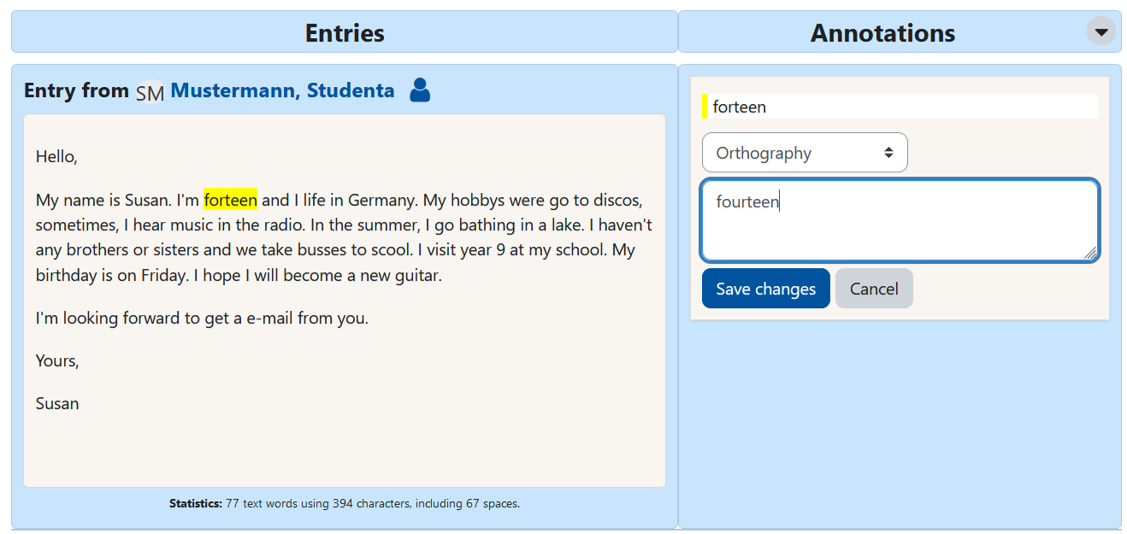
Repeat this process for each annotation to be assigned. All annotations are listed one below the other in the annotation area.
 Mouseover on the target cross of an annotation highlights the corresponding text.
 You can display any comments on an annotation by clicking on the "down arrow" icon.
If you would like to evaluate an entry, click on the "Feedback" button. The rating area will then open below the text and annotation area. Enter your feedback in the input field here. If required, you can format the content or insert spoken audio feedback. The text editor toolbar is available for this purpose. If you have activated an evaluation method in the Margic settings, a corresponding area will also appear with a drop-down list and the option of assigning a point or scale value.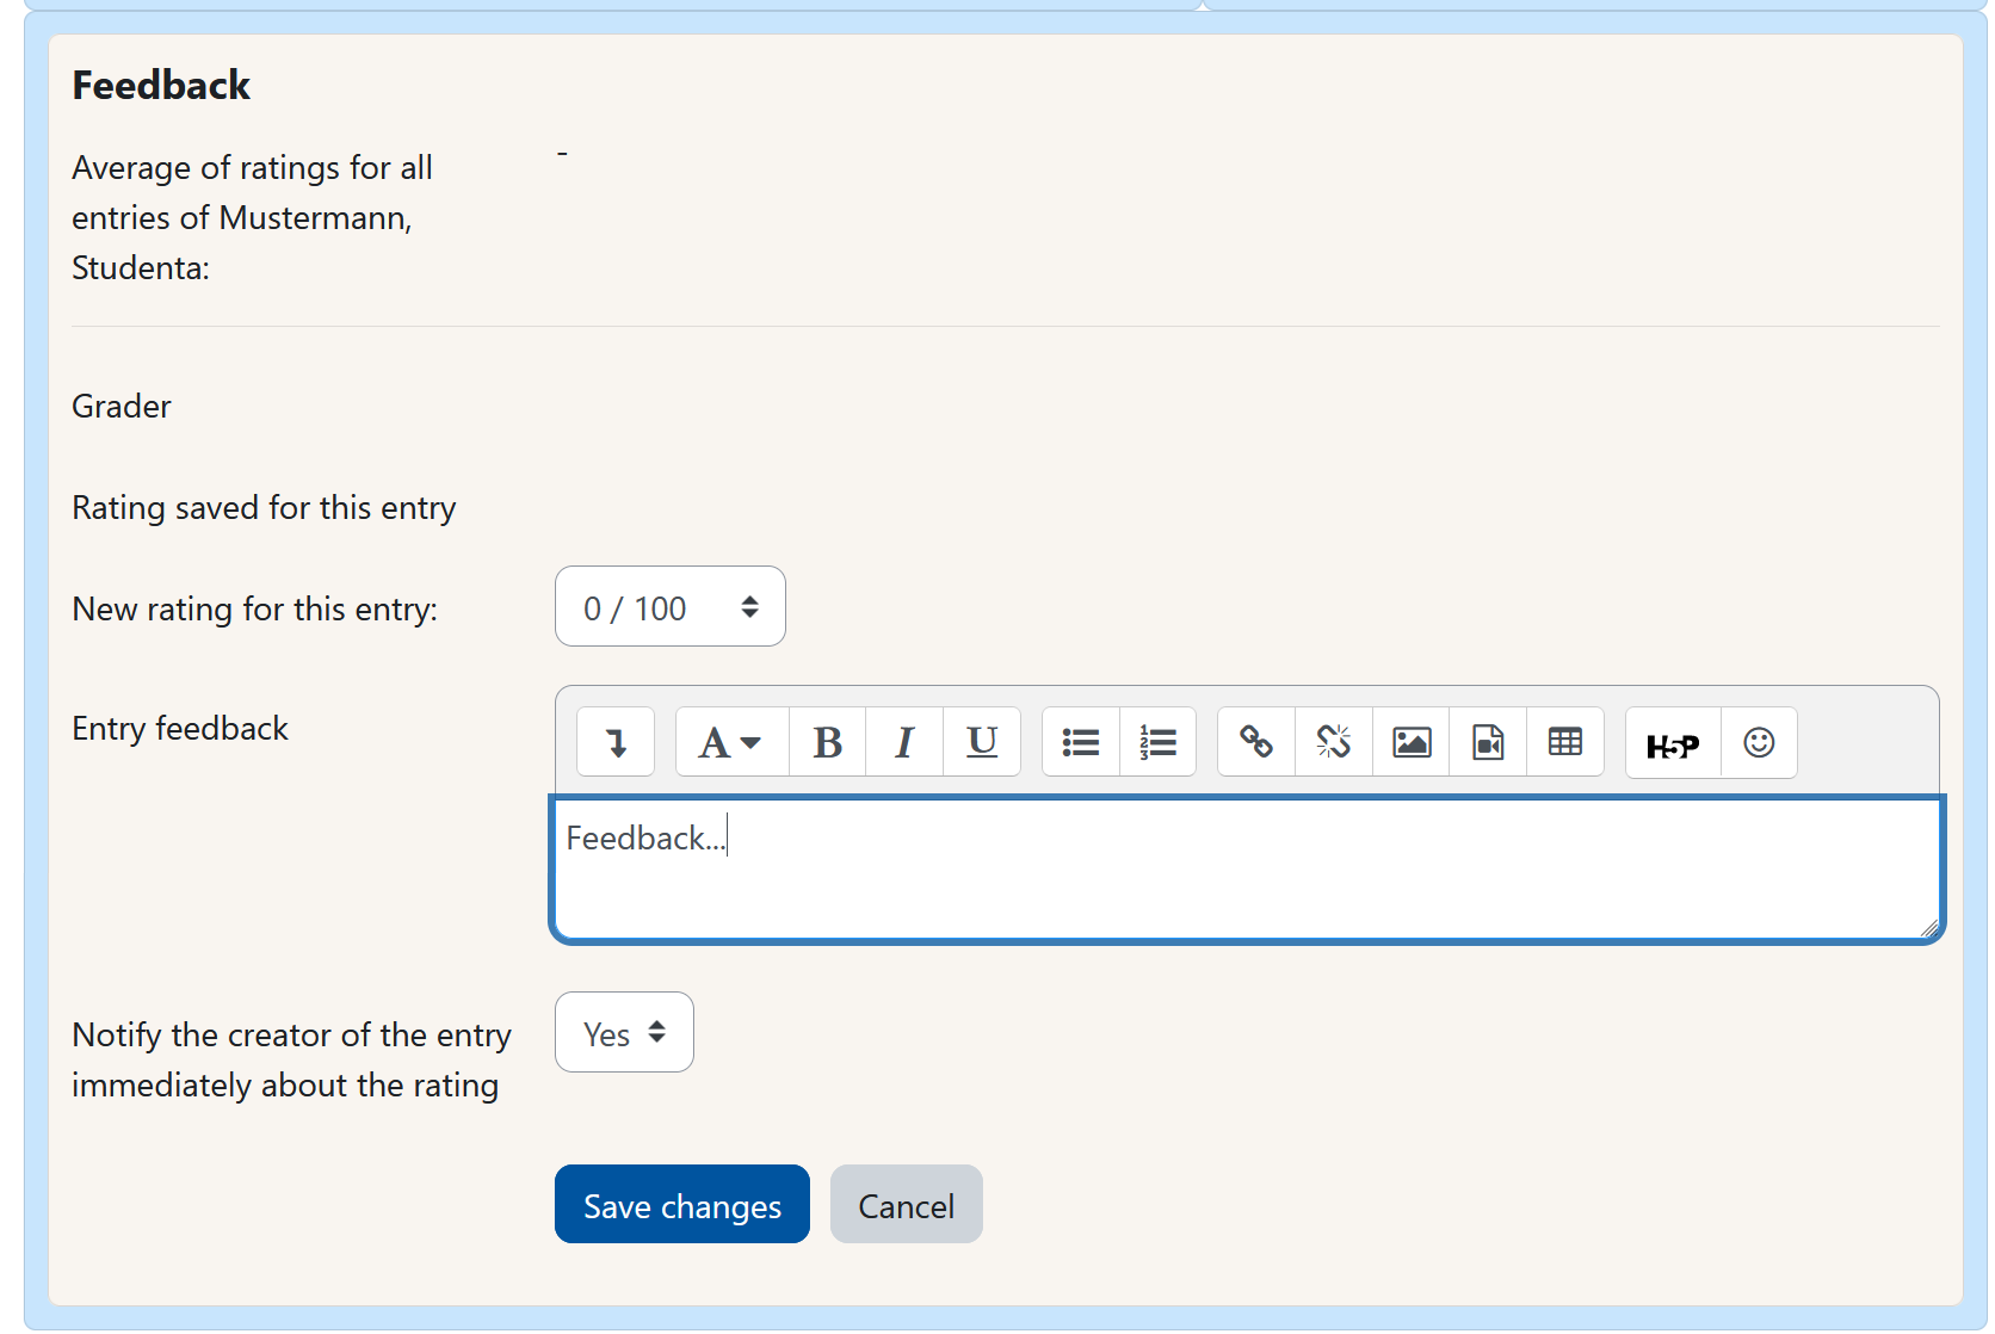
Note
7. Edited entries
If the option "Edit own entries" is activated in the availability settings, students have the option of revising or improving their original entry. For each edit, a revised entry is added and clearly marked as such. Existing entries are therefore not lost or overwritten. Revised entries are labeled "Revised" and are marked below the entry with the note "This entry has changed since the feedback or assessment was submitted".
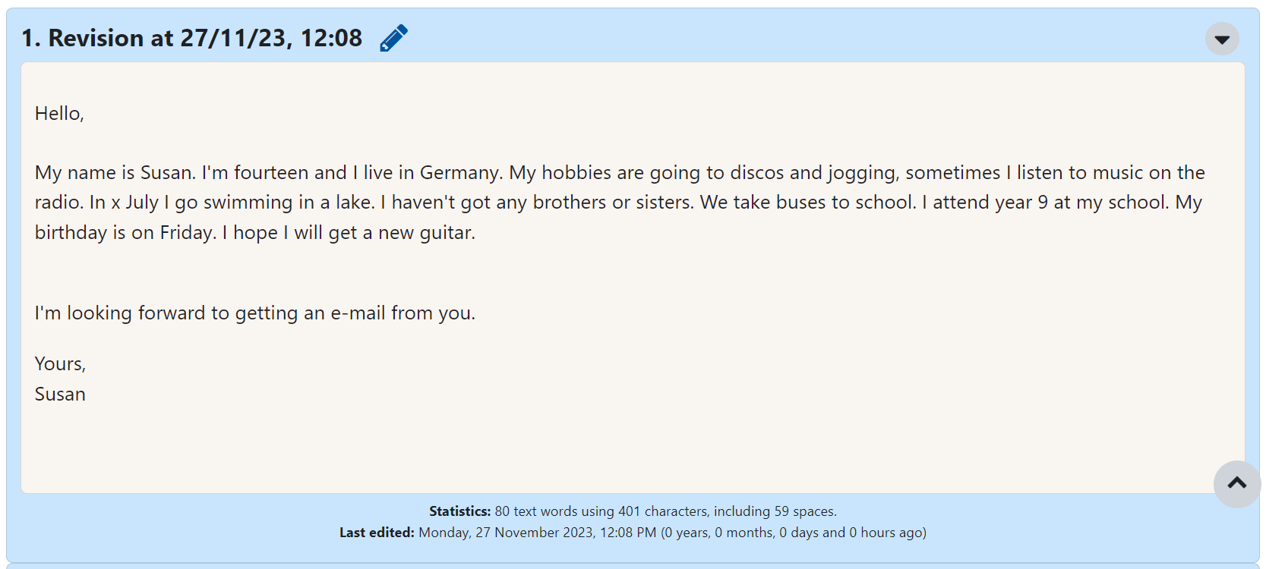
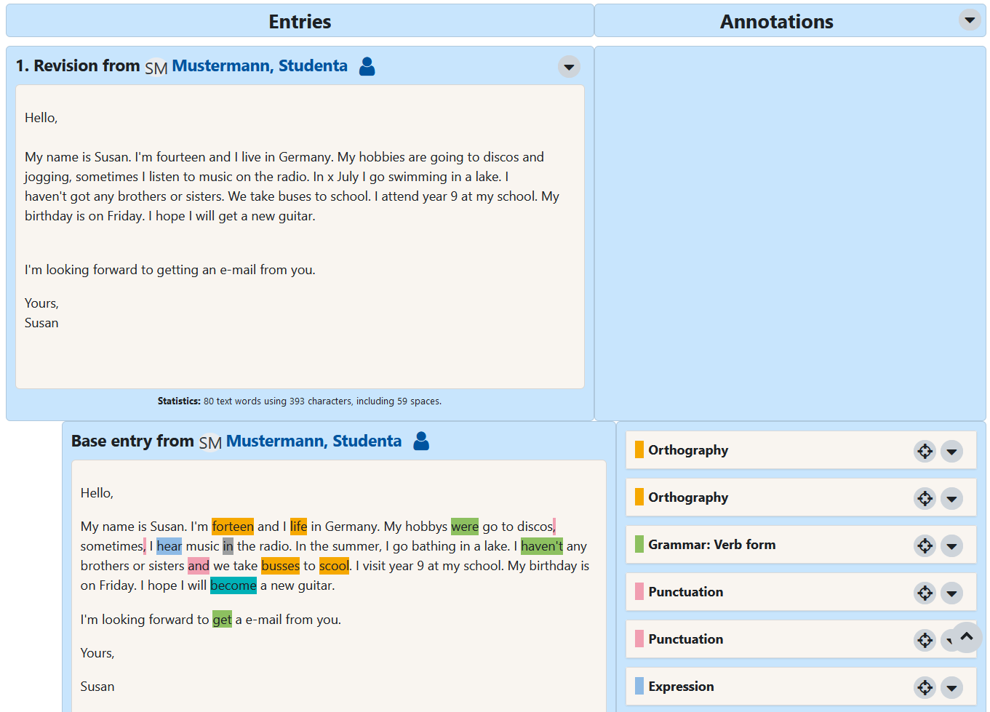
Revised entries can be annotated in the same way as the original entry. Click on the arrow icon  if you want to display the original entry and older revisions:
Rating revised entries
Revised entries can be re-evaluated. In this case, the initial rating of the original entry is overwritten. It is therefore not possible, for example, to calculate an average value from the ratings of multiple revised entries.
Note: If you have set the "Average" summation type in the rating settings in the Margic, this is calculated as the average of all entries in a Margic, whereby entries that have been revised several times are only counted once.


Further information:

