


Overview CISCO Jabber Client
General overview when you open the CISCO Jabber Client or have selected the contact icon:
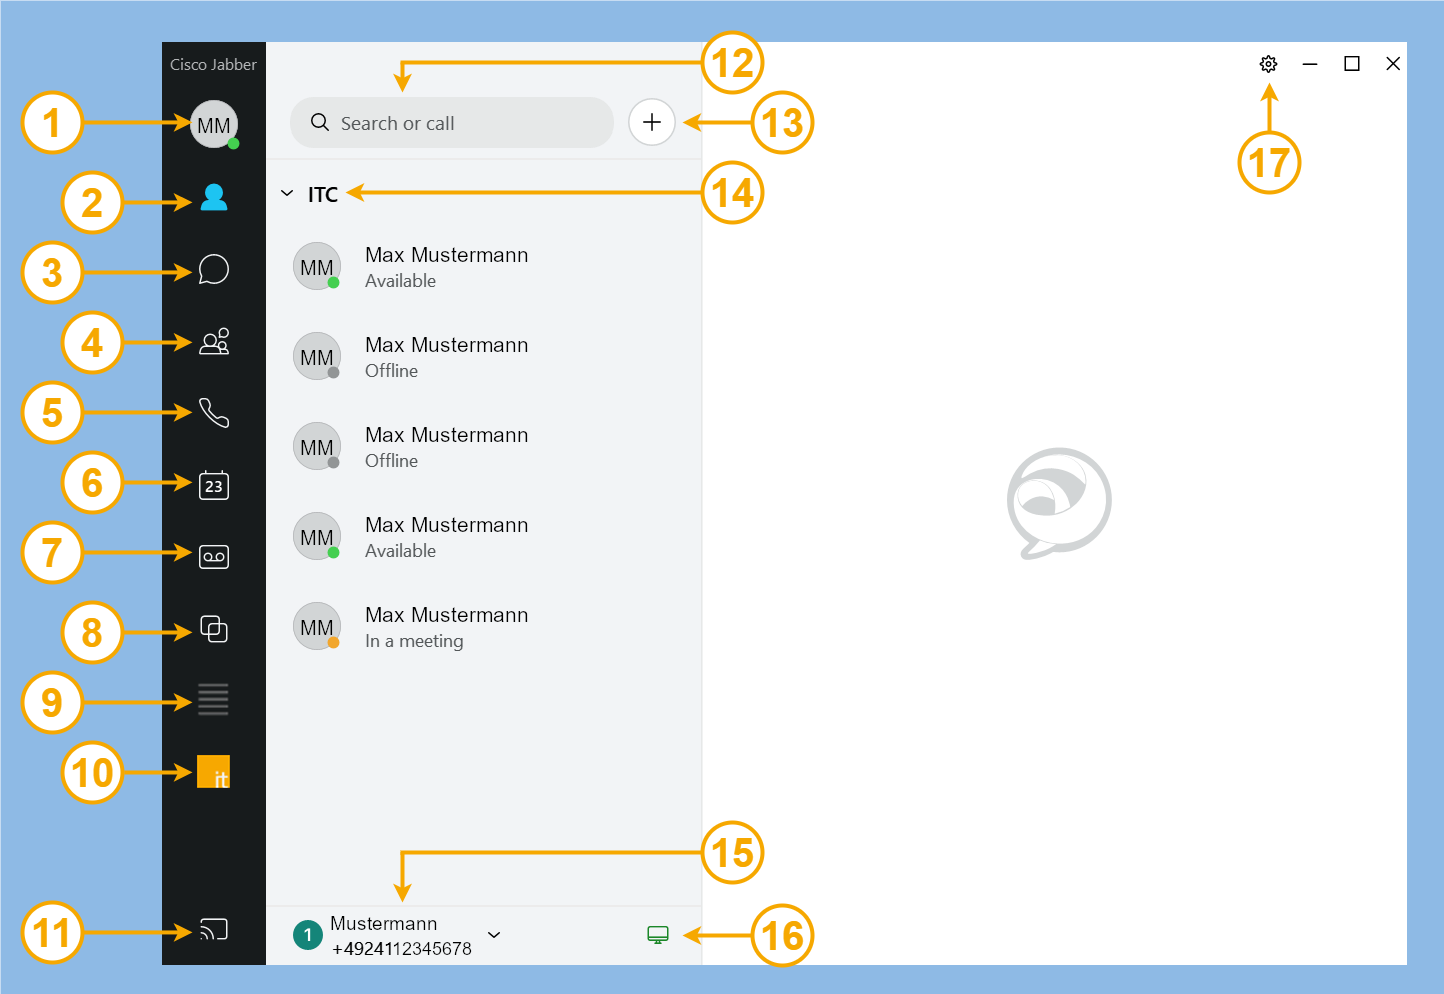
| 1 | Your profile and settings | Access to your profile information and settings Also possibility to log out and set your status. |
| 2 | Contacts | To open an overview of your contacts |
| 3 | Chat | Open the chat overview to chat with others. (You can find more about the chat functions at the overview for the chat view). |
| 4 | Rooms | You can join and create chat rooms using the room icon. (More about the room functions can be found at the overview for the rooms view.) |
| 5 | Calls | Here you can find the call list of Jabber. Note that this list only shows calls that have been actively anticipated with the Jabber client. Calls via the CISCO phone when not connected to Jabber are not listed. (More about the features provided can be found at the overview for the calls view.) |
| 6 | Calendar | To open an overview of your scheduled meetings |
| 7 | Voicemail | Herewith you open your answering machine. (More about the functions offered can be found at the overview for the voicemail view.) |
| 8 | Hunt groups | Here you can log in and out of hunt groups. (You can find out how to do this in the instructions for hunt groups.) |
| 9 | Call list | Unlike (5) Calls, all calls including missed calls of the phone and jabber are displayed here |
| 10 | TC-Portal | Here you get direct access to the TC portal without opening a browser. |
| 11 | Connect icon | To connect to other devices |
| 17 | Gear | Access to the settings menus |
| Contact View Functions | ||
| 12 | Search or call | Using the input field, you can search for contacts or directly enter a number and call. |
| 13 | Plus button | Opens a window with a list of your contacts where you will be able to select a contact and start a conversation with it. |
| 14 | Groups | You have the possibility to group your contacts. By clicking the arrow the contacts in a group will be hidden or displayed. |
| 15 | Your number | If you click on your name or number, you will get a view where all your numbers can be displayed and selected. |
| 16 | Call settings | Here you can connect the CISCO Jabber client to your desk phone and set up forwarding. |
Chat View:
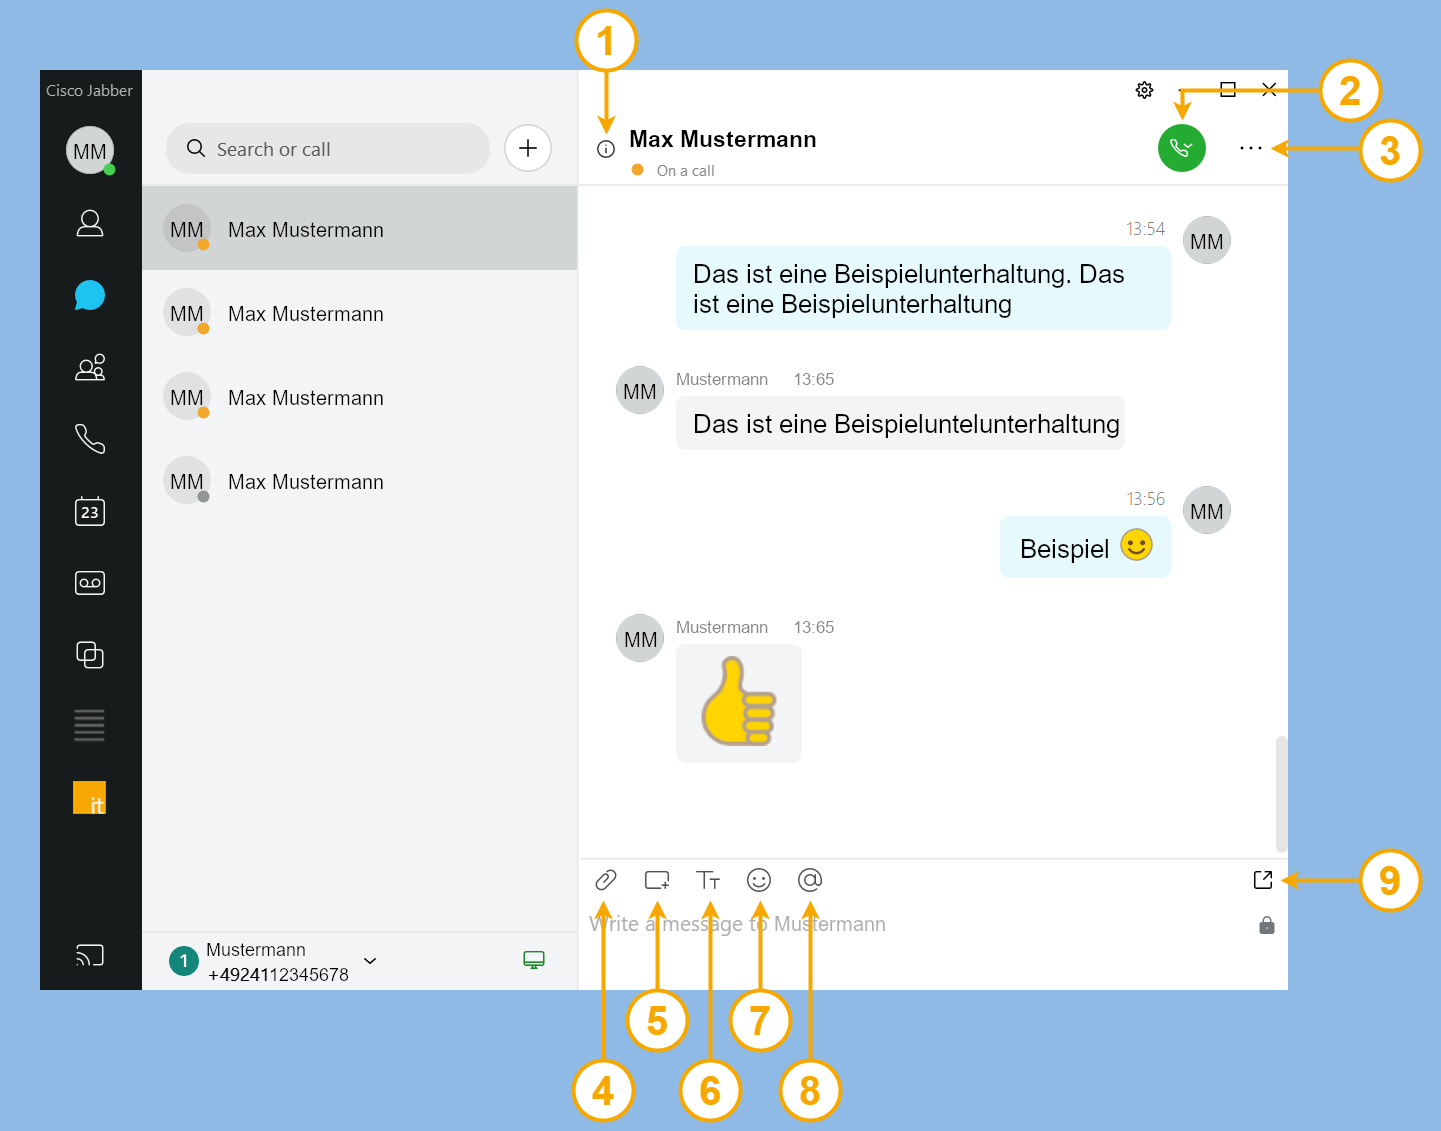
| 1 | Information | Information about the selected contact |
| 2 | Call | To call the selected contact |
| 3 | Options | Here you get access to further options, for example appointment, screen transmission and person overview of the chat. |
| 4 | Send file | To send a file from your computer |
| 5 | Screenshot | Herewith you can select an area of your screen and send it as an image file. |
| 6 | Text settings | To change the font, color and size of your typeface |
| 7 | Emoticons | To choose from a list of emoticons and insert them into your text |
| 8 | Refer | Allows you to refer to another contact and send contact information. |
| 9 | External screen | Opening the chat in an external window |
Room View:
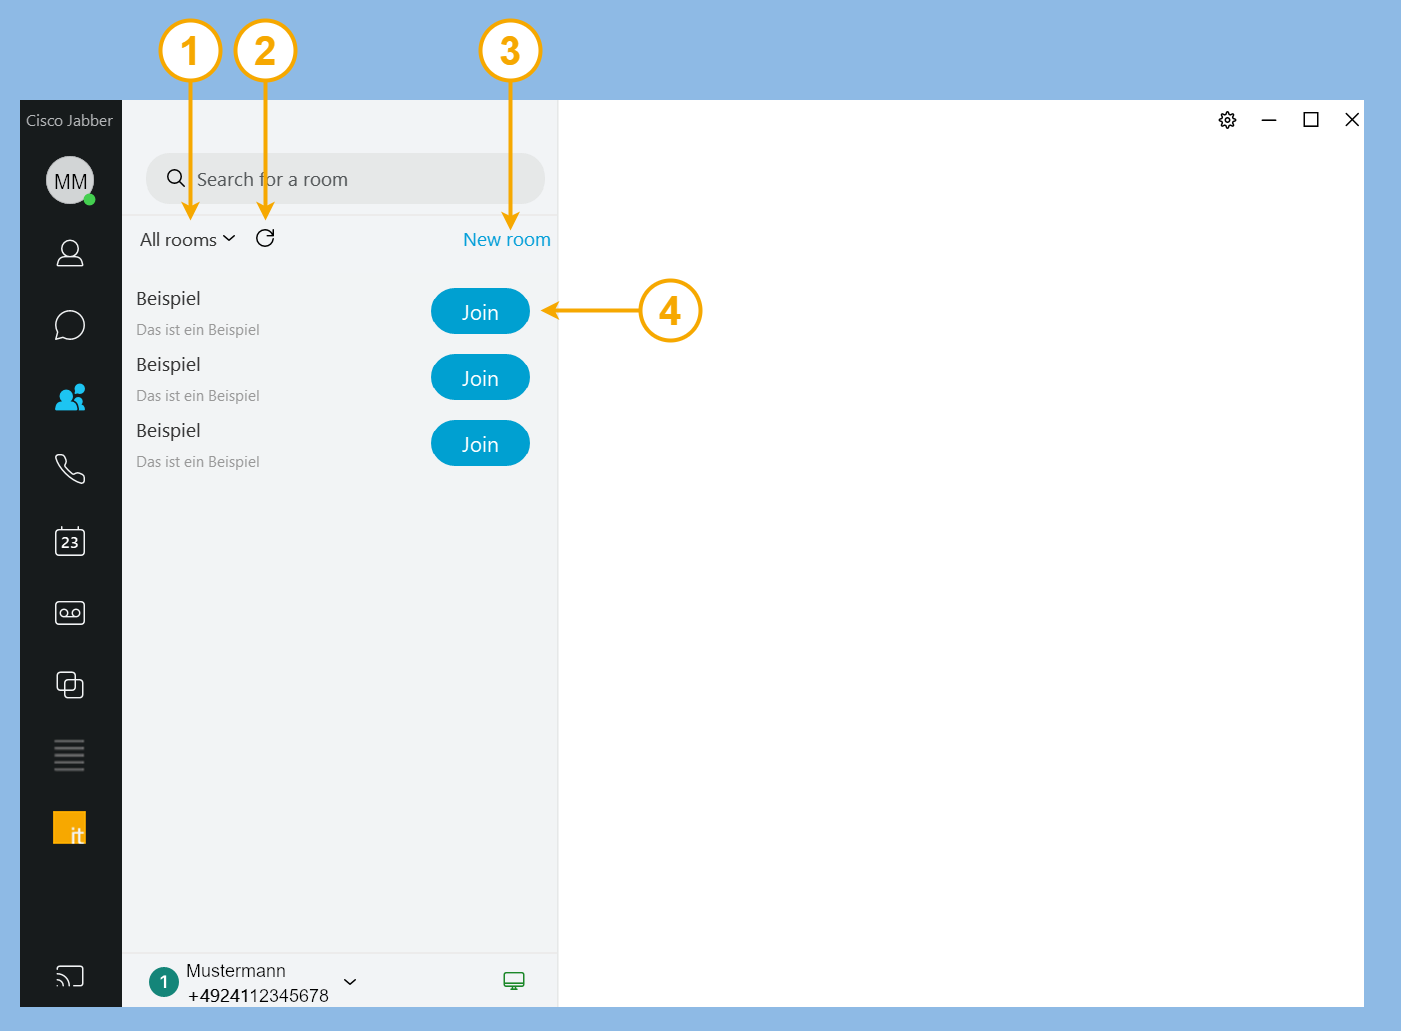
| 1 | Room selection | Here you can select whether only your rooms or all rooms should be displayed. In addition, filter settings can be found here. |
| 2 | Reload | Reloading all rooms |
| 3 | New room | Here you can create a new chat room. |
| 4 | Join | If you have found a group you would like to join, you can do it by clicking this button. |
Calls view:
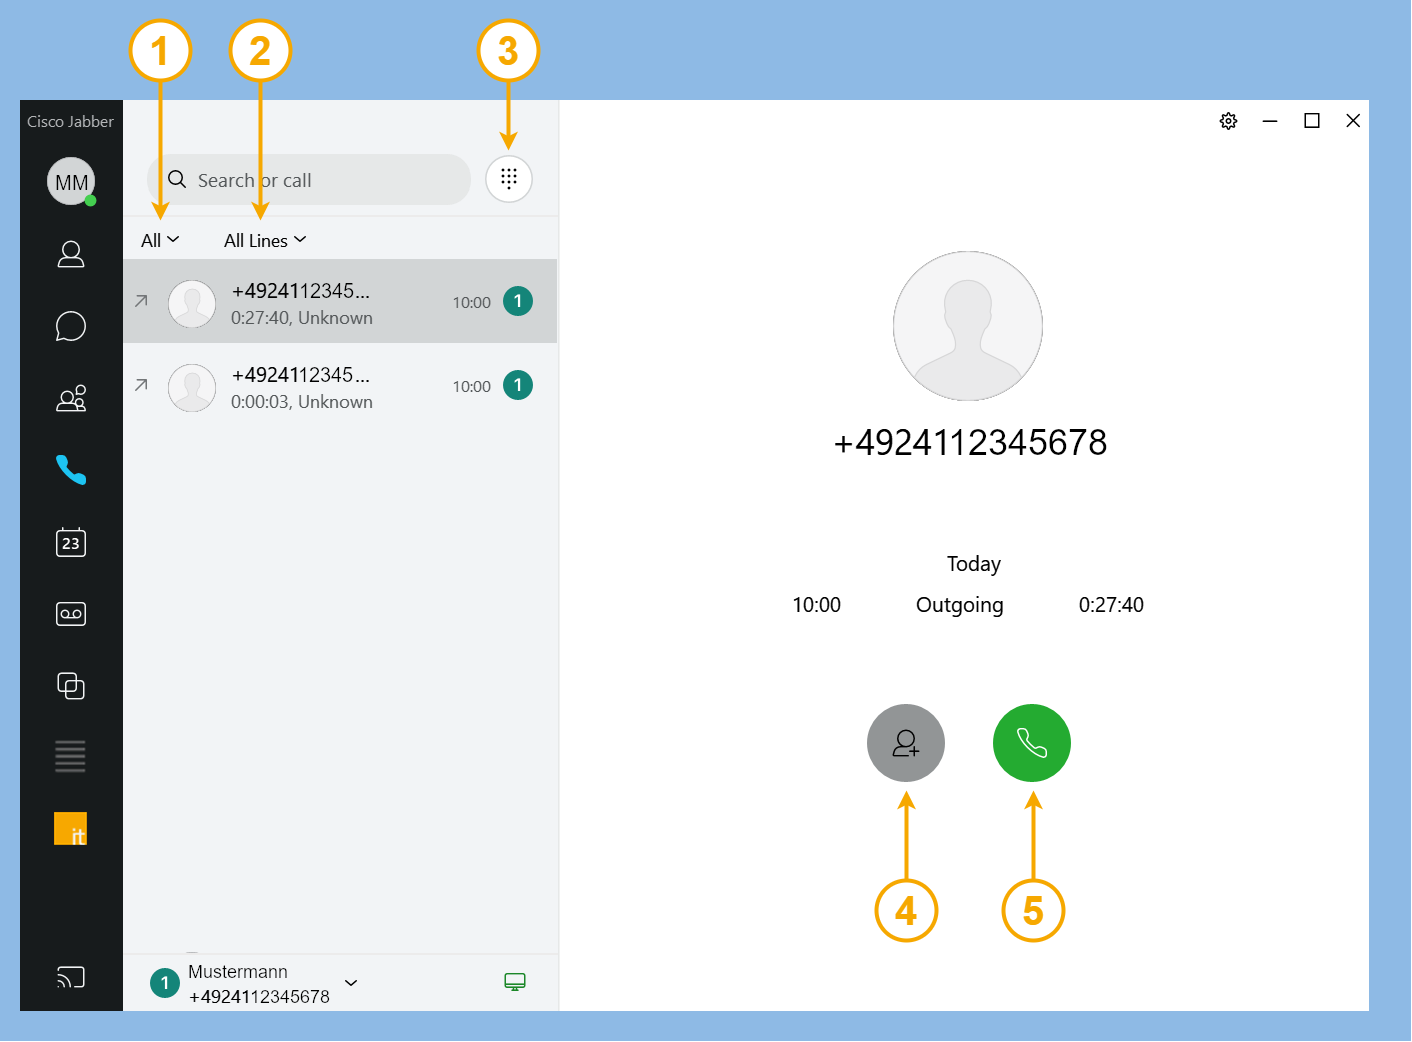
| 1 | Call selection | Here you can choose which calls are displayed: all , all incoming, all outgoing or missed calls. |
| 2 | Line selection | If you can be reached under several numbers, you can select here which lines should be displayed. |
| 3 | Keypad | To open a keypad that allows you to enter a number and call it |
| 4 | Add contact | If you press on a call in the call list, you can add the person directly herewith. |
| 5 | Call | Starting a recall |
Calendar view:
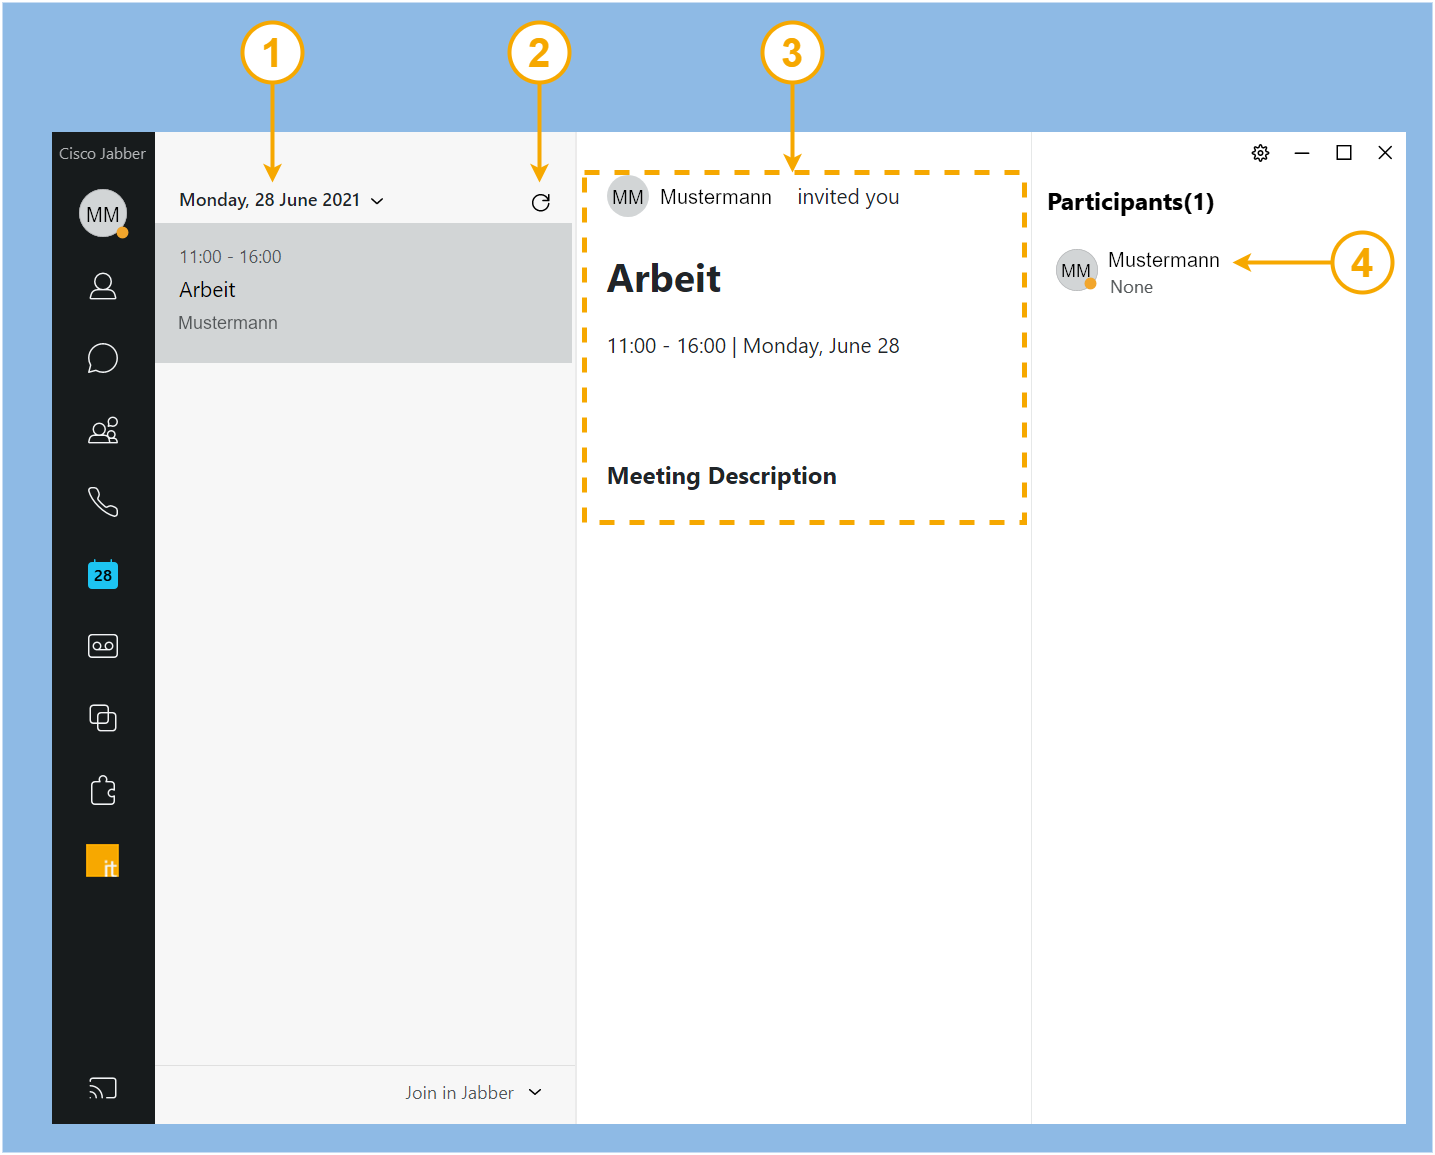
| 1 | Day selection | Here you can select the day you want to have displayed. Immediately below, all events on this day will be displayed. |
| 2 | Reload | To load newly created events into the Jabber client if they have not been transferred automatically yet |
| 3 | Date overview | Here you will find all available information of a clicked on appointment. |
| 4 | attendee list | If you have selected an appointment, you can additionally view all participants via the participant list |
Voicemail view:
 4
4
| 1 | Call selection | Here you can choose whether all entries, unheard, sent or deleted entries should be displayed. |
| 2 | Voicemail button | To record a voice message and send it directly to a contact as a voicemail |
| 3 | Call voicemail | Calling your voicemail |
| 4 | Play | To play the message |
| 5 | Replay | Replay the message from the beginning |
| 6 | Reply | Recording a voice message and send it back as a reply |
| 7 | More options | Opens a small menu that allows you, for example, to delete the message, go to the contact's chat or mark the message as unread. |
Call List view:
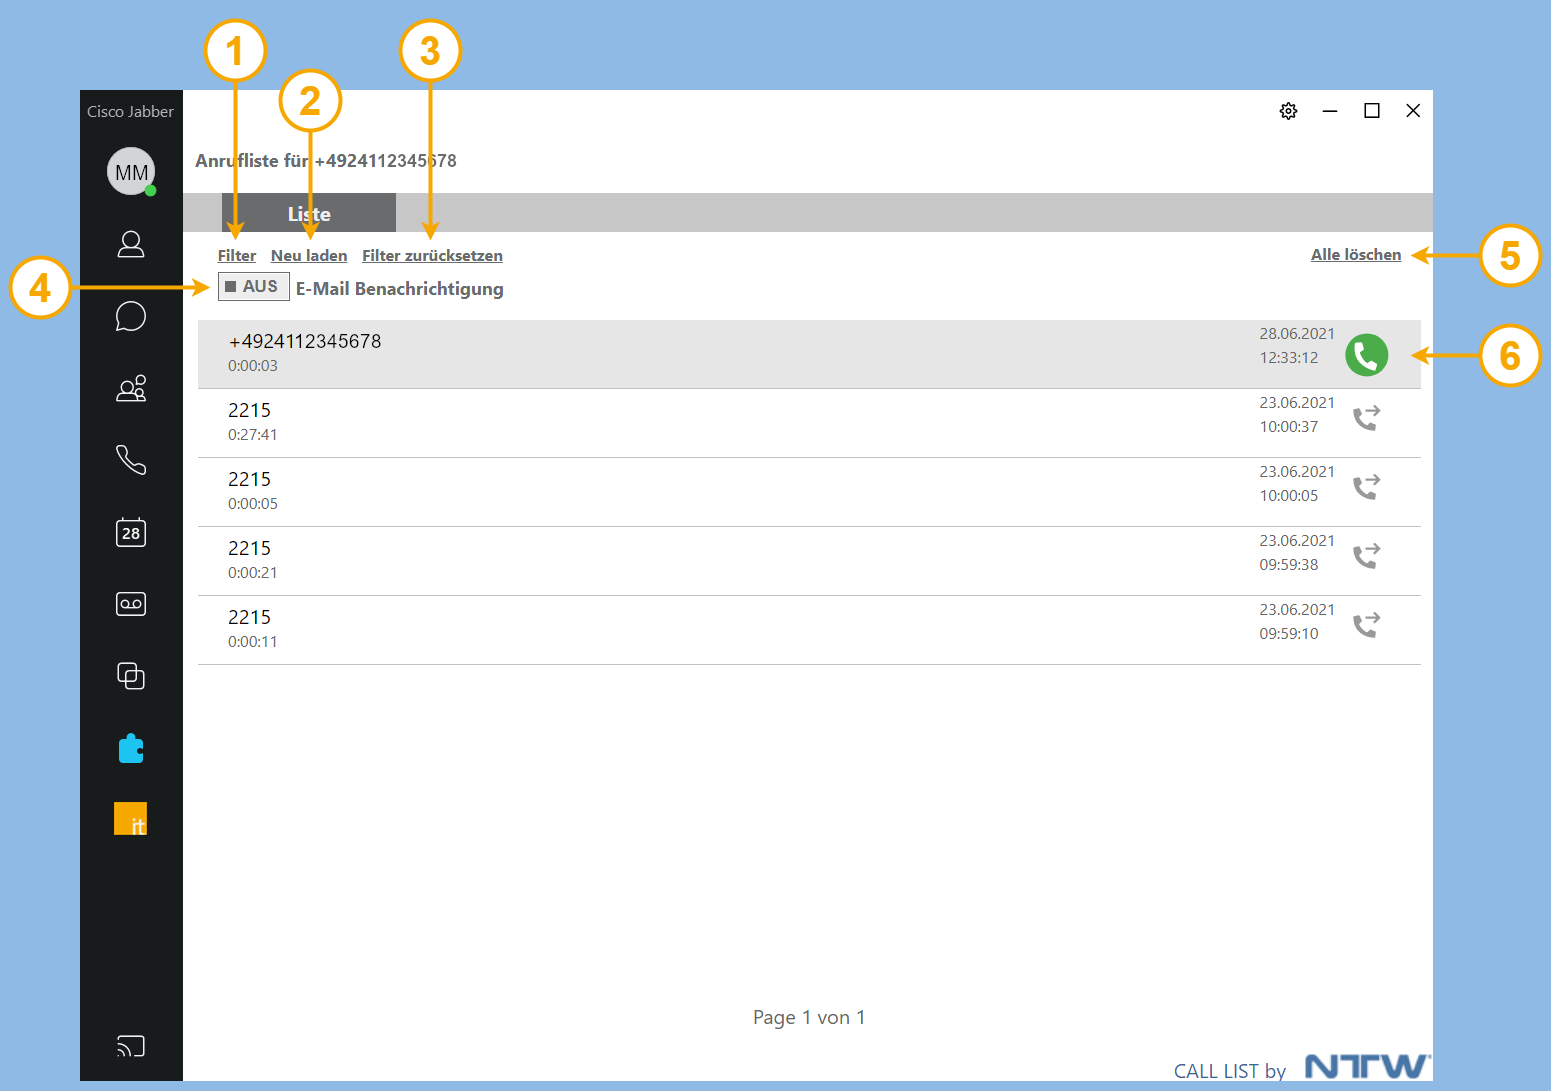
| 1 | Filter | Here you can filter the displayed calls. |
| 2 | Reload | To reload the displayed calls |
| 3 | Reset flter | To reset the set filter |
| 4 | Notification | Selecting whether notifications should be activated or deactivated |
| 5 | Delete all | To delete your call list |
| 6 | Call | Allows you to call back the displayed number. |
