Call Forwarding

Here you will find instructions on how to create call forwarding for incoming calls.
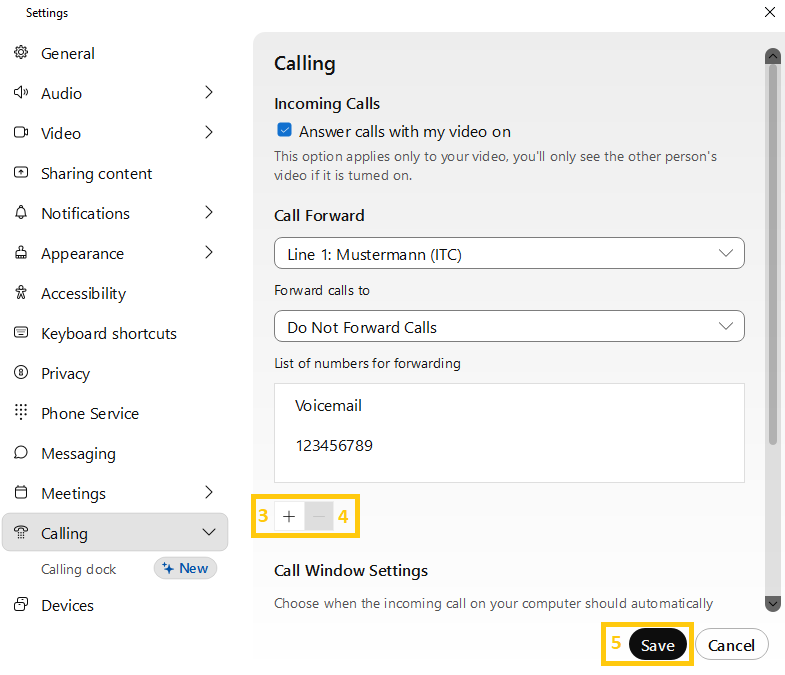
To set up call forwarding in Webex, click on Call settings (1) in the user interface. By default this is found at the bottom left in the application window. Then proceed to Open call preferences (2).

Otherwise you can navigate here by klicking on your initials in the top left corner of the application window, then on settings and calling.
In the settings menu that opens, you can now add telephone numbers for your call forwarding by clicking on the plus button (3), typing in the number and pressing Enter.
You can also delete a phone number from the list by first clicking on the desired number and then on the minus button (4).
Please use the following notation for the telephone numbers:
- XXXXX (RWTH extension)
- external numbers within Germany with a leading zero (0 0151xxxxxxxx)
- or external numbers in E.164 format with corresponding country code (e.g. with country code Netherlands: +31151xxxxxx / 00031151xxxxxx)
Once you have made your settings, please click on Save (5).

To activate call forwarding, open the call settings (1) of the user interface again. Use the button under Call forwarding (6) to select the line for which you want to enter call forwarding. In the window that opens, click on Voice mailbox (7) to forward incoming calls directly to your mailbox. To do this, you must first activate your voice mailbox (Voicebox) in the TK-Portal. You can find the instructions in the Webex user interface instructions under Voice mailbox. However, if you want the calls to be forwarded to a preferred telephone number, select one of the telephone numbers displayed (8).


