


ServiceProviderManager

The ServiceProviderManager (SPM) is the central tool for managing local RWTH services connected to the RWTH IdentityProvider (IdP) and authenticated via RWTH Single Sign-On. It is intended for both technical administrators and individuals responsible for technical or organizational matters.
This page explains how to maintain your own services (ServiceProviders) in the SPM, view configured attributes, and manage administrative contacts.
- Overview of the homepage
- Access for administrators
- Edit the data in the ServiceProviderManager
- Attribute Overview
- Known Issues

Please note
Overview of the homepage
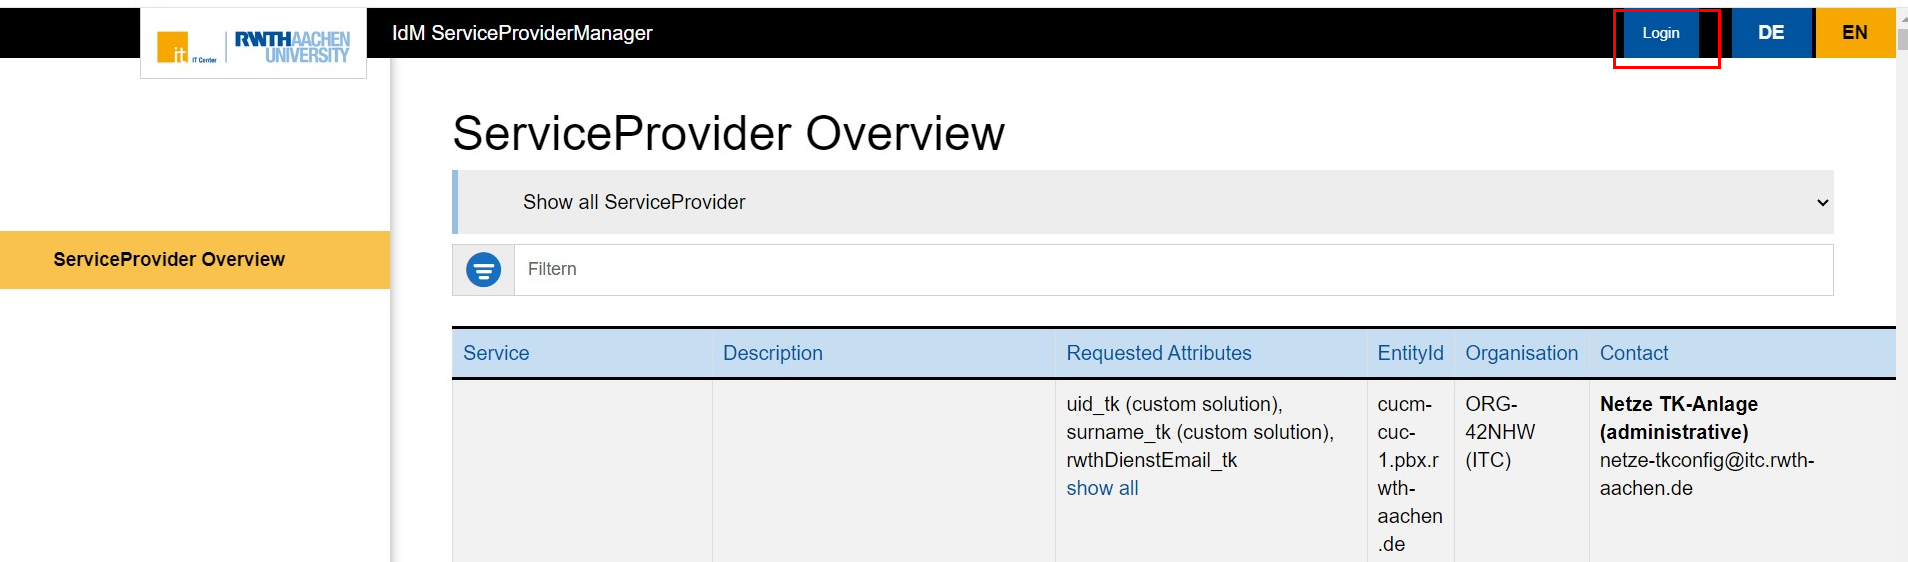
The ServiceProviderManager homepage is accessible without login.
On the homepage, you will find the following:
- a directory of all local services connected via the RWTH IdentityProvider;
- an overview of all DFN-AAI services with special attribute activations;
- the respective contact persons for questions regarding usability.
The following information is displayed for each ServiceProvider:
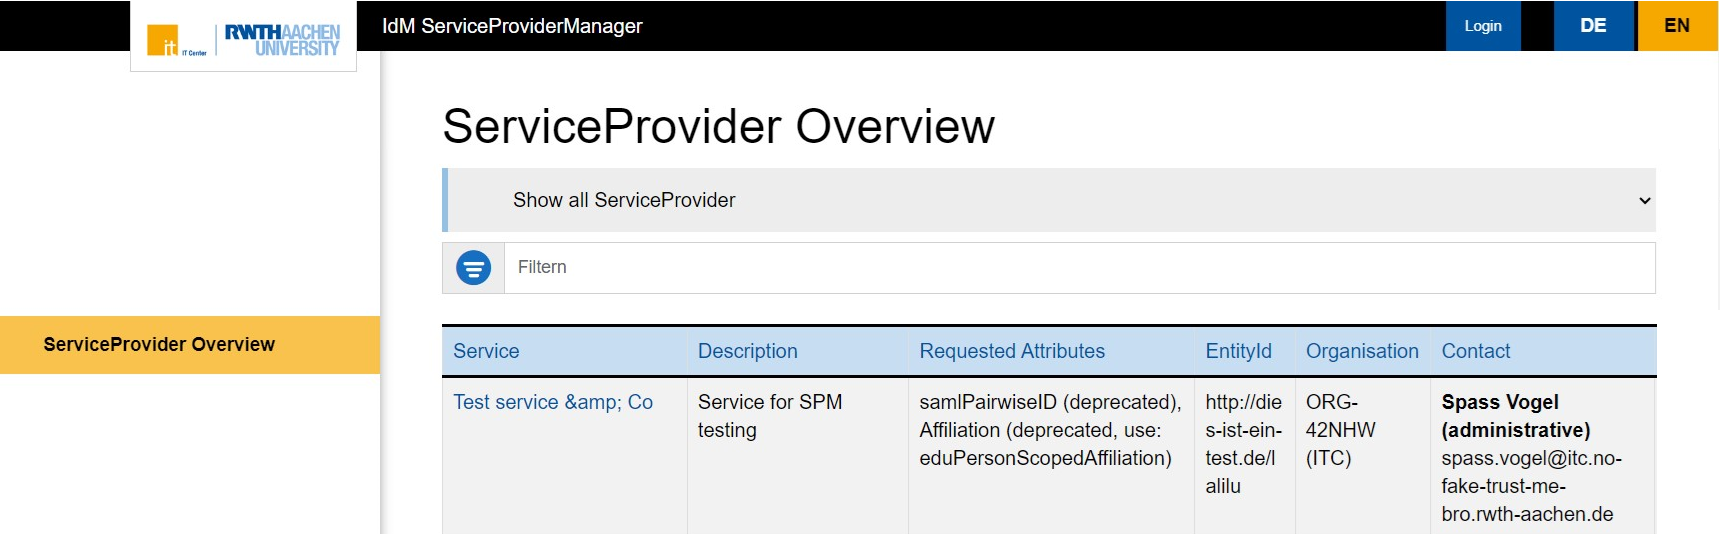
Service
Each ServiceProvider has a clear service name assigned by the responsible organization.
Description
The description should be detailed enough to give users an idea of whether the service is relevant to them. It should explain the purpose of the ServiceProvider.
Please note:
If a service consists of several providers, take a look at how IdM Selfservice is structured for an example of how to organize your description.
Requested Attributes
The SPM displays all the attributes transmitted by the IdentityProvider to the service when a person logs in. Technical details can be found on the Explanation of attributes page.
Only the attributes enabled for the category under the heading EntityAttributes can be requested.
EntityId
The EntityId is a ServiceProvider's technical identification number. It is required for support requests, among other things.
The IT Center sets it.
Organization
This column shows which organization operates or is responsible for the service.
The IT Center fills it out.
Contact
At least one administrative contact must be entered. This information is publicly visible. This allows users to ask the ServiceProvider questions about its content and technical aspects.
Access for administrators
There are two ways to access the SPM:
Role-based access
Access to administration is granted via the "RWTH SSO Service Provider Administration" role.
The IT Center activates this role for the organization during the registration process.
Then, the organization's role manager can assign the role to you as ServiceProvider administrator.
After redeeming the role coupon, you can log in to SPM via RWTH Single Sign-On to manage your ServiceProvider.
Delegation via groups
Organizations with many services can delegate administration via groups set up in the IdM role and group management.
To do this, someone with access to the SPM must log in and follow these steps:
Step 1
Find the desired ServiceProvider in the table on the homepage. Then, click on the pencil icon in the "Edit" column.

Step 2
Click Organization.
Step 3
Add the group under "Groups".
Step 4
Click Save and Continue.
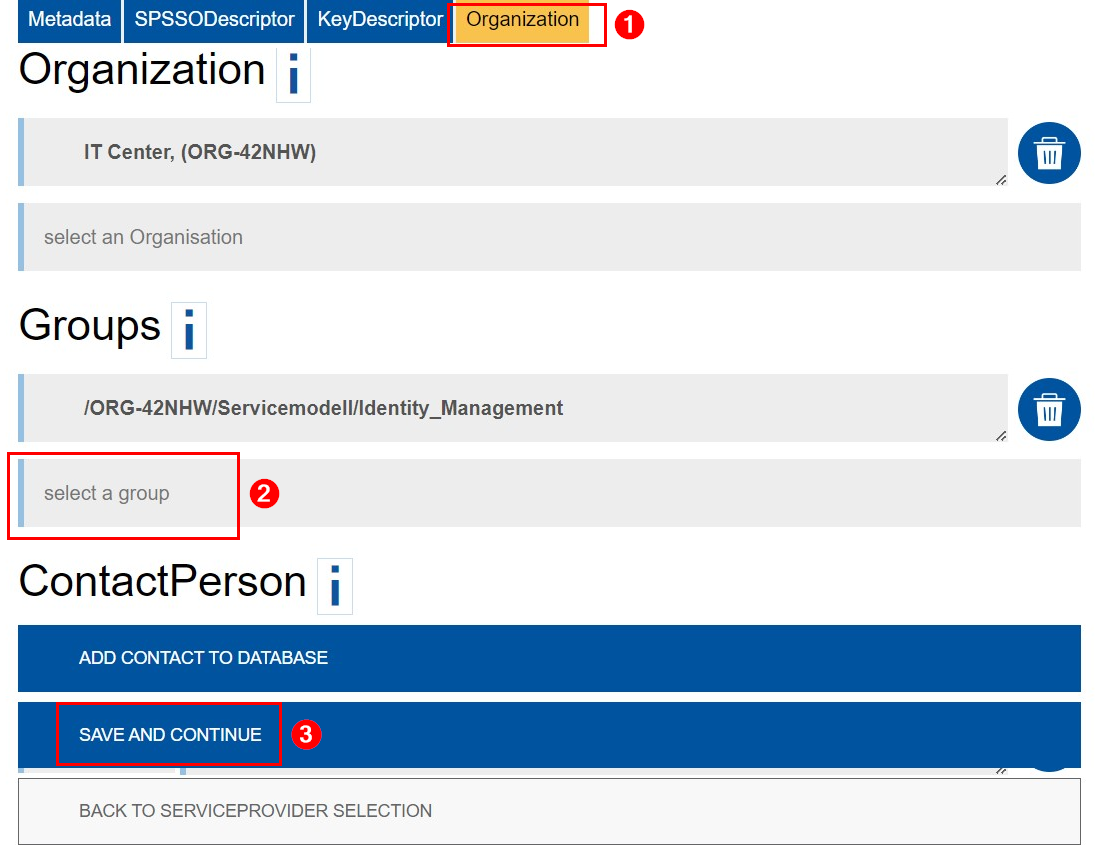
Please note:
- Groups must already exist in IdM. New groups will be visible in SPM 5 to 20 minutes after they are created.
- Group members can add other groups but cannot remove their own.
Edit the data in the ServiceProviderManager
After logging in, you will only see the ServiceProviders for which you have been authorized via a role or group.
Click the pencil icon in the "Edit" column to manage a ServiceProvider.
You can edit the following:
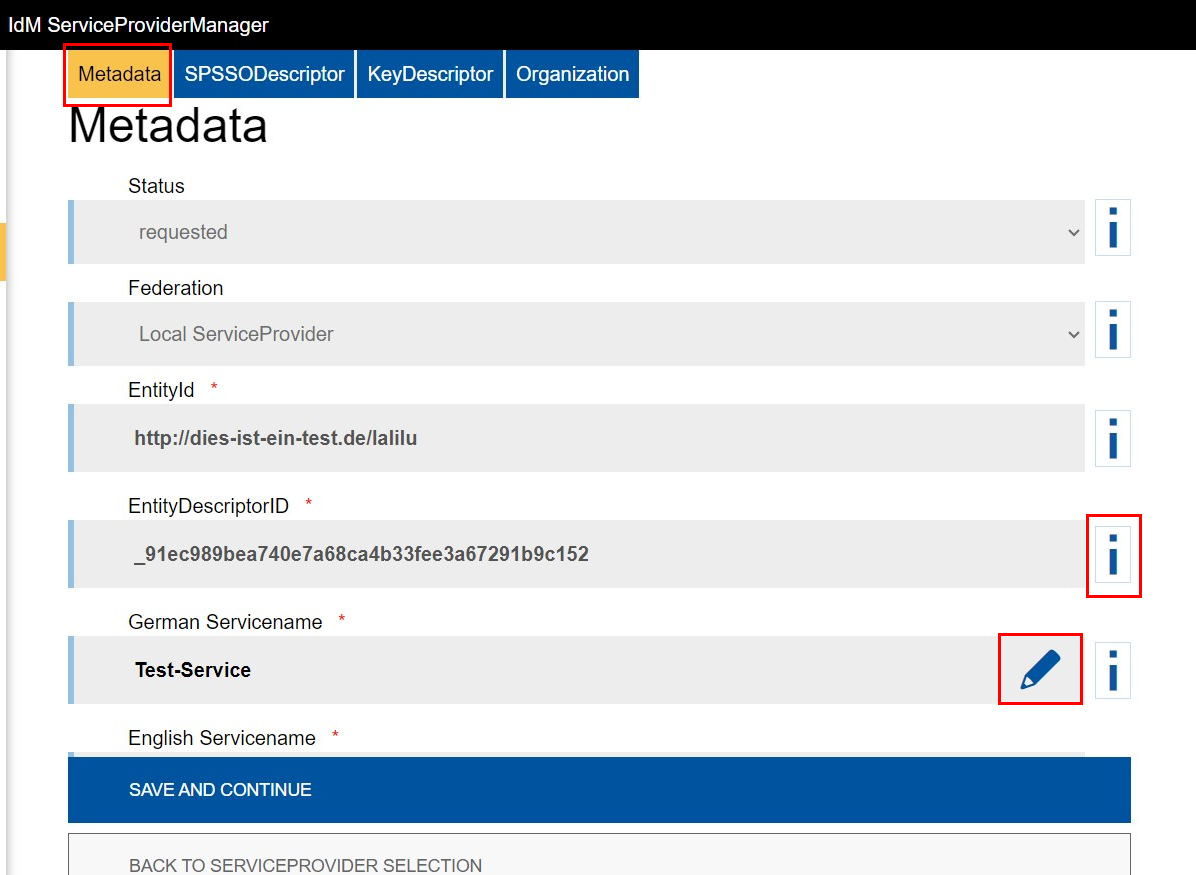
Metadata
You can edit all the fields under Metadata, except:
- Status
- Federation
- EntityId
- EntityDescriptorID
- Organization
These are specified by the IT Center. If the information is incorrect, please contact the IT-ServiceDesk.
To edit a field, click on the pencil icon next to it.
For more information about the fields, click on the blue “i” next to them.
Please note:
Changes will only be applied to the active IdP configuration after a manual approval process.
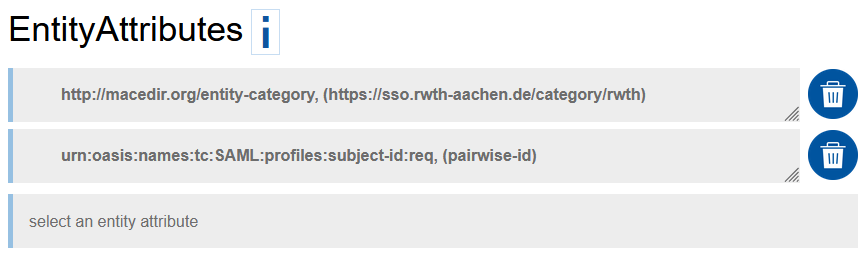
EntityAttributes
An EntityCategory can be set for this purpose, for example. EntityCategories are used to define subfederations, etc.
A general release rule can be created for a category. The following EntityCategory exists for the local RWTH:
http://macedir.org/entity-category (https://sso.rwth-aachen.de/category/rwth)
SPs that have set this EntityCategory can independently request the following attributes via the AttributeConsumingService:
- surname
- givenName
- idmNrwDocumentSurname
- idmNrwDocumentGivenName
- rwthDegreePost
- rwthDegreePre
- title
- eduPersonScopedAffiliation
- organizationName
- schacHomeOrganization
- schacHomeOrganizationType
- rwthMailAddress
- rwthDienstEmail
- rwthTelefonNummer
The attributes must be marked as required in AttributeConsumingService.
Please note: For local service providers of RWTH Aachen University who have set the EntityCategory, the pairwiseID is activated but must also be requested by setting an additional EntityAttribute urn:oasis:names:tc:SAML:profiles:subject-id:req.
SPSSODescriptor
Im Reiter SPSSODescriptor können Sie:
- Select an SPSSODescriptor
- Fill in the AssertionConsumerService
- Fill in the AttributeConsumingService ausfüllen (Optional)
SPSSODescriptors
You can select the following SPSSODescriptors:
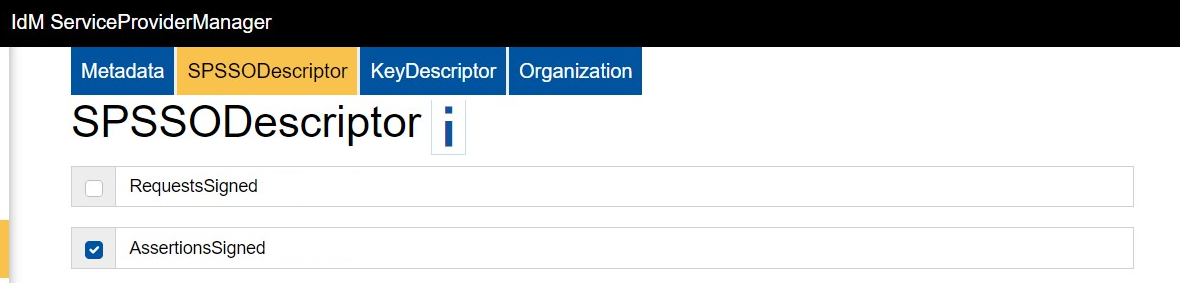
- Request-Signed:
- Verifies that the authentication request originates from the specified ServiceProvider.
- To do so, configure a key descriptor certificate of the signing type. The certificate can be created as either signing and encryption or only signing (see KeyDescriptor).
- Assertions-Signed:
- The IdentityProvider signs the assertion with its private key (signature certificate), and the ServiceProvider uses the corresponding public key to verify the signature.
- This ensures that the user data (username, roles, etc.) is trustworthy and has not been altered.
- This setting is recommended.
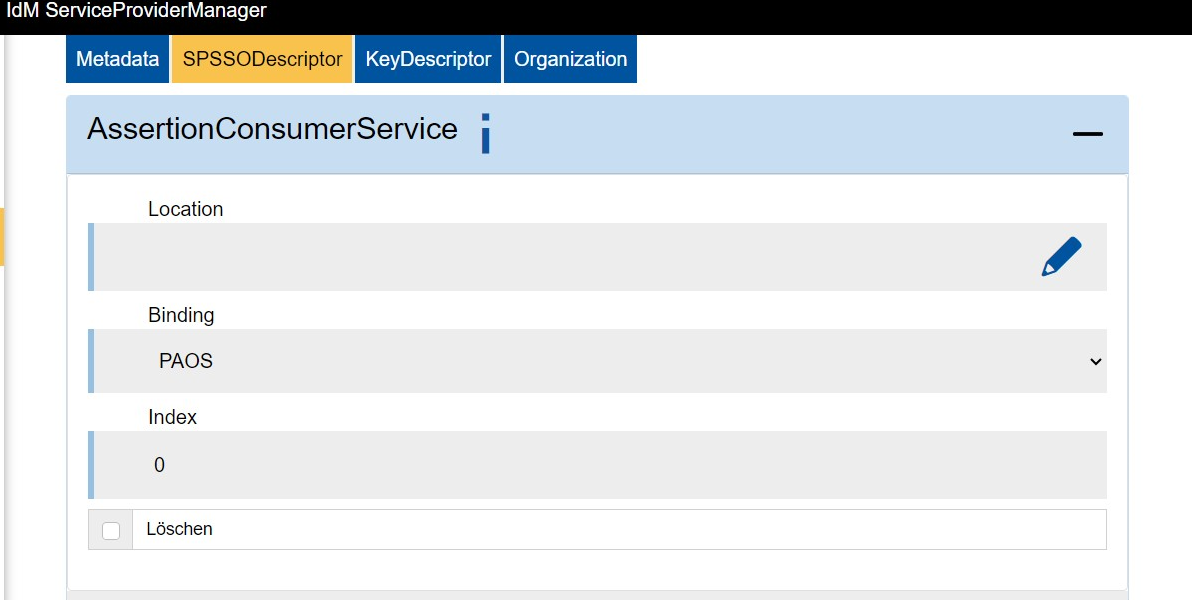
AssertionConsumerService
The AssertionConsumerService must be filled out.
The URL is the endpoint to which the Identity Provider (IdP) sends the assertion containing the determined attributes. Without this information, logging in via Single-Sign On is not possible.
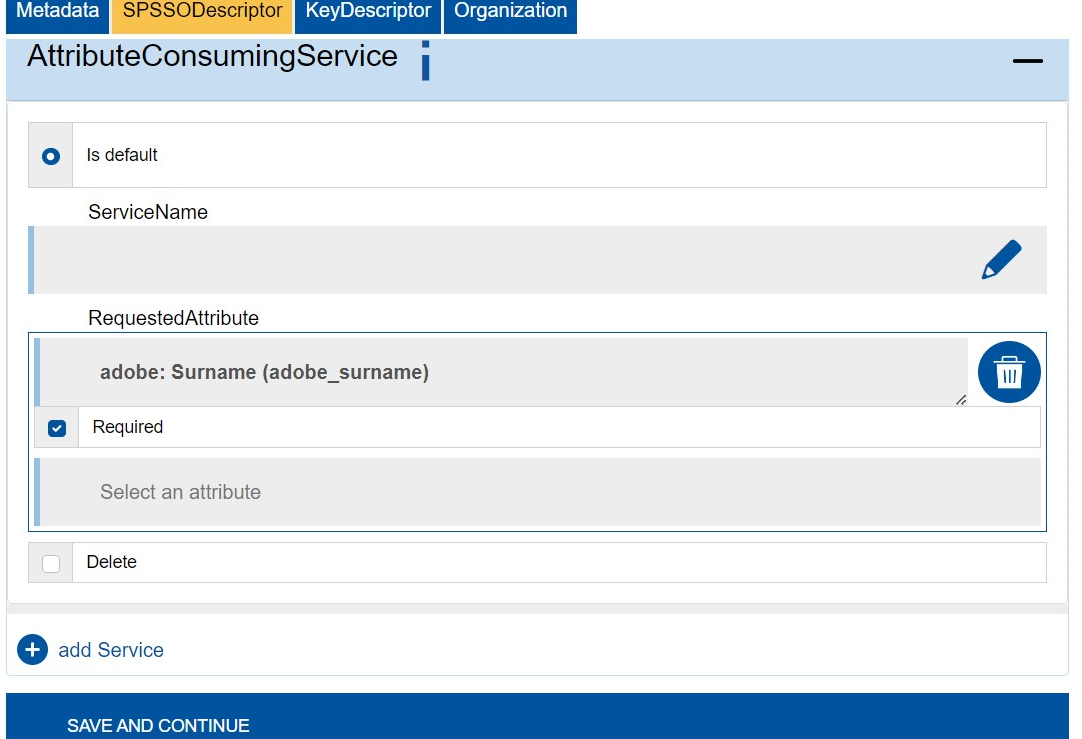
AttributeConsumingService
The AttributeConsumingService is optional.
It specifies the attributes required for logging in to the ServiceProvider.
KeyDescriptor (Certificate)
The SSL certificate securing the exchange between the IdentityProvider (IdP), RWTH, and the ServiceProvider is stored in the KeyDescriptor tab.
Please note:
To ensure a smooth transition, the old and new certificates should be configured in parallel for a period of time.

Click on I want to use KeyDescriptor and import a certificate. Then, click Apply Certificate.
Under "Applied Certificates," you can specify the purpose as encryption and/or signing.
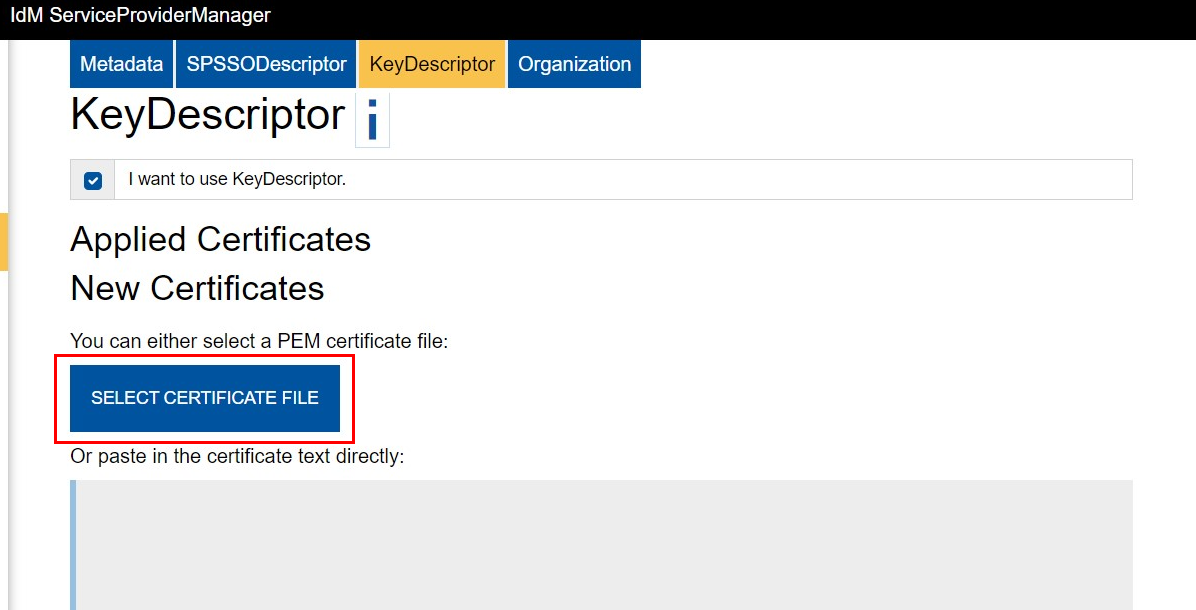
For more information, see the topic Certificates on the DFN website.
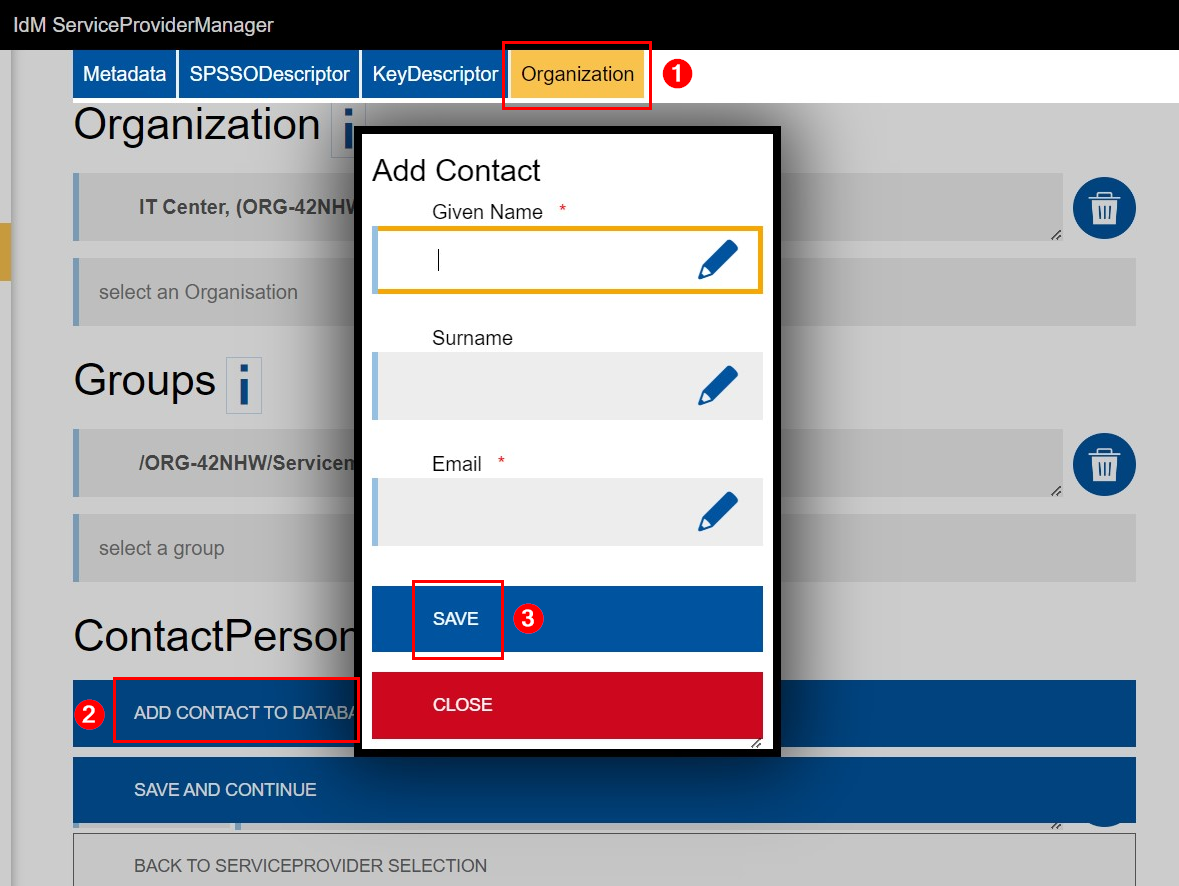
Organization
In the Organization tab, you will find the following sections: Organization, Groups, and Contact Person.

Organization is added by the IT Center.
Under Groups, you can grant groups access to the SPM.
Under ContactPerson, you can add an administrative contact. Technical and content-related questions will be directed to this contact.
Click on Add contact to database to add a contact person.
Please note:
- At least one contact person must be added.
- These entries are publicly visible.
- Adding someone as a contact person does not grant them administrative rights or permissions.
Attribute Overview
After entering the metadata and clicking Save and Continue, the following page will appear:

The IT Center fills in the fields. The attribute display is for your reference only.
AttributeFilterPolicy and PolicyRequirementRule
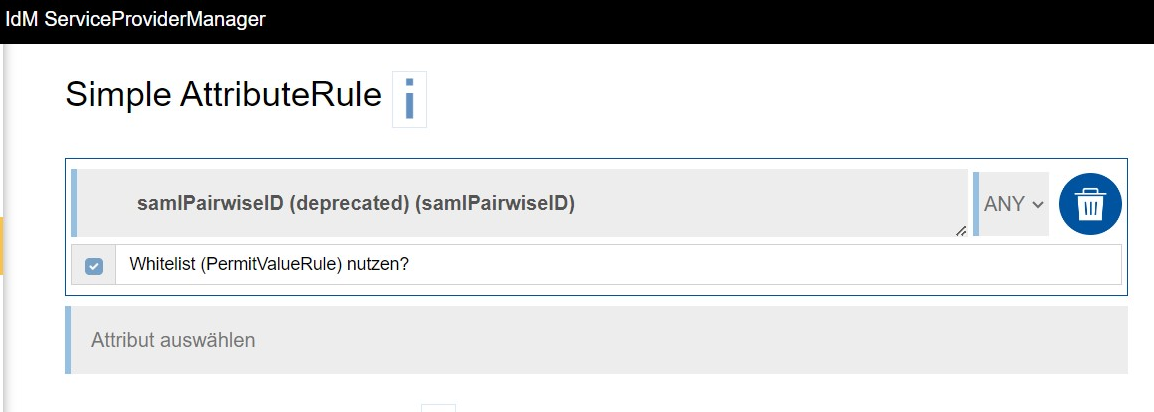
The attributes "AttributeFilterPolicy" and "PolicyRequirementRule" are set up by the IT Center.SimpleAttributeRule
Under "SimpleAttributeRule," you can specify which attributes must be sent to the ServiceProvider (ANY) and which are explicitly to exclude (NOT).
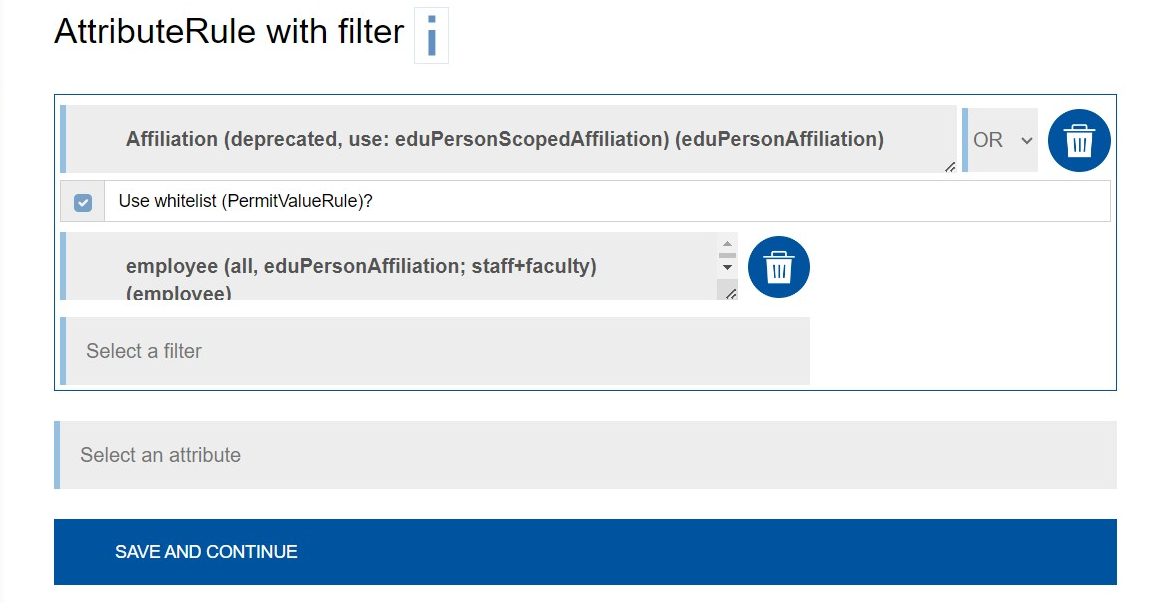
AttributeRule with Filter
Under "Attribute Rule with Filter", attributes are defined and filtered simultaneously according to their values based on the selected (regex) rules.
All rules (AND), at least one rule (OR), or no rule (NOT) must be met.
Known Issues
- Occasionally, you may need to click the pencil icon twice to start editing.
- If two people edit the same ServiceProvider at the same time, the changes saved first will be applied. The other person's changes will be reset. For example:
- Person A and Person B are working on the SP simultaneously.
- Person B saves their changes first.
- Person A's changes are reset. The SP reloads.
- Person A is sent back to the beginning (Metadata) and receives the following message: "The Service Provider you were working on has been changed by someone else. The data has now been updated."
