


Login via FastX

On this page, you will learn how to access CLAIX using FastX and start a remote desktop session.
FastX provides remote desktop access to CLAIX login nodes. It allows you to use graphical applications and interact with files through a graphical interface.
Please note:
Our HPC systems can be accessed directly from the RWTH network, networks connected to the DFN, and selected partner university networks. If you are connecting from an external network (for example, from home), you must first establish a Virtual Private Network (VPN) connection to the RWTH network using the Cisco Secure Client. For instructions on setting up and connecting via VPN, please refer to the VPN manual.
We offer the following access methods:
Login via the FastX Desktop Client
All login nodes on the CLAIX clusters run a FastX server, which allows you to start a remote desktop session via your locally installed FastX Desktop Client.
Step 1
Download (wird in neuem Tab geöffnet) and install the FastX Desktop Client.
Step 2
Start the client and add a new connection by clicking the "+" button.

Select "SSH" as the connection method. Enter the desired login node, your HPC username, and set Port to 22. Optionally, you can add a name for the connection.
For a list of available login nodes see:
CLAIX-2025 compute nodes are currently accessible only to users with computing time allocations through NHR or WestAI computing time projects.
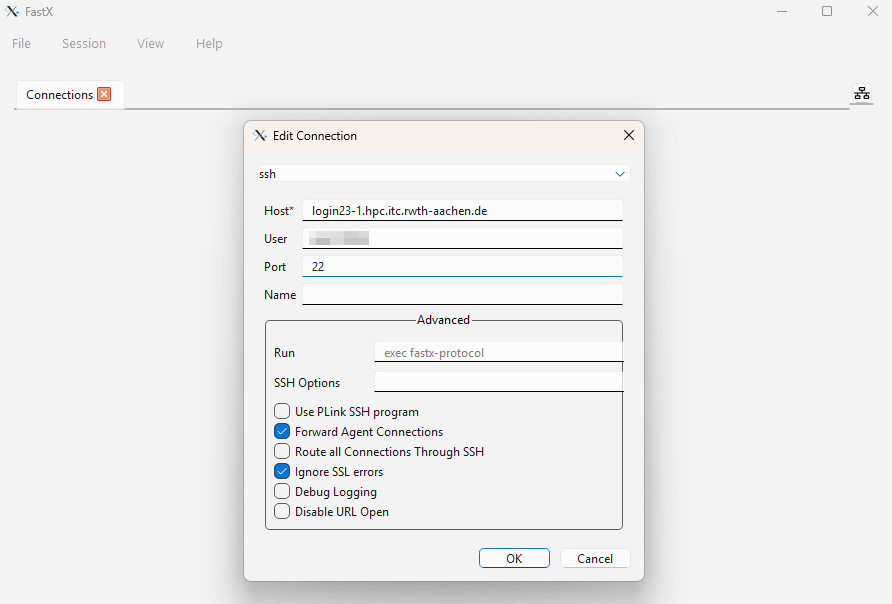
Click "OK" to add the connection.
Step 3
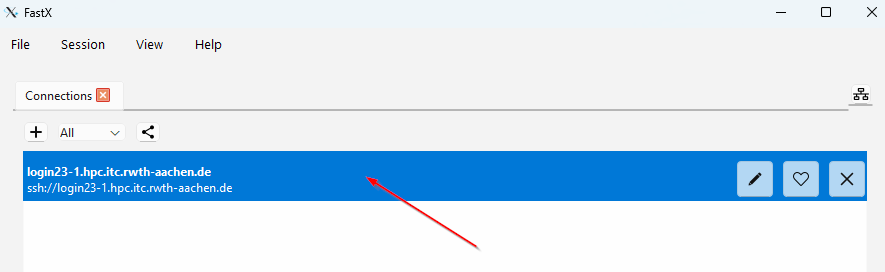
Log in to the cluster by double-clicking the connection you just created. You will be prompted to enter your HPC password and your HPC 2FA token.
Step 4
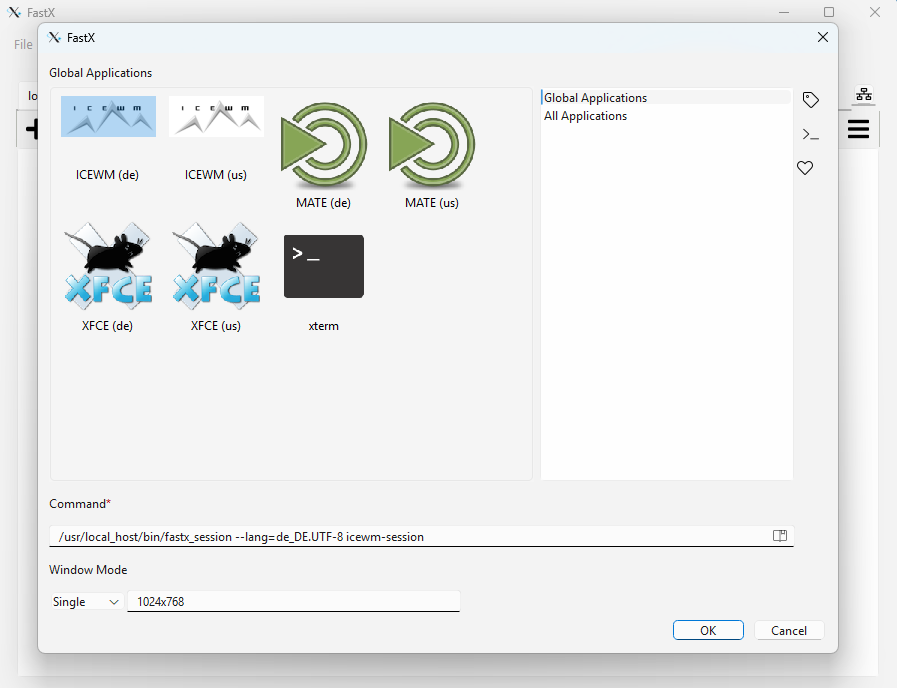
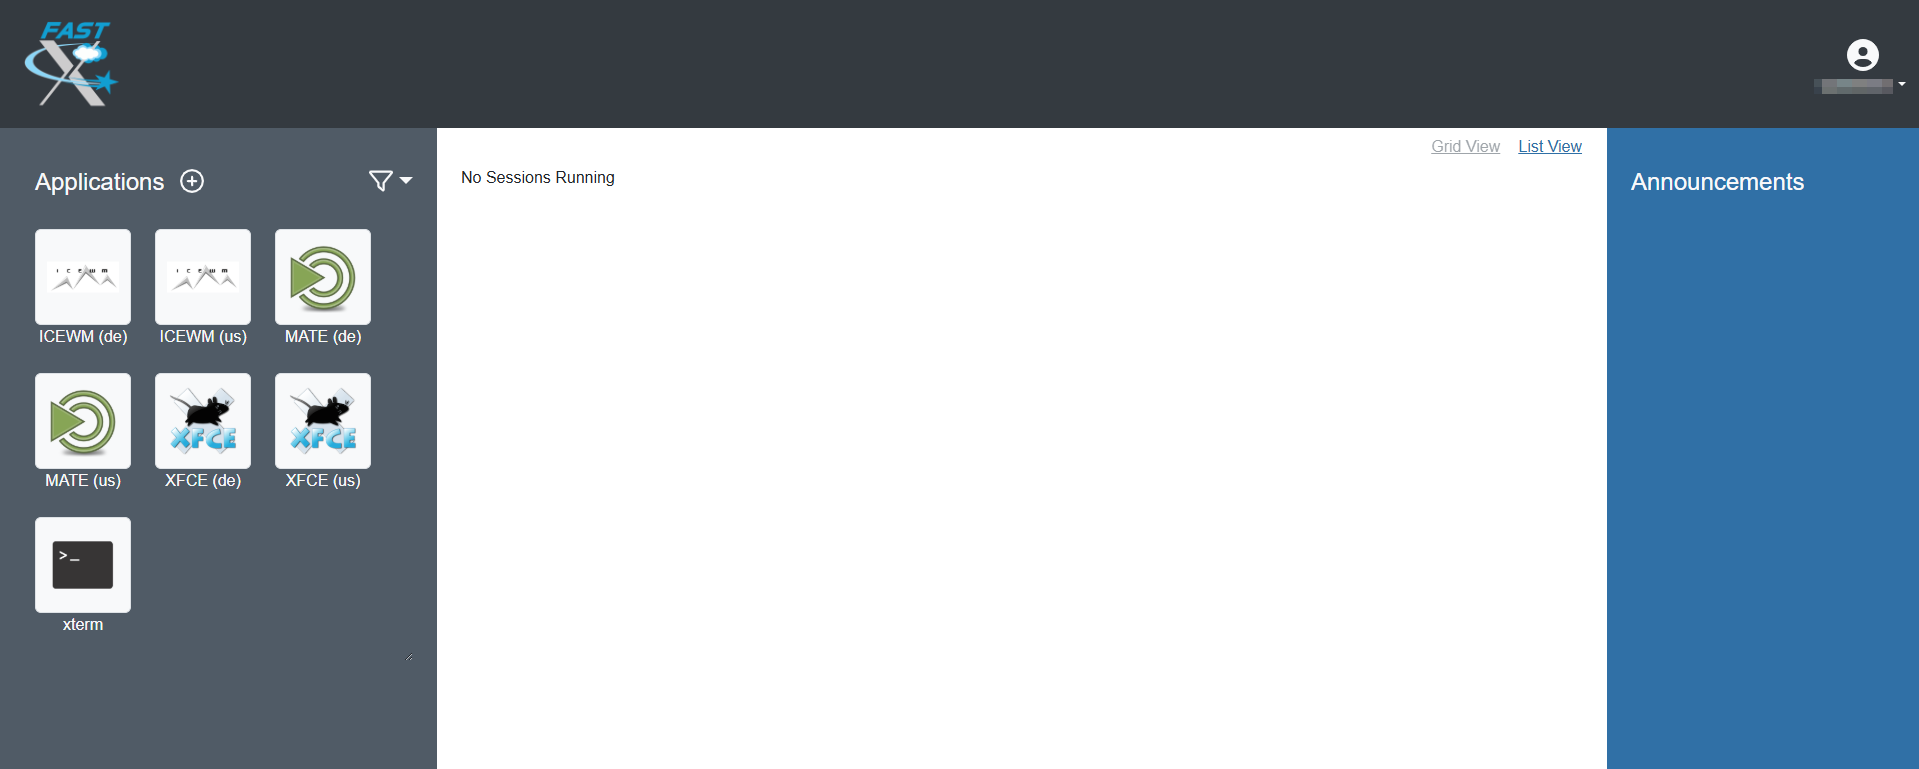
Select your preferred desktop environment by clicking the corresponding icon and start the session by clicking "OK". Desktop environments with graphical user interfaces are available in both English and German language versions.
Step 5
You can close the remote desktop session by simply closing the respective GUI-window. To log out properly, also close any remaining FastX client windows.
Further information on using FastX is available in the official Starnet documentation. (wird in neuem Tab geöffnet)
Login via the FastX Browser Client
Browser-based login is available on dedicated nodes that provide the corresponding FastX web servers. This allows you to create remote desktop sessions and access CLAIX directly from your browser.
Step 1
For accessing CLAIX-2023 via your browser, open one of the following link: login23-x-1 (wird in neuem Tab geöffnet)or login23-x-2 (wird in neuem Tab geöffnet).
For accessing CLAIX-2025 via your browser, please open the following link login25-x-1 (wird in neuem Tab geöffnet). CLAIX-2025 compute nodes are currently accessible only to users with computing time allocations through NHR or WestAI computing time projects.
Step 2
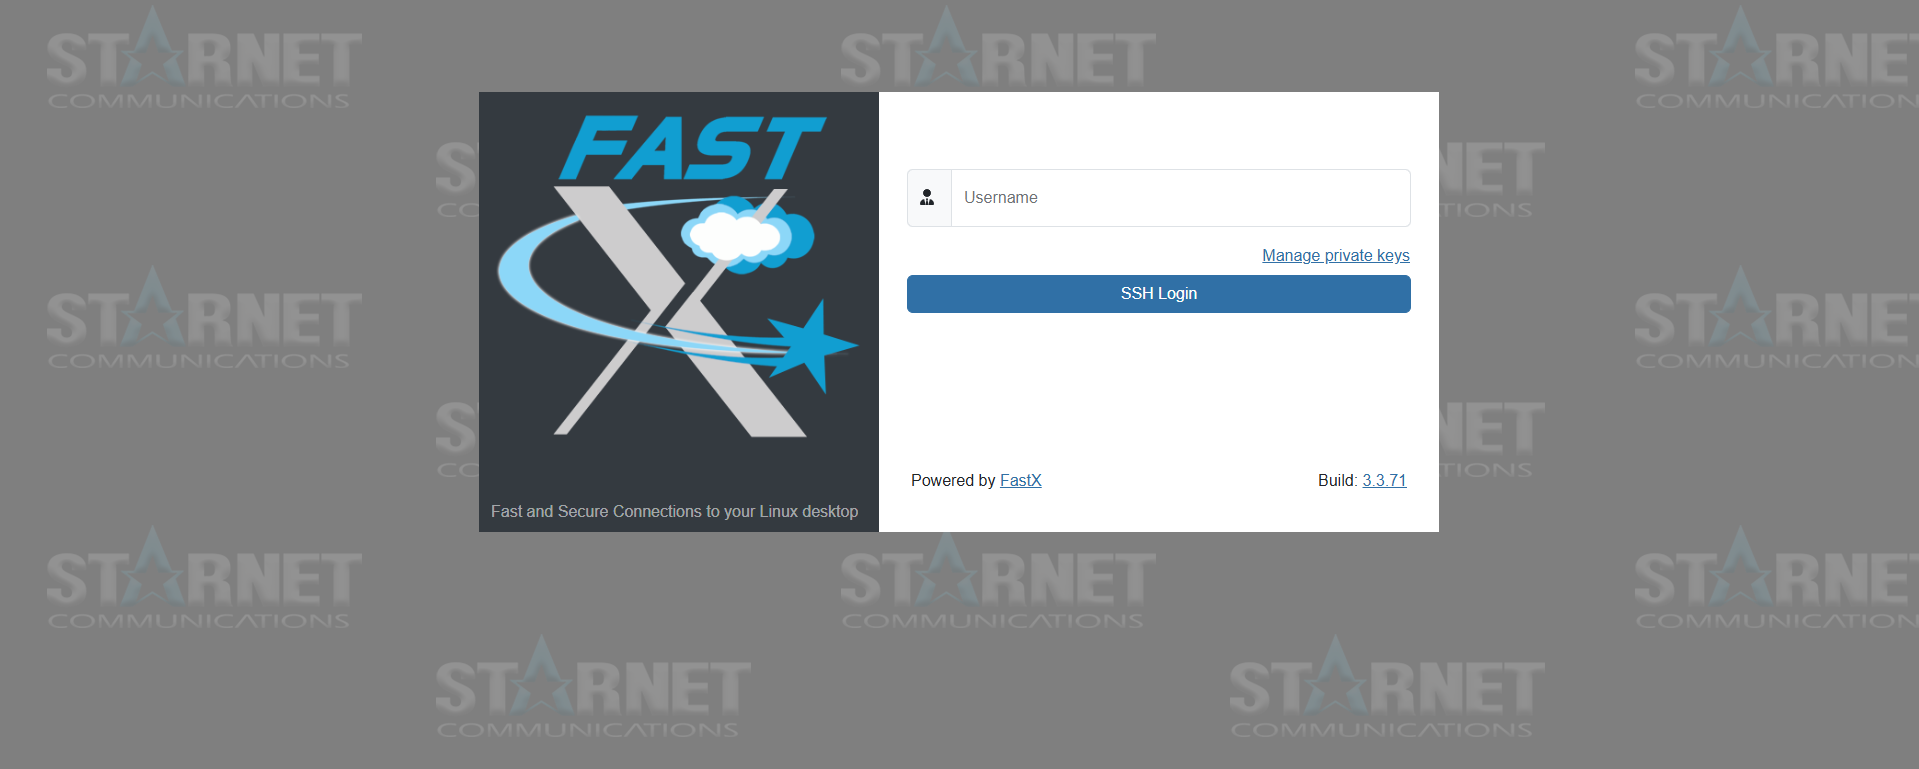
You will be prompted to enter your HPC username, HPC password and your HPC 2FA token to login.
Step 3
Start a remote desktop session. Select your preferred desktop environment by clicking the corresponding icon and start the session by clicking "OK". Desktop environments with graphical user interfaces are available in both English and German language versions.
Step 4
When starting a new remote desktop session, a new browser tab will open and ask whether you want to connect using the Browser Client or the Desktop Client. If you have not installed the Desktop Client, select Browser Client.
Your remote desktop session will then open directly in your browser.

Step 5
To close the remote desktop session, simply close the browser tab. Additionally, open the "My Sessions | FastX" tab and log out to properly terminate your login.
Further information on using FastX is available in the official Starnet documentation. (wird in neuem Tab geöffnet)
