


Manage SSH Keys

SSH keys provide a secure way to authenticate when connecting via the SSH protocol and can be used as an alternative to password and two-factor authentication (2FA). This method uses a key pair consisting of a public key (uploaded to the RWTH RegApp) and a private key (which must be securely stored on your local machine) for authentication.
This manual provides step-by-step guidance on setting up and managing SSH keys for cluster access through the RWTH RegApp.
To successfully generate, upload, and enable an SSH public key for cluster login, follow these three steps:
- Generate an SSH Key Pair
- Upload the SSH public key to the RWTH RegApp
- Enable Cluster Login for the SSH Key
The sections below provide further details on using SSH keys for connecting to our clusters:
- Hint for Usage of PuTTY-generated SSH Keys
- SSH Key Expiration Time
- SSH Key Login Restrictions
- SSH Key Usage Types
1. Generate an SSH Key Pair
Step 1
Open a terminal or command line on your local machine (e.g., Command Prompt on Windows or Terminal on macOS/Linux).
Step 2
Run the SSH key generation command:
ssh-keygen -t ed25519 -C "your.email@domain.com"Step 3
You can accept the default location (~/.ssh/id_ed25519) or specify a custom path to save your key pair.
Step 4
We recommend setting a passphrase to protect your private key.
Step 5
You have now created
- a private key file
~/.ssh/id_ed25519 - a public key file
~/.ssh/id_ed25519.pub
Important Security Advice: Keep your private key secure and never share it. Only the public key should be uploaded to the RWTH RegApp.
2. Upload the SSH Public Key to the RWTH RegApp
Step 1
If you are already logged into the RWTH RegApp, proceed directly to Step 2. Otherwise, follow the manual: Login RWTH RegApp.
Step 2
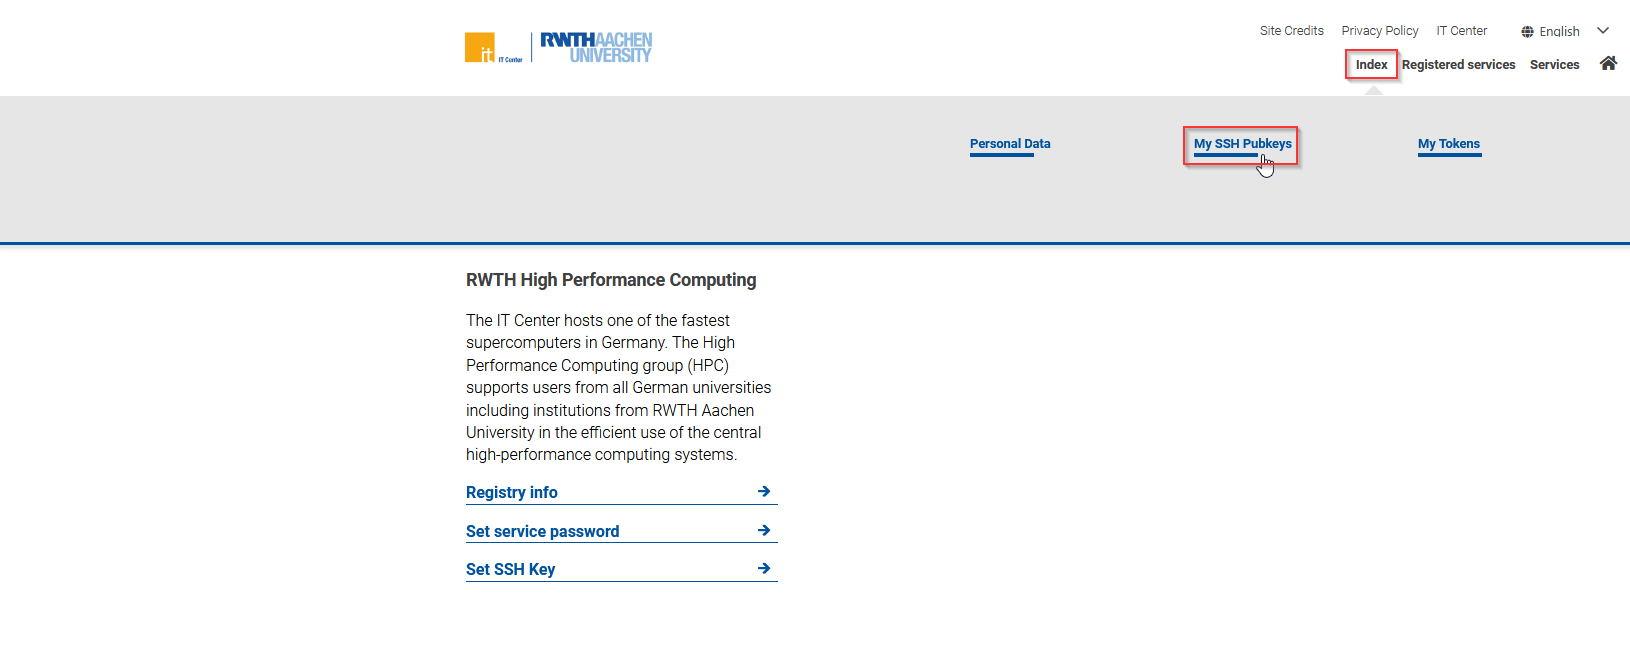
On the RWTH RegApp dashboard in the top-right corner, hover your cursor over the "Index" button and click on "My SSH Pubkeys" in the menu that appears.
Step 3
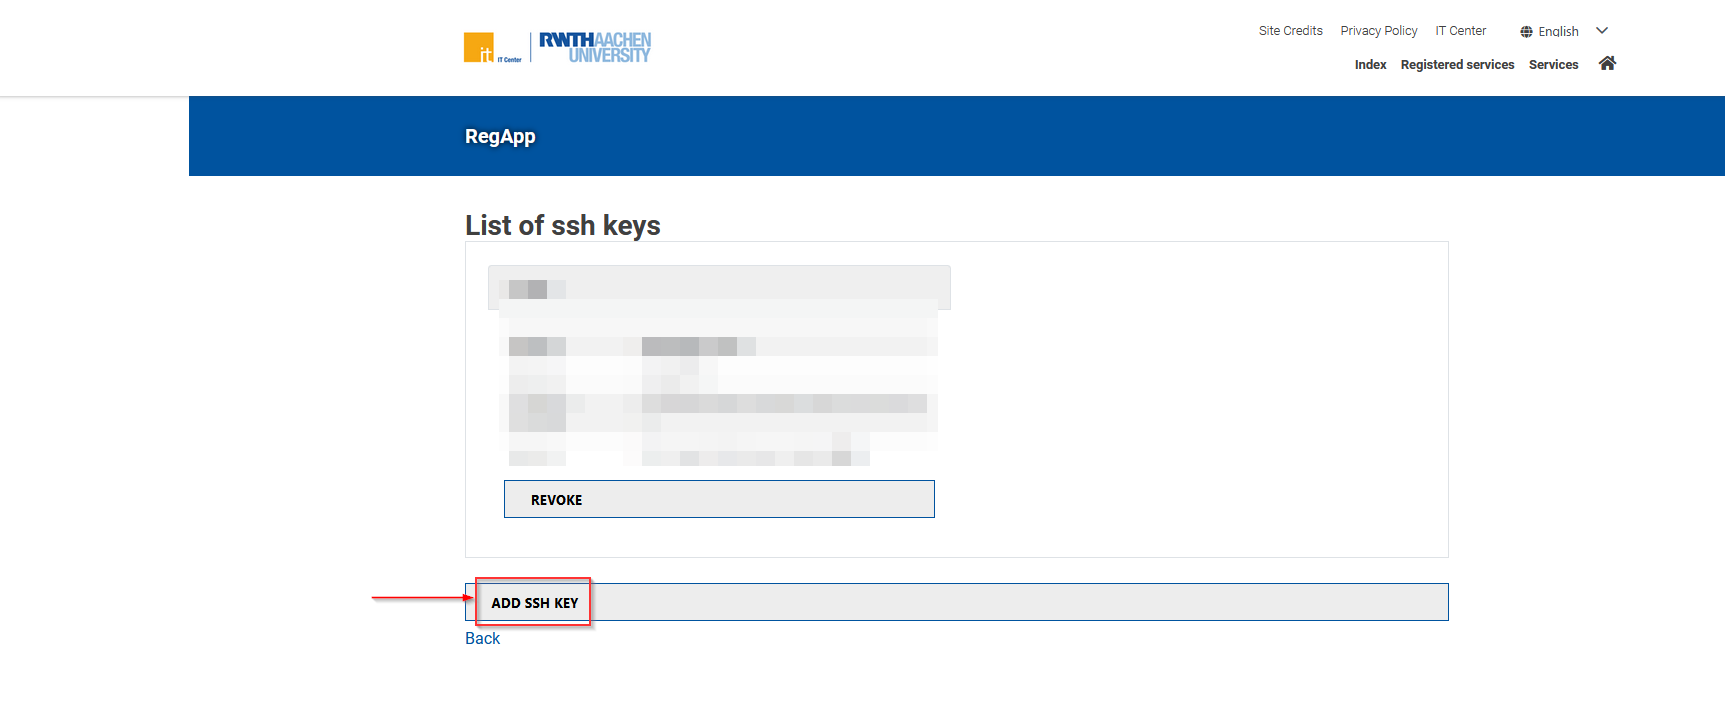
You will be taken to a page where you can view your uploaded SSH public keys and add new ones. Click on the "Add SSH Key" button.
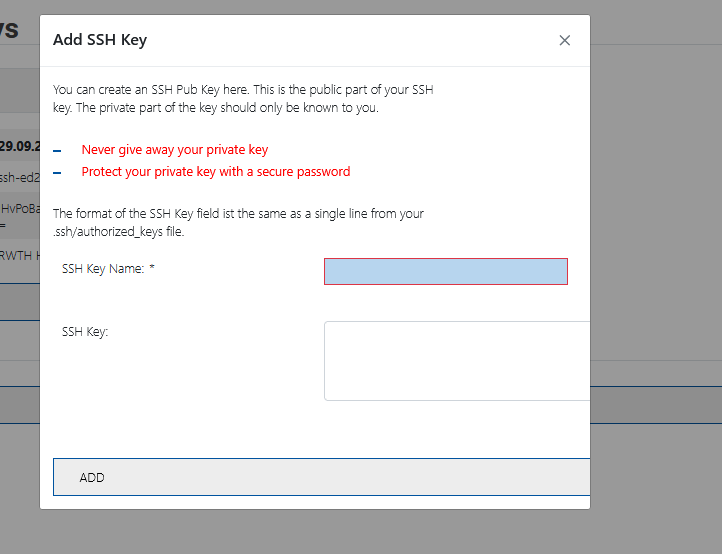
A dialogue window will appear. Enter a name for your public key (this can be any name you choose). Then open your saved public key file (the one with the ".pub" extension), copy its contents, and paste them into the "SSH key" field. Remember: Do NOT upload your private key!
Click "ADD" to continue.
Note for PuTTY Users: PuTTY uses a different public key format. Refer to the section Hint for Usage of PuTTY-generated SSH Keys for instructions on how to correctly copy and paste your public key file.
Step 5
Your uploaded SSH key will now appear in the list of SSH keys. Proceed to the next section of this manual to enable cluster login with your newly added SSH public key.
3. Enable Cluster Login for the SSH Key
Step 1
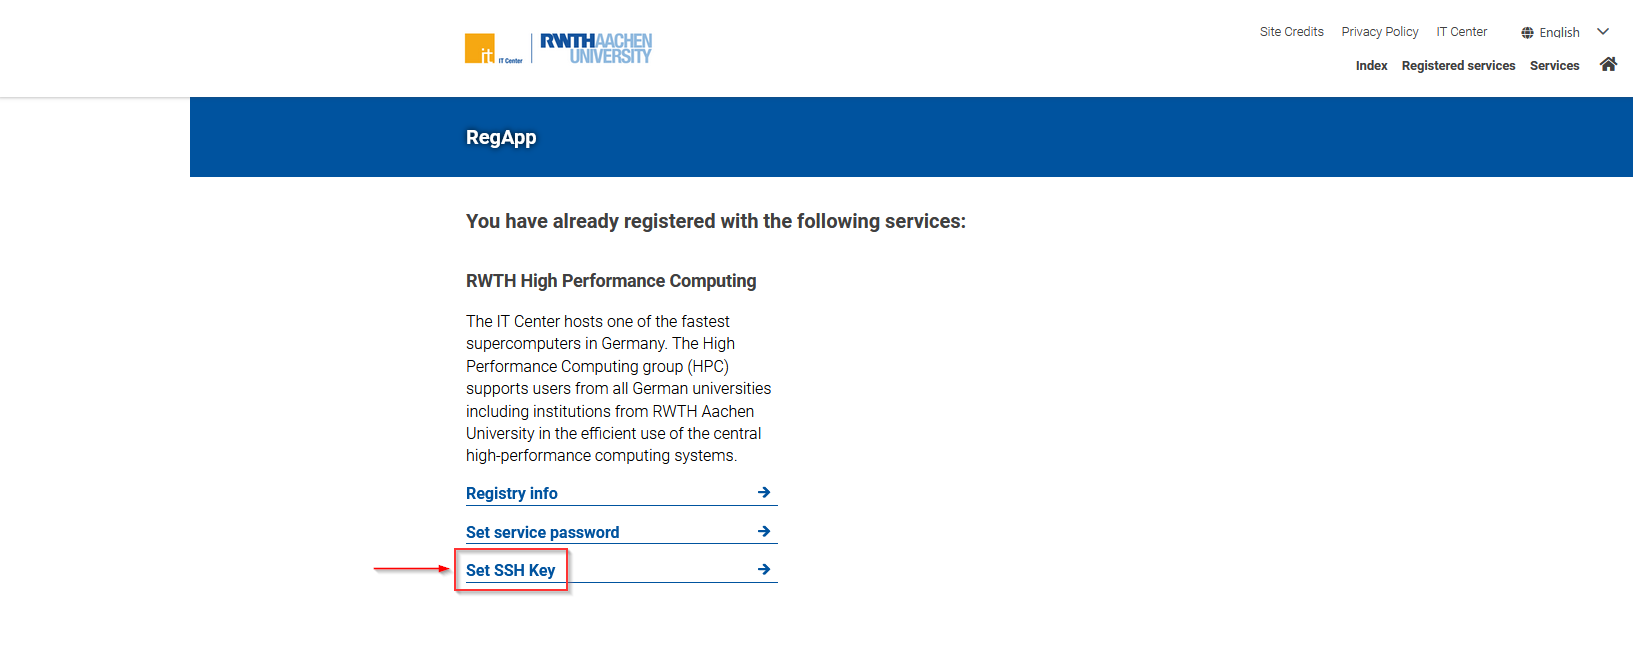
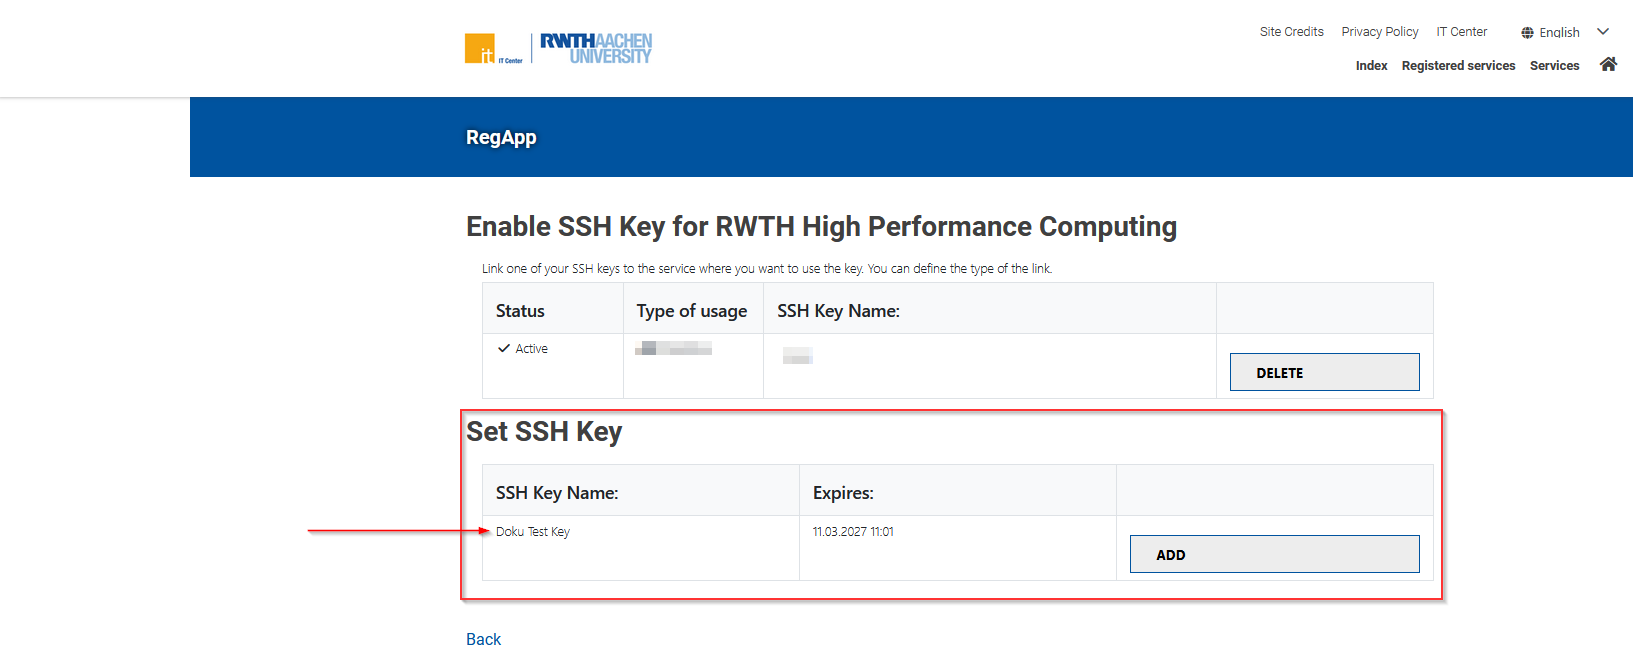
On the RWTH RegApp dashboard click on the "Set SSH Key" button.
Step 2
Under the heading "Set SSH Key," you will find all uploaded SSH keys that have not yet been activated. If you have just completed the section Upload SSH Public Key to RWTH RegApp you should see the name of your newly uploaded public key here.
Click on the "ADD" button to proceed.
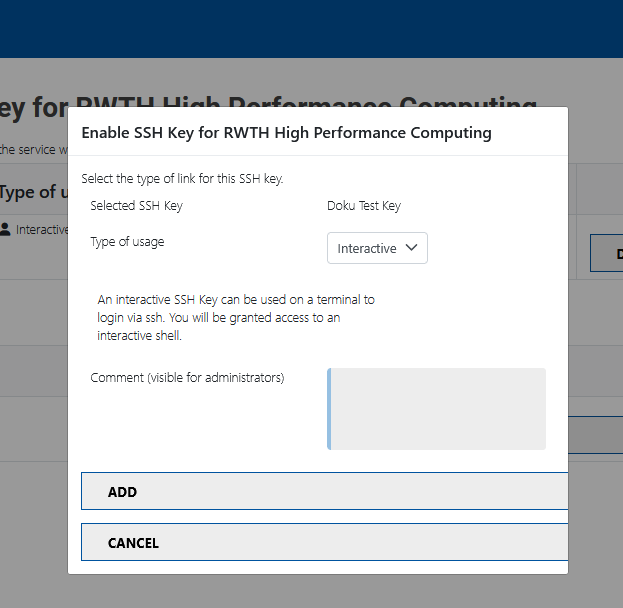
Step 3
In the dialog that appears, specify the type of usage for your SSH key. For interactive login, select "interactive." For more details about usage types, refer to this section: SSH Key Usage Types.
Comments are optional. Click on "ADD" to continue.
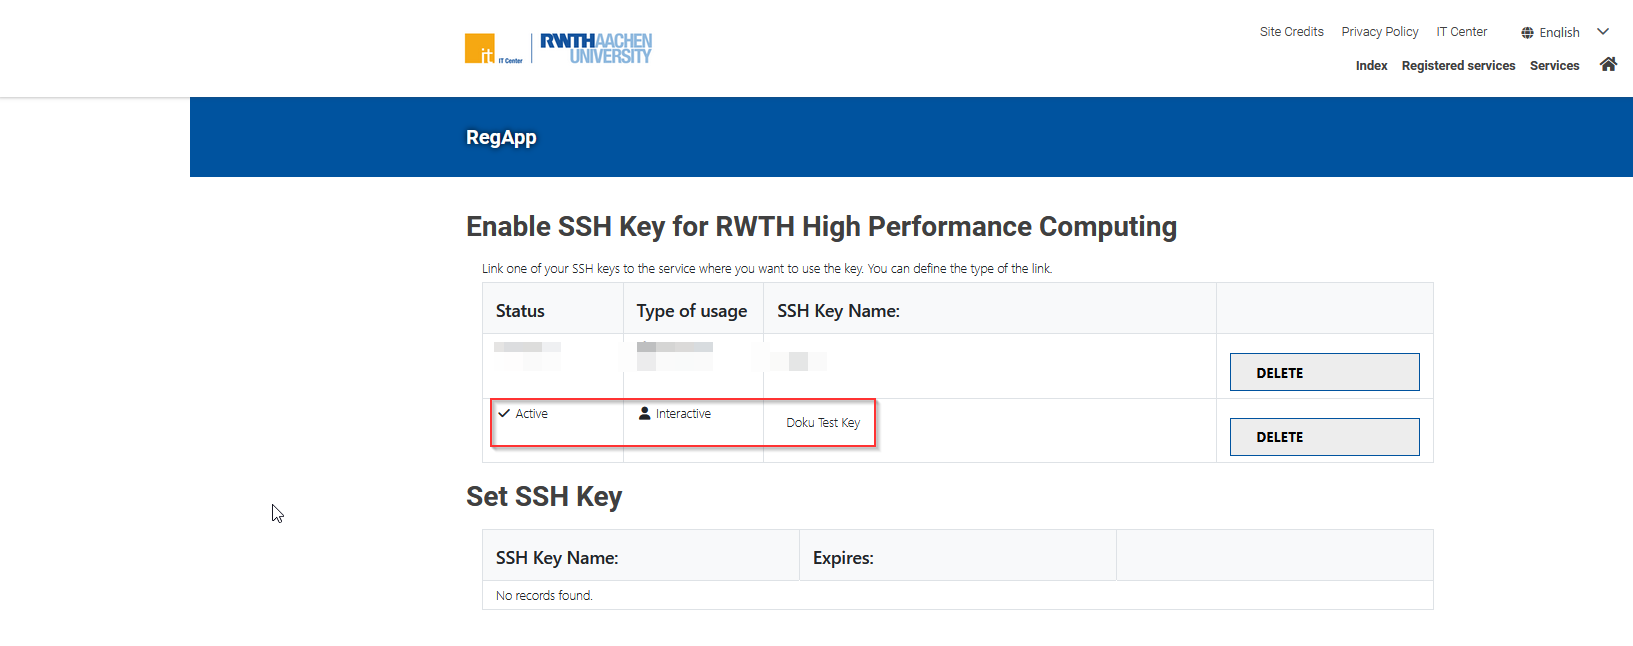
Step 4
If you selected the “interactive” usage type, your SSH public key has been immediately activated for login. It will appear in the table above with status “Active”. Please review the notes under SSH Key Login Restrictions carefully.
If you selected the “command” usage type, your SSH public key will remain pending until it is approved.
Hint for Usage of PuTTY-generated SSH Keys
When following Step 4 in the section Upload the SSH public key to the RWTH RegApp, be aware that PuTTY uses a different public key format. To ensure your public key is correctly formatted for pasting into the RWTH RegApp, follow these steps:
Step 1
Open PuTTY Key Generator (PuTTYgen).
Step 2
Load your private key.
Step 3
Enter the passphrase associated with your private key.
Step 4
In PuTTYgen, locate and copy the text from the “Public key for pasting into OpenSSH authorized_key file” panel.
Step 5
Paste this copied key sequence into the "SSH key" field in the dialogue mentioned in Step 4.
SSH Key Expiration Time
SSH keys uploaded to the RWTH RegApp are configured to automatically expire after a predetermined period, currently set at 12 months. Once expired, the key will be removed from your RWTH RegApp dashboard overview and cannot be used for login anymore. It is important to note that an expired or deleted key cannot be re-added; you will need to generate and upload a new key pair.
SSH Key Login Restrictions
When accessing a login node interactively for the first time, you must enter both a password and a second authentication factor within a specific time frame (currently 10 hours). After this initial setup, subsequent logins can proceed directly using your SSH key.
Implications for SSH Configuration
This requirement affects your SSH configuration. If you utilize a ssh config file (located at ~/.ssh/config), ensure that for certain domains - such as *.hpc.itc.rwth-aachen.de - you do not configure public keys as the preferred authentication method (i.e., avoid setting PreferredAuthentications publickey). Doing so would prevent the system from requesting a password and thus block successful login.
SSH Key Usage Types
In Step 3 of section Enable Cluster Login for the SSH Key you can choose between the following usage types for your SSH key:
- Interactive - For interactive logins.
- Command - For automated scripts, restricted to a specific command and requires administrator approval. E.g. running
sshusername@login23-1.hpc.itc.rwth-aachen.de"rsync -av /data/project /backup/project"- Here,
"rsync -av /data/project /backup/project"is the command the key is allowed to execute. The key cannot be used for an interactive shell.
- Here,
