


Client certificate with own CSR RA-Portal

You can use openssl to generate your RSA keys and your own certificate signing request for your user certificate. The CSR can then be uploaded into the RA-Portal.

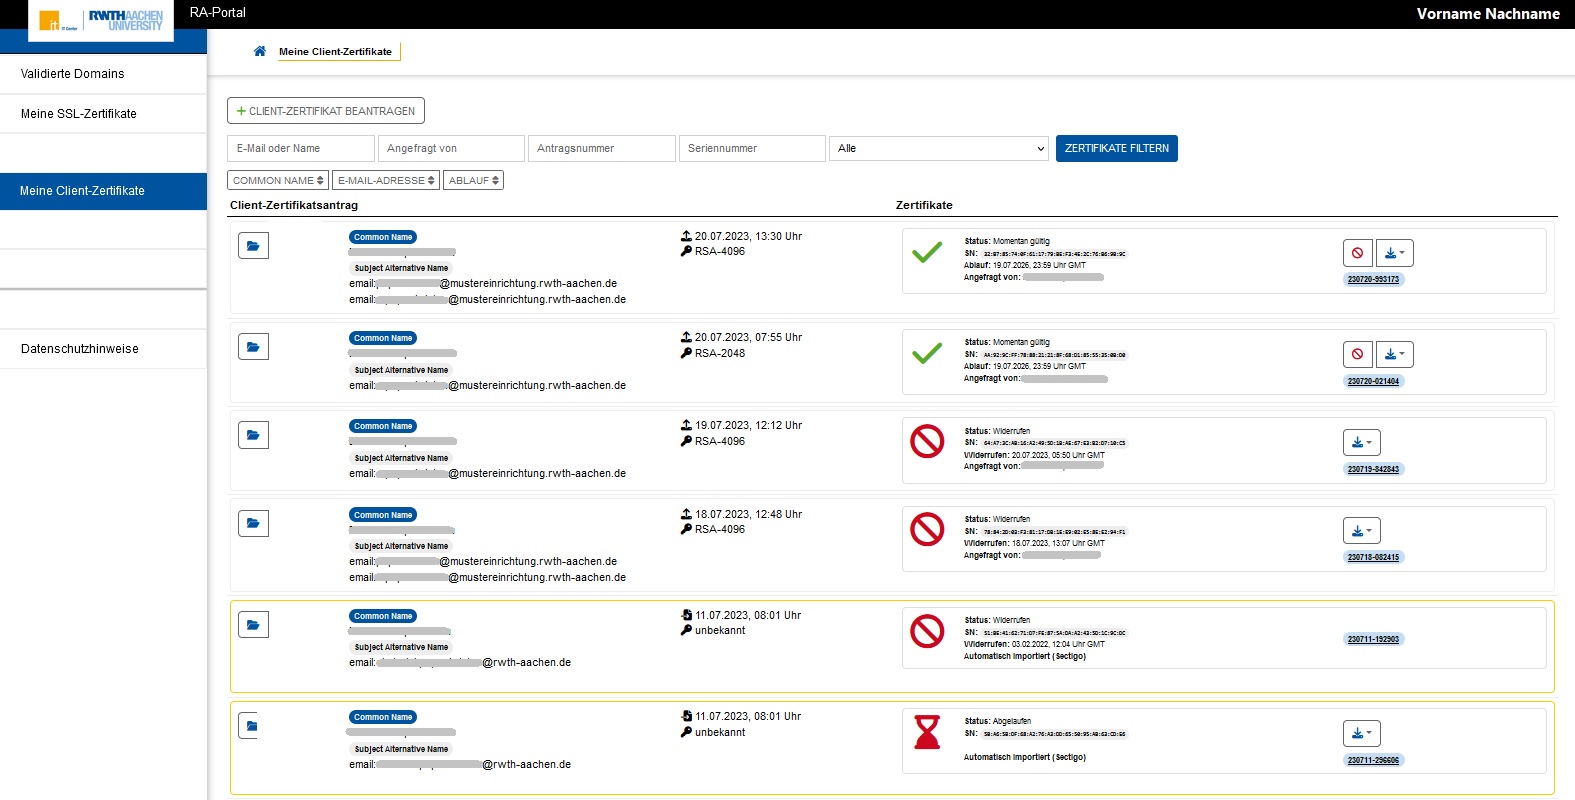 | Step 1: Log in to the RA-Portal (via SSO). The RA-Portal is only accessible within the RWTH intranets. Check how your given name and surname are passed on from the Identity Management of the RWTH. Your certificate will be issued for this given name and surname combination. Navigate to the tab "Meine Client-Zertifikate". On your first visit, the list of your user certificates should be blank. Select "+ Client-Zertifikat beantragen" |
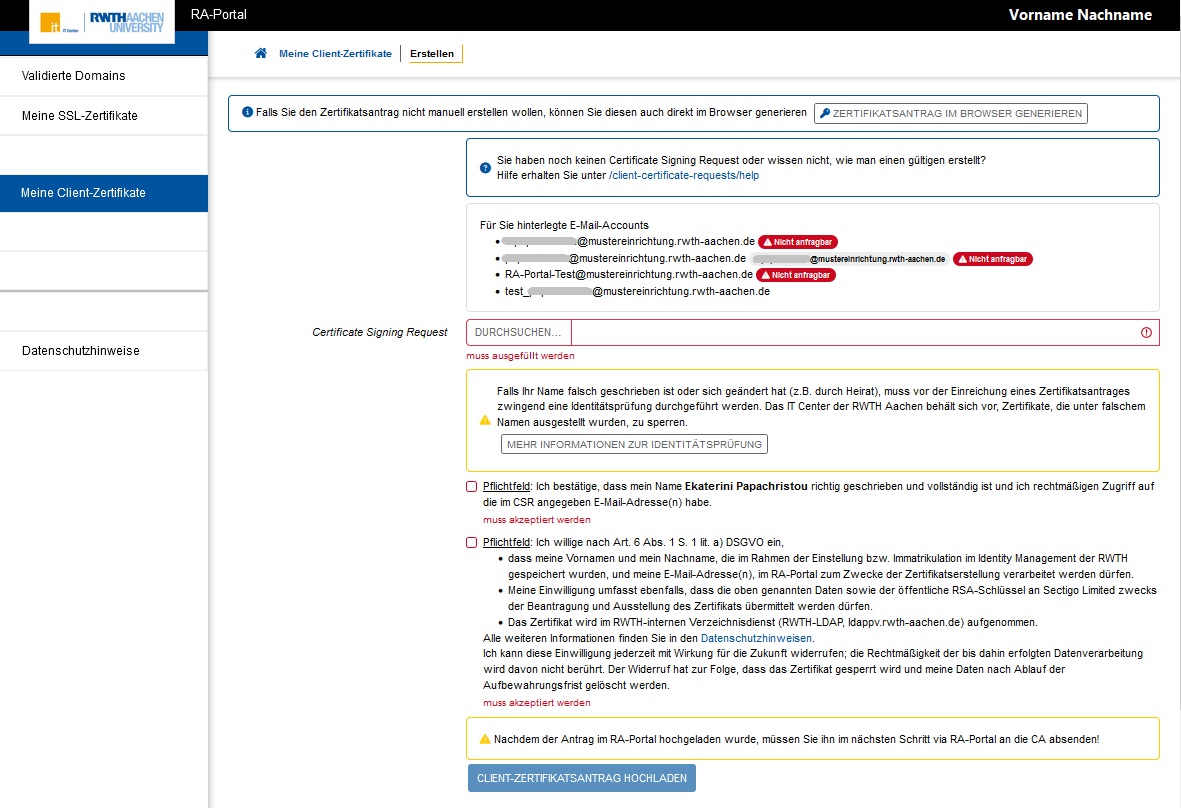 | Step 2: Requests can only be generated for email addresses that are assigned to you. Use the help link to display the needed openssl commands (step 3). "Nicht anfragbar" are email addresses for which a certificate exists in GÉANT/TCS, that is still valid for more than 28 days. If you need a new certificate for such an email address, you must first revoke the valid certificate. Go back to "Meine Client-Zertifikate". |
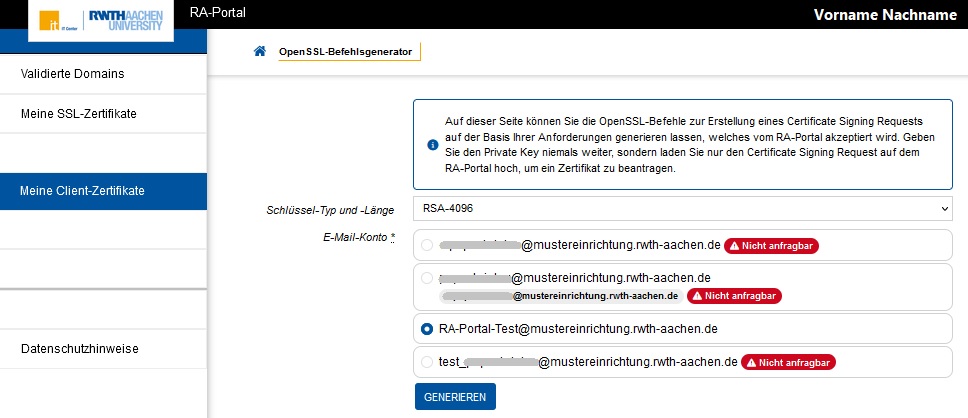 | Step 3: Your are now under "OpenSSL-Befehlsgenerator" Select the email address for which you want to apply for a user certificate. For personal mailboxes the common name is provided by IdM, for functional mailboxes there is no common name in the issued certificate.
|
openssl genrsa -out private_key.pem 4096 | Step 4: RSA-2048 and RSA-4096 (recommended) are both allowed. For your CSR, use the openssl command displayed. |
Step 5: o Go back to step 2 o Select your generated CSR file o Agree to "name correct", "process my data", "ldap" (oversimplified here) o Click on "Clientzertifikatsantrag hochladen" | |
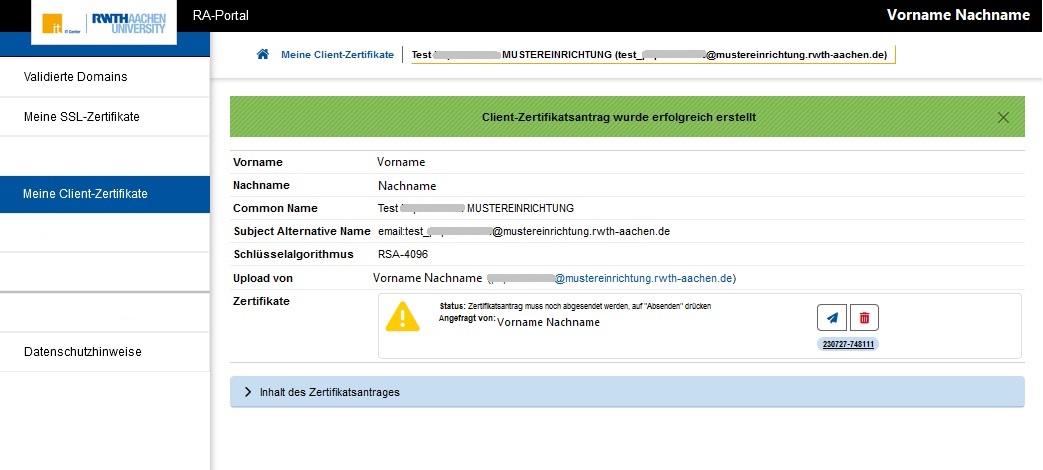 | Step 6: Make sure the information under "Inhalt des Zertifikatsantrags" is correct. You may still delete your certificate application via the trash can icon. If you do want the certificate, you need to send your request to the certification authority via the paper airplane icon. |
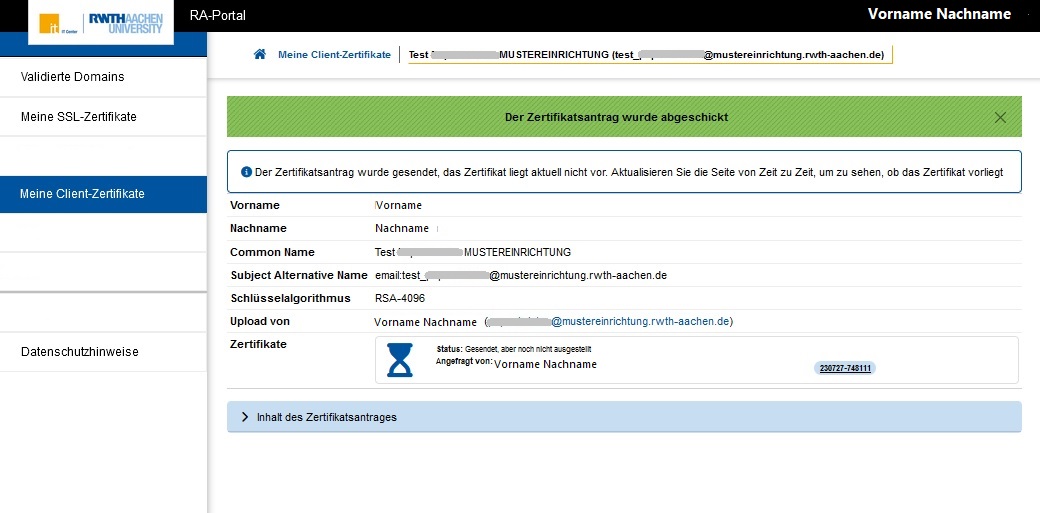 | Step 7: The hourglass icon shows that the certificate still needs to be issued. Status is "Sent, but not yet issued". |
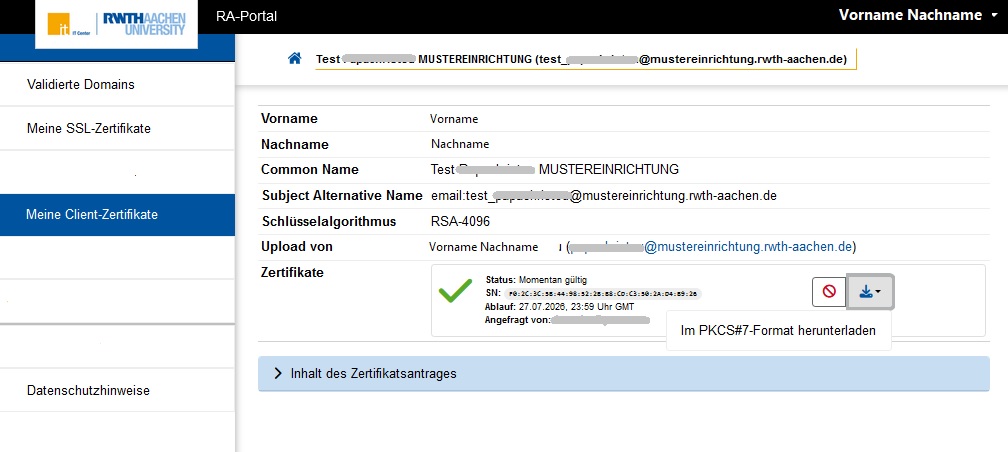 | Step 8: Status icon has changed to a green checkmark, i.e. the certificate is issued and valid, it can now be downloaded. Select the option "Download in PKCS#7 format". |
| Step 9: You need to convert the PKCS#7 file (cert.p7b, as downloaded from the RA-Portal) into a PEM-formated file cert.pem. |
openssl pkcs12 -export -in cert.pem -inkey private_key.pem -out cert.p12 -passout pass:<passout> | Step 10: You need to use openssl to create a .p12 file from your private_key.pem (step 4) and your cert.pem (step 9). <passout> is the password you set for the .p12 file. You can now use your cert.p12 file to configure your applications to digitally sign e.g e-mails, PDFs, etc. |
