


Configure digital signature in Adobe Acrobat

On this page, you will learn how to configure a digital signature for PDF documents
You need a user certificate to sign documents electronically. You can request a user certificate in the RA-Portal and then import the certificate into the Windows certificate store.
Please note:
Group certificates or the digital ID of group certificates, such as those issued for functional e-mail inboxes, cannot be used for electronic signatures because they are not typically associated with a single person, which is a requirement for electronic signatures.
Please follow the steps below to set up a digital signature:
- Security settings in the Adobe Acrobat Reader
- Configure timestamp
- Configure trusted certificates
- Configure digital signature
1. Security settings in the Adobe Acrobat Reader
Step 1
Launch Acrobat Reader an choose Menu > Preferences.
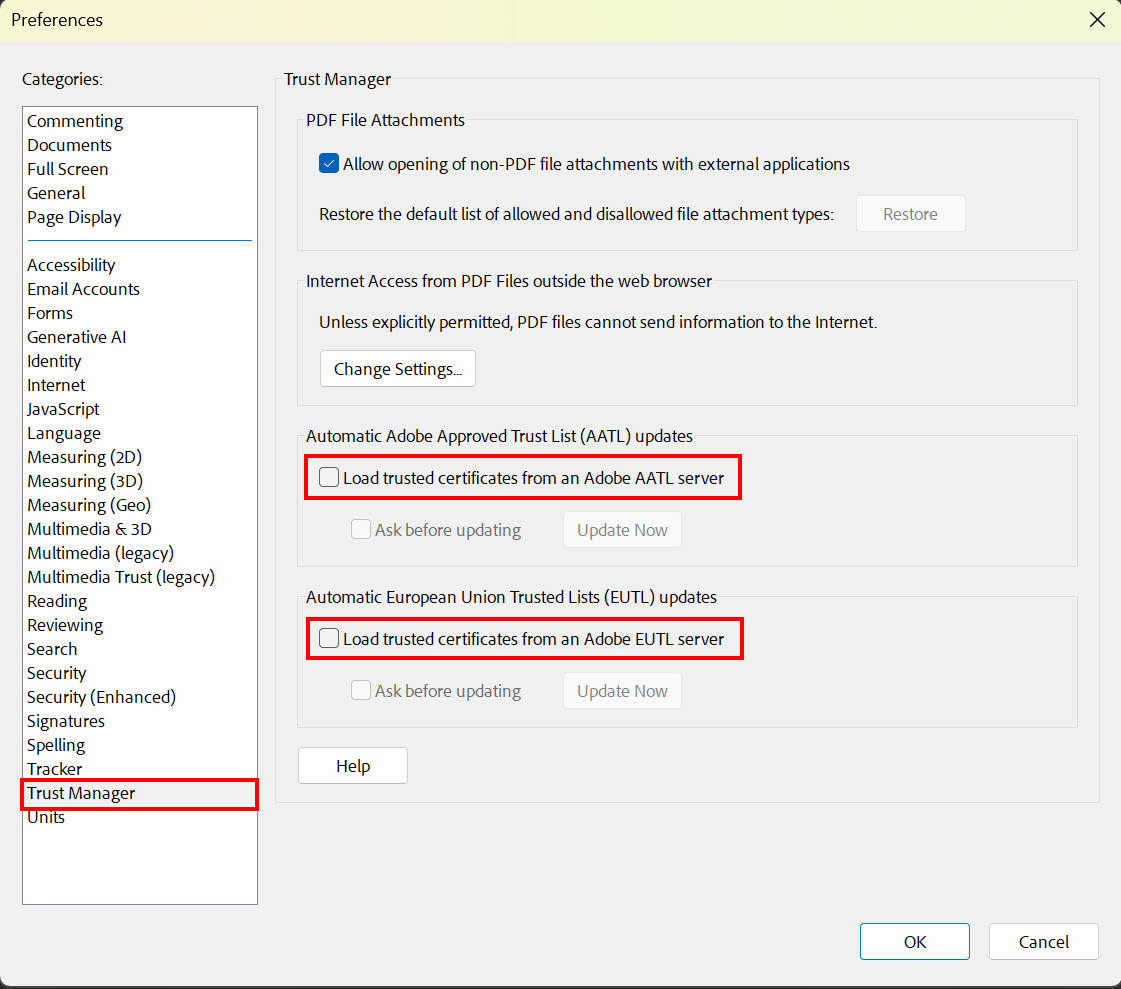
Step 2
Choose Trust Manager and uncheck the boxes for Automatic Adobe Approved Trustlist (AATL) updates and Automatic European Union Trust Lists (EUTL) updates.
Step 3
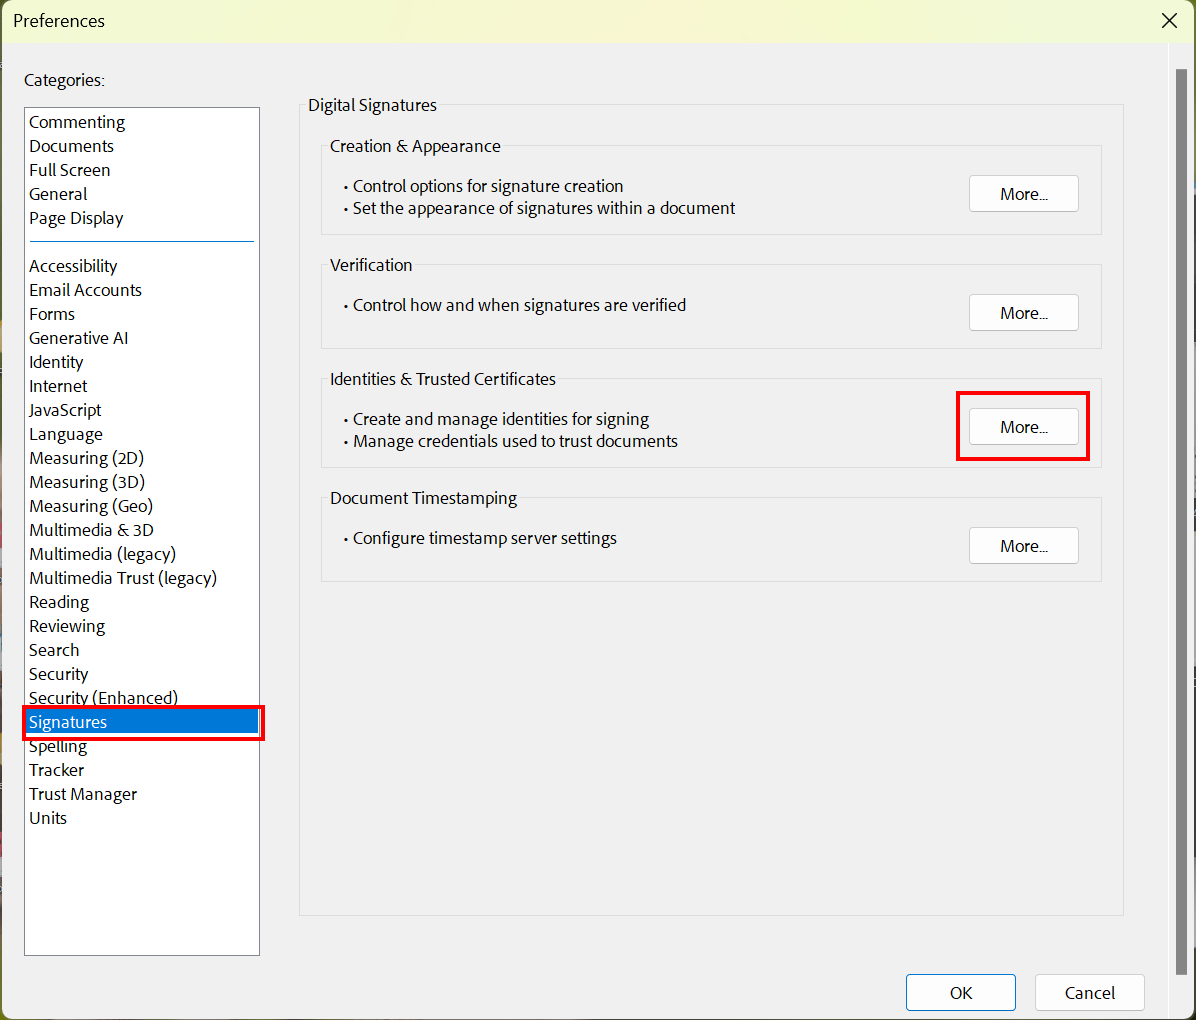
Choose Signatures and click More in the Identities & Trusted Certificates field.
Step 4
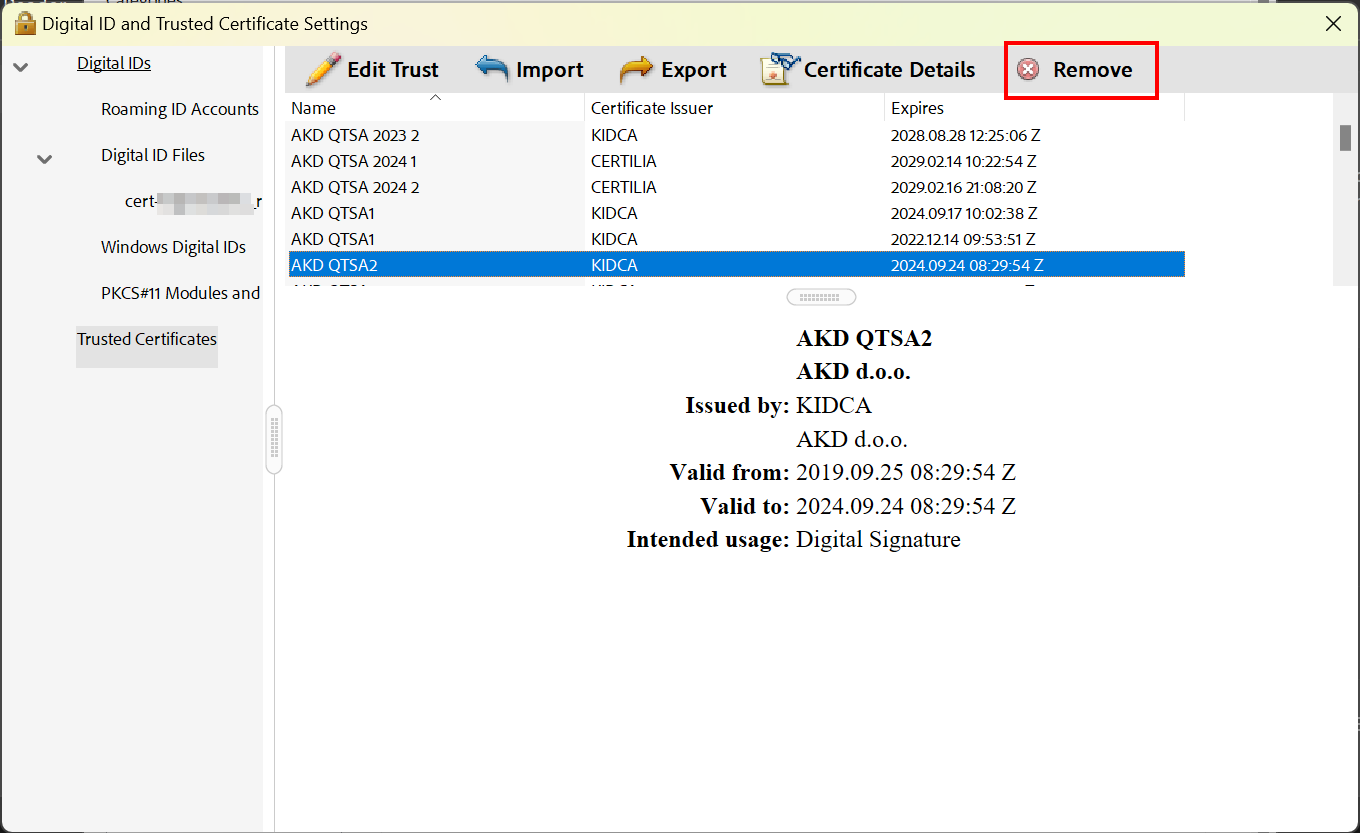
Go to Trusted Certificates, select all listed certificates and click Remove to delete them. You can close the Trusted Certificates Settings now.
- Please note that the Adobe Root CA G2-Certificate (and sometimes also the Adobe Root CA) cannot be deleted or can be deleted but will appear automatically the next time you open Adobe Acrobat.
2. Configure timestamp
The DFN provides a verifiable and trusted timestamp that can be attached to the electronic signature. The timestamp is independent of the individual time configuration of your device. Since this time configuration can be manipulated, RWTH Aachen uses the DFN timestamp server.
To configute the timestamp, proceed as follows.
Step 1
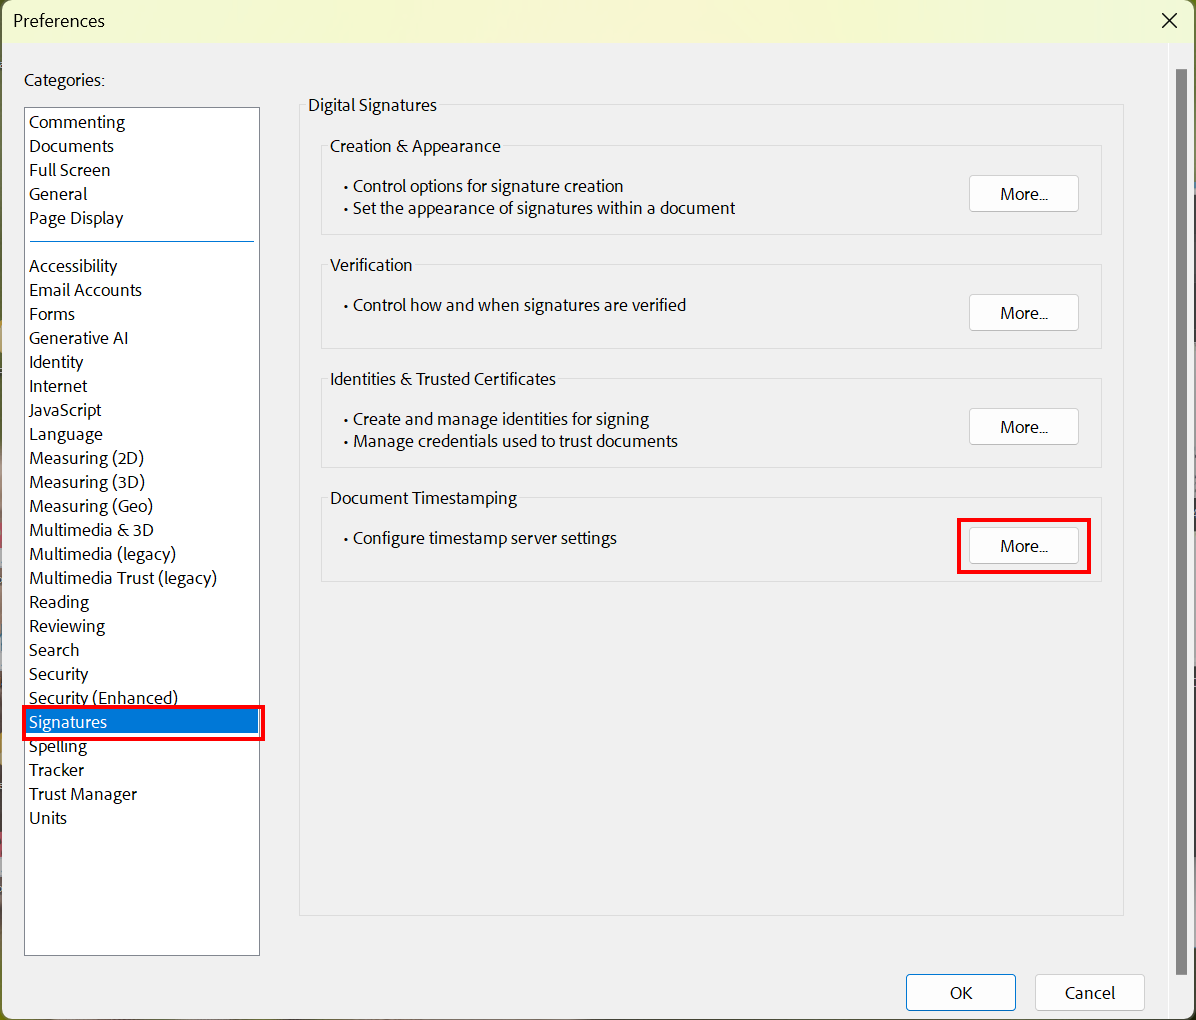
Go to Preferences > Signatures and click More in the Document Timestamping field.
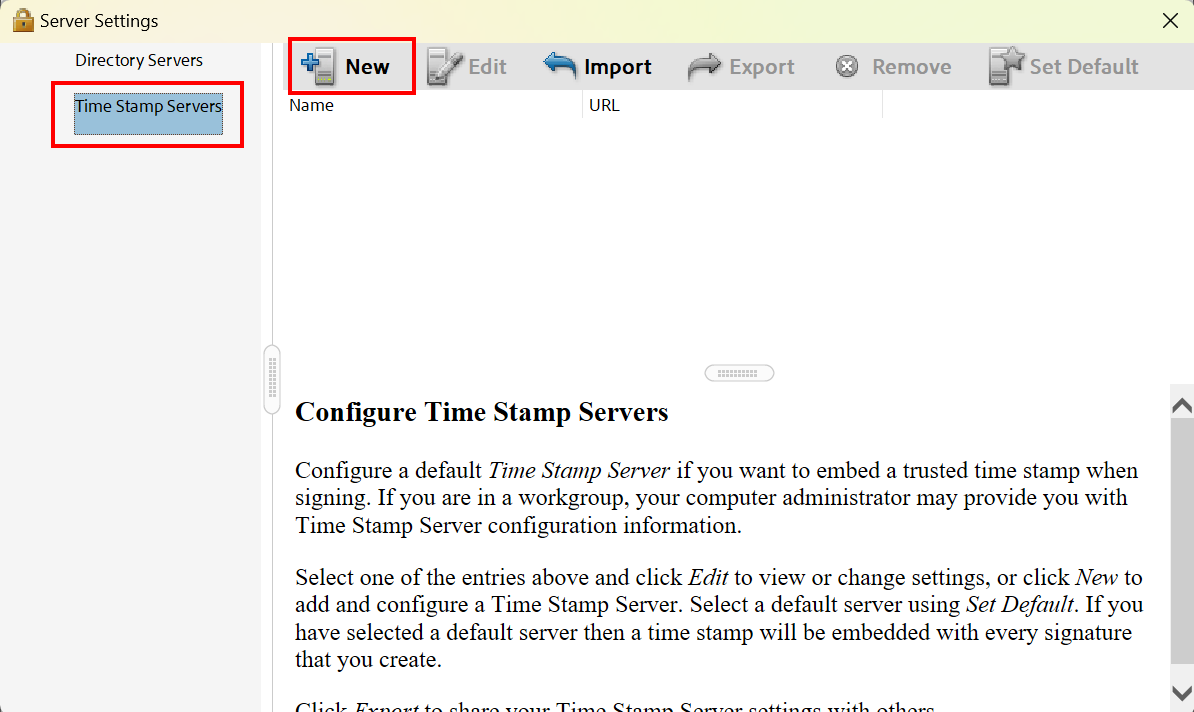
Step 2
Choose Time Stamp Servers and click the button New.
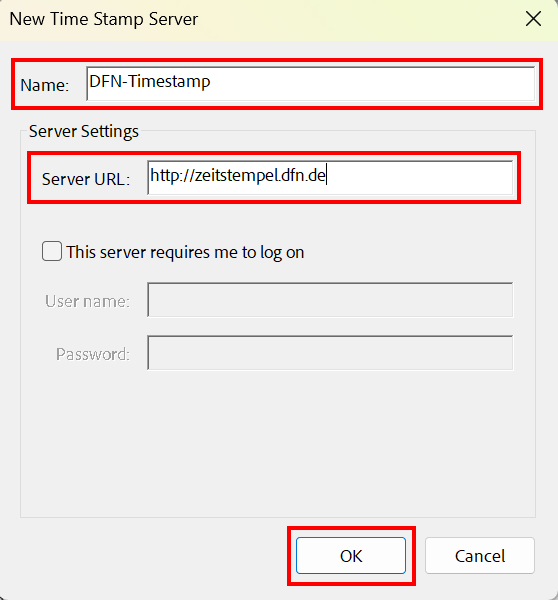
Step 3
Enter the following configuration settings:
- Name: DFN-Timestamp
- Server-URL: http://zeitstempel.dfn.de
Click OK to confirm the settings.
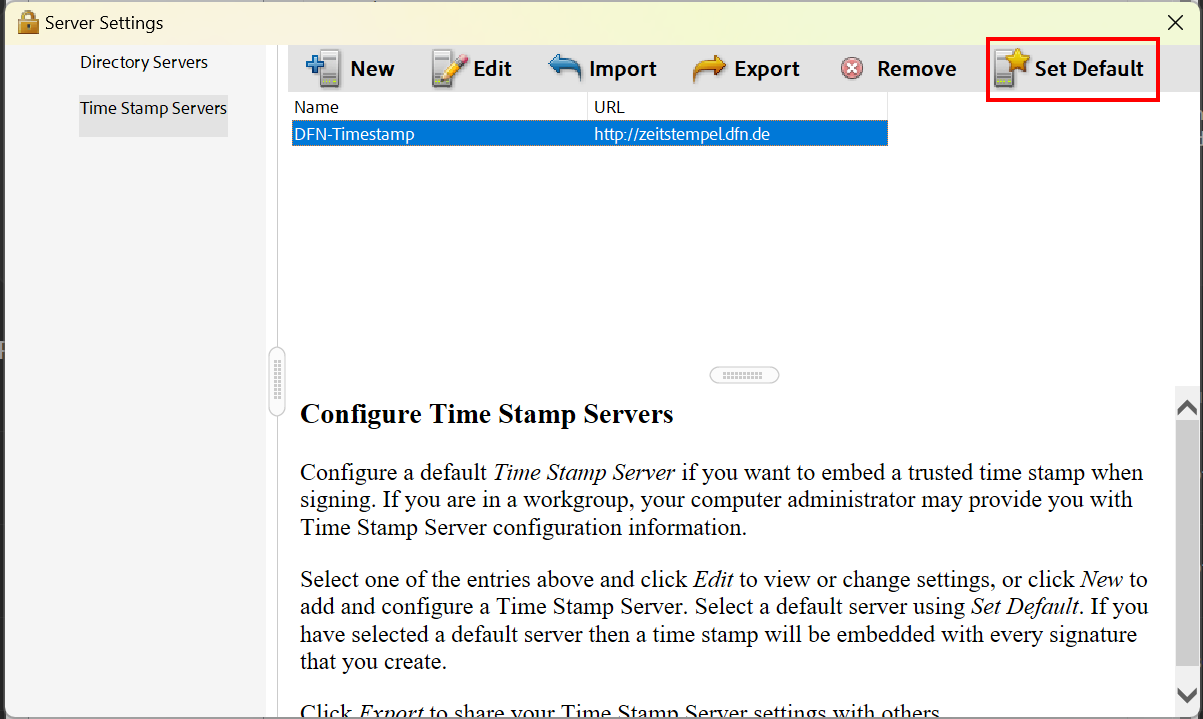
Step 4
Select the DFN-Timestamp in the table and click Set Default.
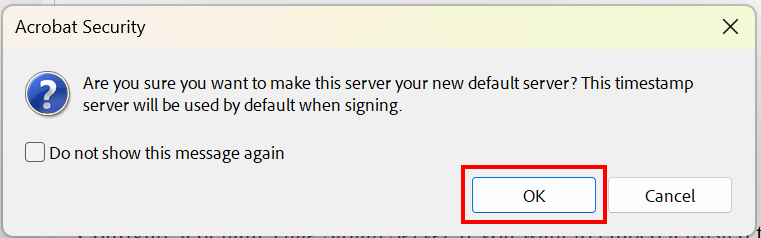
Click OK to confirm your choice.
For more information on the DFN Timestamp service, visit the DFN website.
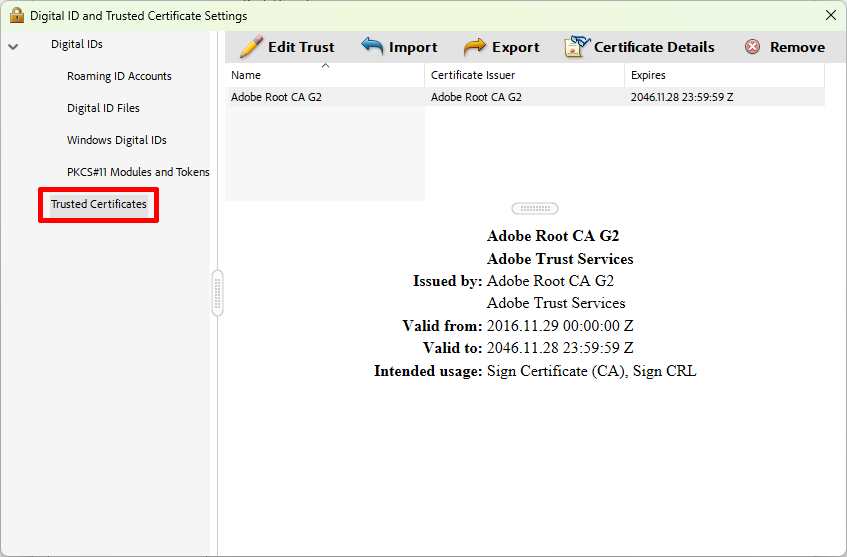
3. Configure Trusted Certificates
In the default settings of Adobe Acrobat DC, the certificate chain or the root certificate of the user certificates used at RWTH is not included.
To verify and import the required root certificates, follow these steps.
Step 1
Under Settings > Signatures click More in the Identities and Trusted Certificates section.
Step 2
Select Trusted Certificates in the left‑hand menu.
Step 3
To validate an advanced electronic signature you need three root certificates (as of April 2025):
- The root certificate T‑TeleSec GlobalRoot Class 2 (rootcert_telesec.crt) of the DFN‑PKI Global certificate chain.
- The root certificate AAA Certificate Services (root_cert_comodo.cer) of the Sectigo user‑certificate chain.
- The root certificate HARICA Client RSA Root CA 2021 (HARICA-Client-Root-2021-RSA.cer) of the HARICA user‑certificate chain.
Please download all three root certificates from the URLs above to your hard drive and click Import:
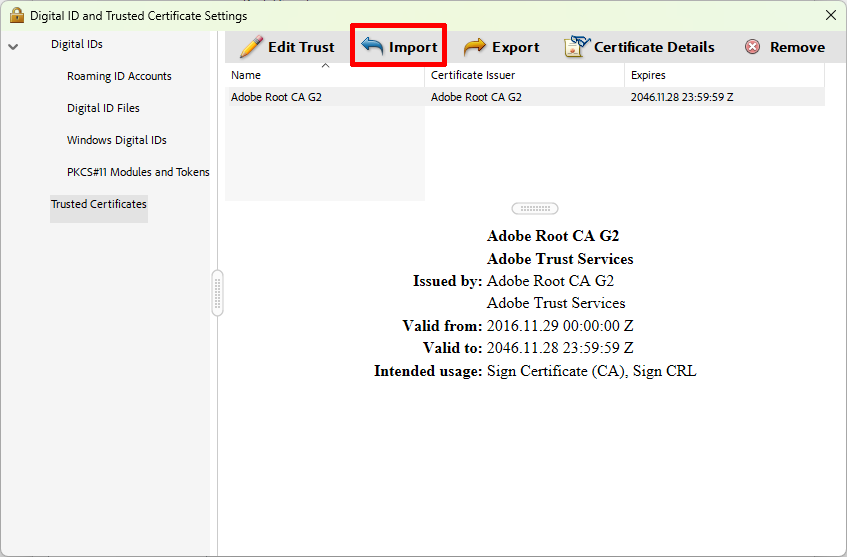
Step 4
In the Select contacts to import window click Browse.
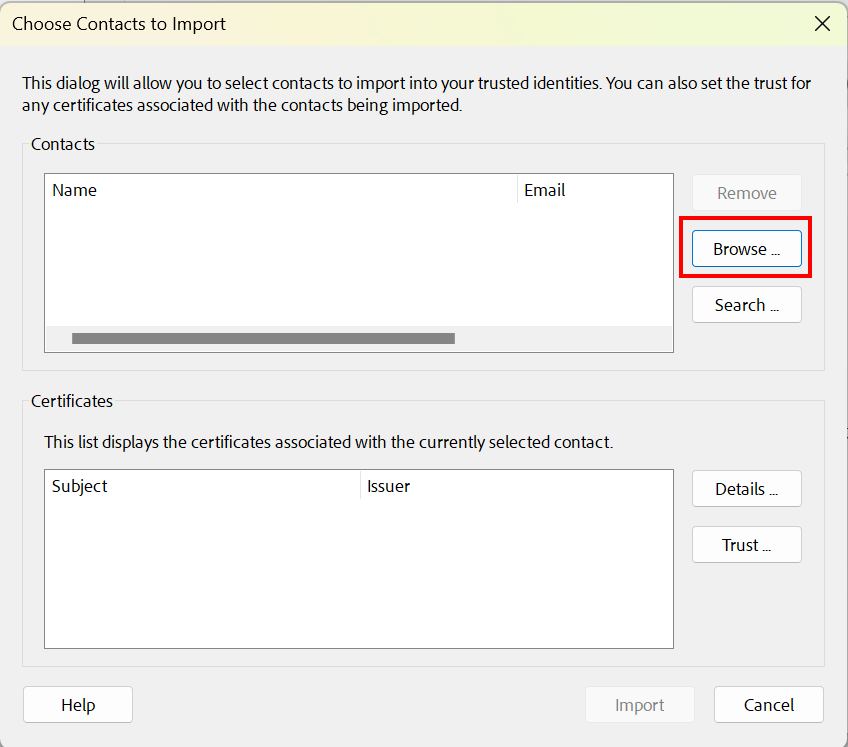
Step 5
Choose the file containing the previously saved root certificate (e.g., the T‑TeleSec GlobalRoot Class 2) and click Open.
If *.crt files are not shown, you can use one of the following workarounds:
- In Adobe’s file‑open dialog, type *.crt into the file‑name field and press Enter. Adobe will then display this file type.
- Rename rootcert_telesec.crt to rootcert_telesec.p7b via Windows Explorer.
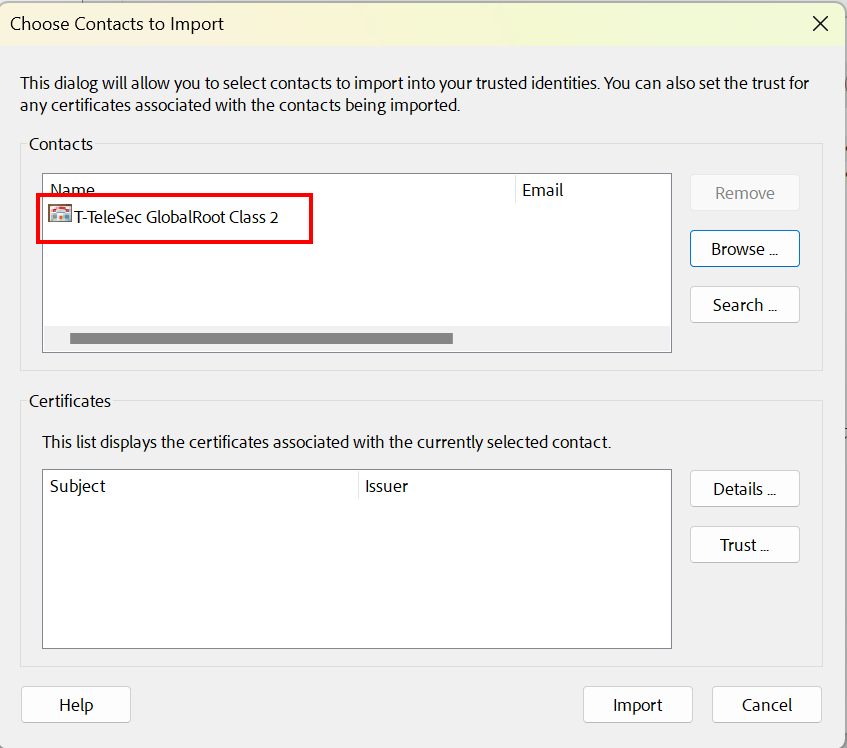
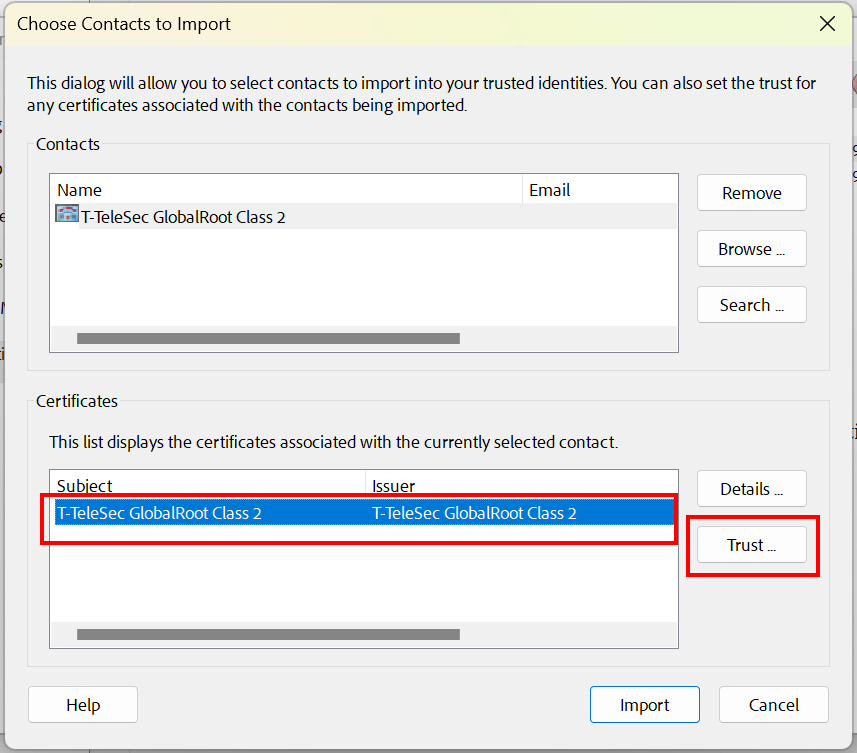
Step 6
The selected certificate appears in the Contacts field (see screenshot for T‑TeleSec GlobalRoot Class 2). Click the certificate’s name.
Step 7
The certificate is now also shown in the Certificates section. Click the certificate’s name in the Certificates area and then click the Trust button.
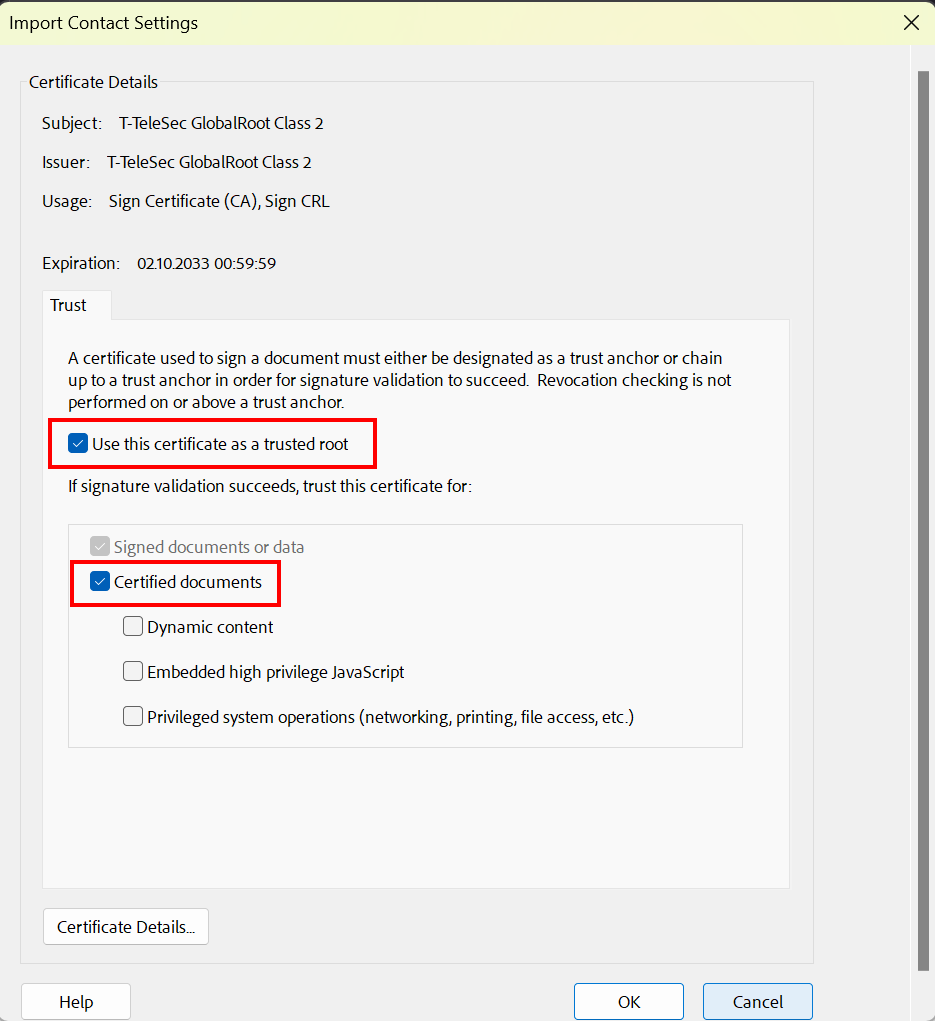
Step 8
In the Import contact settings window tick the options Use this certificate as a trusted root and Certified documents, then confirm with OK.
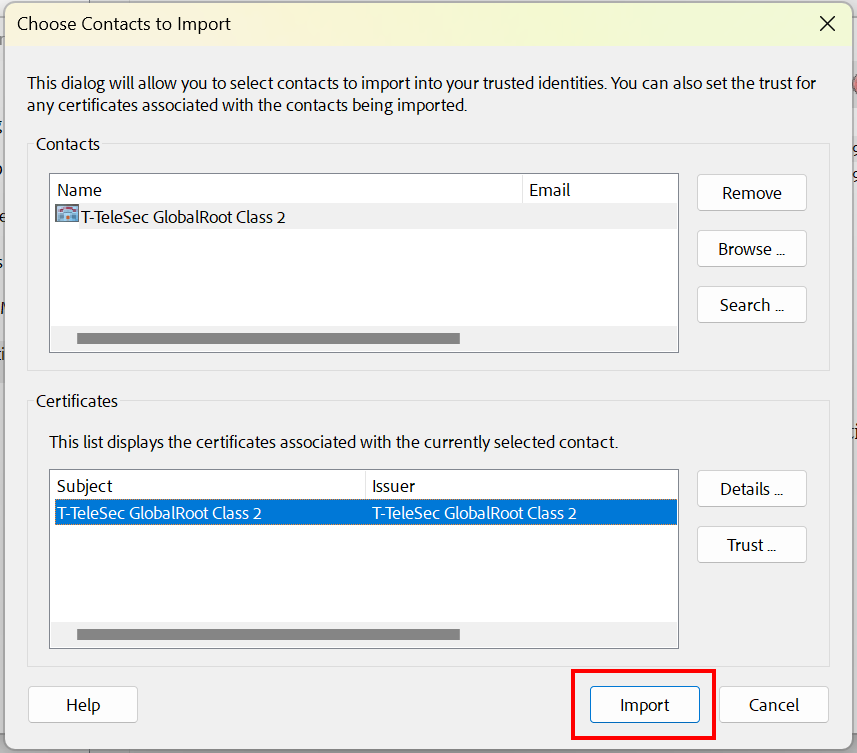
Step 9
Click Import and confirm the import with OK.
Step 10
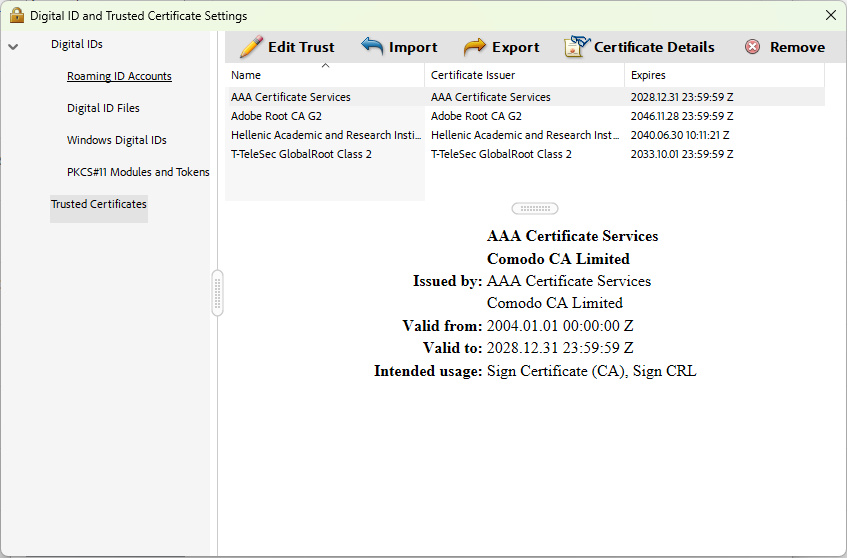
Repeat the procedure for the remaining root certificates.
All three root certificates (plus Adobe Root CA G2) should now be displayed.
4. Configure Digital Signature
When configuring your digital signature, you decide which digital ID to use for signing. Adobe allows you to use certificates from the certificate store (Own Certificates).
Step 1
Under Settings > Signatures click More in the Identities and Trusted Certificates section:
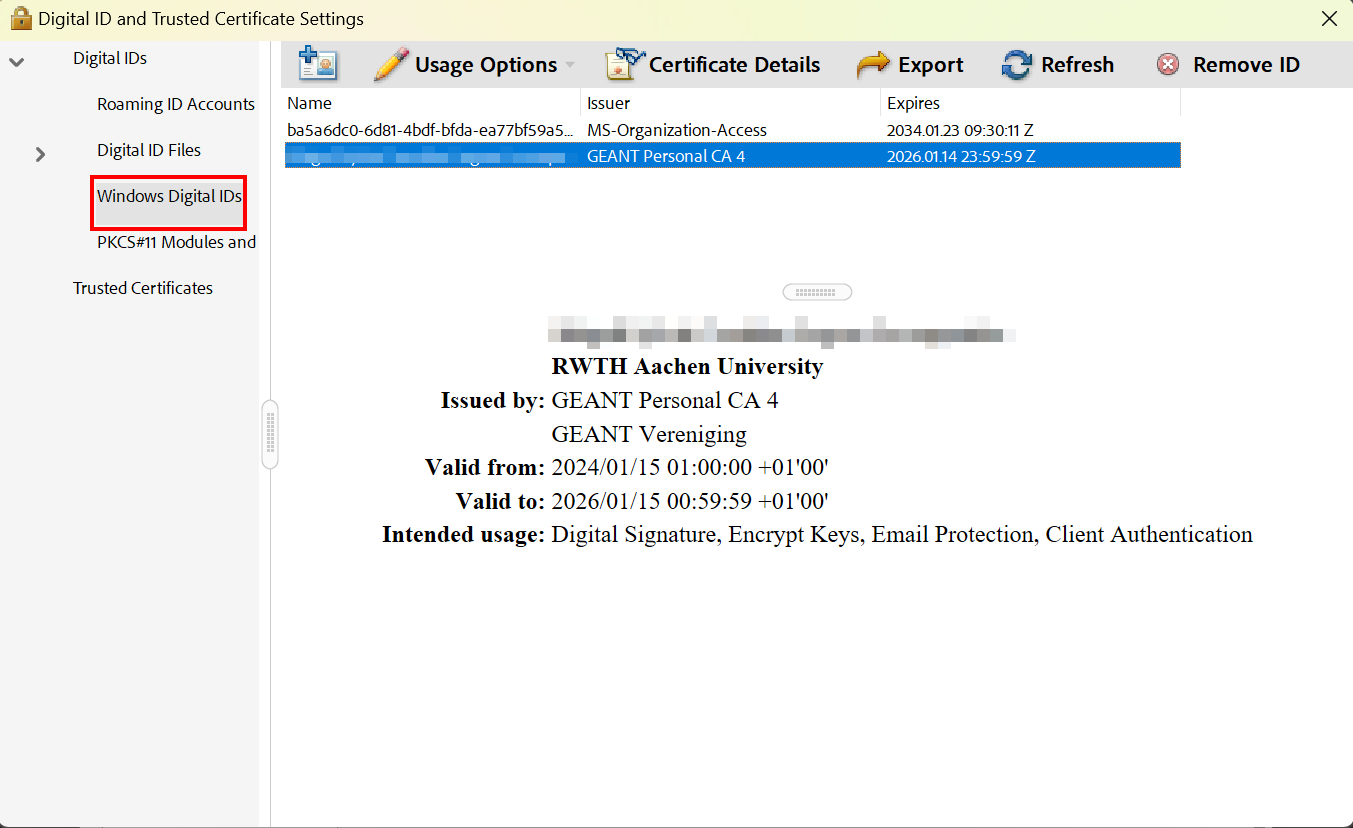
Step 2
In the Digital IDs menu all certificates are listed. You can also switch to Digital IDs from Windows to show only certificates that reside in the Windows certificate store.
Select the certificate you want to use for digital signing.
- If no digital ID appears in this list, you either do not yet have a personal user certificate or you have not imported it into the certificate store.
- If you have several valid digital IDs (e.g., because you sign e‑mails for different addresses), select the one you want to use by default. Choose the ID that is linked to your name and personal e‑mail address.
- Note that digital IDs belonging to group certificates (used for functional e‑mail addresses) cannot be selected here. Group certificates are identified by the prefix GRP.
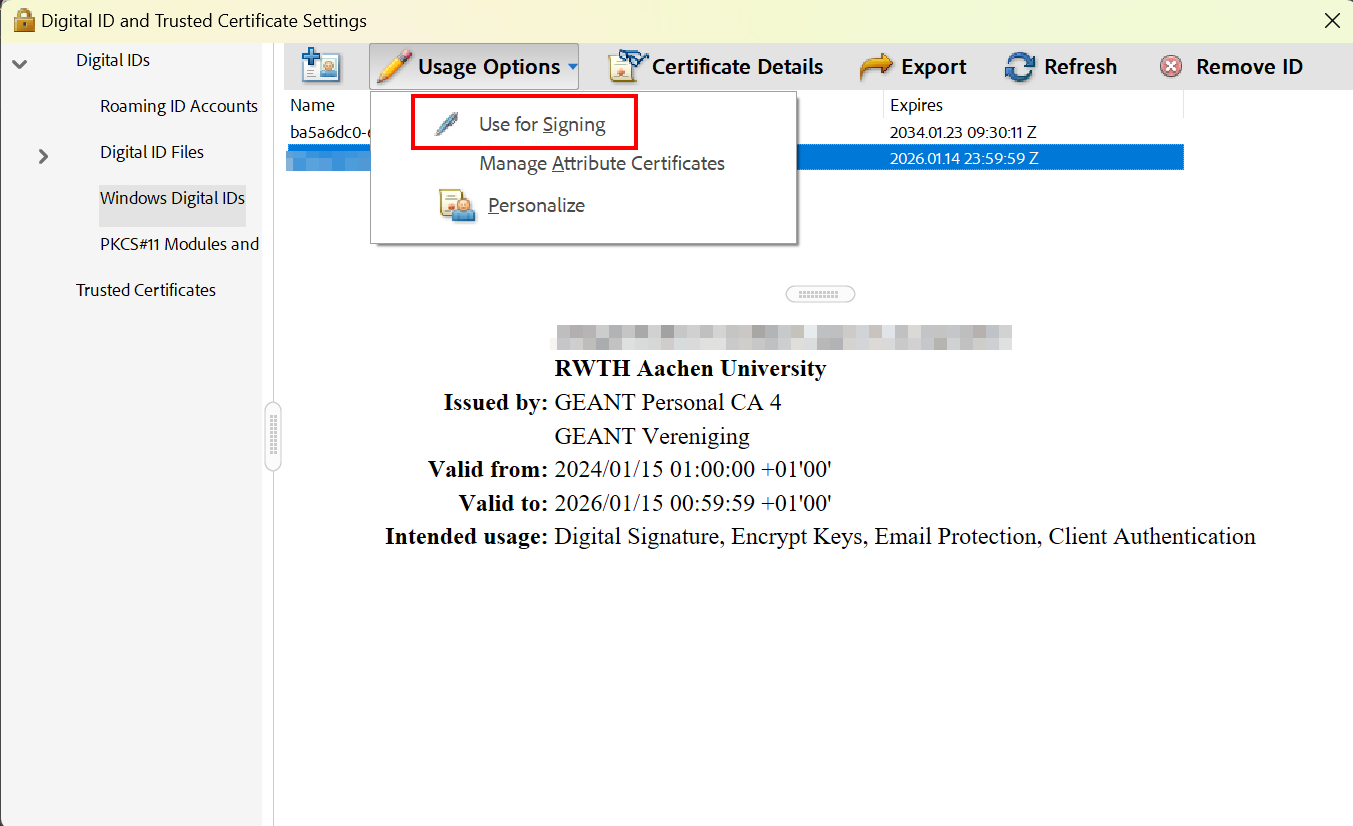
Step 3
Click the pencil icon and choose Use for signing.
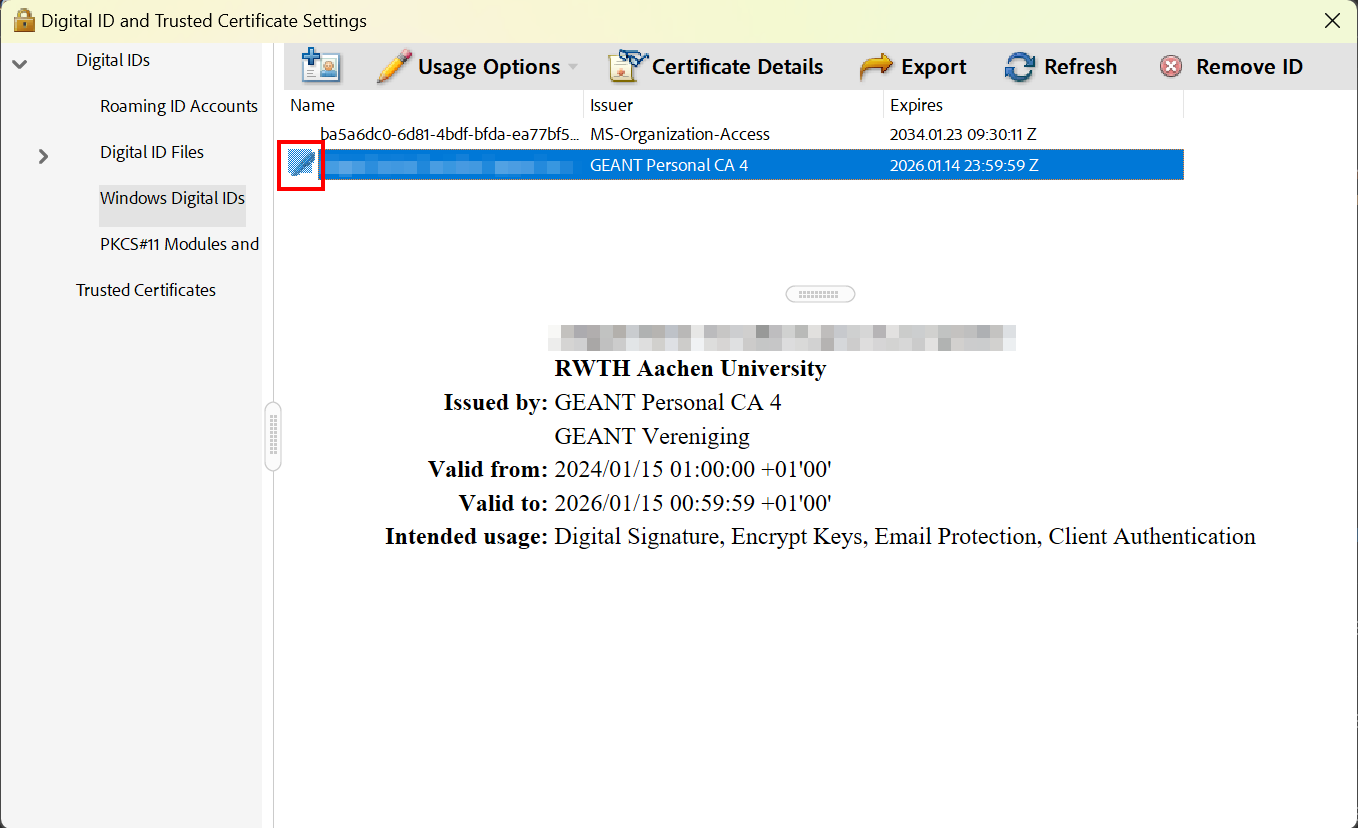
The chosen certificate is now marked with a pencil in the list. You may close the window.
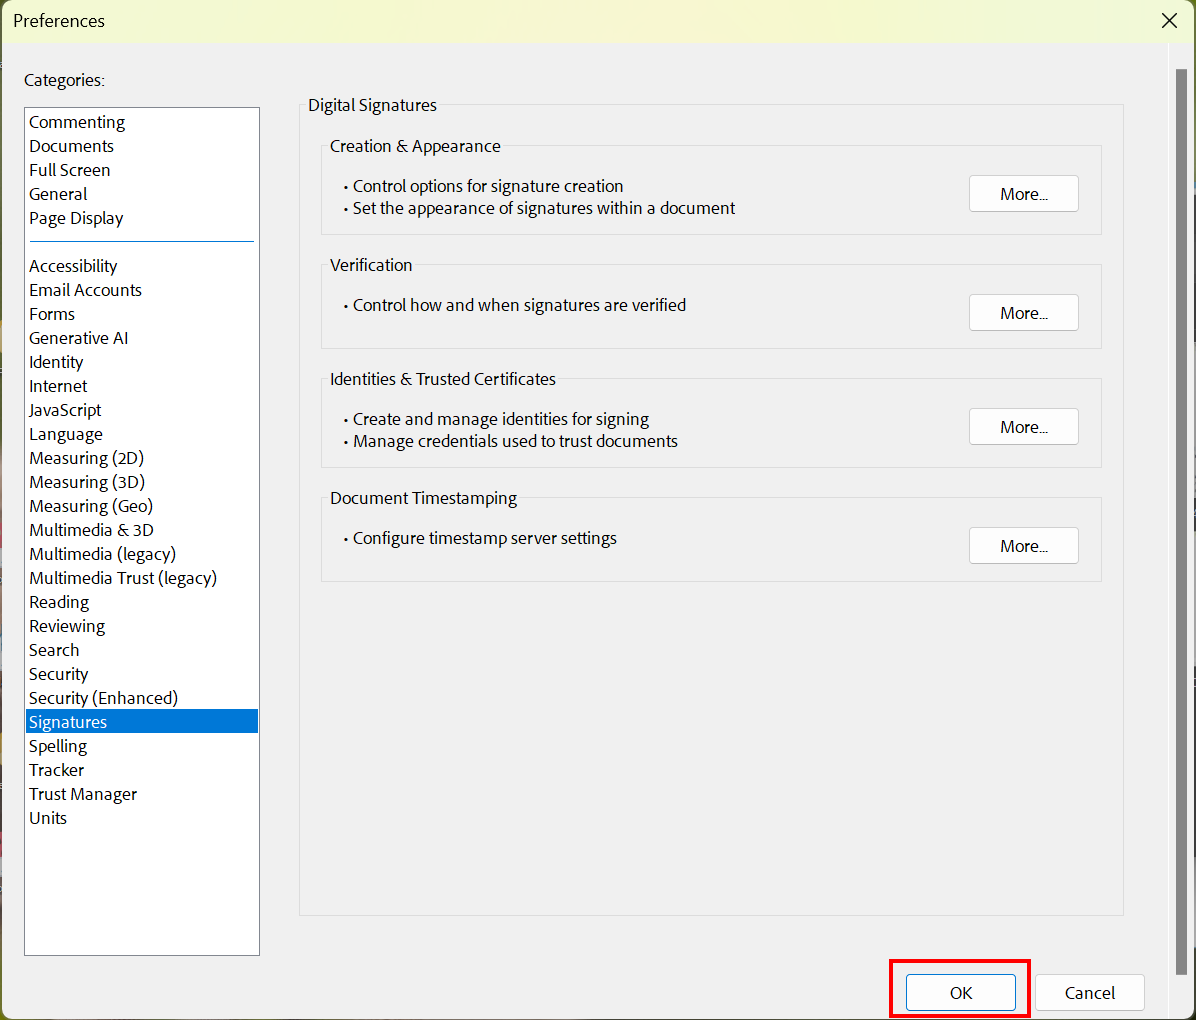
Step 4
Click OK to finish the configuration.
You can now digitally sign PDF documents using Adobe Acrobat.
