Security Settings

If this is the first time you are signing a document electronically or verifying an electronic signature, you will need to check the security settings for your Acrobat Reader DC first.
Launch Acrobat Reader DC without opening a document.
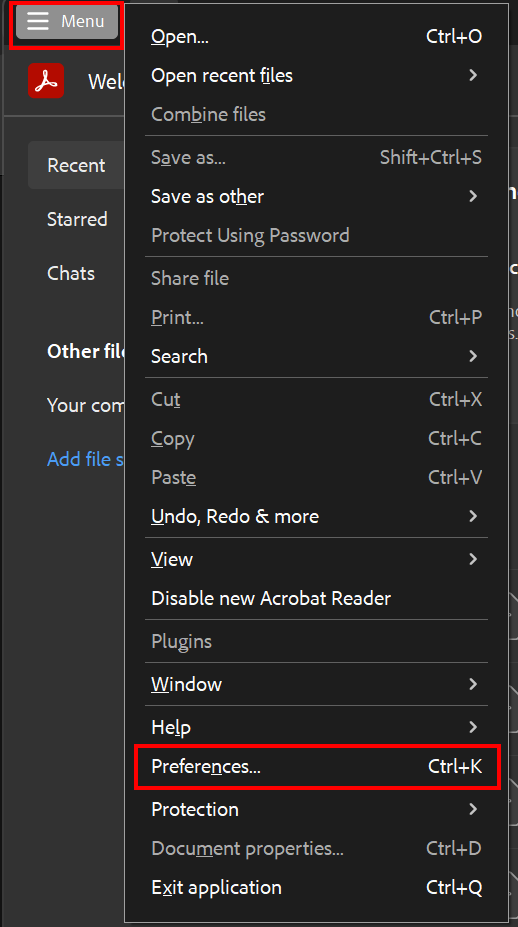
Open Preferences by clicking Menu, and then clicking Preferences.
Trusted Services
Please note
Make sure that you configured a root certificate that you fully trust.
Deselect automatic updates of the certificate list
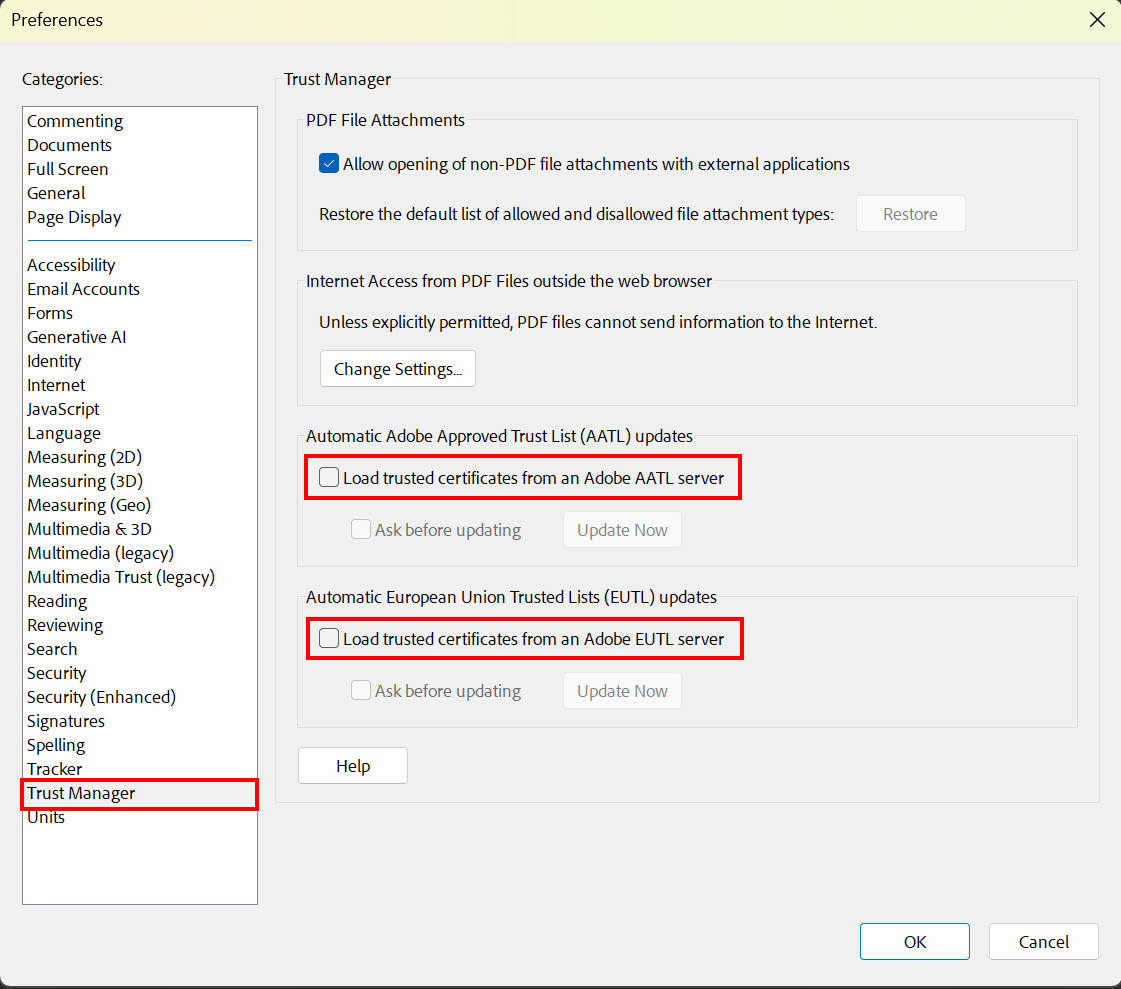
Under "Categories", select Trust Manager.
Uncheck the box under "Automatic Adobe Approved Trustlist (AATL) updates" and "Automatic European Union Trust Lists (EUTL) updates".
Delete pre-installed root certificates
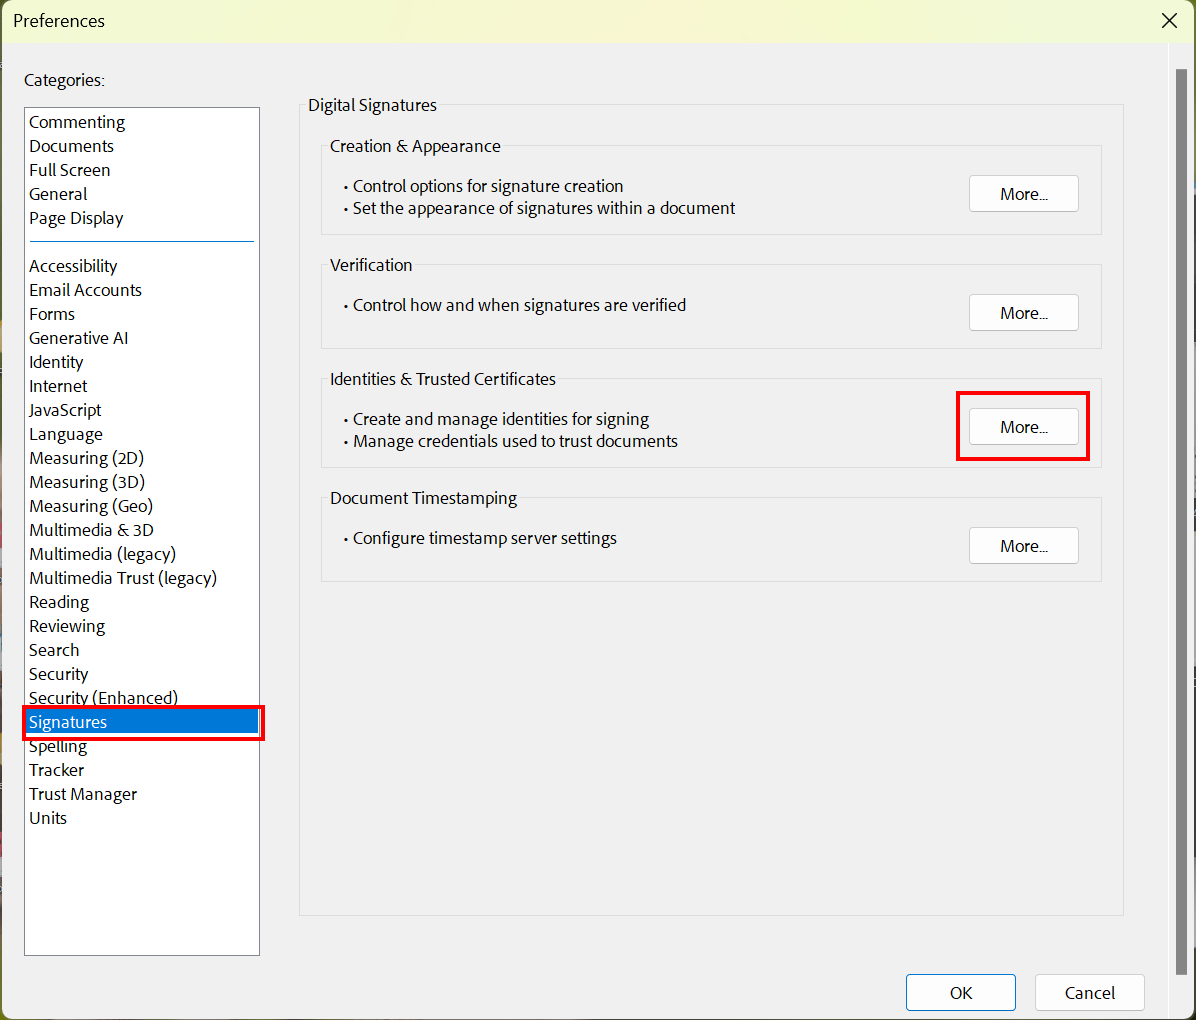
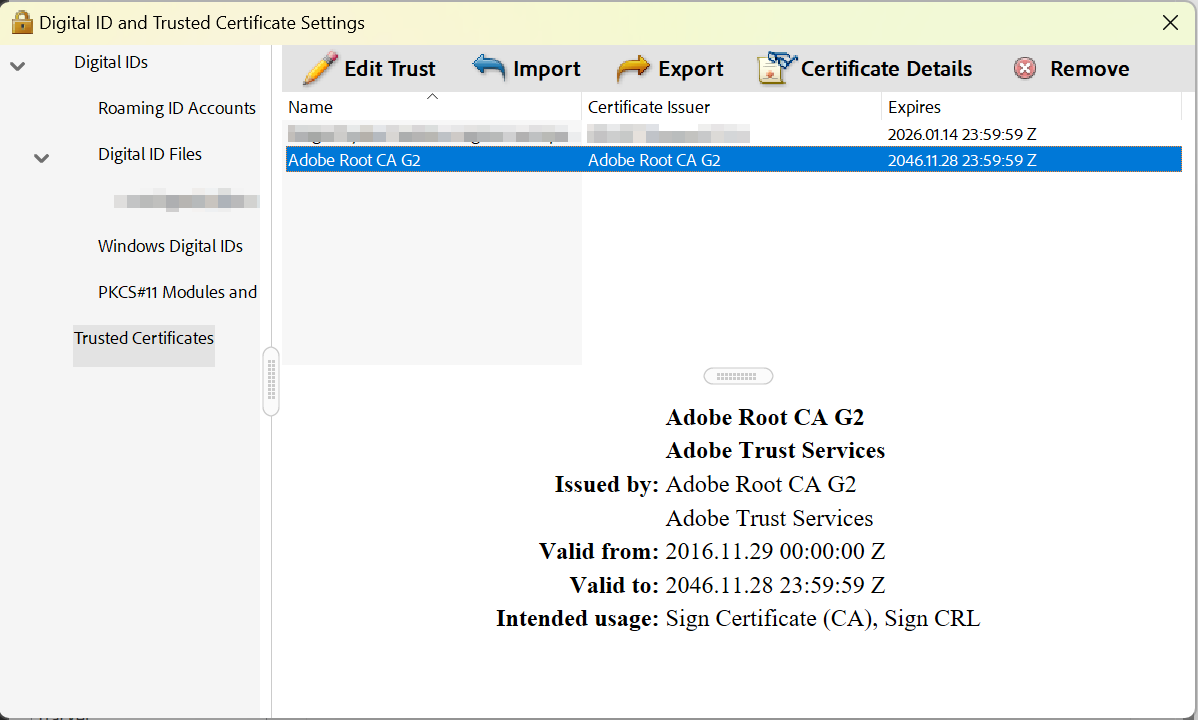
To delete the root certificates preinstalled by Adobe, click Signatures under "Categories".
Under "Identities & Trusted Certificates", click More.
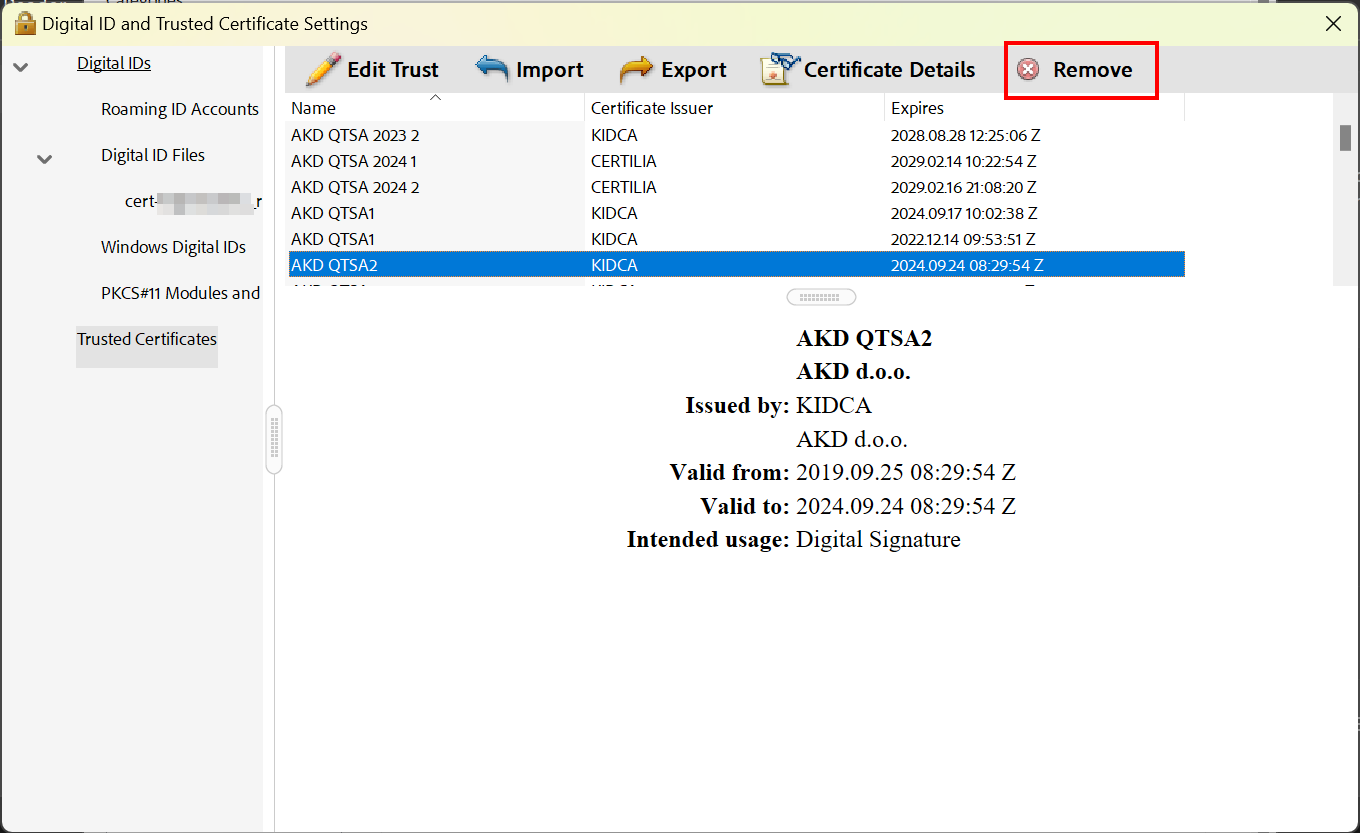
Click Trusted Certificates.
The Adobe Trustlist (AATL) and the European Union Trust Lists (EUTL) provide a long list of trusted certificates.
Select all certificates and click Delete.
Adobe Root CA G2-Certificate cannot be deleted
Please note that the Adobe Root CA G2-Certificate (and sometimes also the Adobe Root CA) cannot be deleted or can be deleted but will appear automatically the next time you open Adobe Acrobat.
Close the Trusted Certificates Settings.
Configure Timestamp
The DFN provides a verifiable and trusted timestamp that can be attached to the electronic signature. The timestamp is independent of the individual time configuration of your device. Since this time configuration can be manipulated, RWTH Aachen uses the DFN timestamp server.
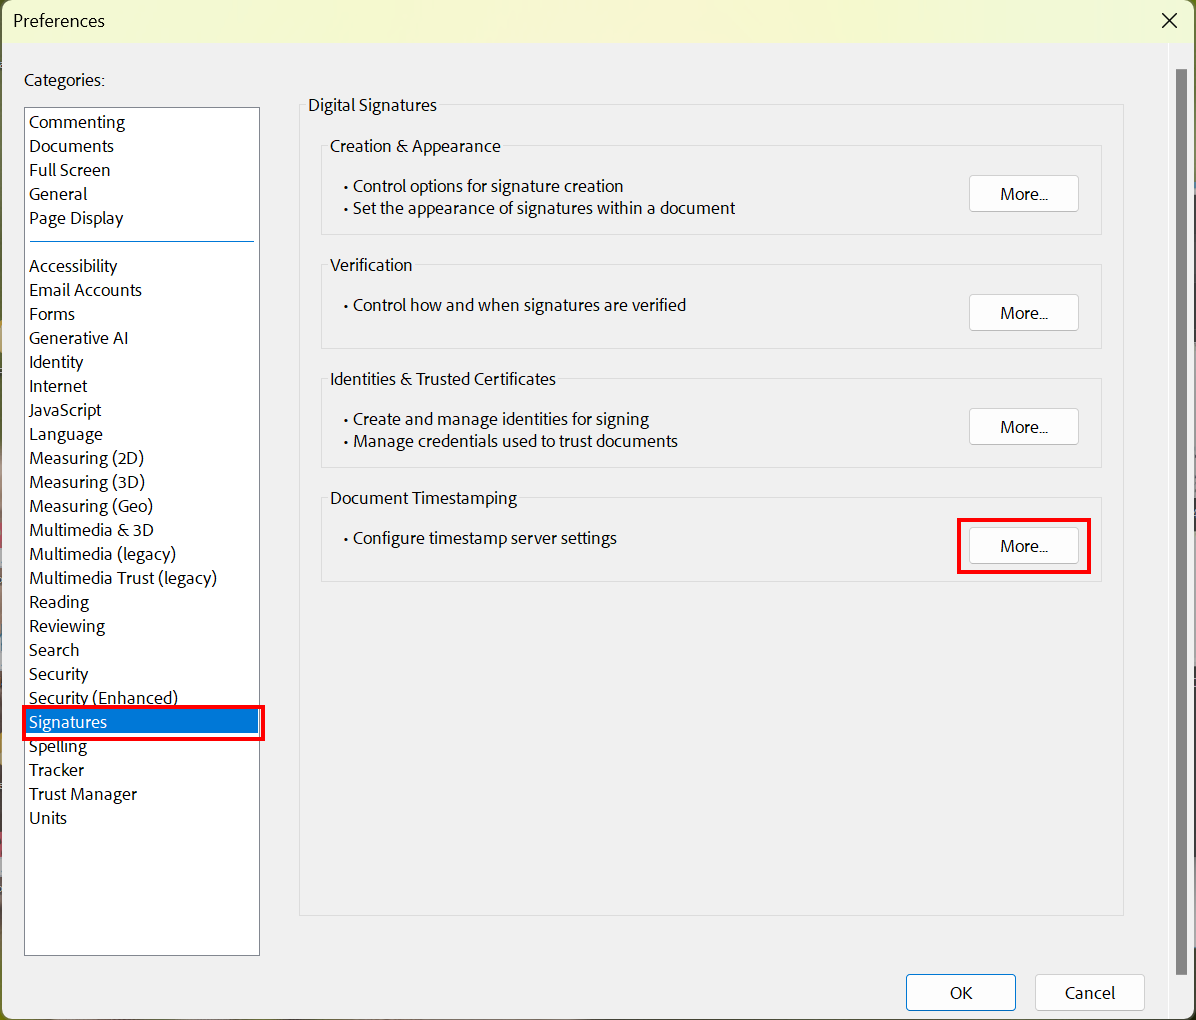
Open the Timestamp Settings
Click Signatures.
Under "Document Timestamping" click More.
Time server Settings
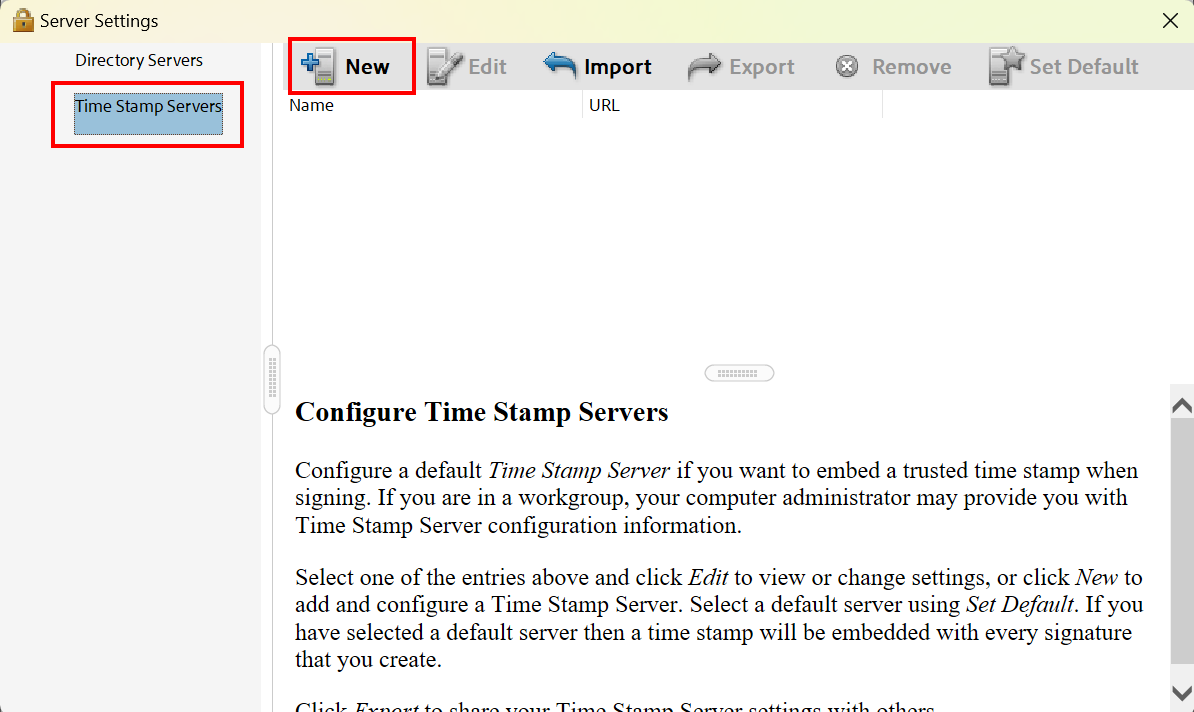
The dialogue box "Server Settings" opens.
Click the button New (+) in the Top-Navigation
Configure the time server
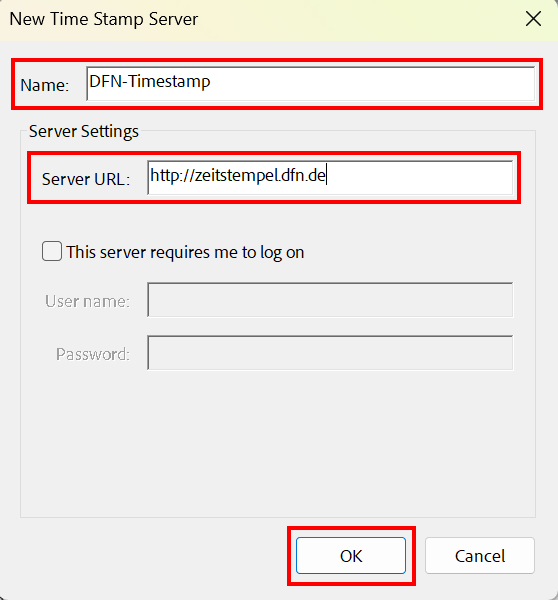
The dialogue box "New Time stamp Server". Enter the following configuration settings:
- Name = DFN-Timestamp
- Server-URL = http://zeitstempel.dfn.de
Click OK to close the dialogue box.
Set the DFN Timestamp as the default
Select the DFN Timestamp in the table and click on Set Default.
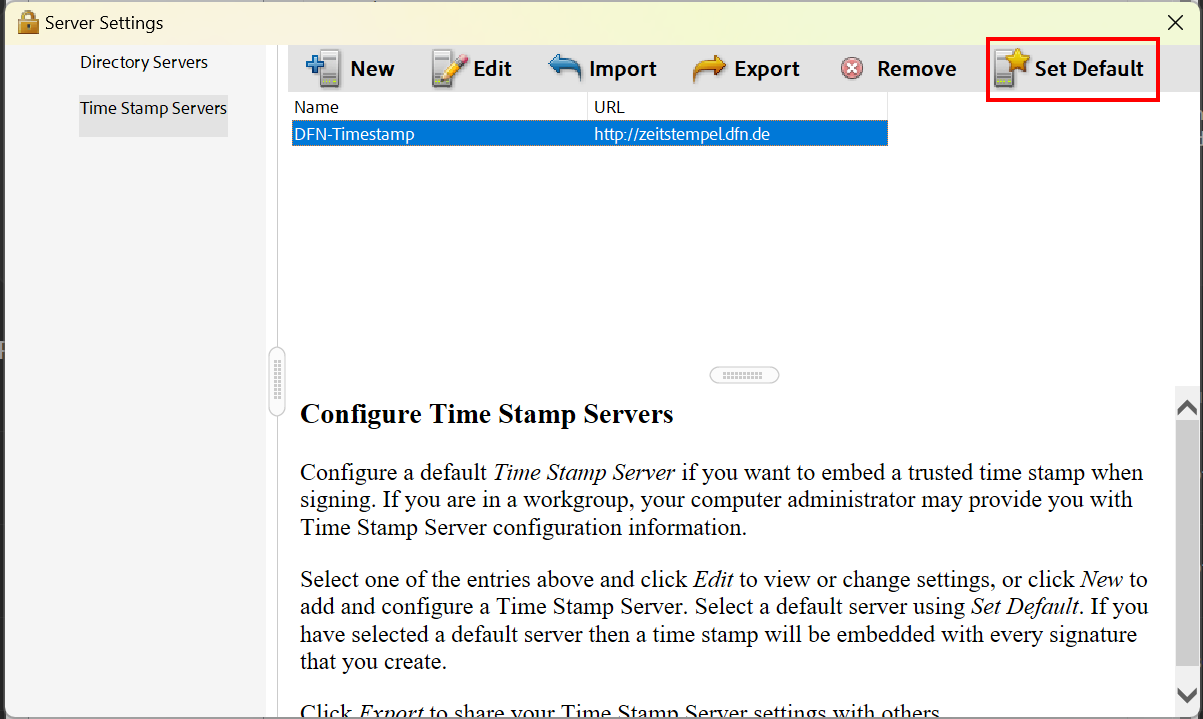
Click OK to confirm your choice.

Additional Information
For more information on the DFN Timestamp service, visit the DFN website.

