Configure Outlook (to sign automatically)

Please note:
Before you can start configuring Outlook, you must import your personal (S/MIME or X.509) user certificate into the Windows certificate store.
If you do not own a certificate, you can apply for one via the RA-Portal. For more information please visit User certificates RA-Portal.
It may be the case that you have to send a digitally signed e-mail from the mailbox with an integrated certificate before it is displayed as an e-mail “Signature” by default.
This page describes how to integrate certificates into Outlook and use them to send digitally signed and/or encrypted emails.
Digital signatures allow the recipient of an email to verify...
- the identity of a sender
- that an email has not been modified while being transmitted
Old certificates can also be replaced with new certificates.
- Configure Outlook to digitally sign outgoing e-mails
- Replace an old certificate (Optional)
- Send a digitally signed e-mail (optional)
1. Configure Outlook to digitally sign outgoing e-mails
These instructions were created using Outlook for Microsoft 365 MSO (Version 2310).
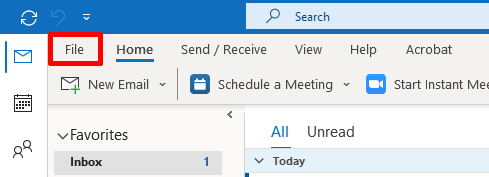
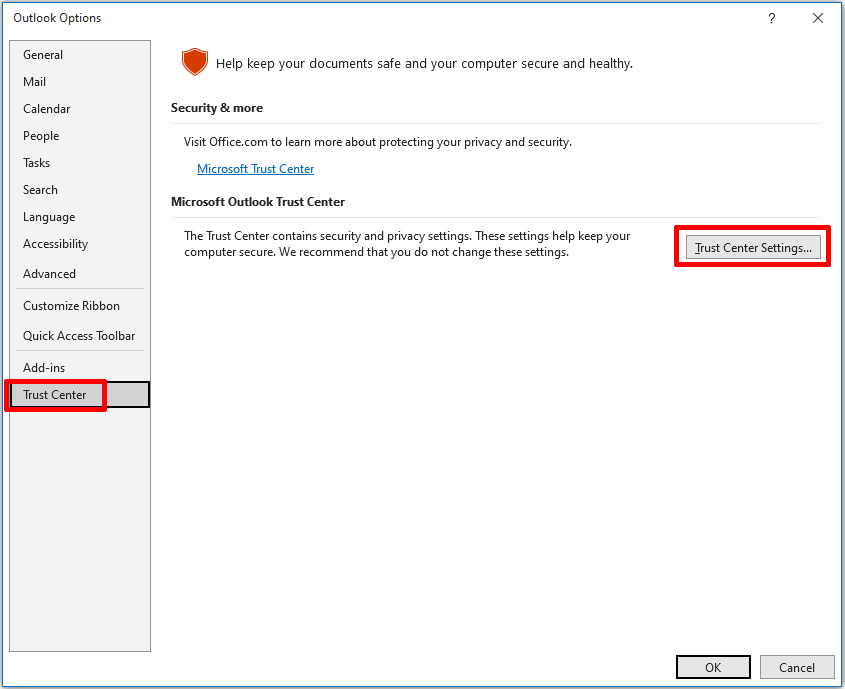
You can configure Outlook to automatically sign emails in the Trust Center. To open the Trust Center settings, click File → Options → Trust Center → Trust Center Settings.
User certificates for personal mailboxes or group certificates for functional mailboxes can be integrated according to these instructions.

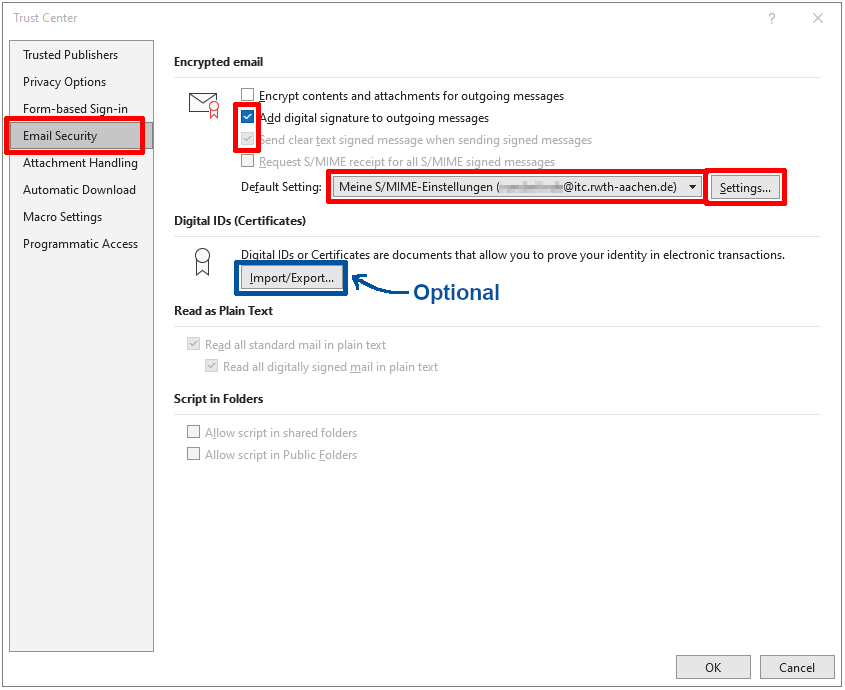
In the Trust Center, you can configure an automatic signature under the Email Security heading. With the settings shown below:
- Per default all outgoing e-mails will be digitally signed.
- Signed e-mails will be sent in plain text.
Click on Settings to continue.
Optional
If you have yet to import your certificate into Windows, you can do so with the Import/Export button. You must then search for your p12-File and enter the corresponding password.
2. Replace an old certificate (Optional)
You can replace an existing certificate by selecting Settings in the Email Security menu as shown in the step above.
If Outlook is already configured to use a certificate, you can replace it with a new certificate (e.g. if the old certificate is expiring).
The new certificate must have been imported into the Windows certificate store. In the case of certificates for functional e-mail addresses, we recommend adapting the display name of the certificate.
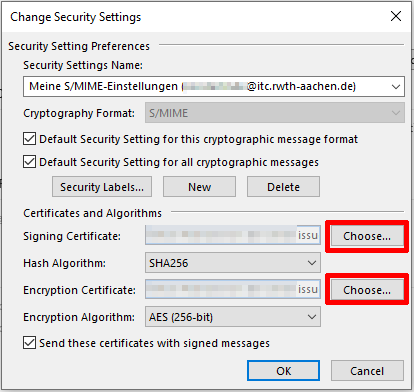
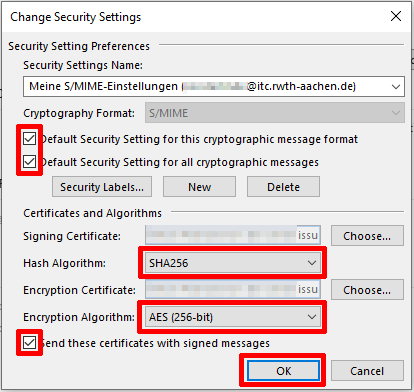
By selecting Choose you can respectively choose the new certificate as your signing certificate and encryption certificate.
- If you have multiple email addresses, you can use the New Button, to create new Security Settings for a different email address.
- You can then switch between the settings using the Security Settings Name drop-down menu.
Set the hash algorithm and encryption algorithm:
- Tick the two boxes under cryptography formats
- Select the hash algorithm SHA256
- Select the encryption algorithm AES (256-bit)
- Tick the box Send these certificates with signed messages
3. Send a digitally signed e-mail (optional)
If you have configured Outlook to sign automatically, the Sign option will be selected by default when sending an email.

You can verify the digital signature of a signed email by clicking on the signature icon.
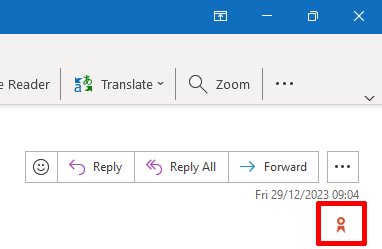
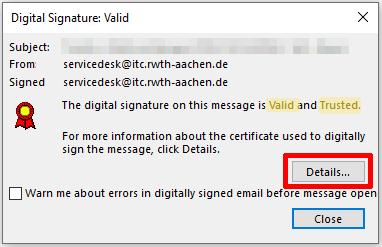
A valid signature means that the hash signature is correct, meaning that the content of the message was not modified in transmission.
A trusted signature means that the public RSA key of the sender was included in a user certificate issued by a certificate authority whose certificate chain is anchored in a root certificate included in Outlook's certificate store.
It does not necessarily prove the identity of the sender! You can view the identity of the sender by clicking on Details... .
Select the signer and click View Details.
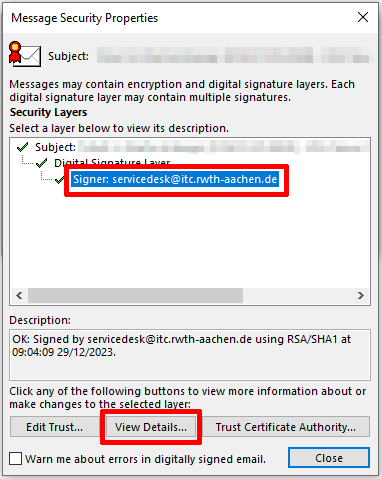
You can view the certificate in the General tab. Click View Certificate... to take a closer look at the certificate.
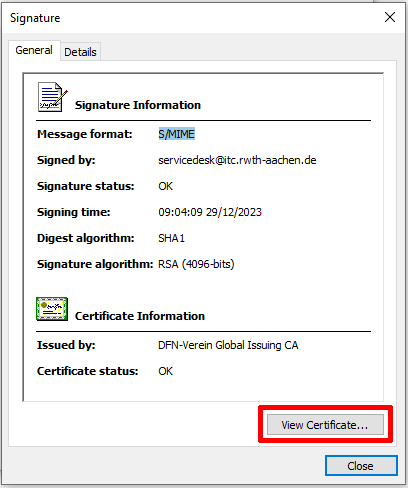
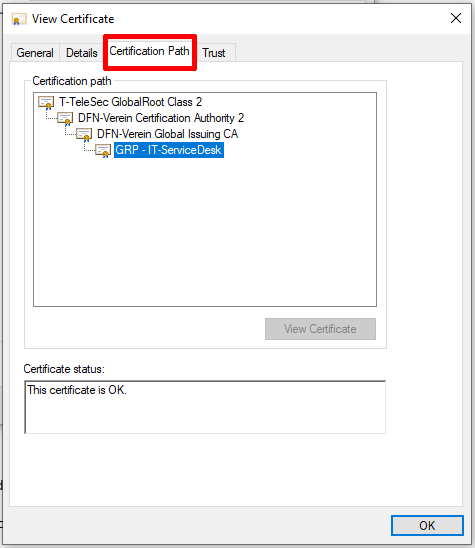
In the Certification Path tab, you can see the certificates in the certificate chain and the sender's certificate at the end of the chain.
- In this example, the sender is using a group certificate, denoted by the GRP-prefix. The field for their certificate displays the value for the Common Name in their certificate, this is the proof of identity part. This would usually be the sender's name.
It may be the case that you have to send an e-mail from the mailbox with an integrated certificate before it is displayed as a e-mail “Signature” by default.
Additional information:

