Spam folder settings

This article explains how you can configure the spam folder settings in Outlook or the RWTH MailApp.
In the spam folder settings in your mailbox, you can specify which content is automatically moved to the spam folder or deleted and which content should not be recognized as spam.
Most email clients allow you to create so-called blacklists and whitelists. In these lists you can explicitly block or allow certain content or senders.
If certain content and senders are on the whitelist, they are not moved to the spam folder.
So if certain emails mistakenly keep ending up in the spam folder, the problem can possibly be fixed by adding them to the whitelist.
With a blacklist, on the other hand, content that is overlooked by the spam filter is actively placed in the spam folder.
Outlook settings
Step 1
First log in to Outlook or open your mailbox.
Step 2
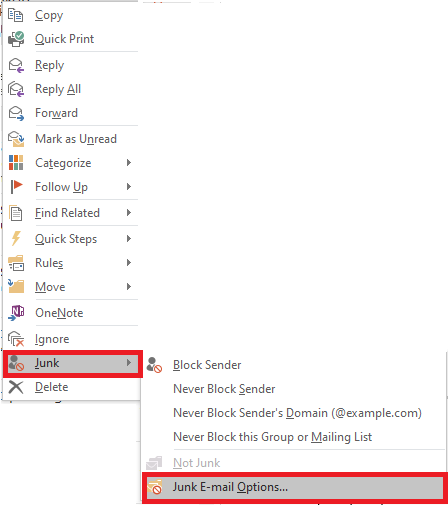
Right-click on an email in your inbox
Then select the menu item Junk > Junk e-mail options
Step 3
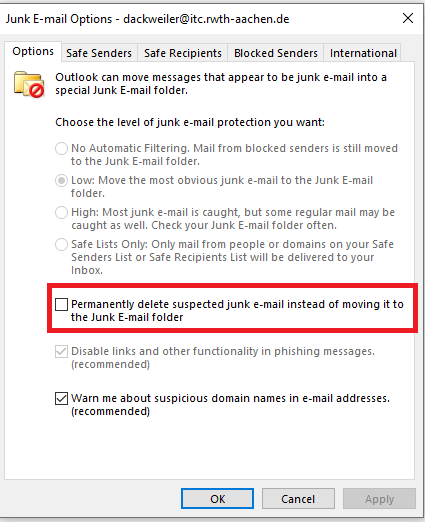
Remove the checkmark from Permanently delete suspected junk e-mail instead of moving it to the junk E-mail folder.
Step 4
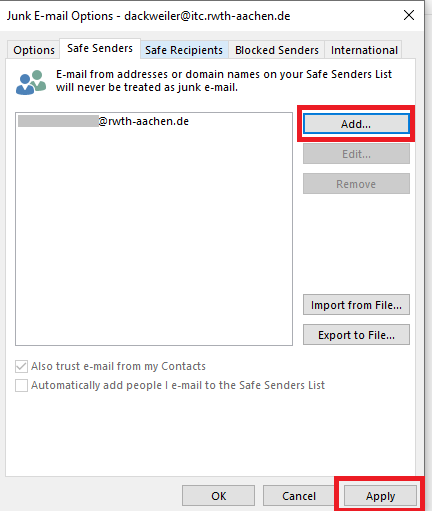
Under Safe senders click on Add... .
Step 5
Then enter an e-mail address and click on Apply.
RWTH MailApp Settings
Step 1
Log in to the RWTH MailApp. You can find separate instructions for logging in to the RWTH MailApp here.
Step 2
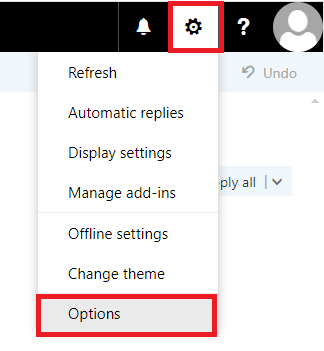
Click on the gear wheel symbol at the top right and choose Options.
Step 3
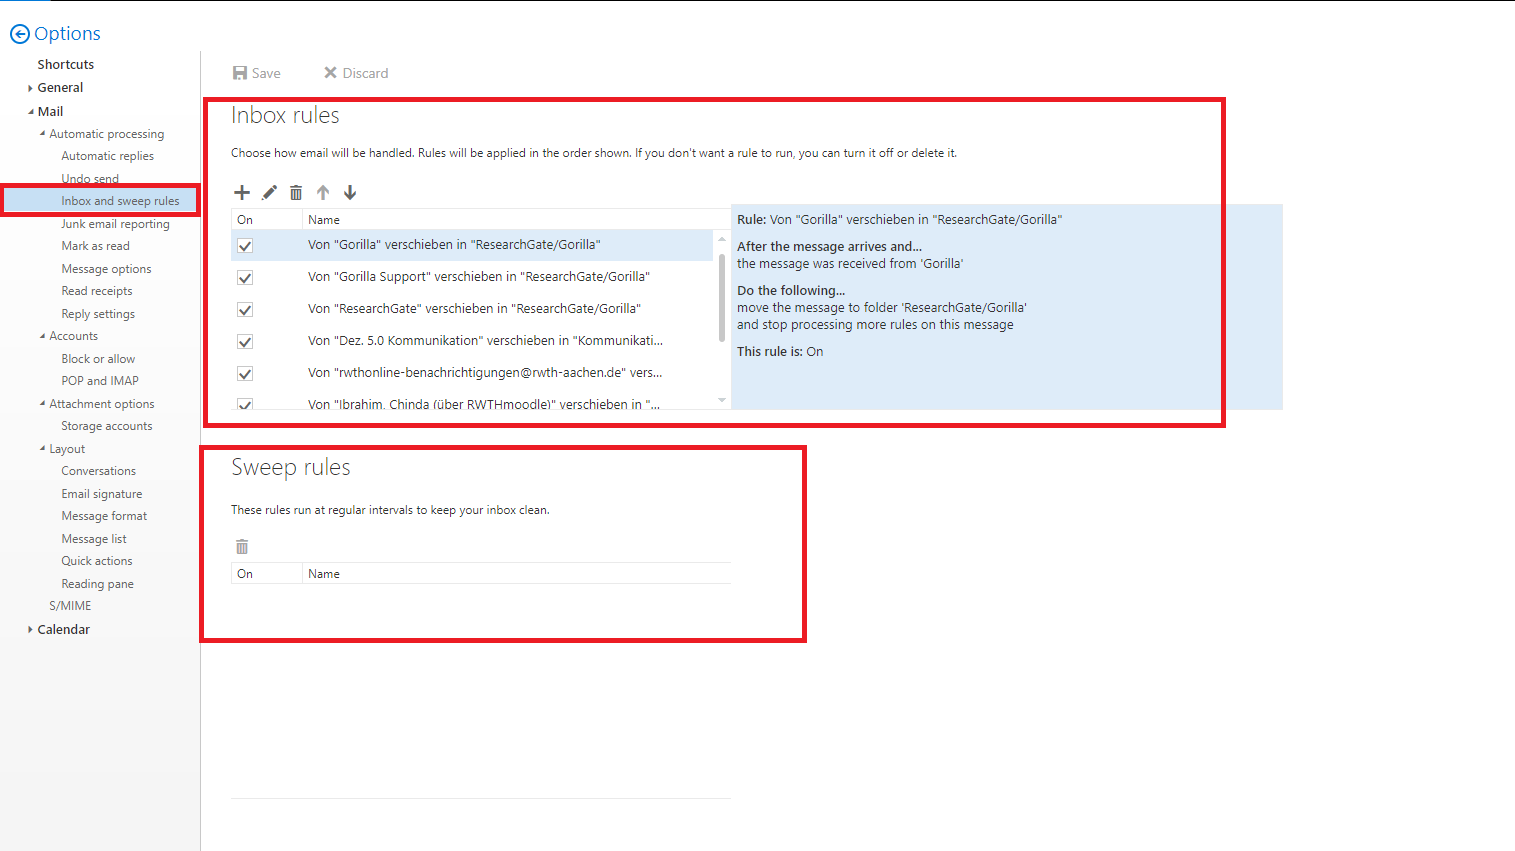
Select E-mail > Automatic processing > Inbox and sweep rules.
Here you can define general inbox and sweep rules, which can also be applied to the spam folder.
You can find separate instructions for creating rules here.
Step 4
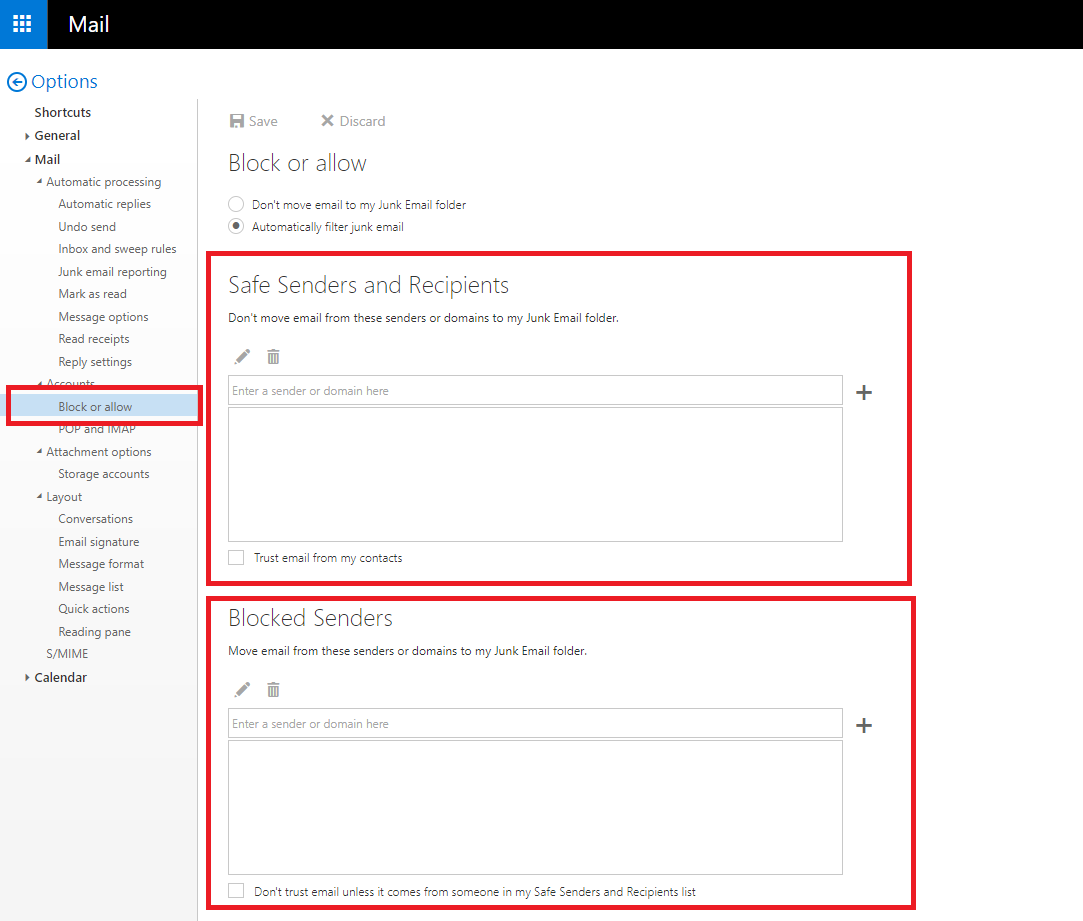
Under the Accounts > Block or allow option, you can differentiate between Safe and Blocked senders (addresses).
Depending on the configuration, email addresses entered there are either moved directly to the spam folder (Blocked senders) or not moved by spam filtering (Safe Senders and Recipients).
Step 5
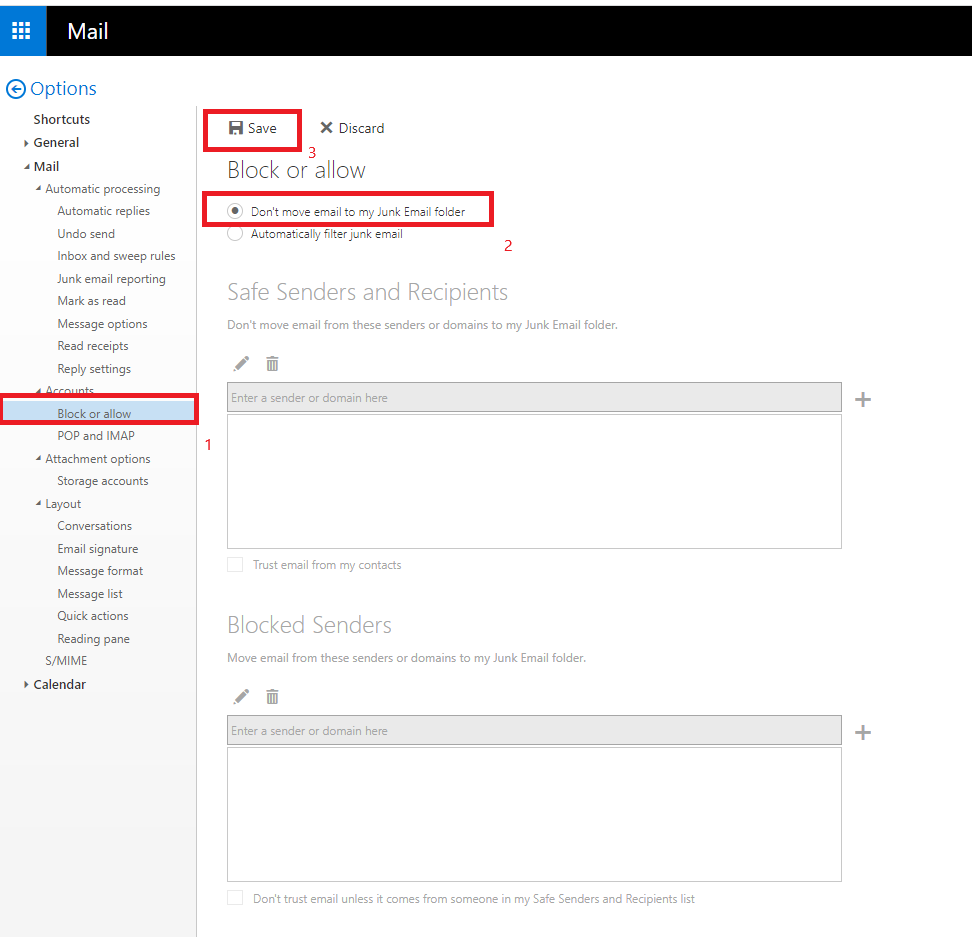
Under Block or allow, you can also completely disable spam detection and moving E-Mails to the junk e-mail folder if required (2).
Step 6
As soon as you have made the desired settings, click on Save (3) to complete the process.

