


Android
This article describes how you can set up an email client for RWTH email under Android.

Note
- Setting up an email account under Android (Exchange)
- Setting up an email account under Android (IMAP)
Setting up an email account under Android (Exchange)
With the Exchange option, you set up email, calendar, and contacts.
The instructions below were created using a Google Pixel 9 device under Android version 17.
Step 1
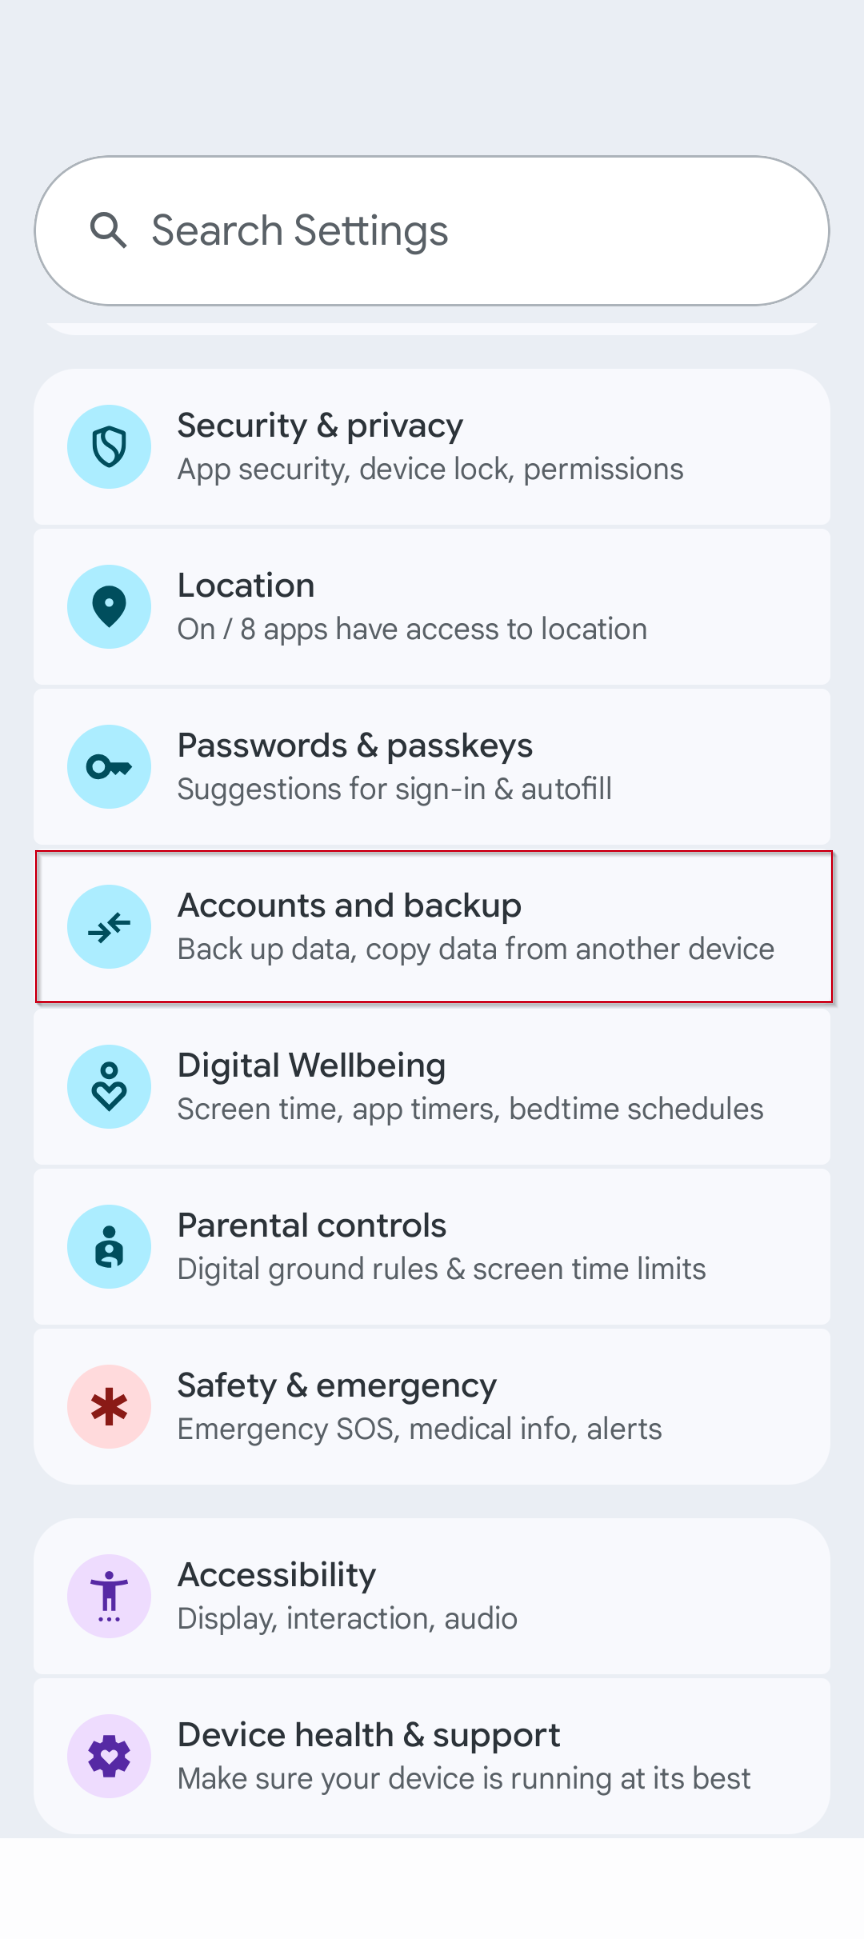
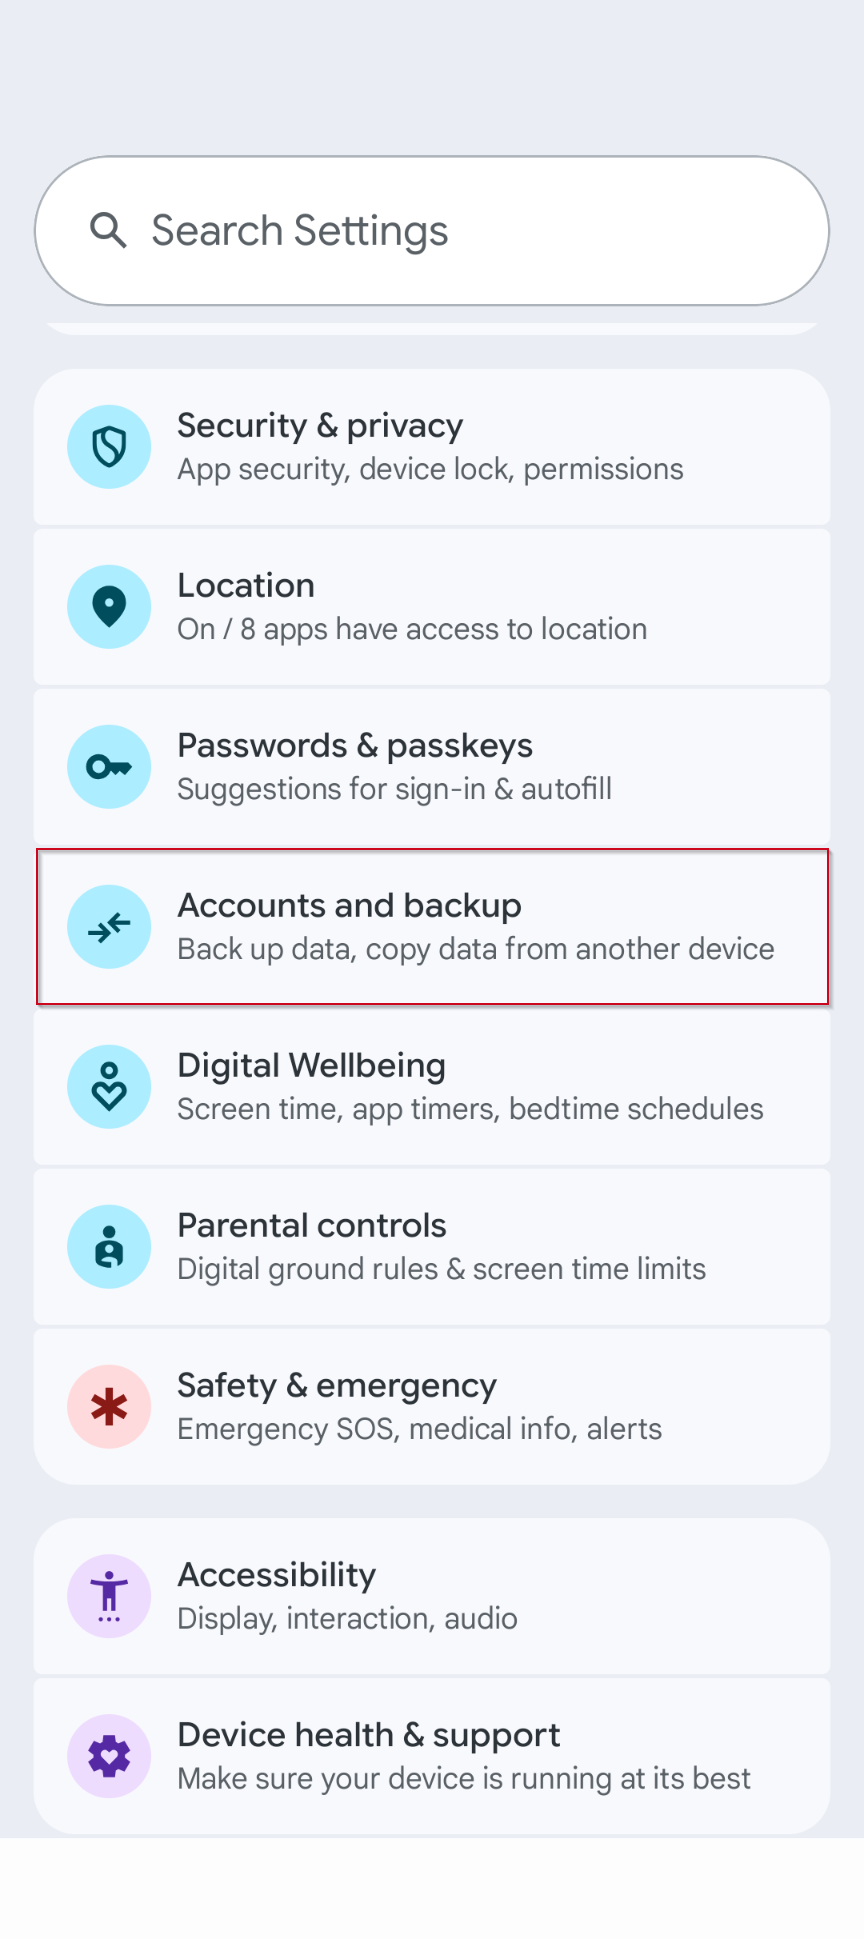
Open the settings and tap on Accounts and backup.
Step 2
Tap on Manage accounts.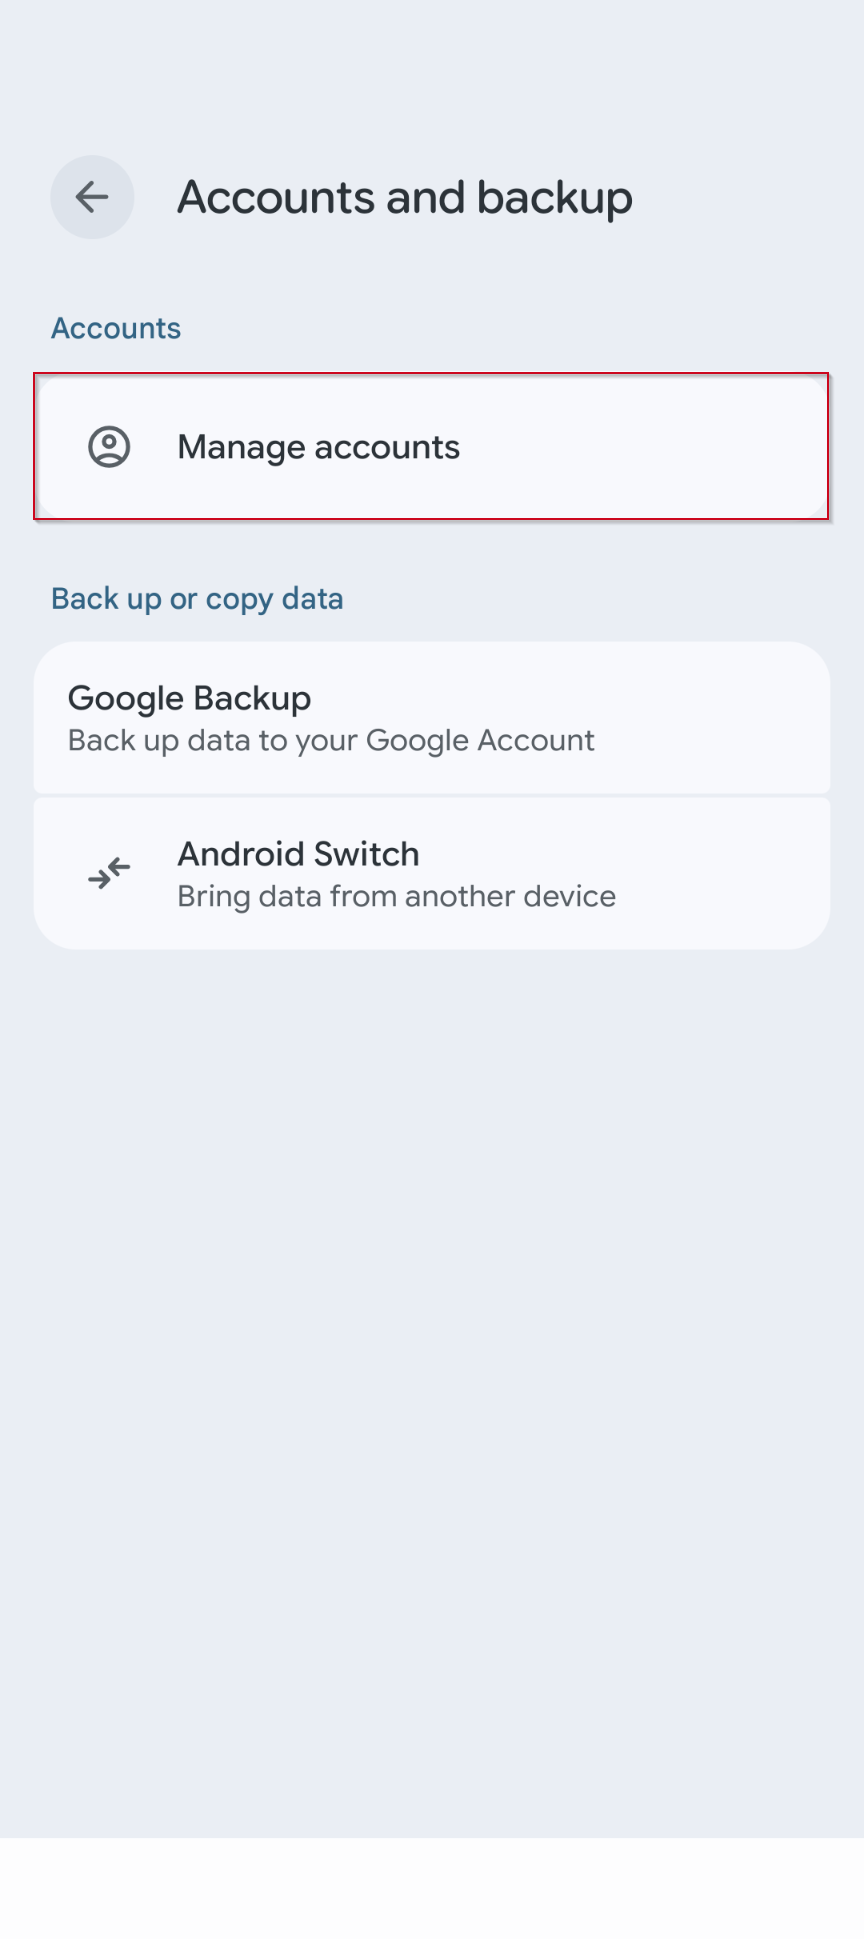
Step 3
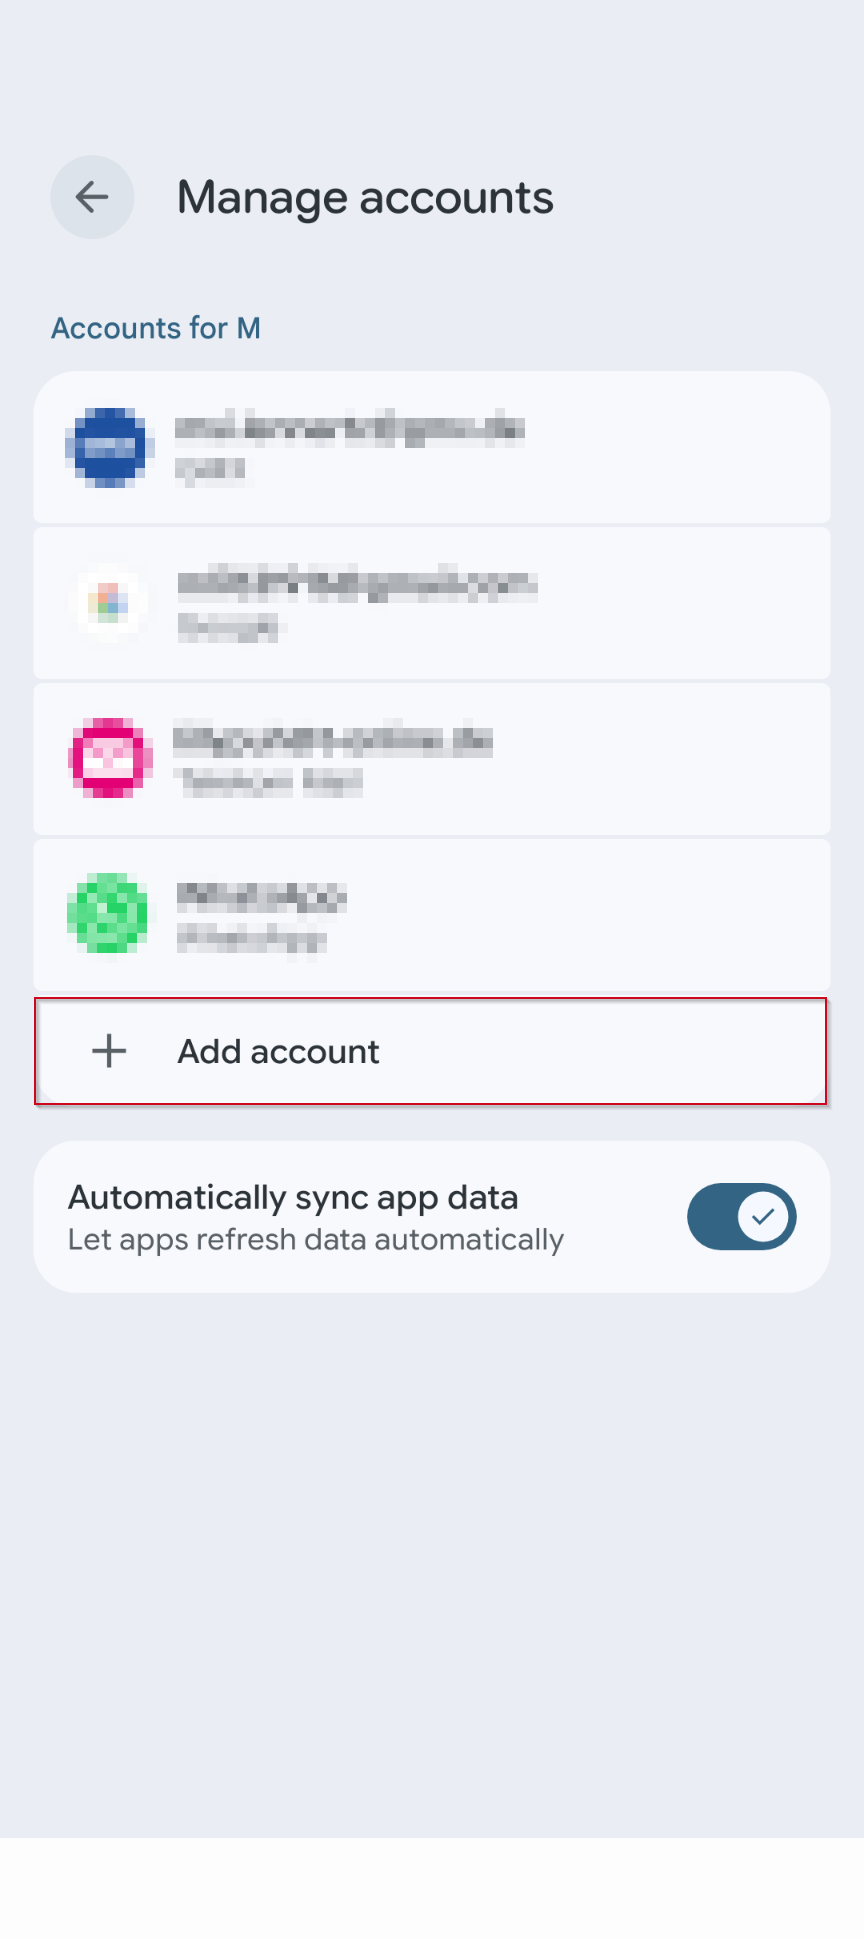
Tap on Add account.
Step 4
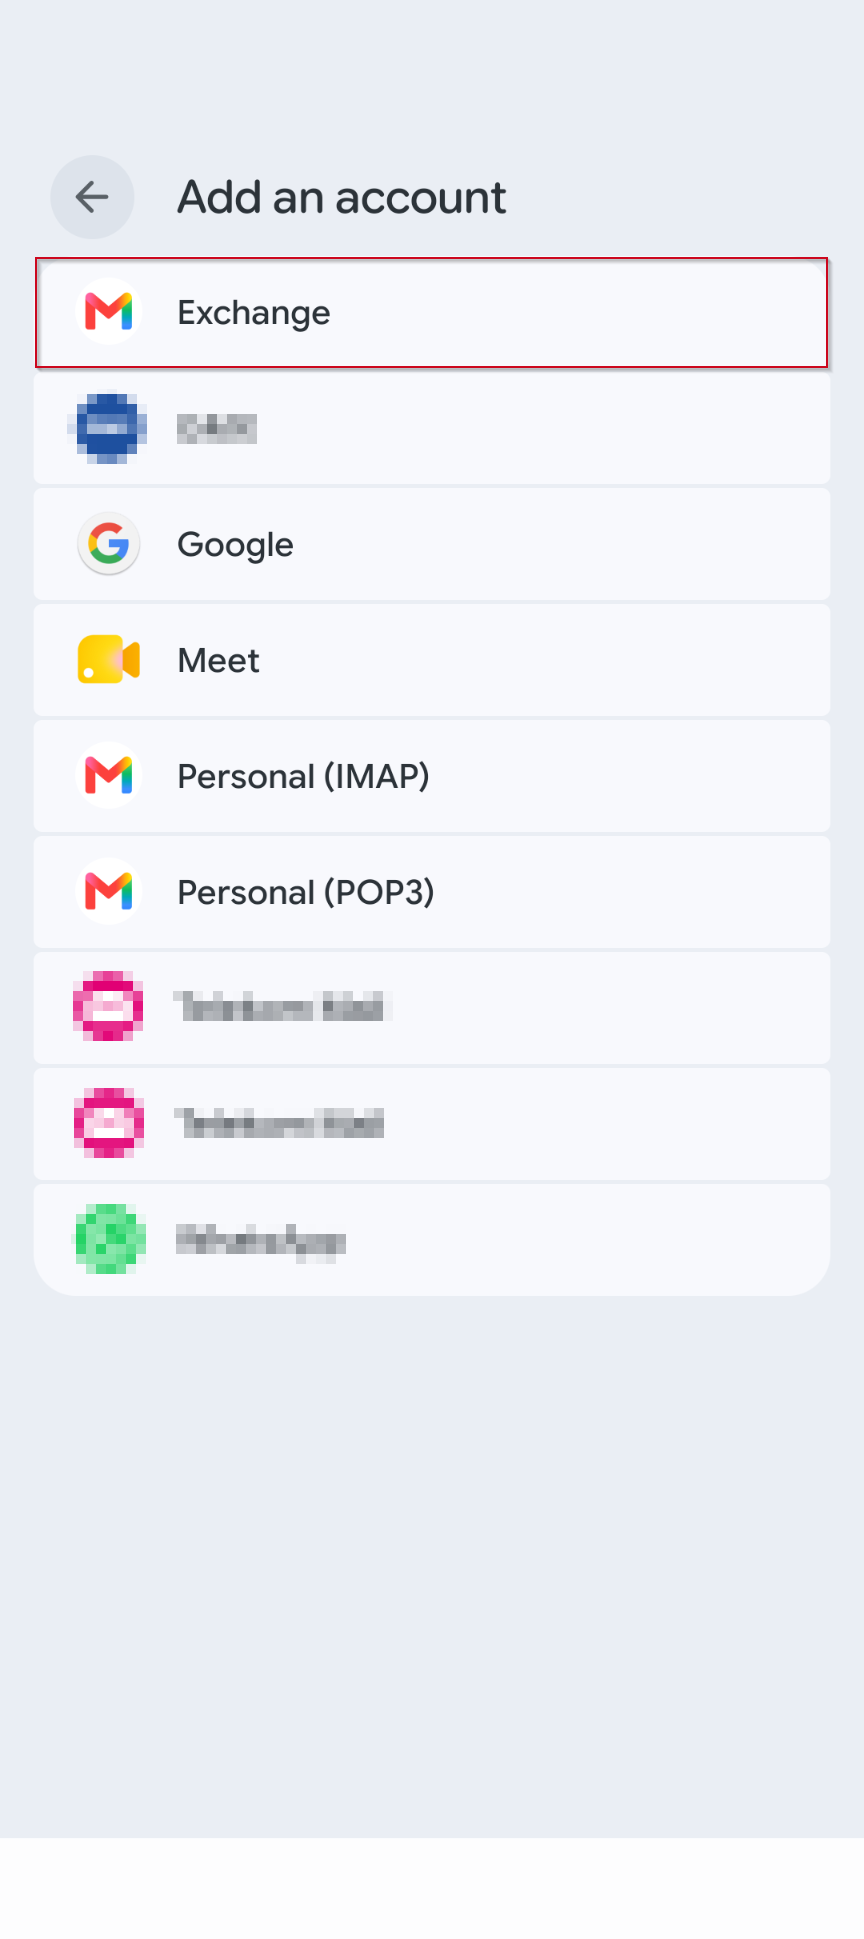
Tap on Exchange.
Step 5
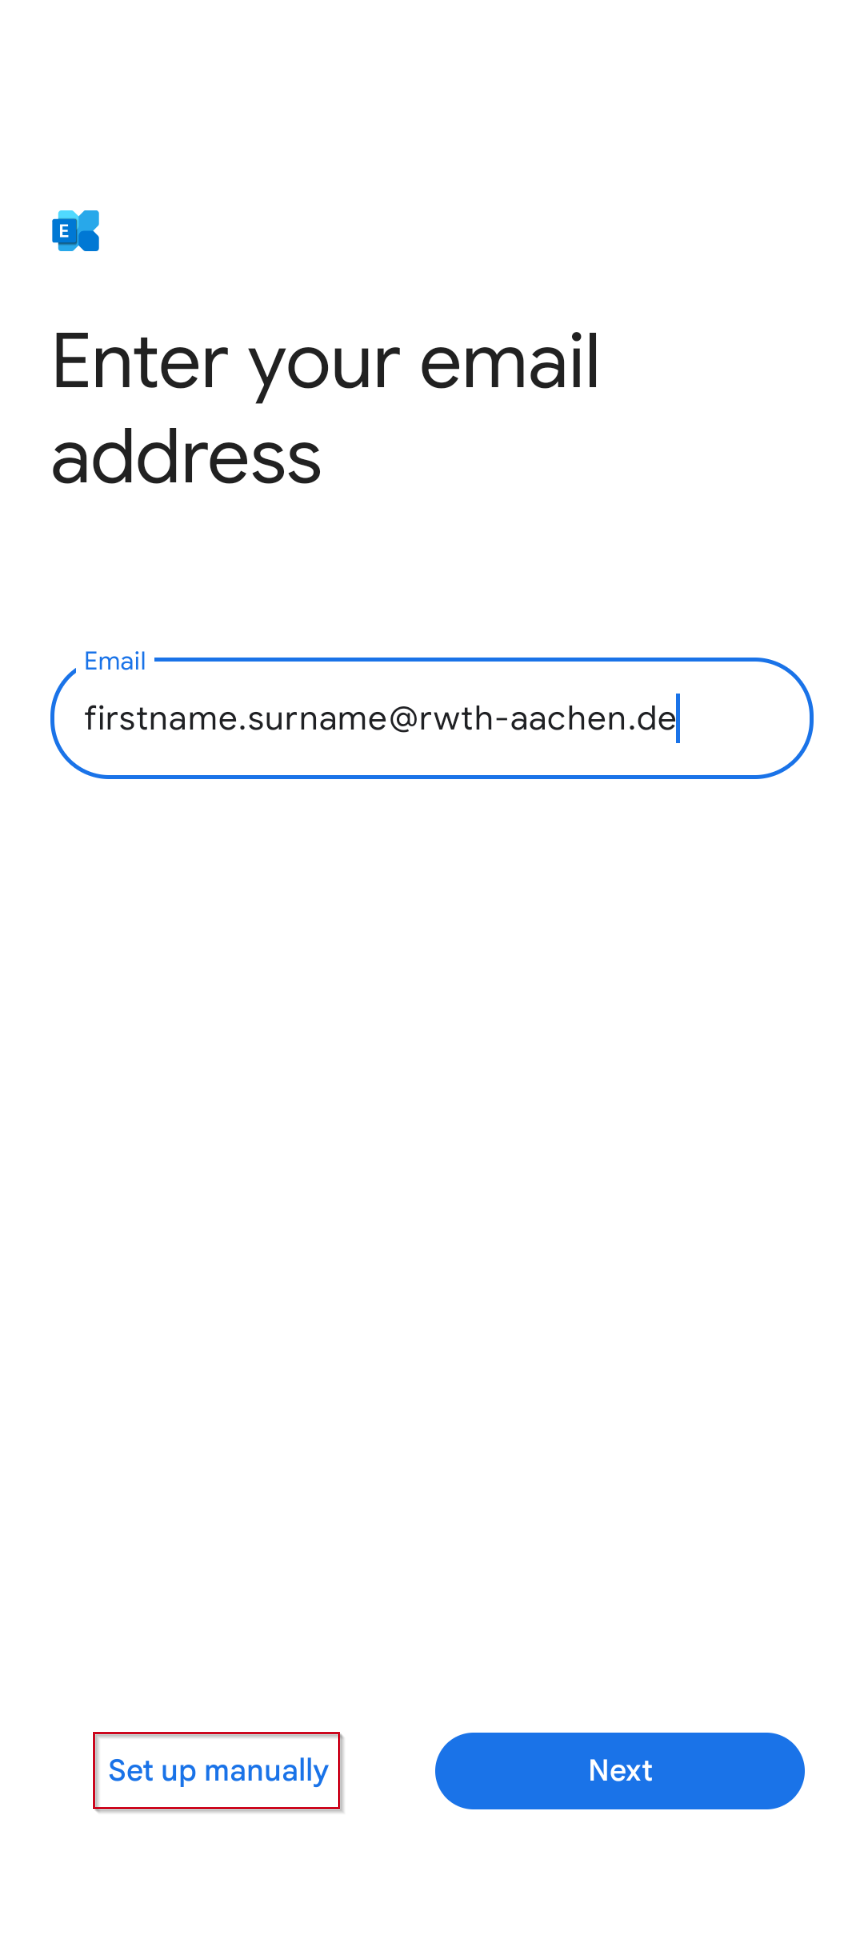
Insert your email address in the form firstname.lastname@rwth-aachen.de and tap on Set up manually.
Step 6
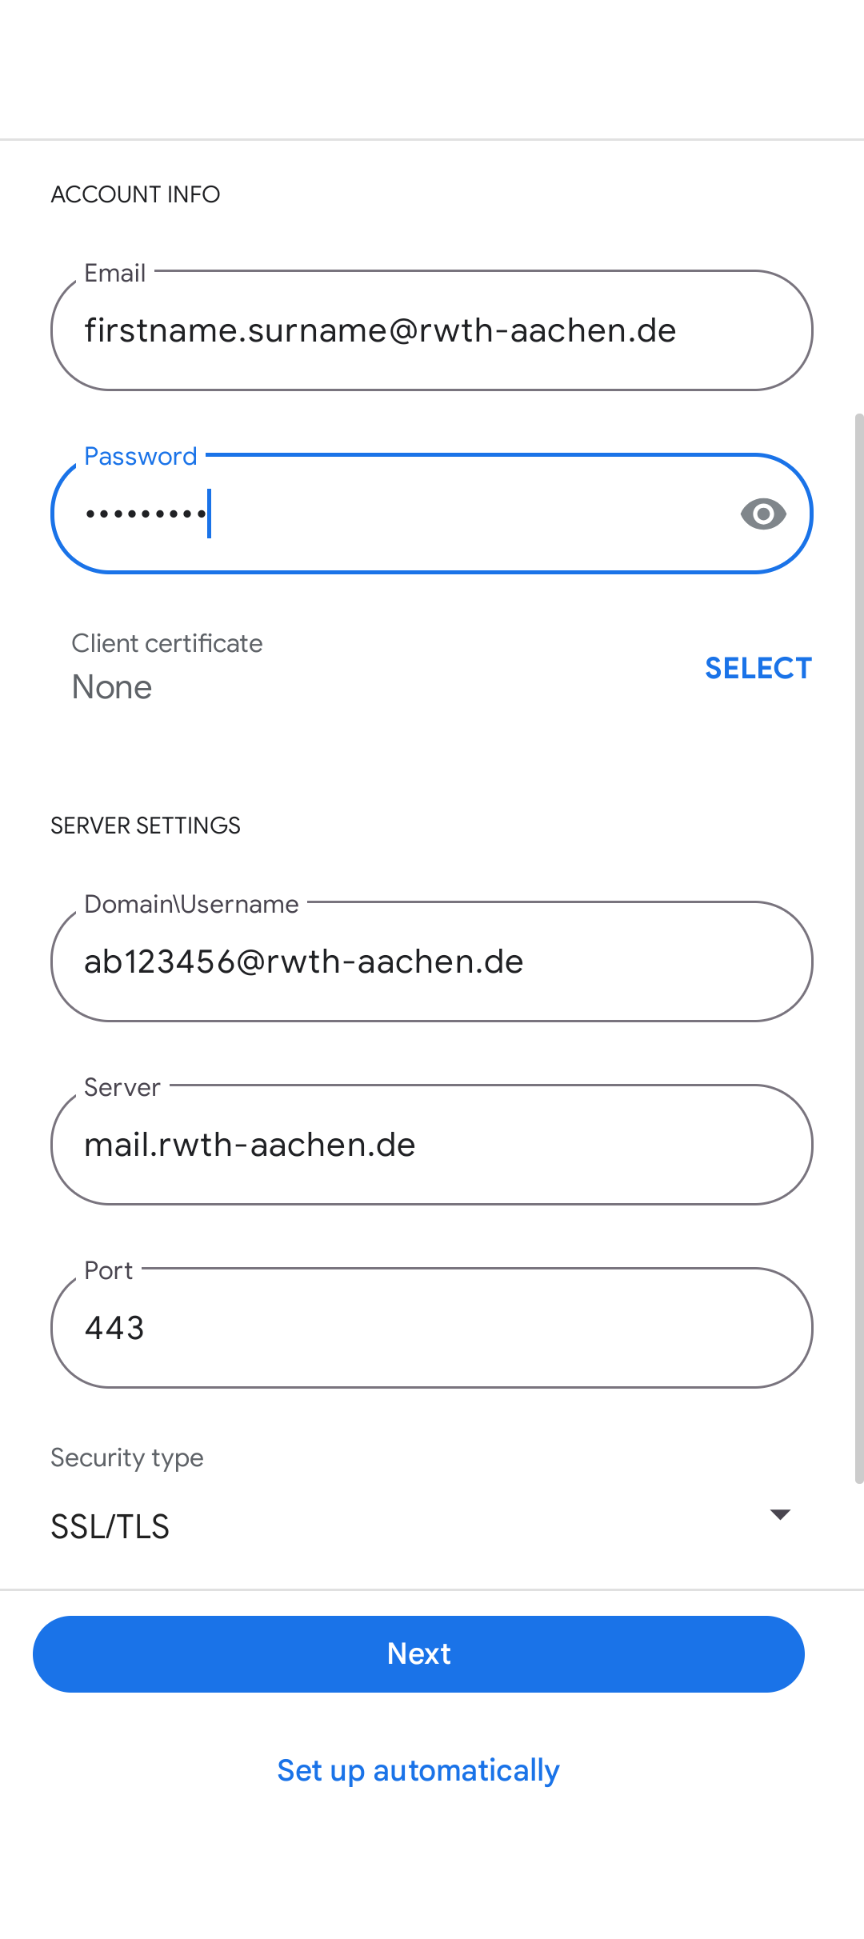
Enter the following configuration settings:
- Email: Your email Address, that you added in the previous step.
- Password: Your password for the corresponding email account
- Domain/Username: username@rwth-aachen.de (format: ab123456@rwth-aachen.de or ab123456@institution.rwth-aachen.de)
- Server: mail.rwth-aachen.de
- Port: 443
- Security type: SSL/TLS
Step 7
Tap on Next to set up your account.
Setting up an email account under Android (IMAP)
The instructions below were created using a Google Pixel 9 device under Android version 17.
Step 1
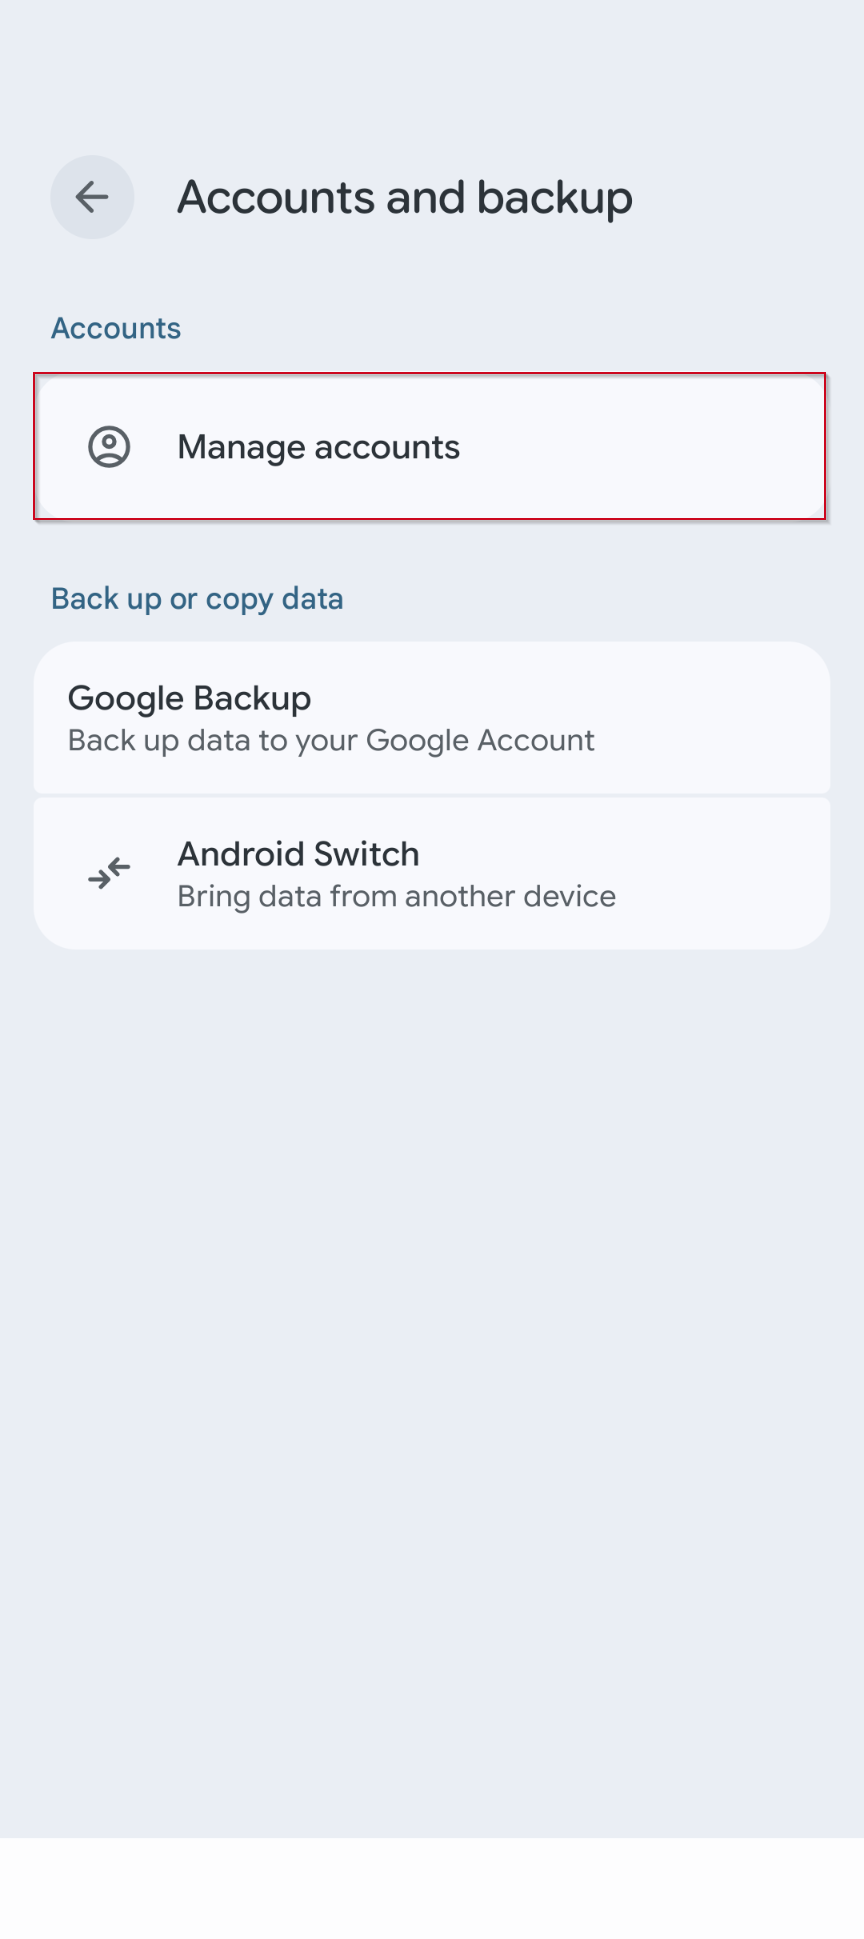
Step 2
Tap on Manage accounts.
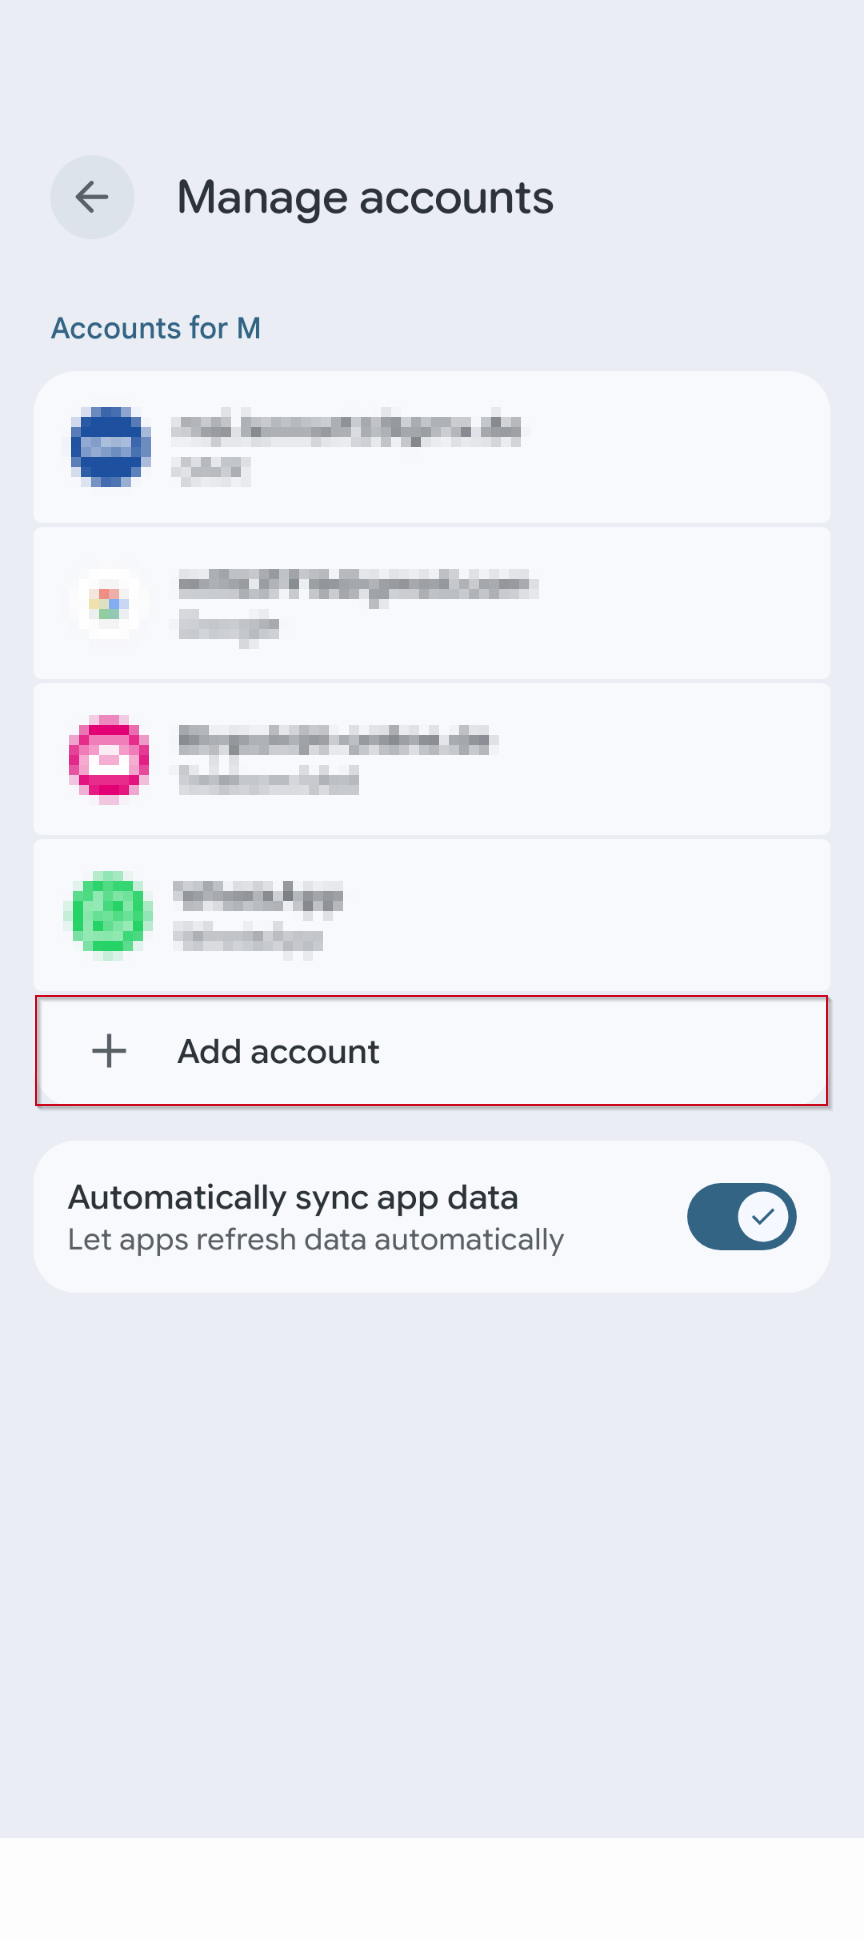
Step 3
Tap on + Add account.
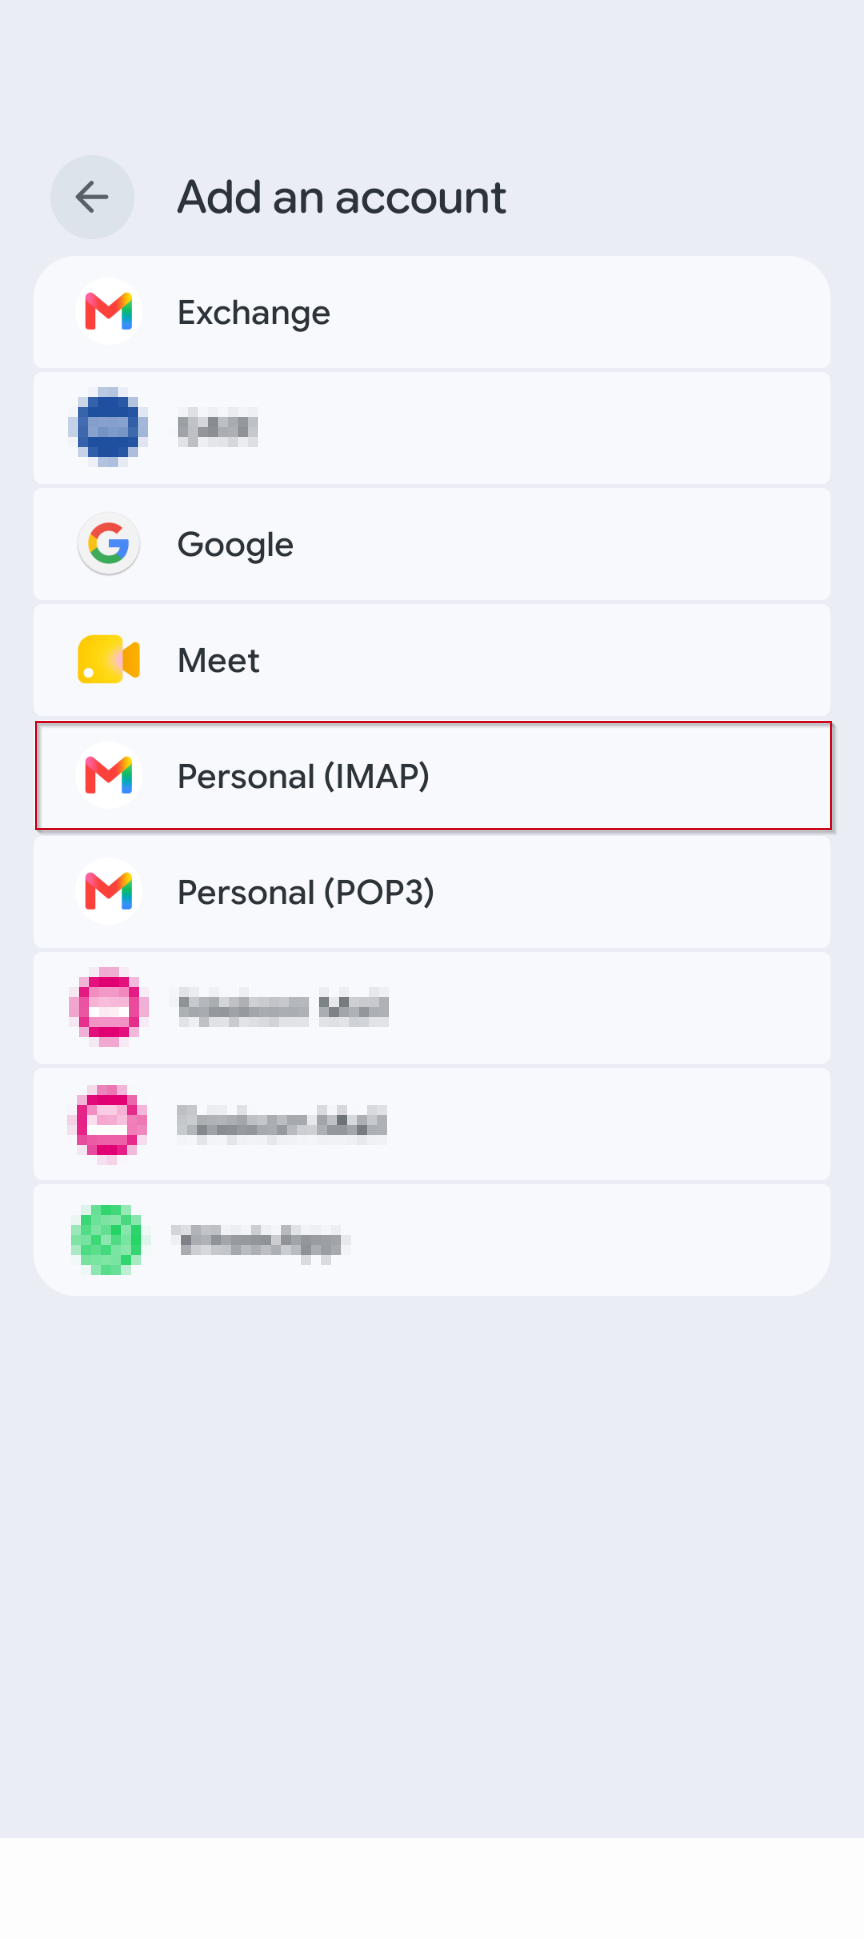
Step 4
Tap on Personal (IMAP).
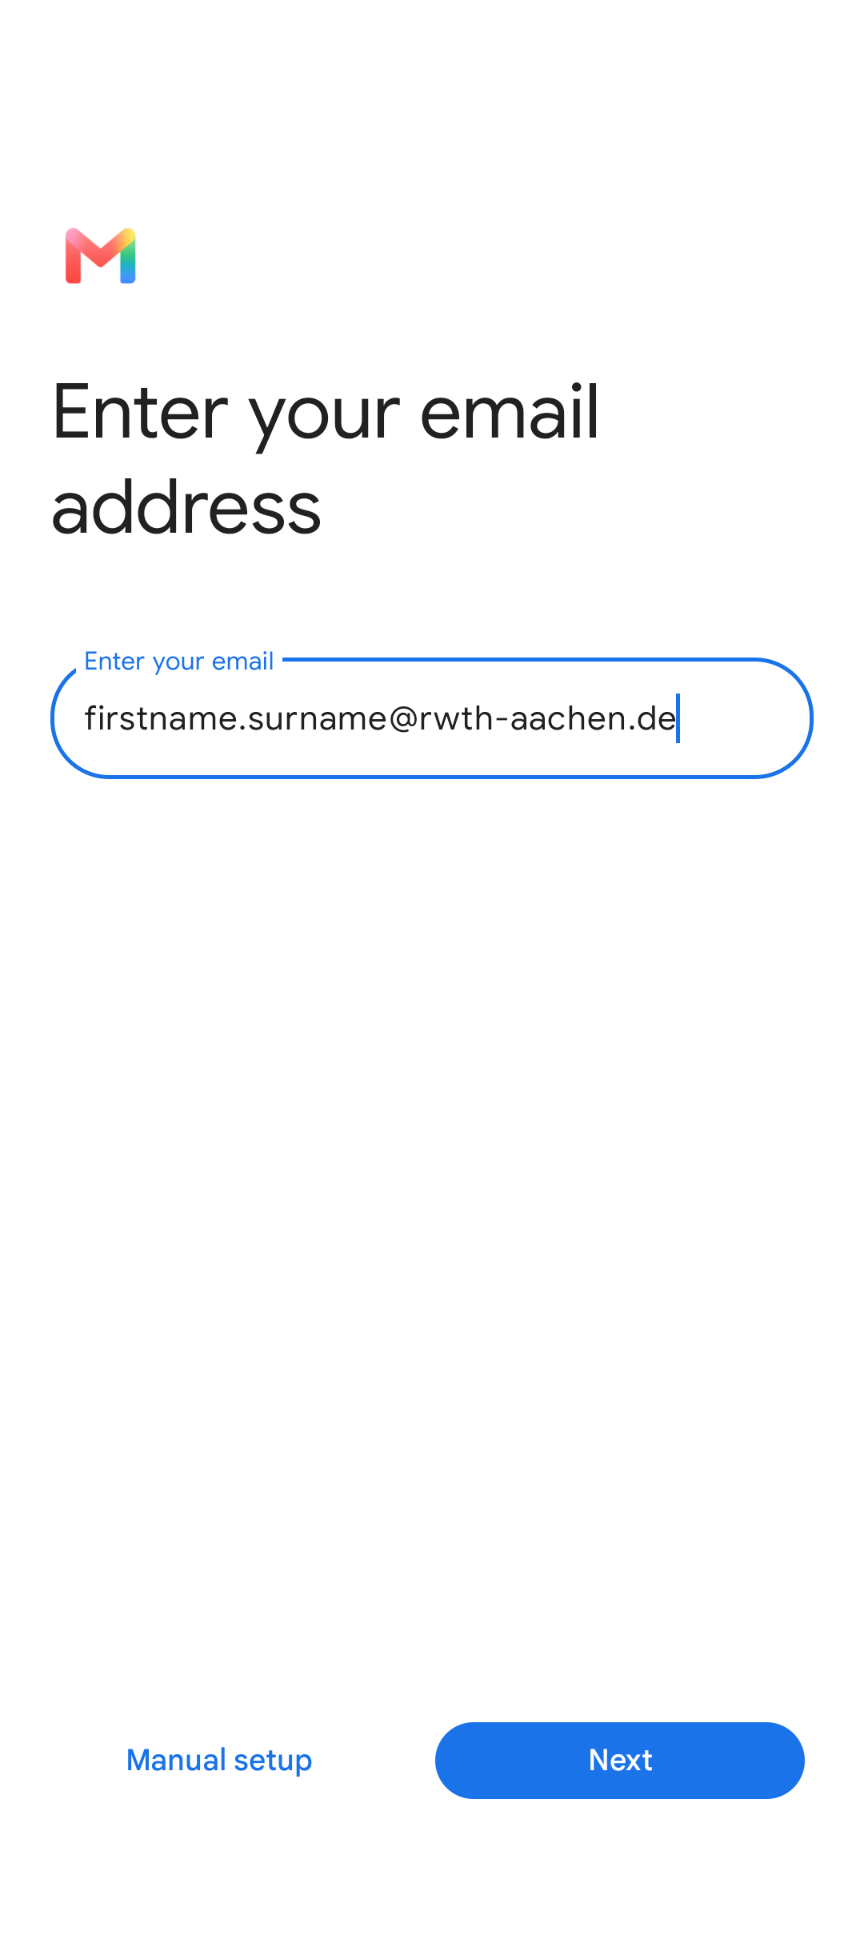
Step 5
Enter your email address and Tap Next.
Step 6
Enter the password for the email account and tap Next.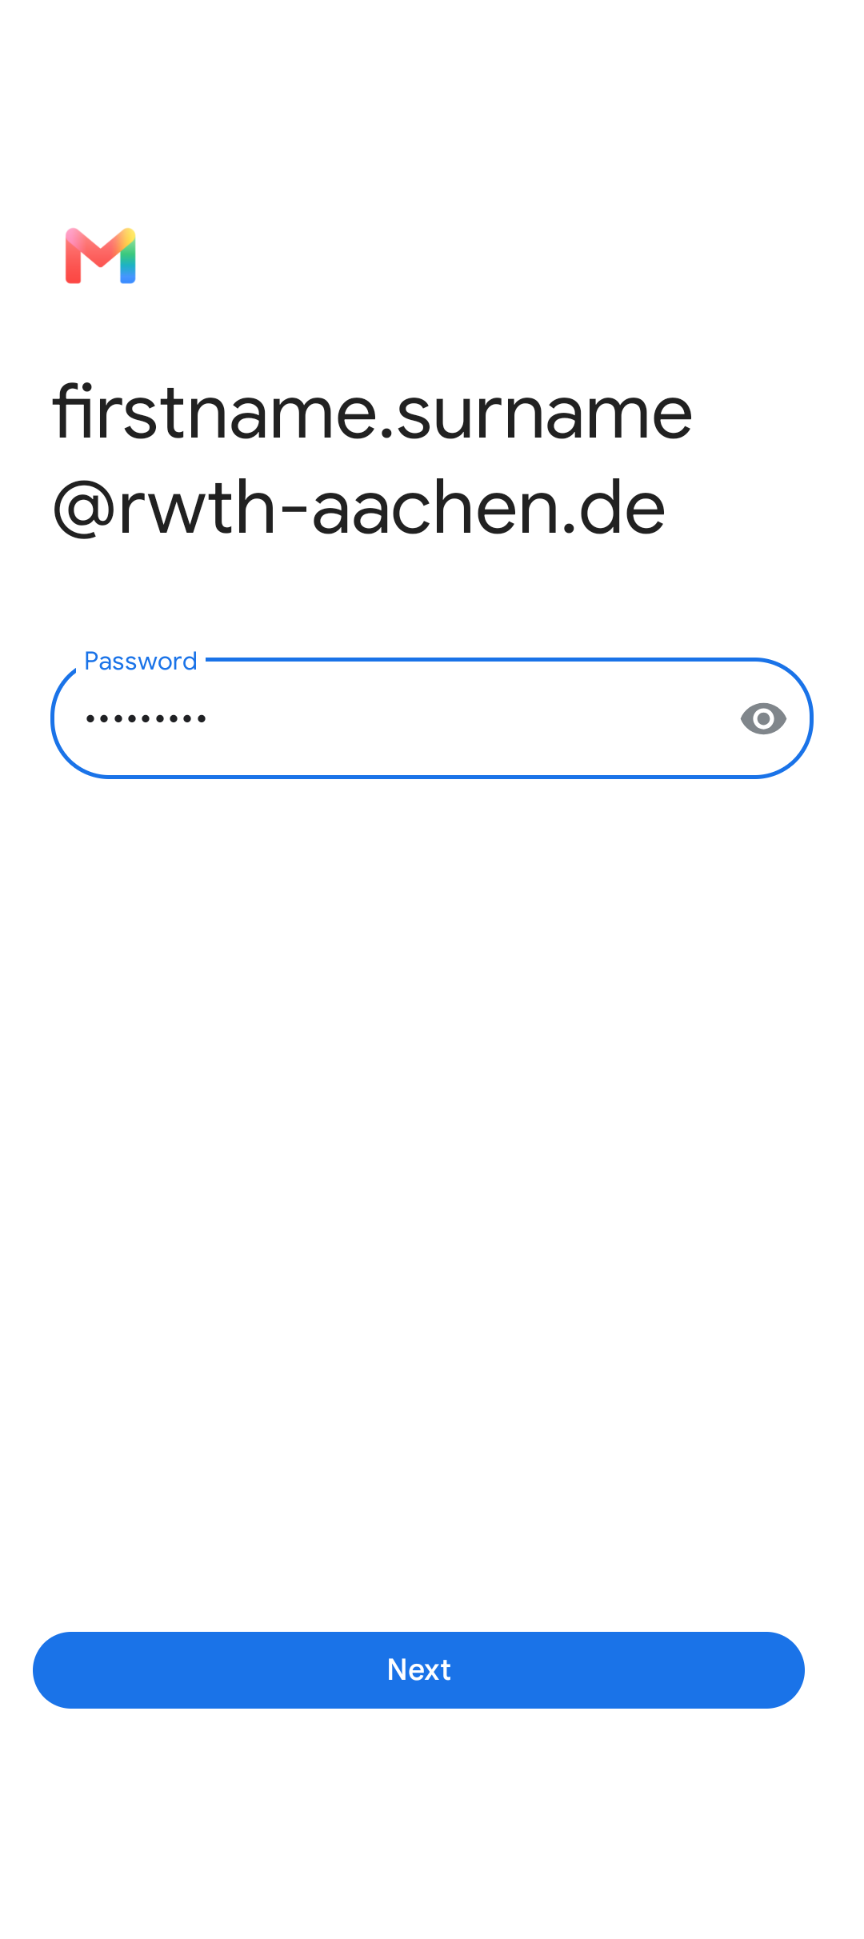
Step 7
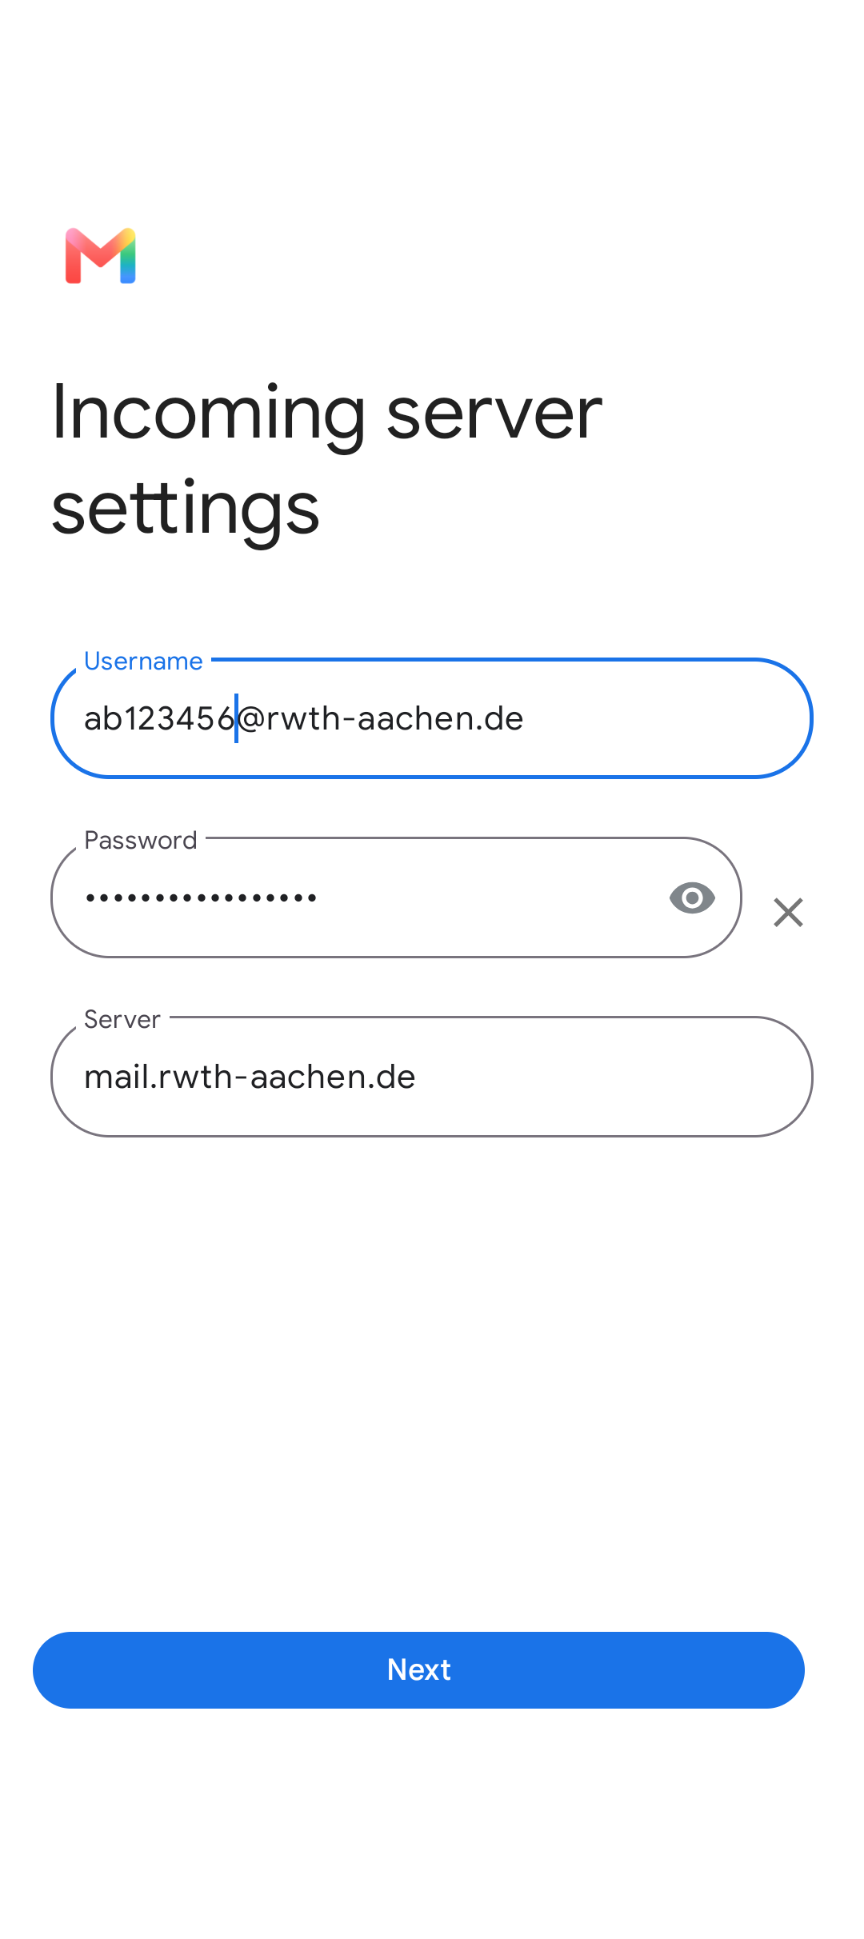
Enter the following settings for the incoming server:
- Username: Your RWTH username in the format ab123456@rwth-aachen.de or ab123456@institution.rwth-aachen.de
- Password: The password for the email account
- Server: mail.rwth-aachen.de
Step 8
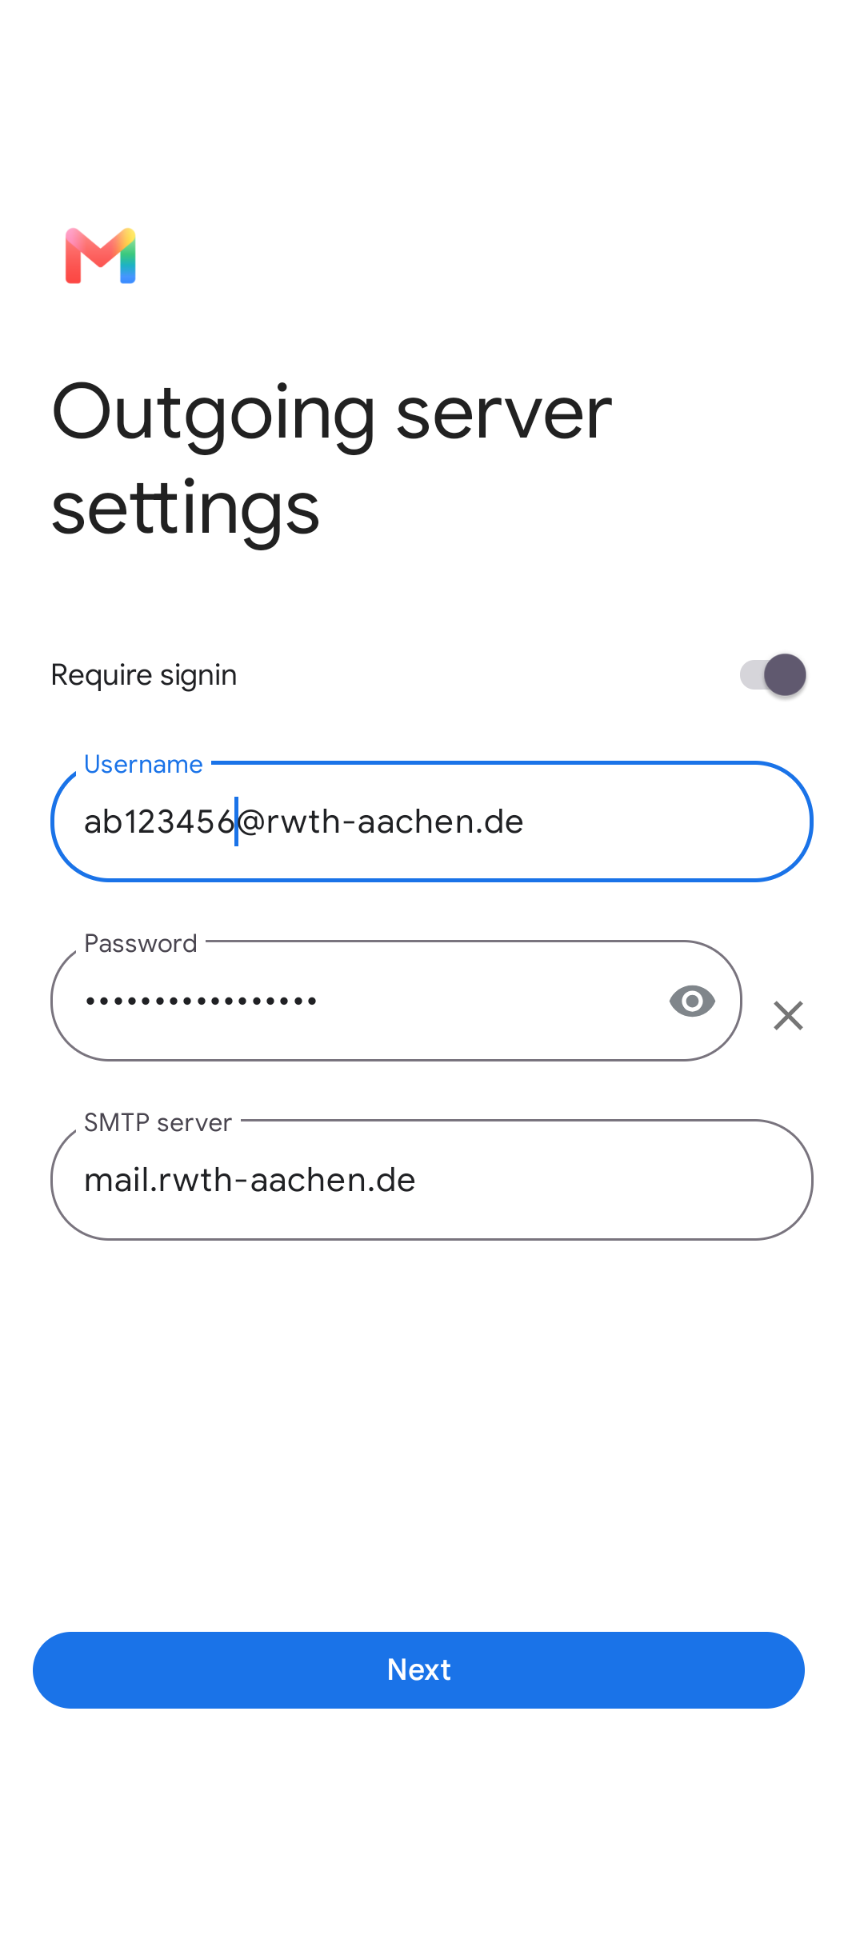
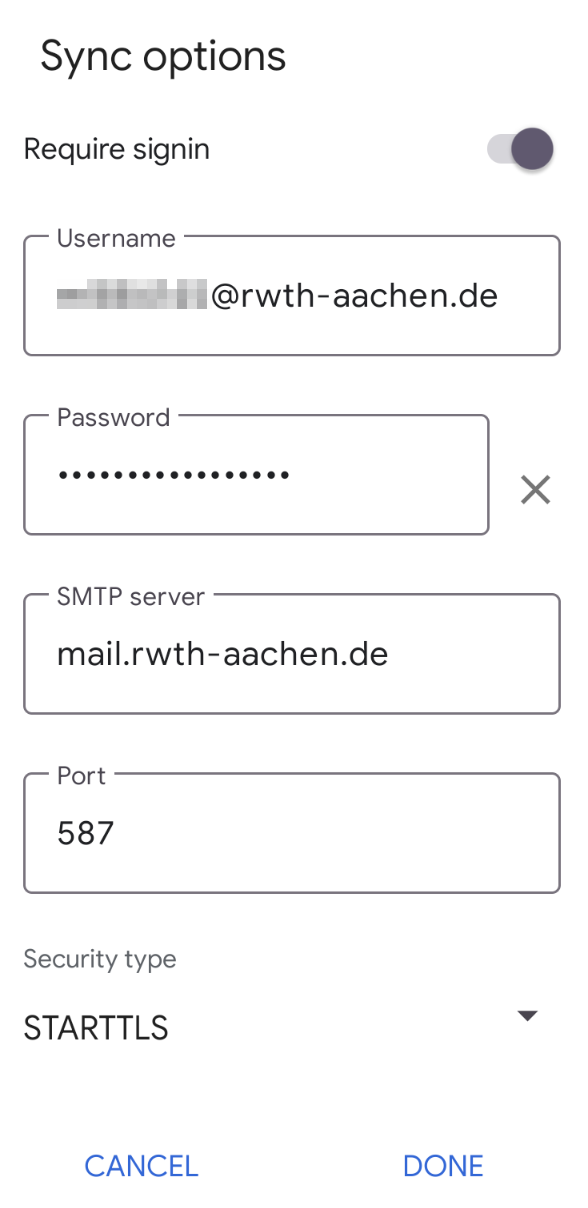
Enter the following settings for the outgoing server:
- Username: username in the format ab123456@rwth-aachen.de or ab123456@institution.rwth-aachen.de
- Password: the password for the email account
- Server: mail.rwth-aachen.de
Step 9
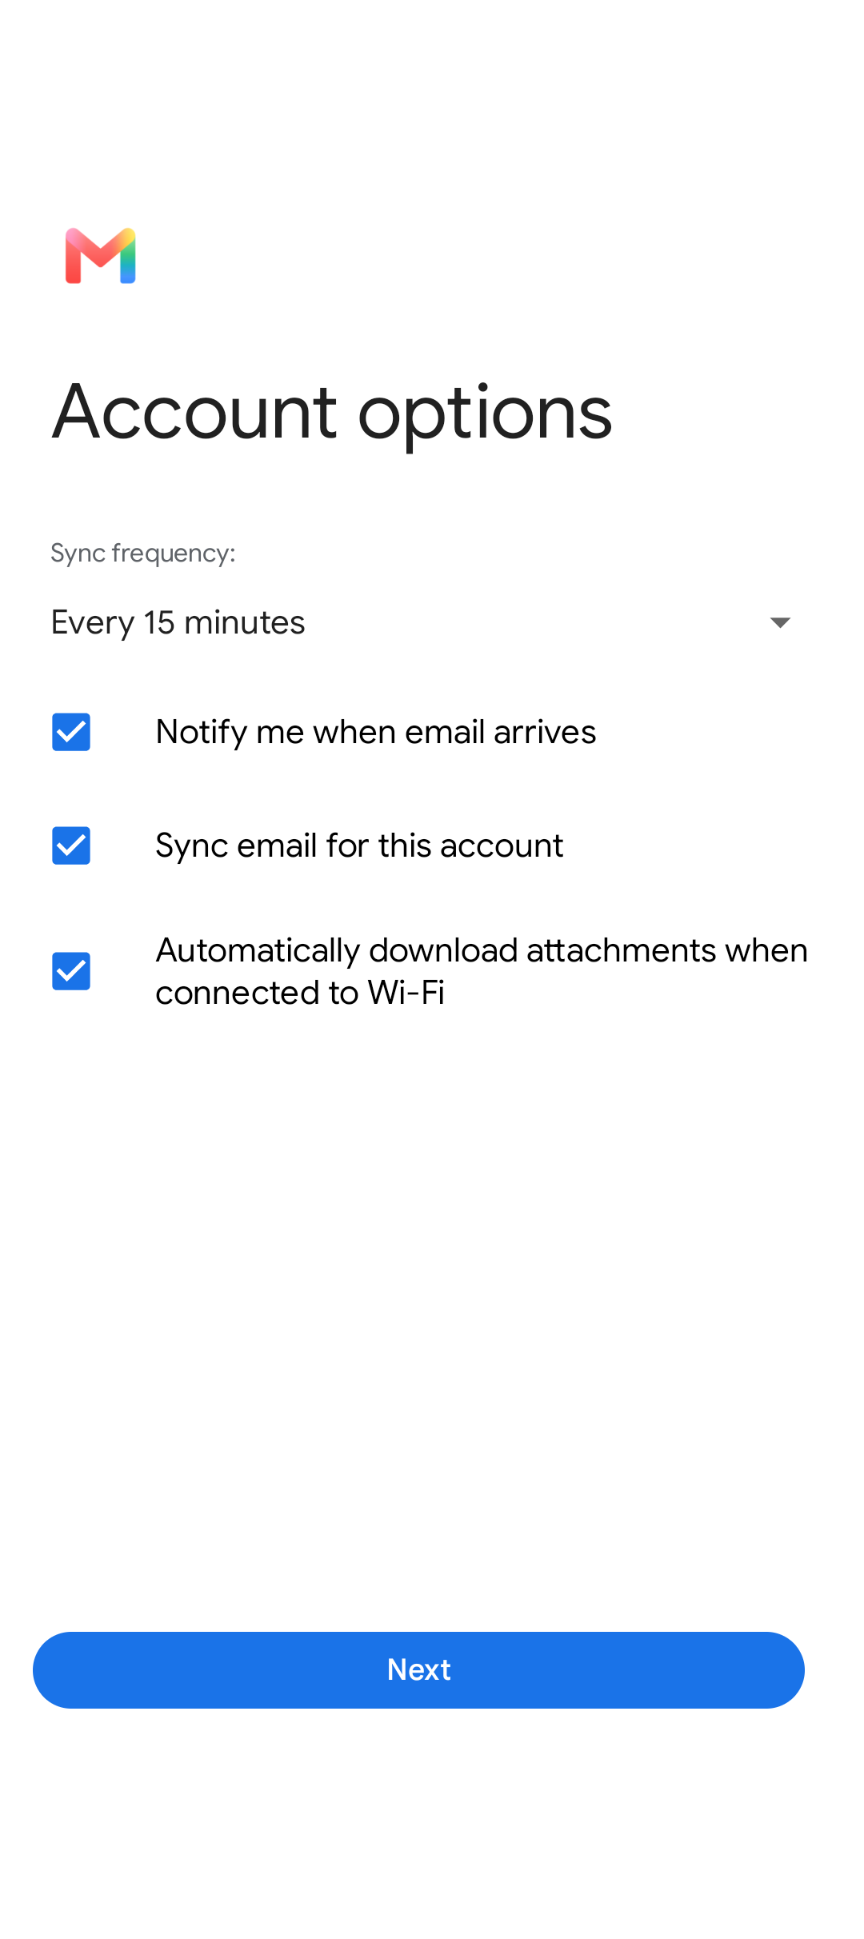
Choose the account options and tap on Next.
Step 10
Enter the account name and the name you want to appear on outgoing messages, then tap Next to complete the setup.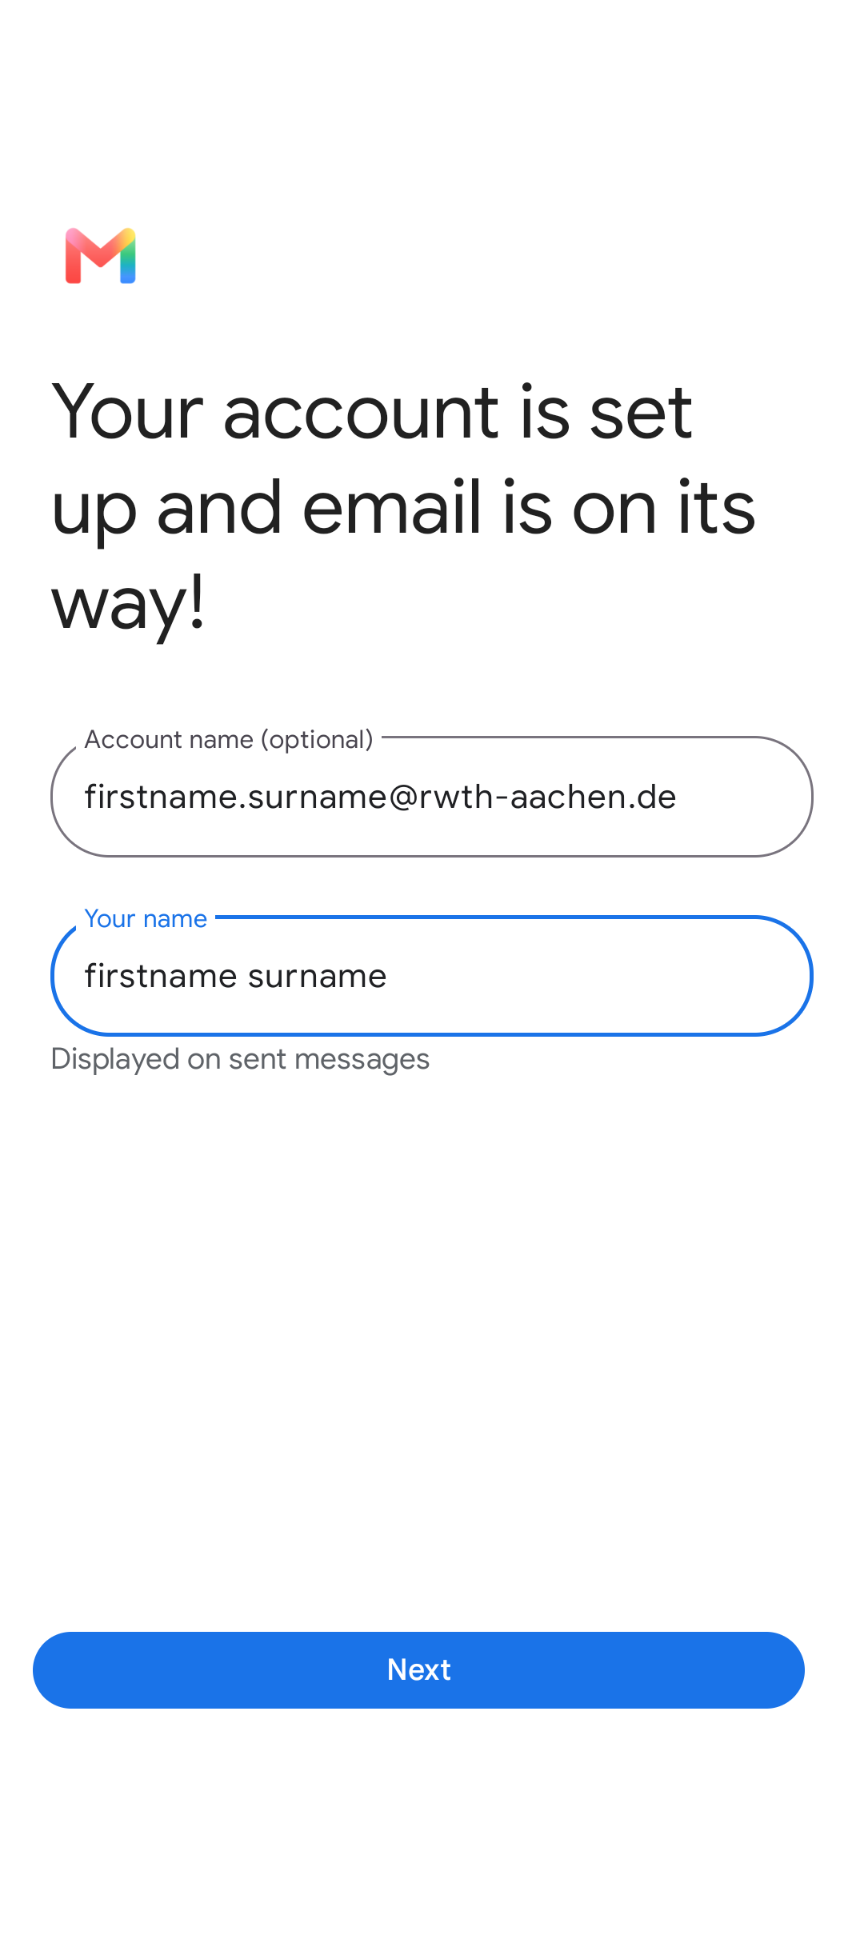
Step 11
Check if your decice has automatically applied the correct settings. To do this, open Settings > Account and back up > Manage accounts.
Step 12
Tap on the IMAP account that you just created.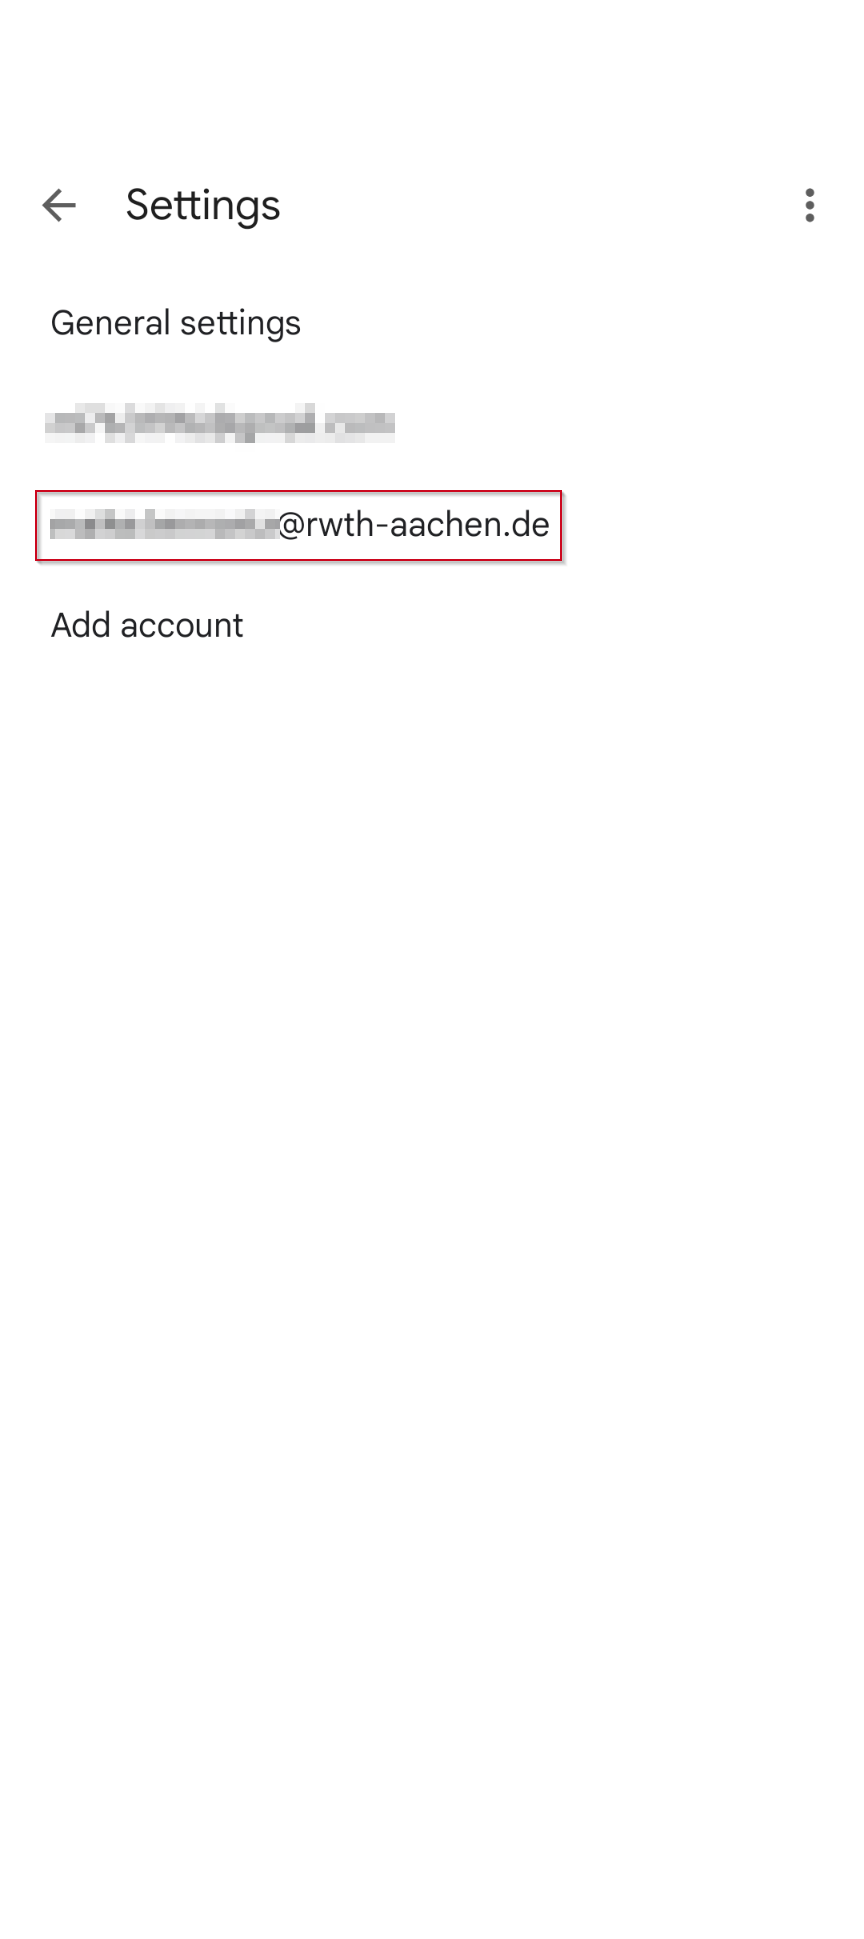
Step 13
Tap on Server settings.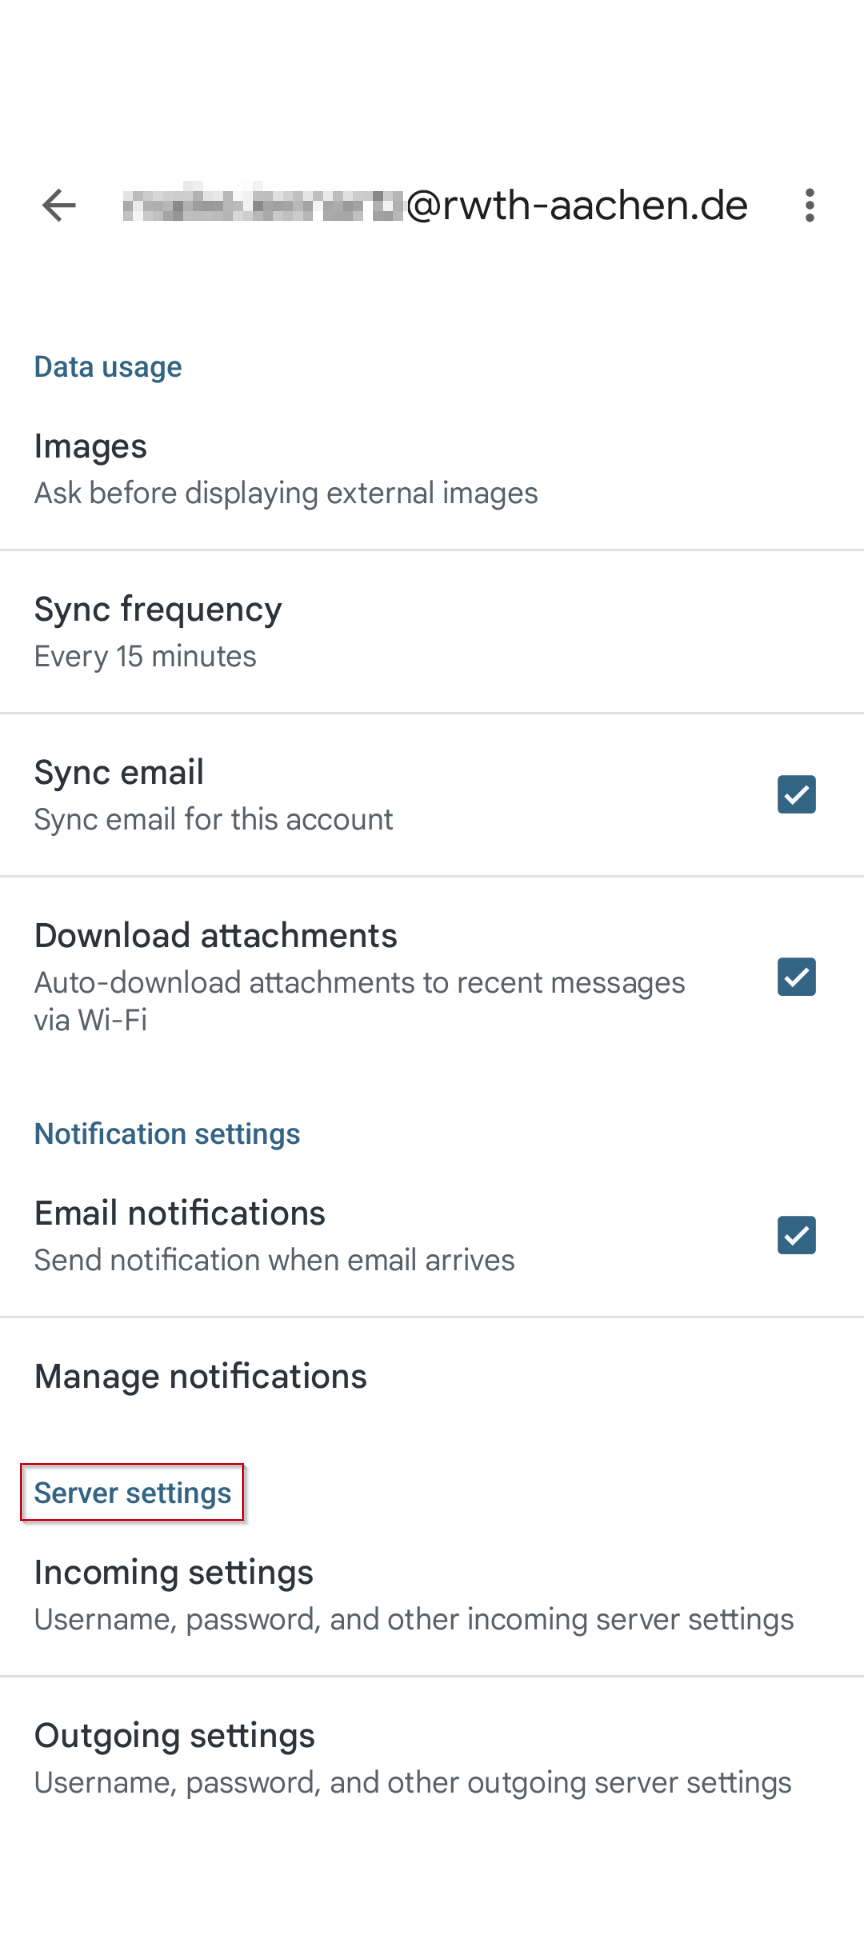
Step 14
The synchronization options for the inbox server are as follows: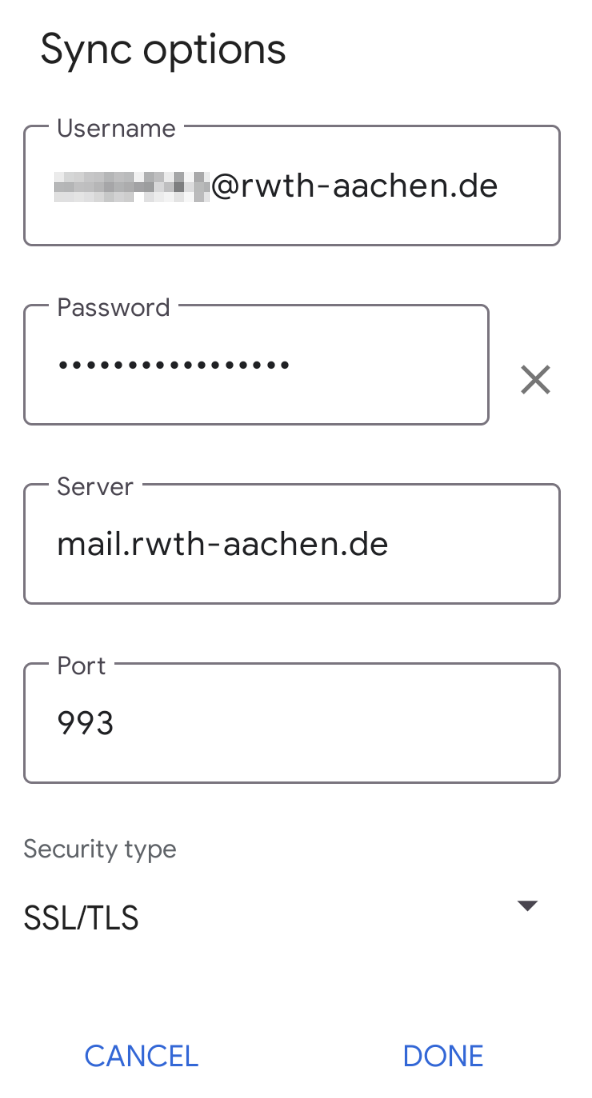
Step 15
The synchronization options for the outbox server are as follows:
Additional Information
