


Integrate and use an LDAP address book

On this page you will learn how to integrate an LDAP Server as an address book in Outlook and Thunderbird.
By using an LDAP server, that contains user certificates, you can send encrypted e-mails to addresses (previously found in this LDAP) without having previously received a digitally signed e-mail from them.
This instruction demonstrates the configuration of the RWTH-UserCertificates-LDAP as an address book. By adjusting the server address and the search base you could similarly use it to configure any LDAP address book.
Under LDAP for user certificates from the RA-Portal you find the currently valid server addresses and search bases for our user certificate LDAPs.
1. Integrate an LDAP address book in Outlook
2. Integrate an LDAP address book in Thunderbird
1. Integrate an LDAP address book in Outlook
To integrate an LDAP address book into your Outlook, please carry out the following steps.
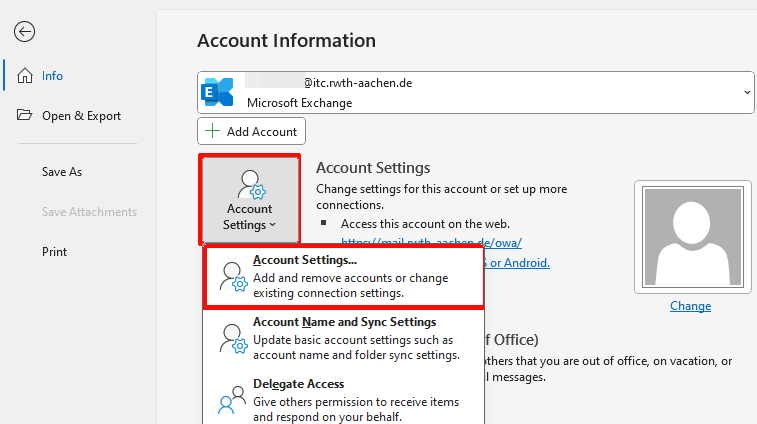
Step 1
Open Outlook and navigate to File > Info > Account Settings > Account Settings.

Step 2
Click on Address Books and select New... from.

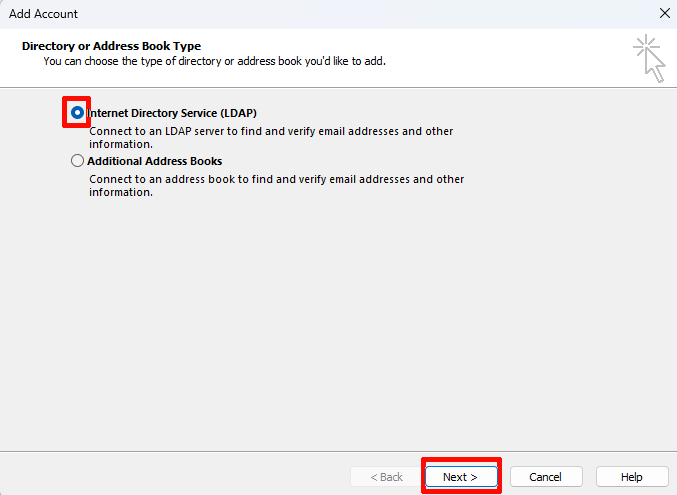
Step 3
Select Internet Directory Service (LDAP) as the directory or address type and click Next.
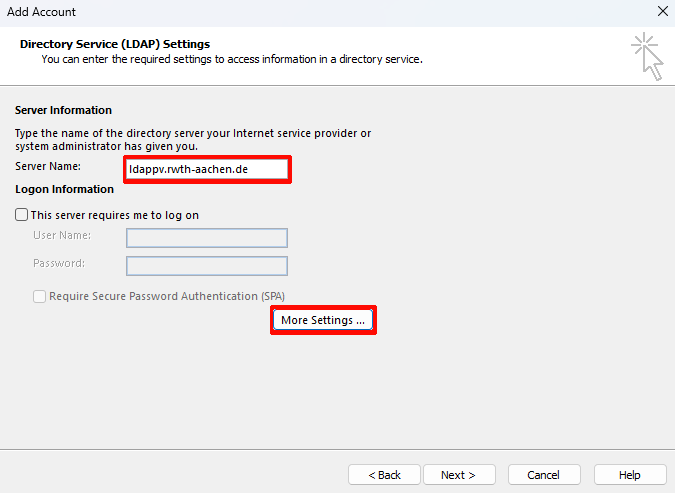
Step 4
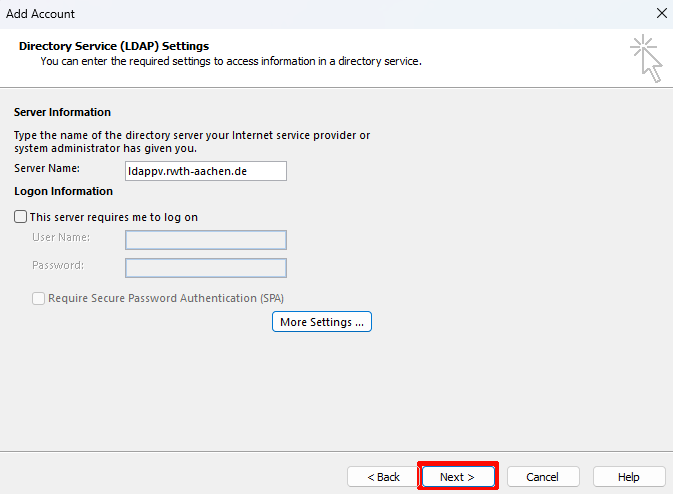
Enter the server name and click on More Settings ... .
- For the RWTH-LDAP address book: ldappv.rwth-aachen.de
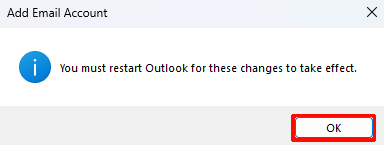
Step 5
A message is displayed stating that Outlook must be restarted. Click OK to confirm the message.
Step 6
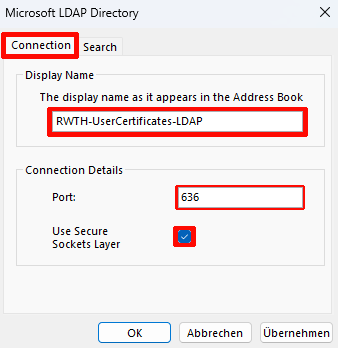
Under the Connection tab, fill in the fields as follows:
- Display name: Can be selected as required. We recommend selecting a unique name.
- Port: 636
- Use Secure Sockets Layer: selected
Step 7
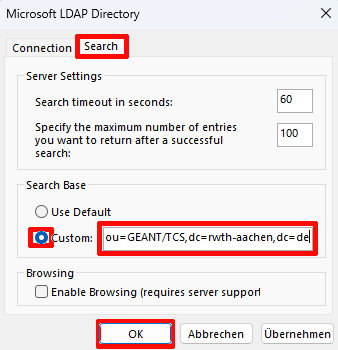
Under the Search tab, fill in the fields as follows and click OK to confirm your entries.
- Search Base: Custom (depending on the LDAP address book)
- e.g. for the RWTH-LDAP address book: o=RWTH Aachen University,ou=GEANT/TCS,dc=rwth-aachen,dc=de
- Enable Browsing: do not select
Step 8
Click Next to confirm the settings.
Step 9
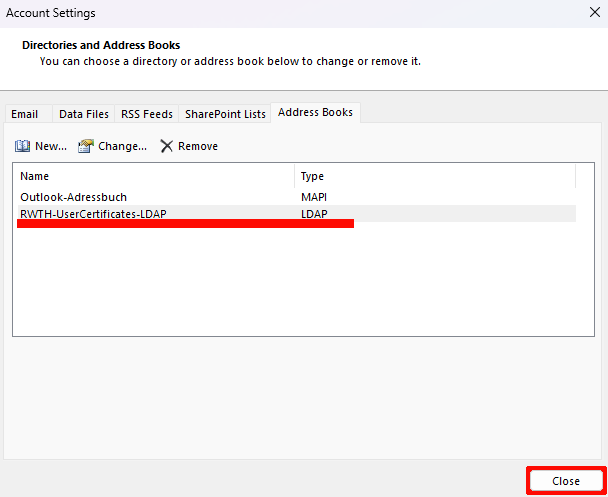
Click Finish to add the address book.
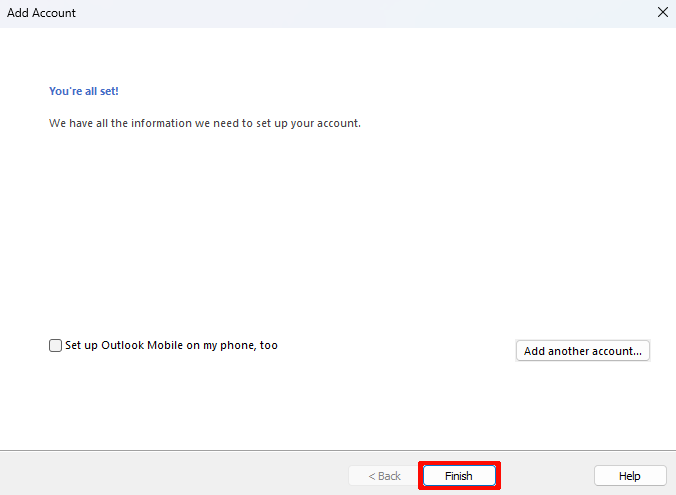
The RWTH-LDAP should now be displayed in the list of configured address books. Please restart outlook to complete the configuration.
Step 10
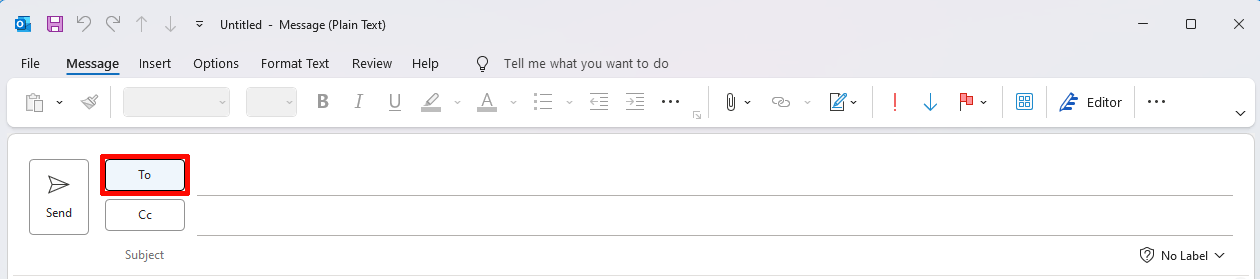
To use the integrated LDAP address book for sending e-mails, open a new e-mail and click on To. This will open your address book.
Step 11
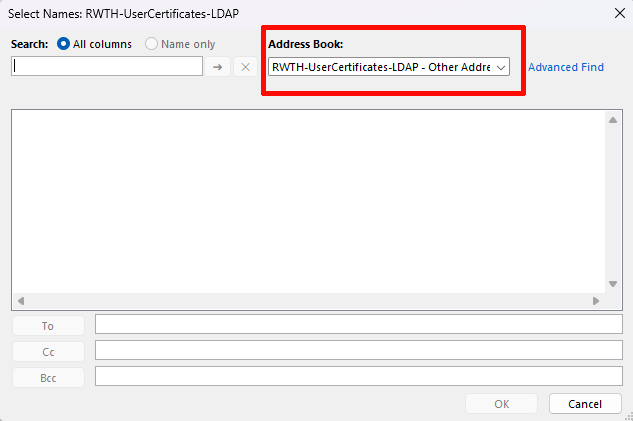
Select the previously set up LDAP address book.
Step 12
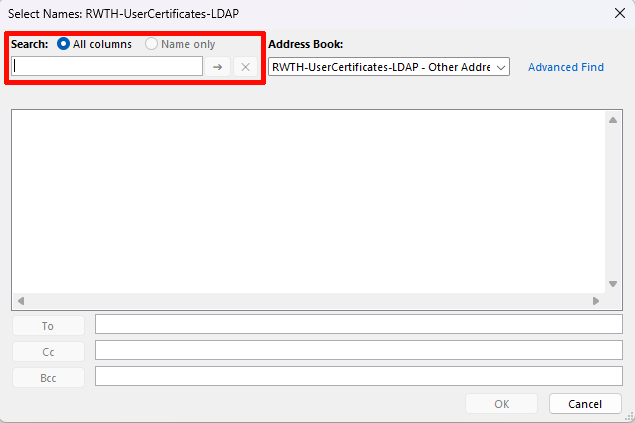
Enter the name or e-mail address of the person in the search field.
Step 13
Select the person from the suggested contacts, also click On and confirm your selection with OK.
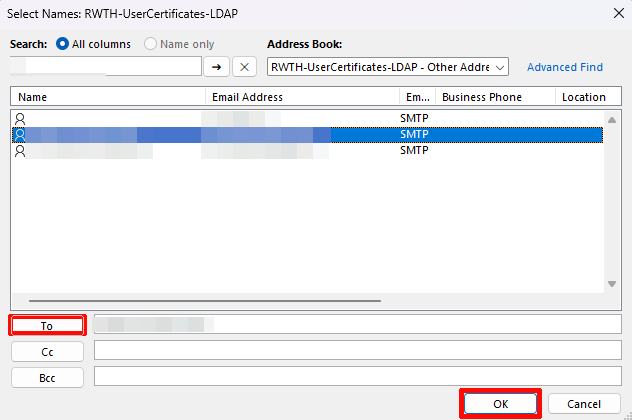
The selected person is now entered in the recipient line.
2. Integrate an LDAP address book in Thunderbird
To integrate an LDAP server as an address book in Thunderbird, please follow the steps below.
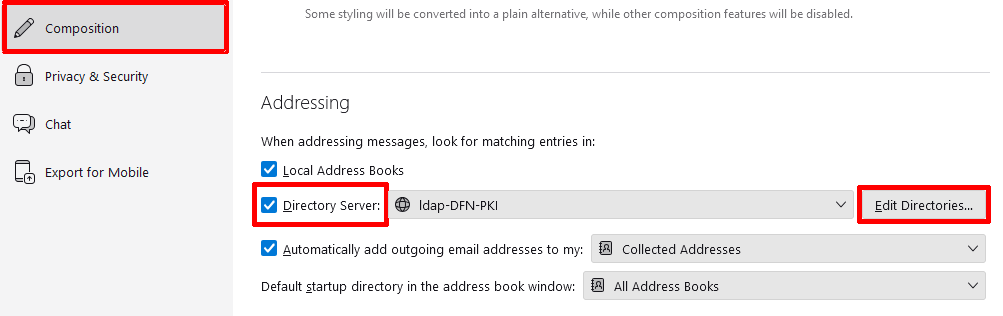
Step 1
Go to the menu on the top right and choose Settings.
Step 2
Choose Composition and scroll to the passage Addressing.
Step 3
Check Directory Server and click on Edit Directories.
Step 4
Click on Add

... and enter the following settings:
- Name, hostname and Basis-DN depending on the LDAP server. Please find the required information in LDAP for user certificates from the RA-Portal
- Port-Nummer: 636
- Bind-DN: keep empty
- Check Use secure connection (SSL)
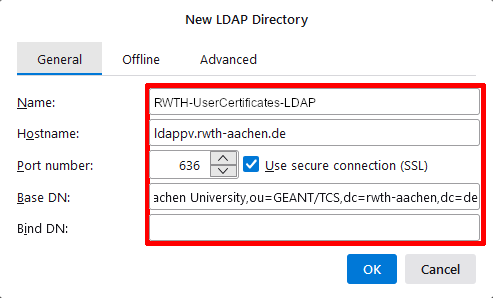
Step 5
Click OK to complete the process.
After that, the address book can be found under Address Book in the menu bar.
