


Apple

On this page, you will find instructions on how to set up an email client for RWTH email on Apple devices.
- Set up an email account on macOS via Applemail (Exchange)
- Set up an email account on macOS via Applemail (IMAP)
- Set up an email account on macOS via Outlook
- Set up an email account on iOS
With the Exchange option, you set up email, calendar, and address book. With the IMAP option, only email is set up.
Set up an email account on macOS via Apple Mail (Exchange)
With the Exchange option, you set up email, calendar, and address book. To do so, follow these steps:
Step 1
Open Apple Mail and add a new account. If the setup process does not start automatically, go to Mail > Accounts in the menu.
Step 2
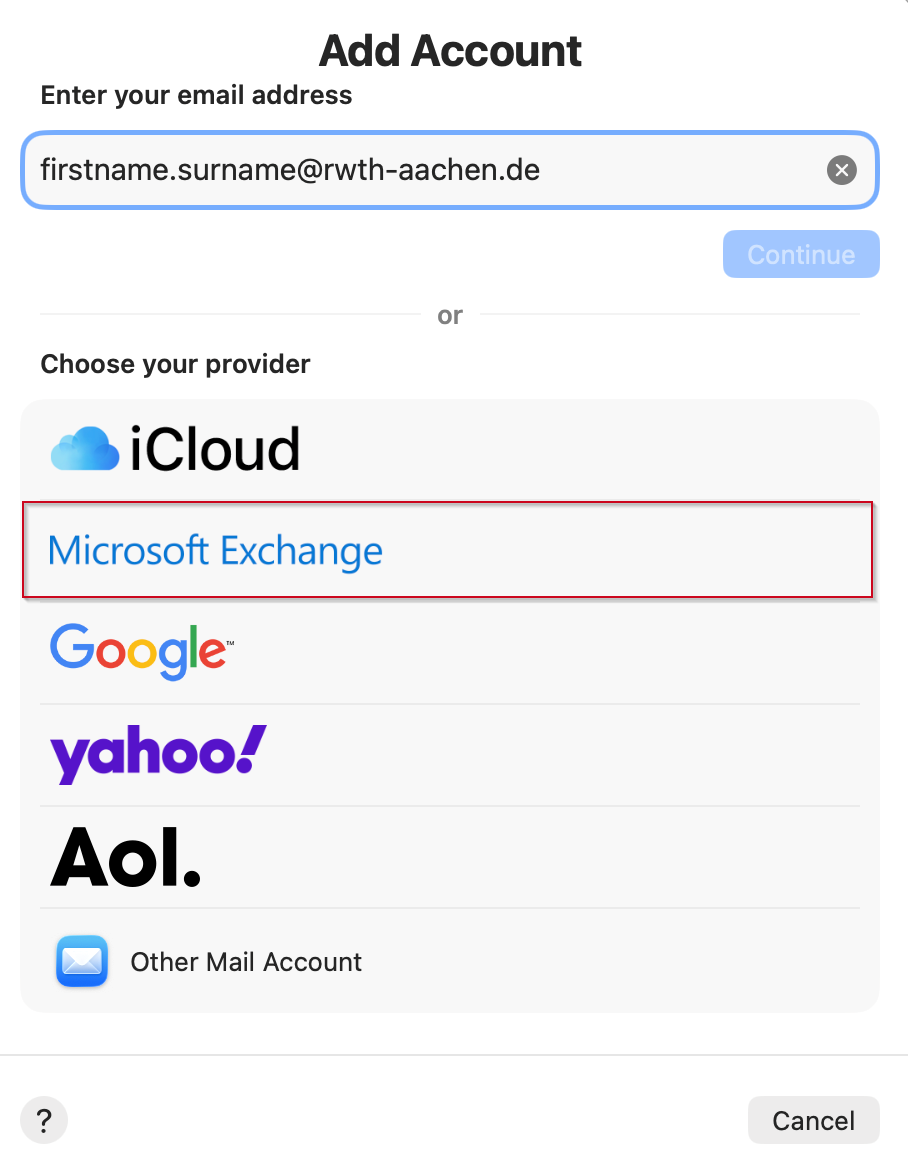
Enter your email address. Use the format firstname.lastname@rwth-aachen.de or name@institute.rwth-aachen.de.

Step 3
Select Microsoft Exchange.
Step 4
Enter your name and click Sign In.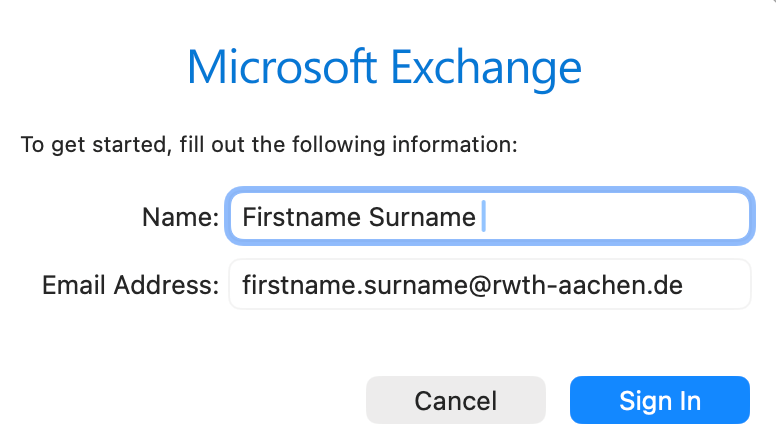
Step 5
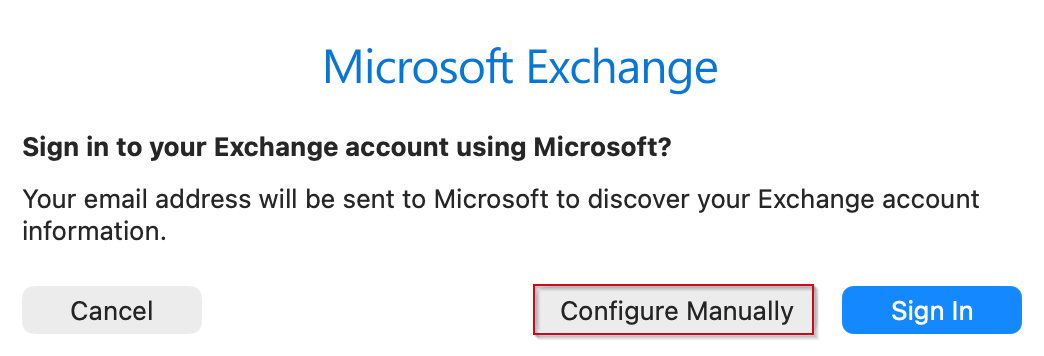
Click Configure Manually.
Step 6
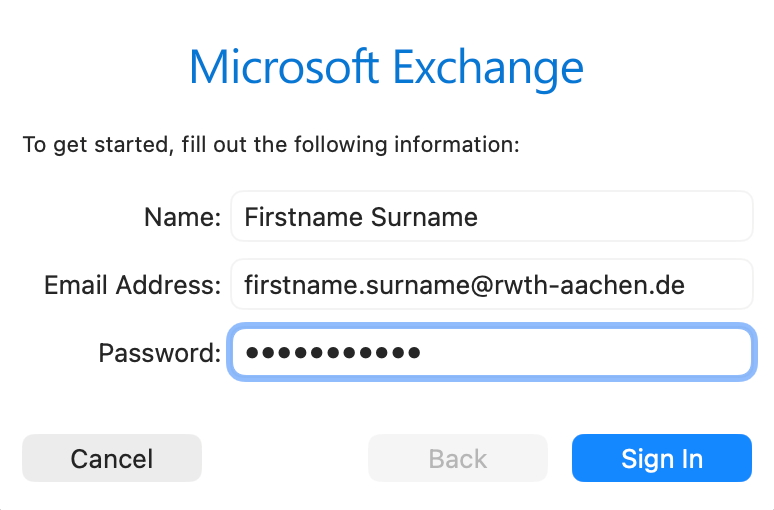
Enter your password and click Sign In.
Step 7
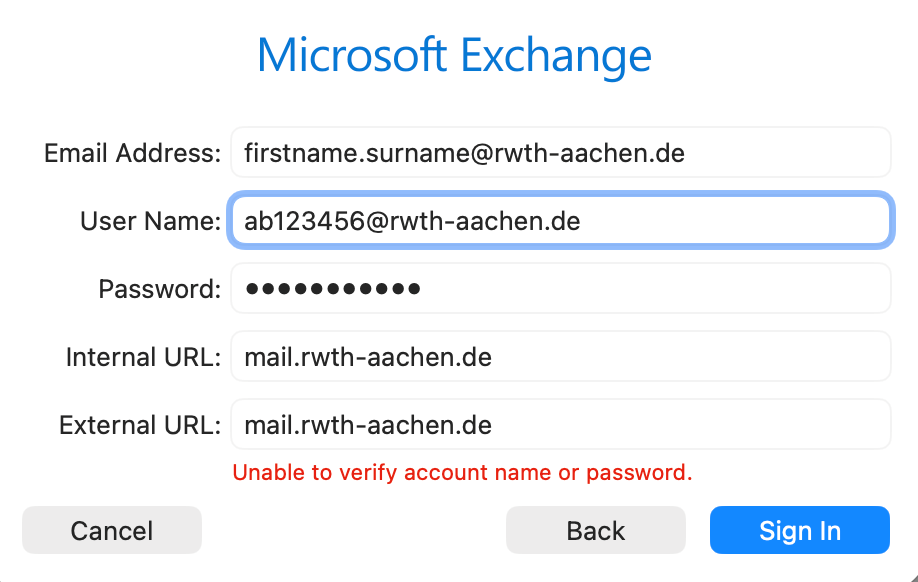
Enter your username in the format ab123456@rwth-aachen.de or ab123456@institute.rwth-aachen.de and enter the server settings if they were not detected automatically.
For institute email addresses, please use your own domain (e.g., name@domain.rwth-aachen.de).
Step 8
Select which apps (Mail, Contacts, Calendar, etc.) you want to sync with this account.

Step 9
Click Done to complete the setup.
Set up an email account on macOS via Apple Mail (IMAP)
With the IMAP option, only email is set up.
These instructions describe how to add an RWTH email address to Apple Mail via IMAP/POP3. Apple Mail version 13.4 was used.
Step 1
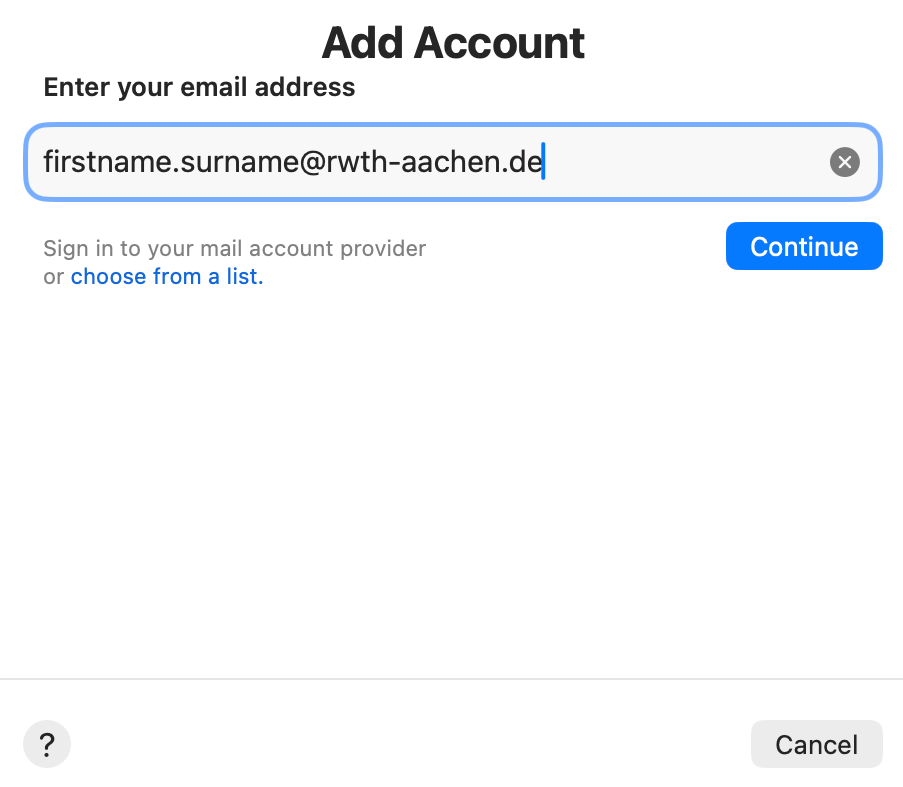
Open Apple Mail and add a new account. If the setup process does not start automatically, go to Mail and then Accounts.
Step 2
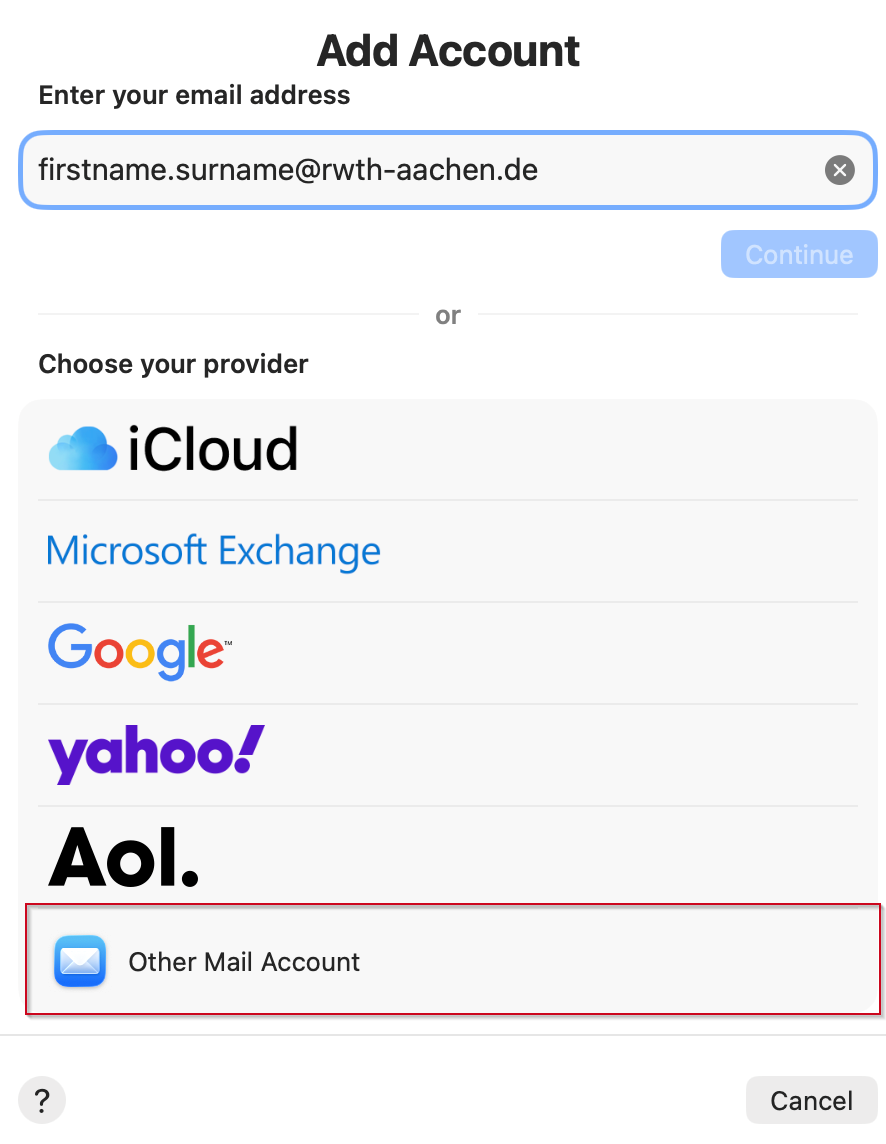
Select Other Mail Account.
Step 3
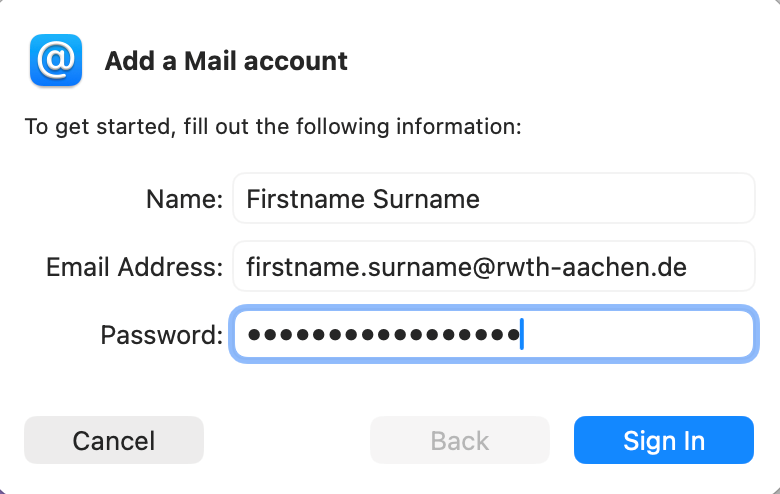
Enter your email address in the format firstname.lastname@rwth-aachen.de or name@institute.rwth-aachen.de, your name, and the password for your RWTH email account (opens in new tab).
Step 4
Enter your username in the format ab123456@rwth-aachen.de or ab123456@institute.rwth-aachen.de and enter the following server settings.
For institute email addresses, please use your own domain (e.g., name@domain.rwth-aachen.de).
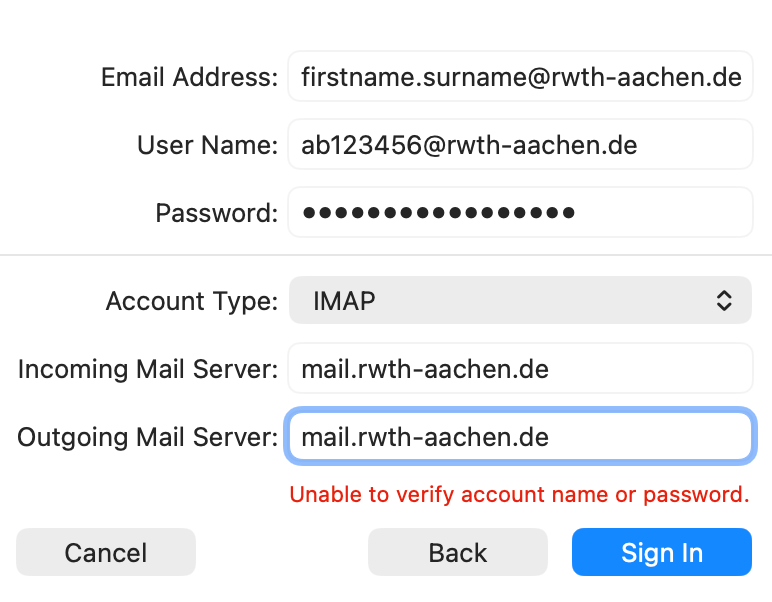
- Email address: Your email address in the format firstname.lastname@rwth-aachen.de
- Username: Your RWTH email user account in the format ab123456@rwth-aachen.de
- Password: The password for your RWTH email account (opens in new tab)
- Account type: IMAP (alternatively, POP3 if required)
- Incoming mail server: mail.rwth-aachen.de
- Outgoing mail server: mail.rwth-aachen.de
Step 5
Select the apps you want to use with this account.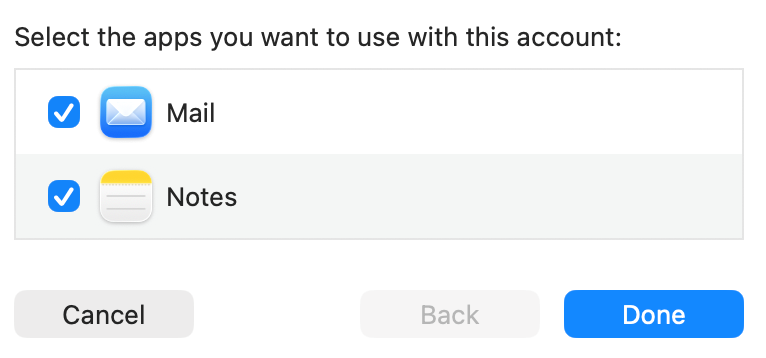
Check SMTP server settings (optional)
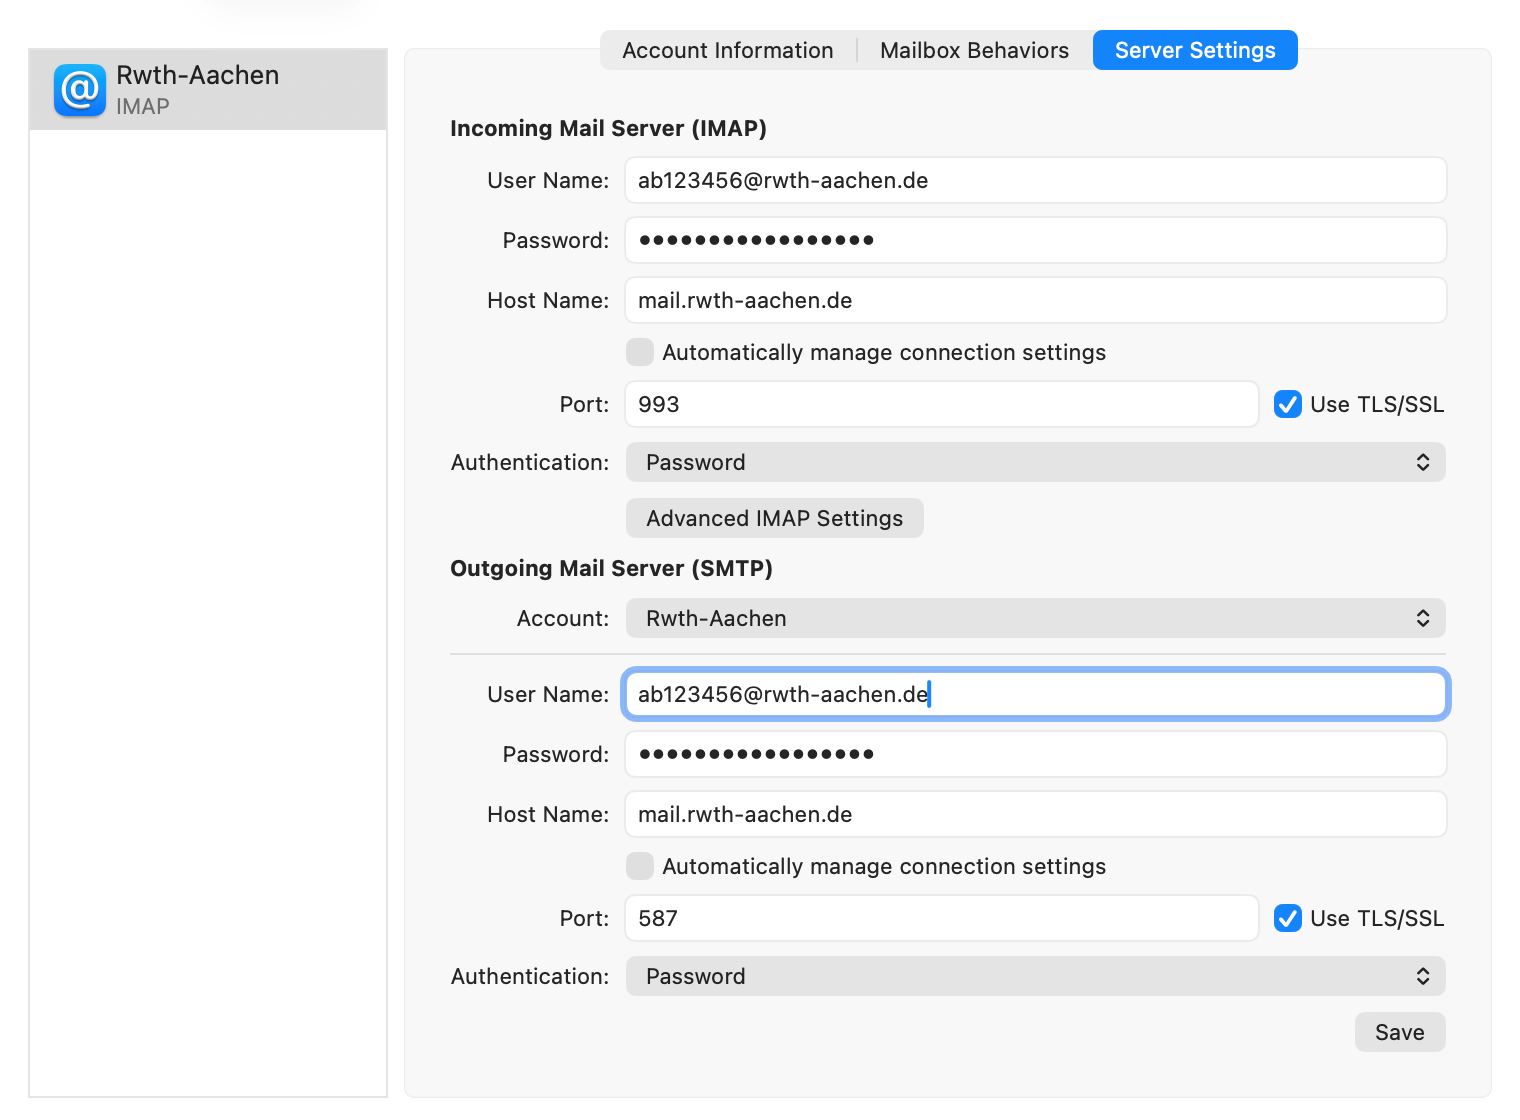
If you are still unable to send emails at this point, please check the outgoing mail server settings (SMTP) under:
- Mail > Settings > Server Settings (for the corresponding account)
- Uncheck Automatically manage connection settings
- Account: Name of the account
- Username: Your RWTH email account in the format ab123456@rwth-aachen.de
- Password: Your RWTH email account password
- Host Name: mail.rwth-aachen.de
- Port: 587 / Check Use TLS/SSL
- Authentication: Password
Set up an email account on macOS via Outlook
You can find instructions on how to set up an Outlook email account on macOS on the page Outlook.
Set up an email account under iOS
Please follow the steps below.
Step 1
Open Settings and type Accounts in the search field at the bottom. Select Mail Accounts and click Add Account.
If prompted, click on choose from a list beneath the field to enter your email address.
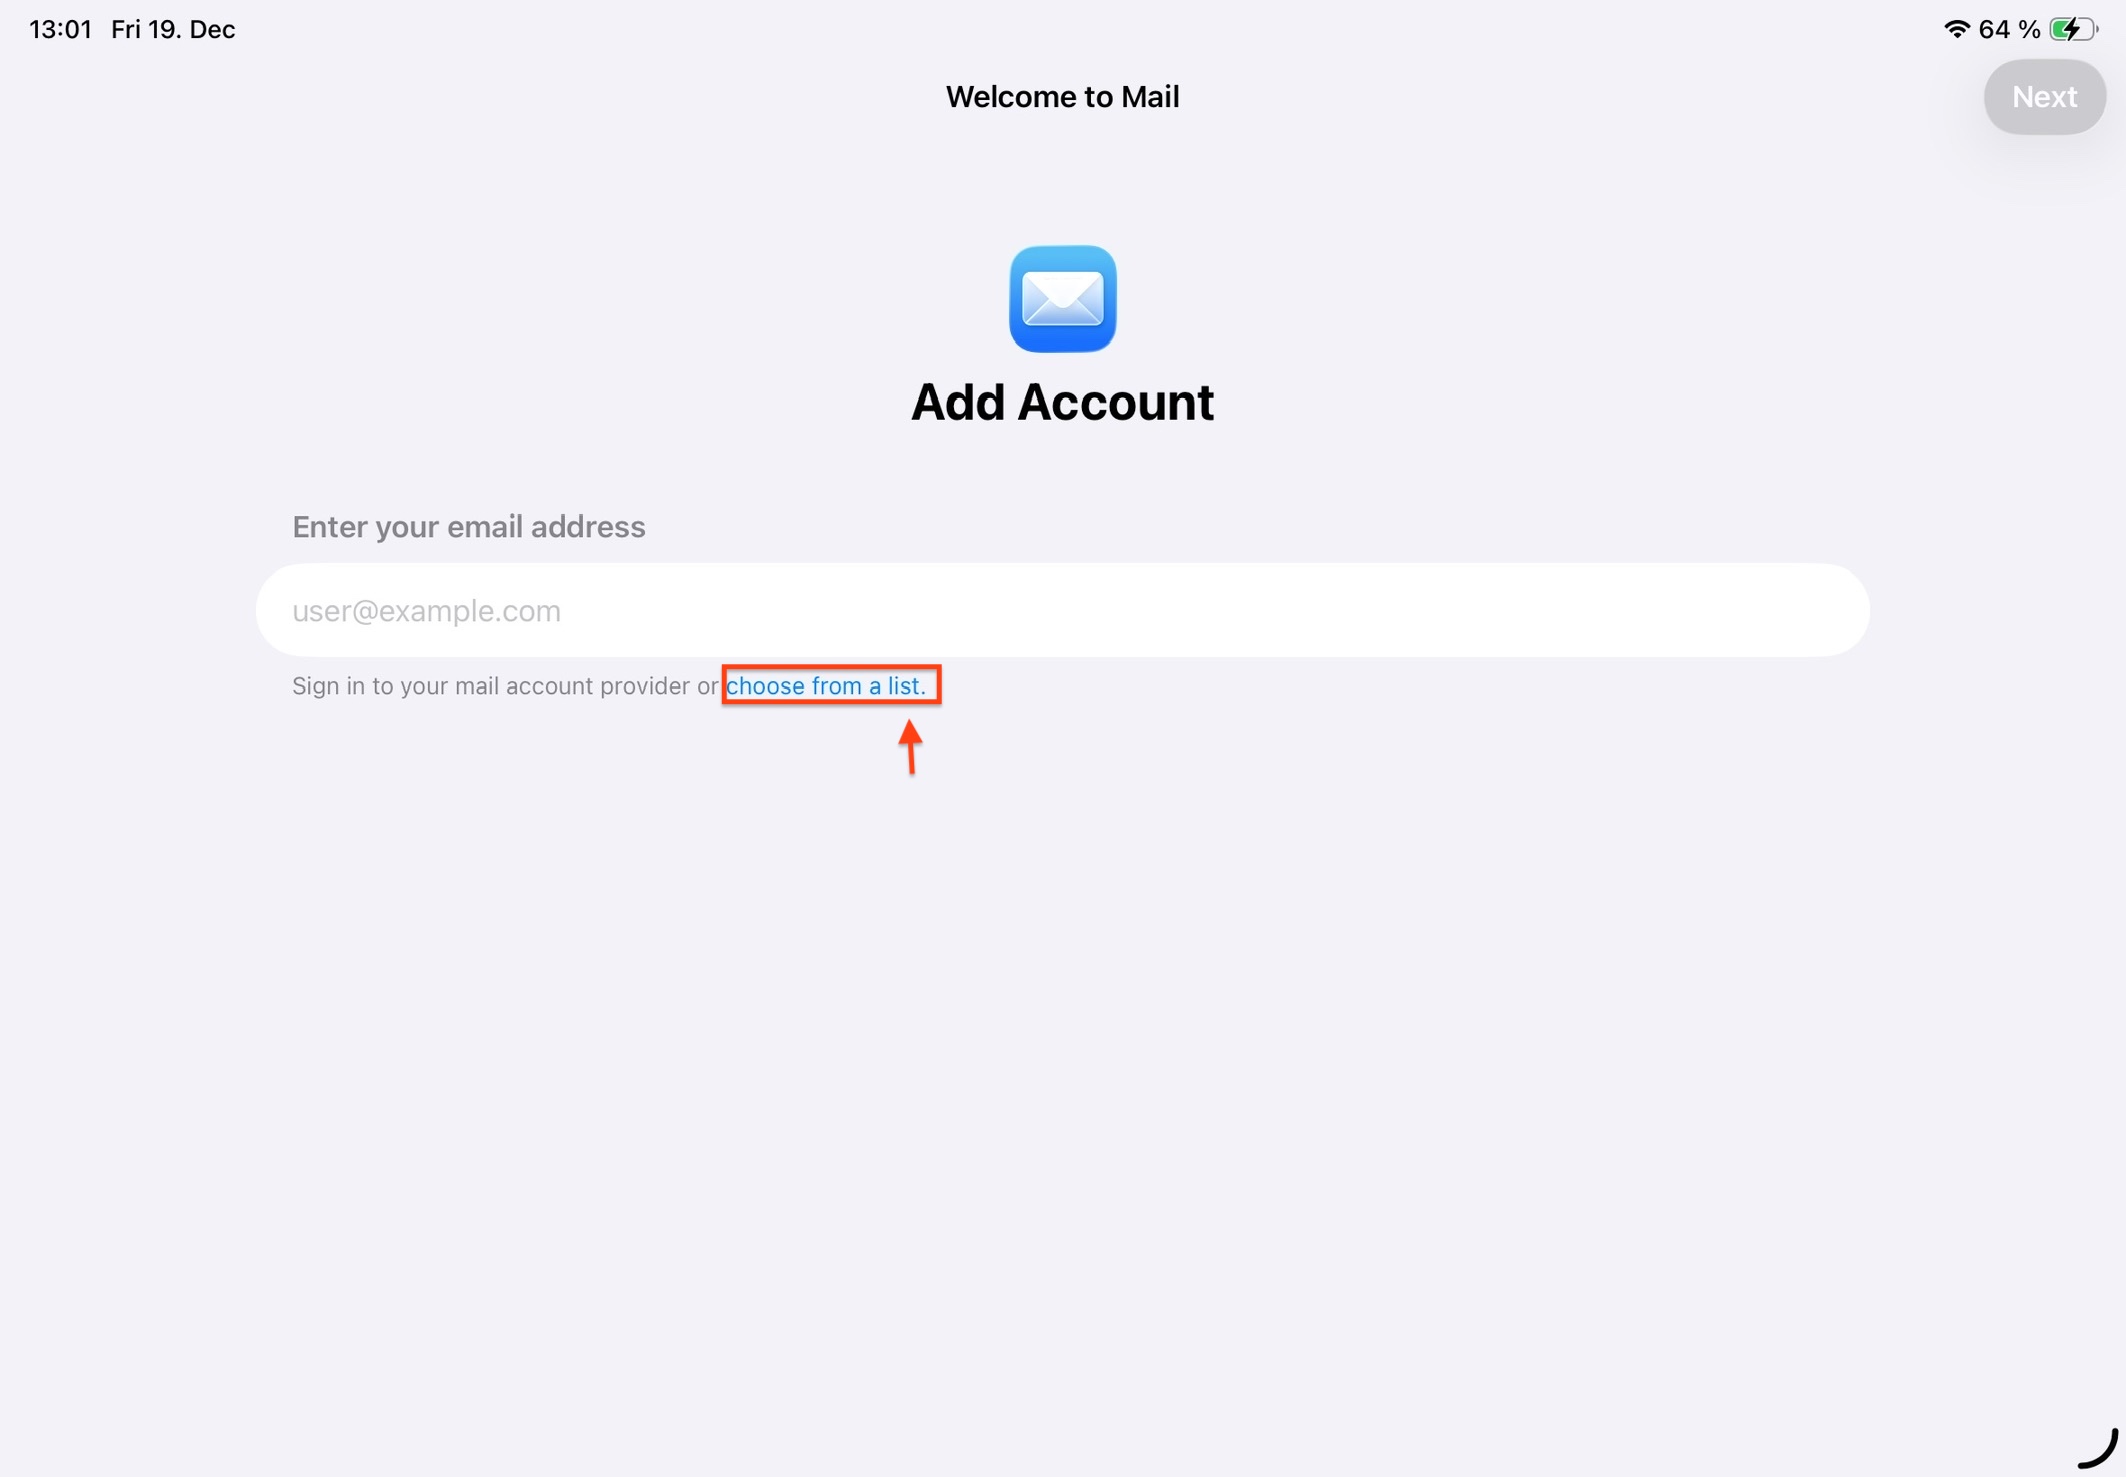
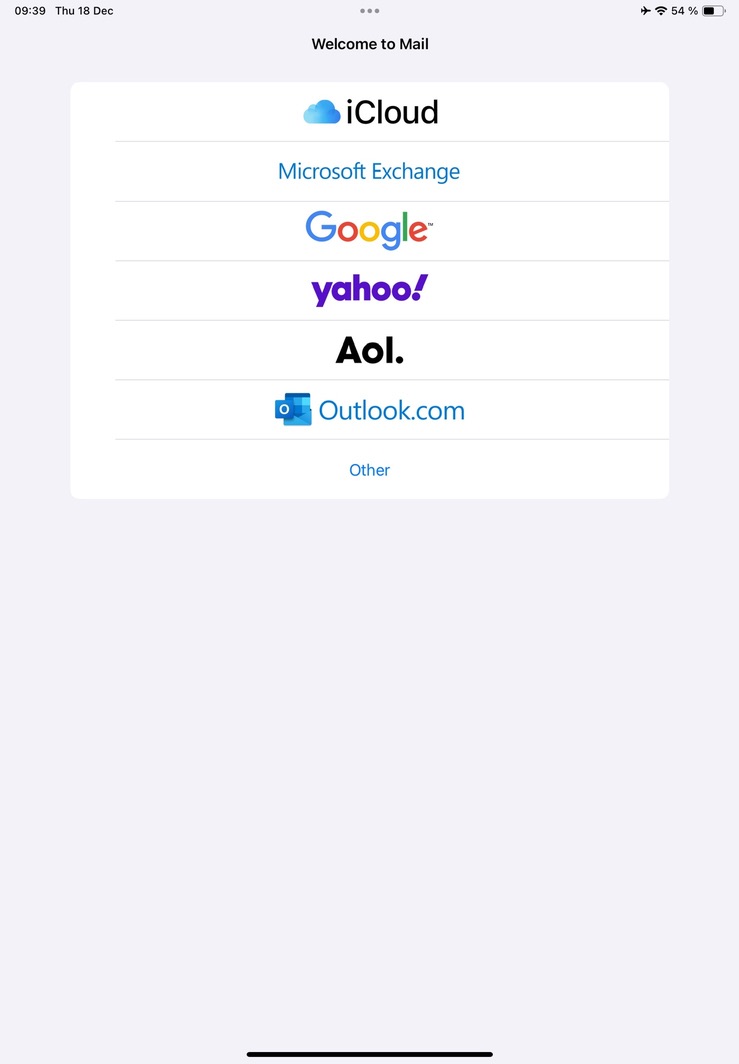
Choose Microsoft Exchange from the list.
Step 2
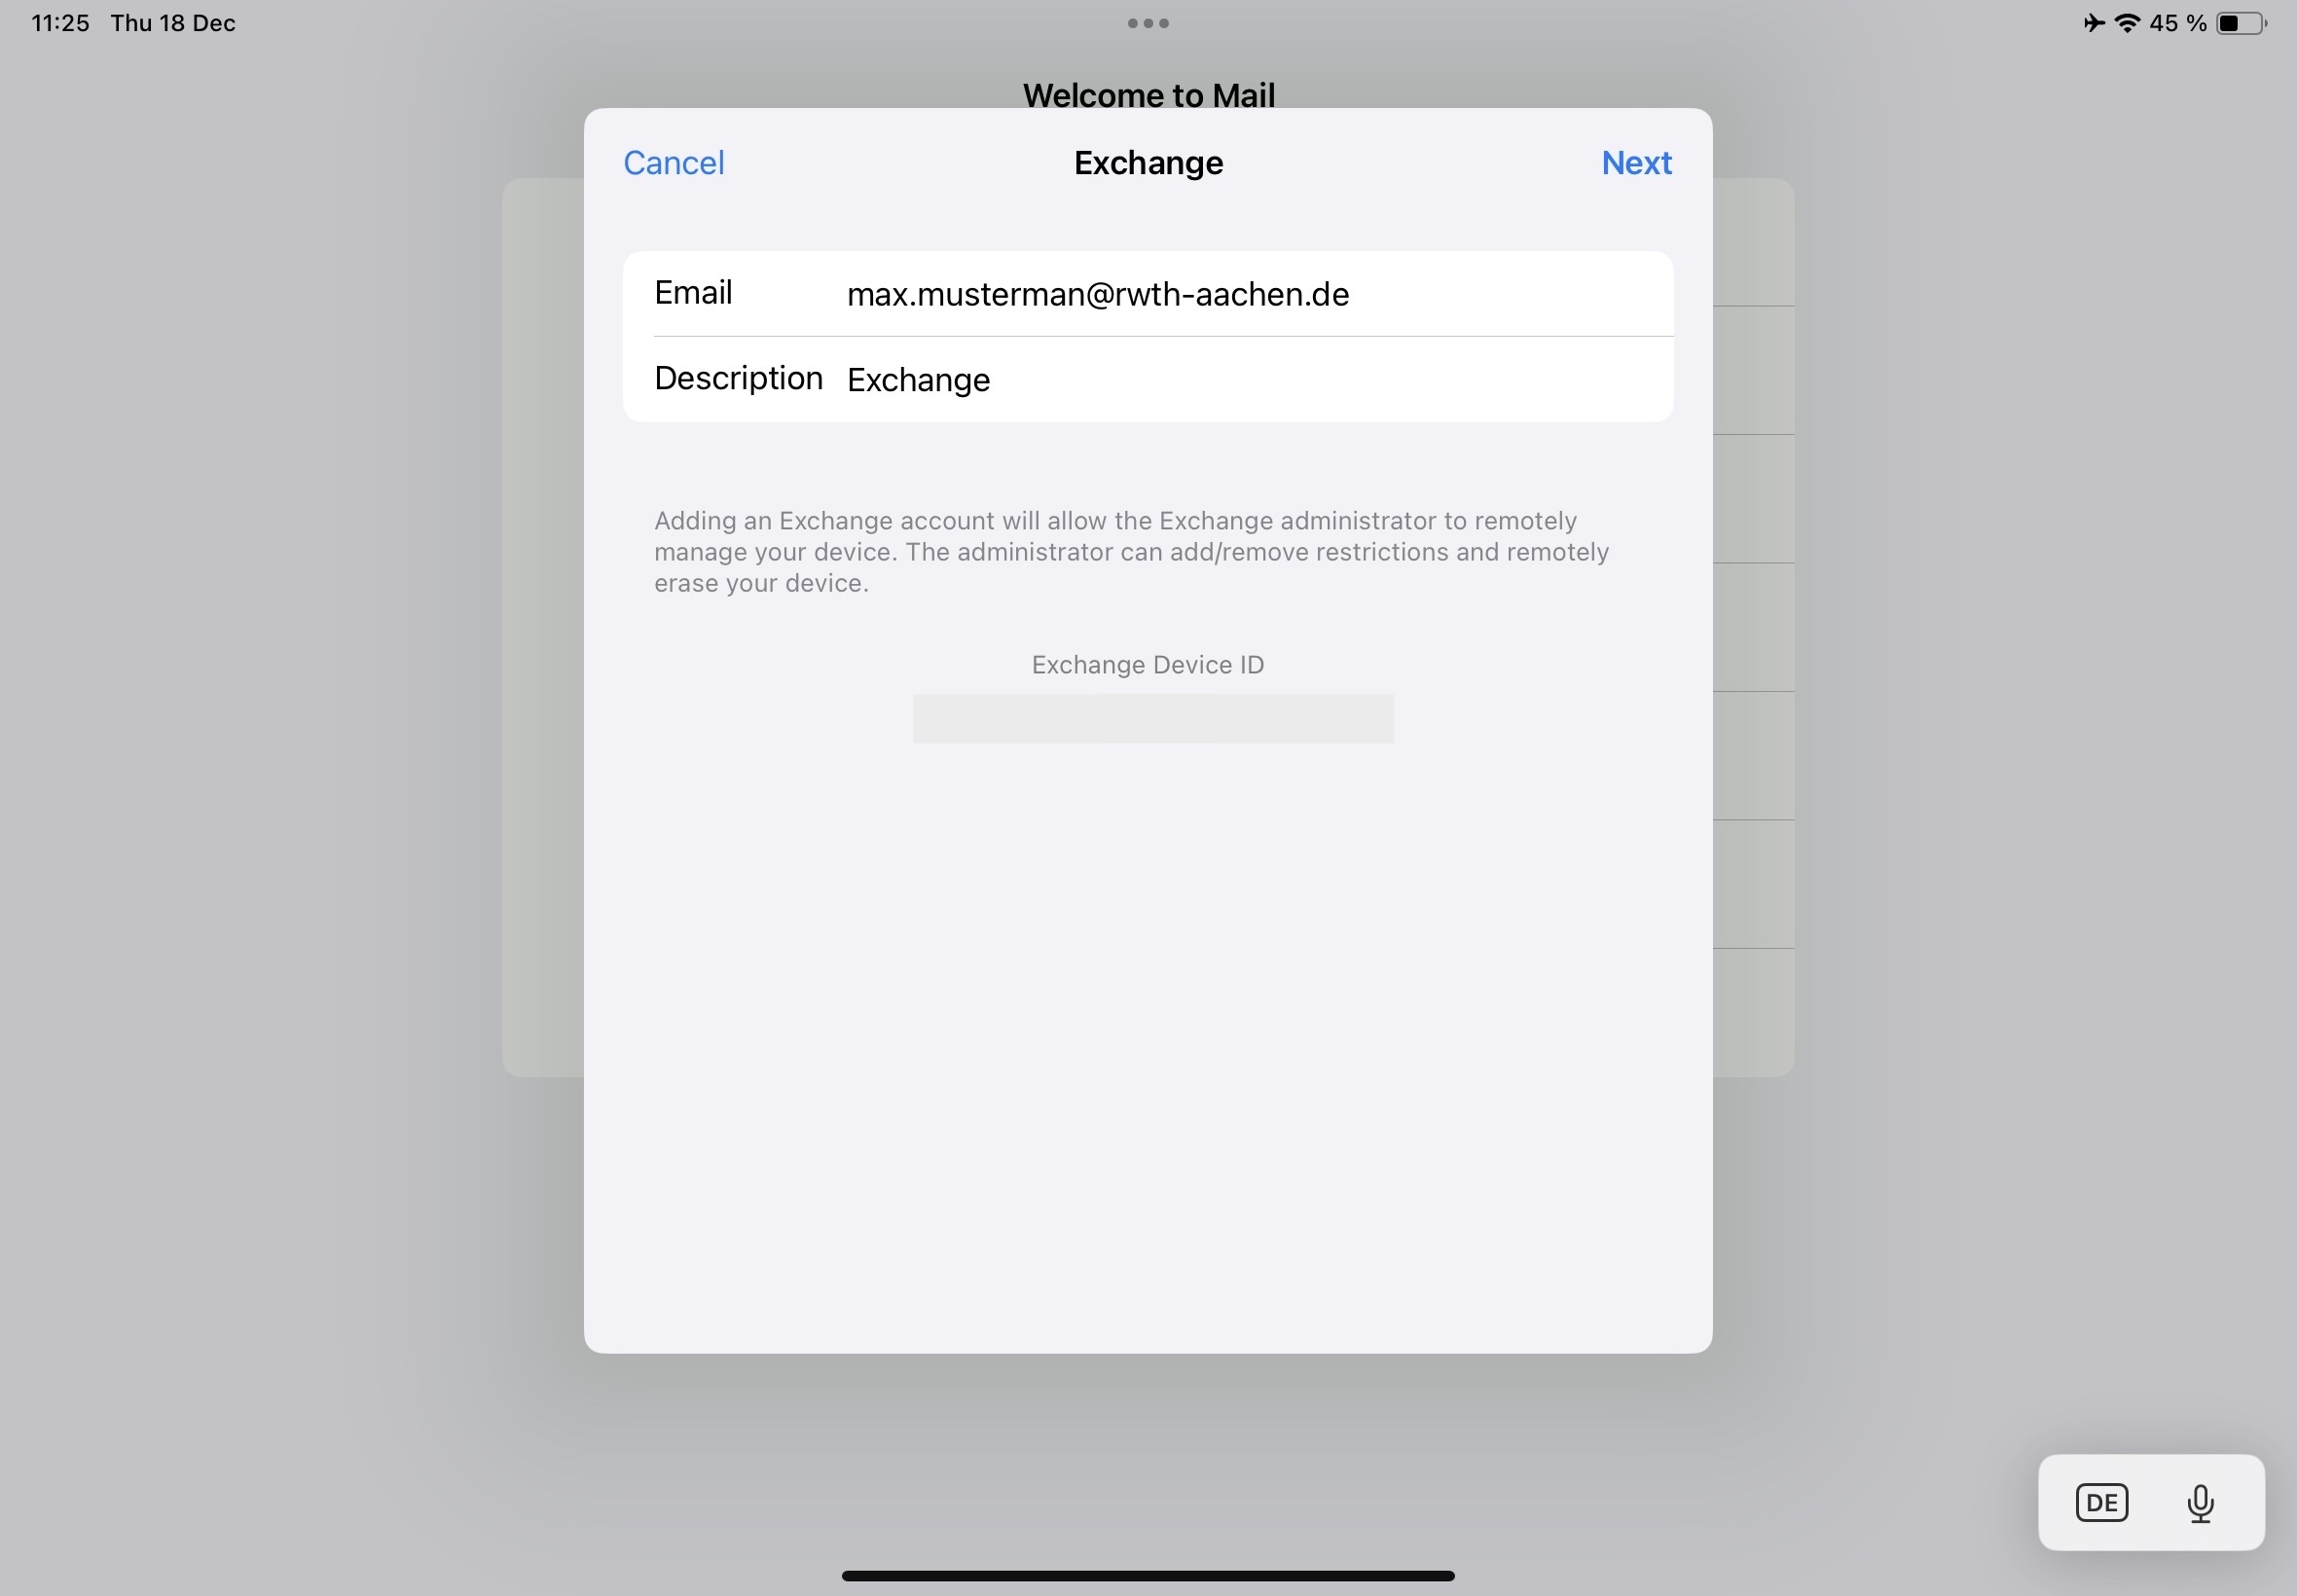
Enter your email address in the format firstname.lastname@rwth-aachen.de or name@institution.rwth-aachen.de.
Step 3
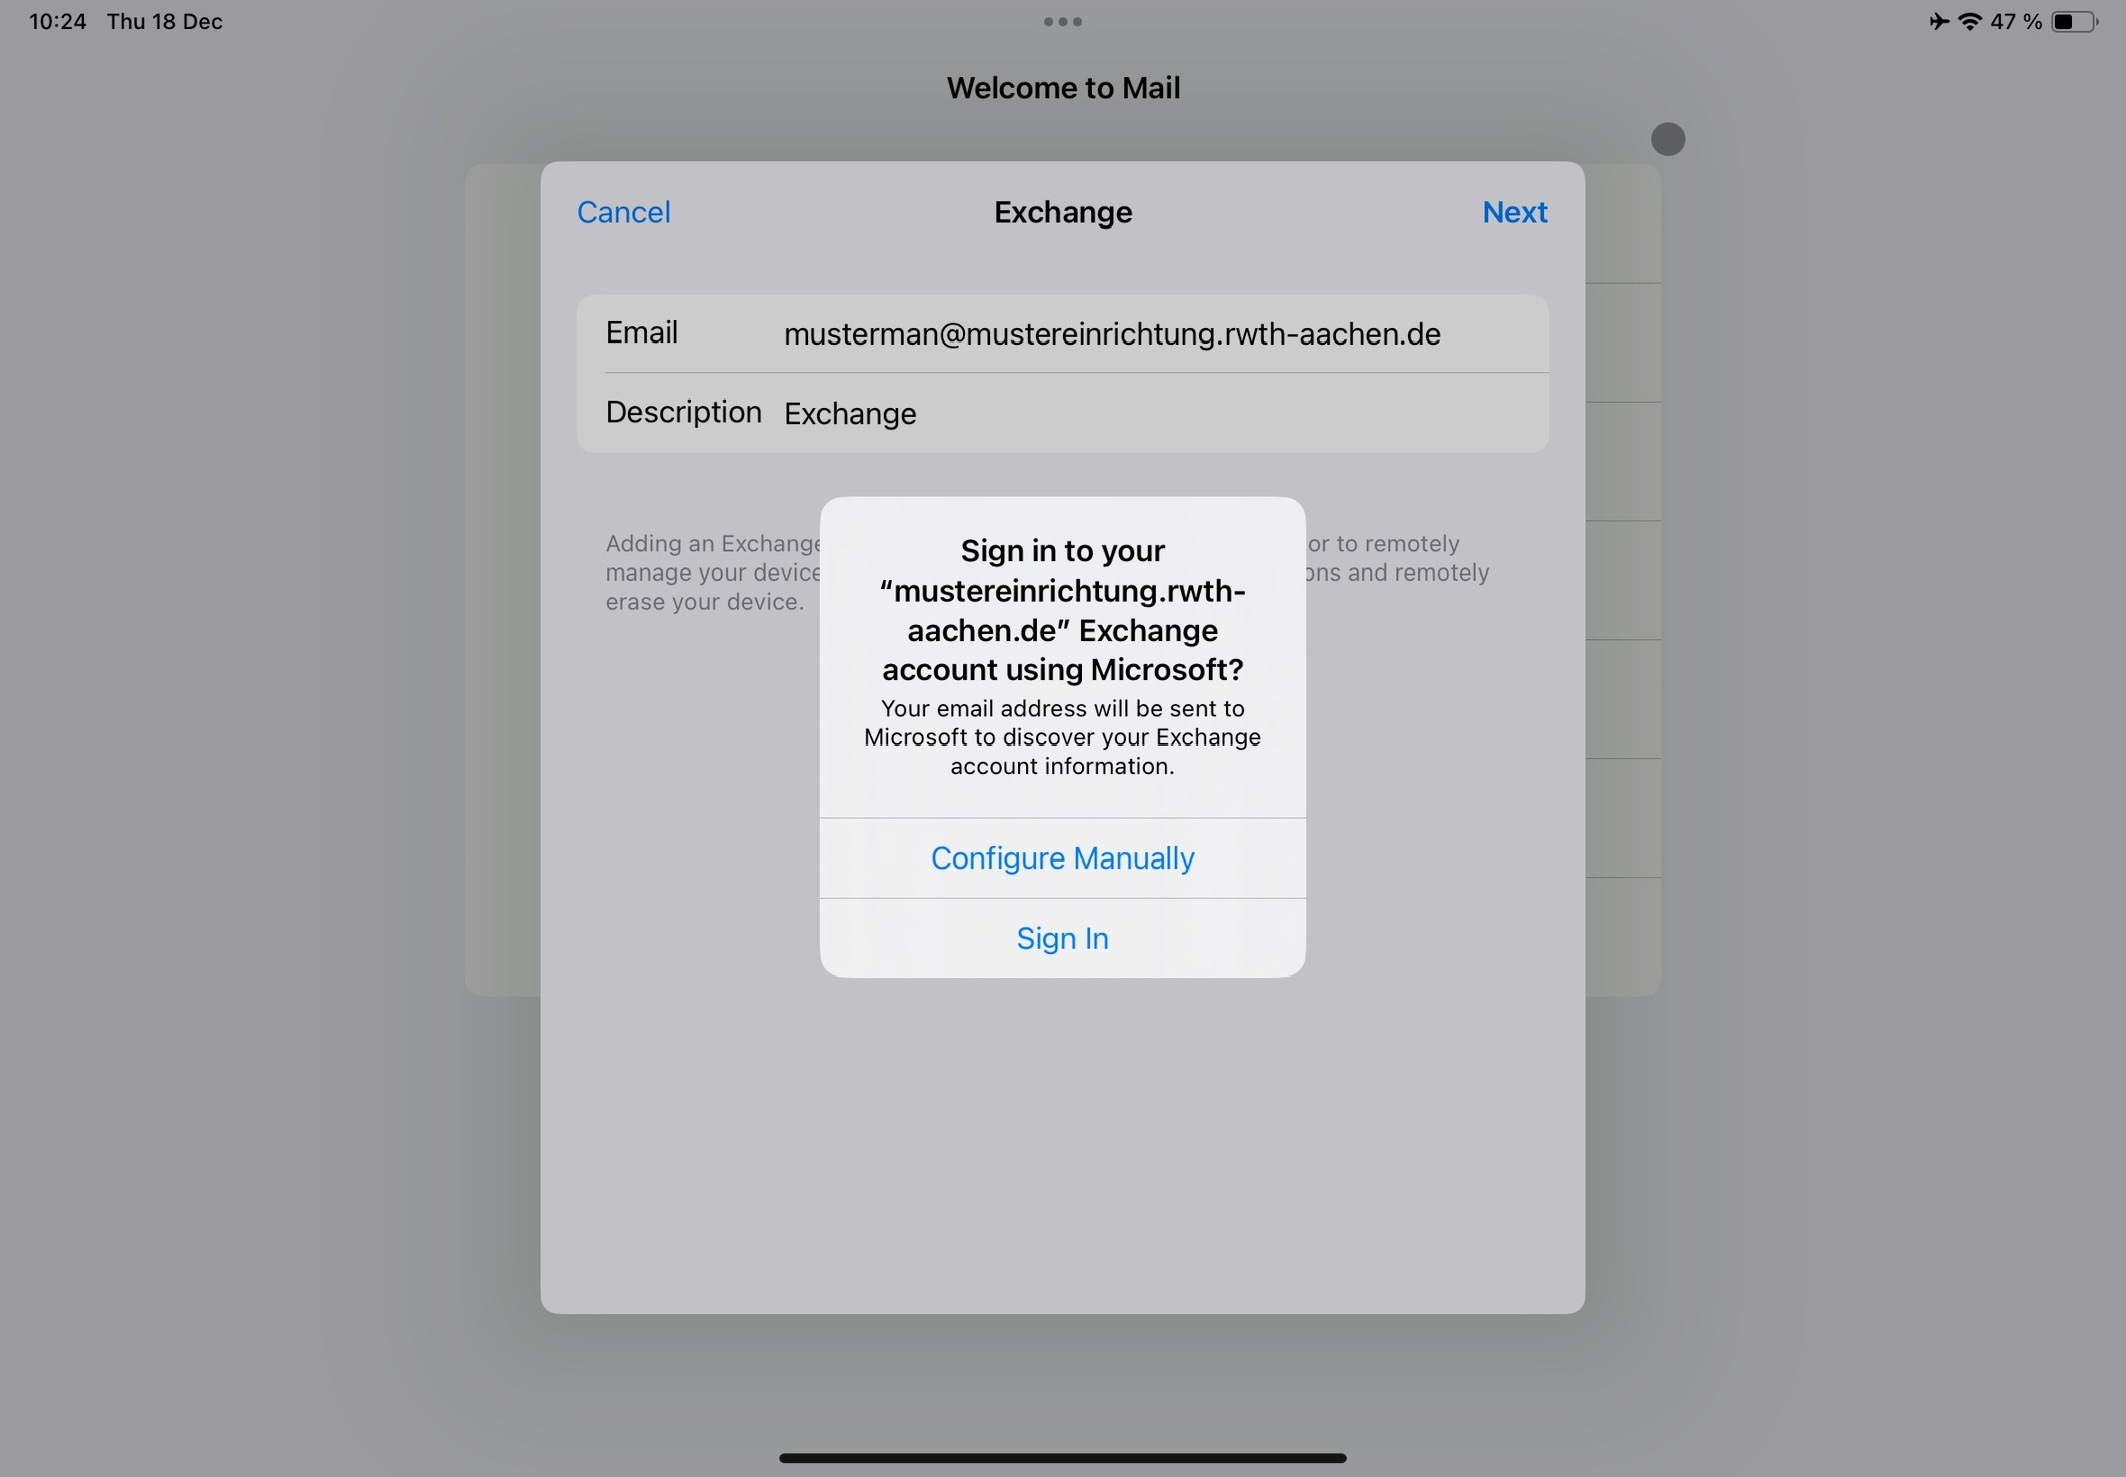
Choose Configure Manually.
Step 4
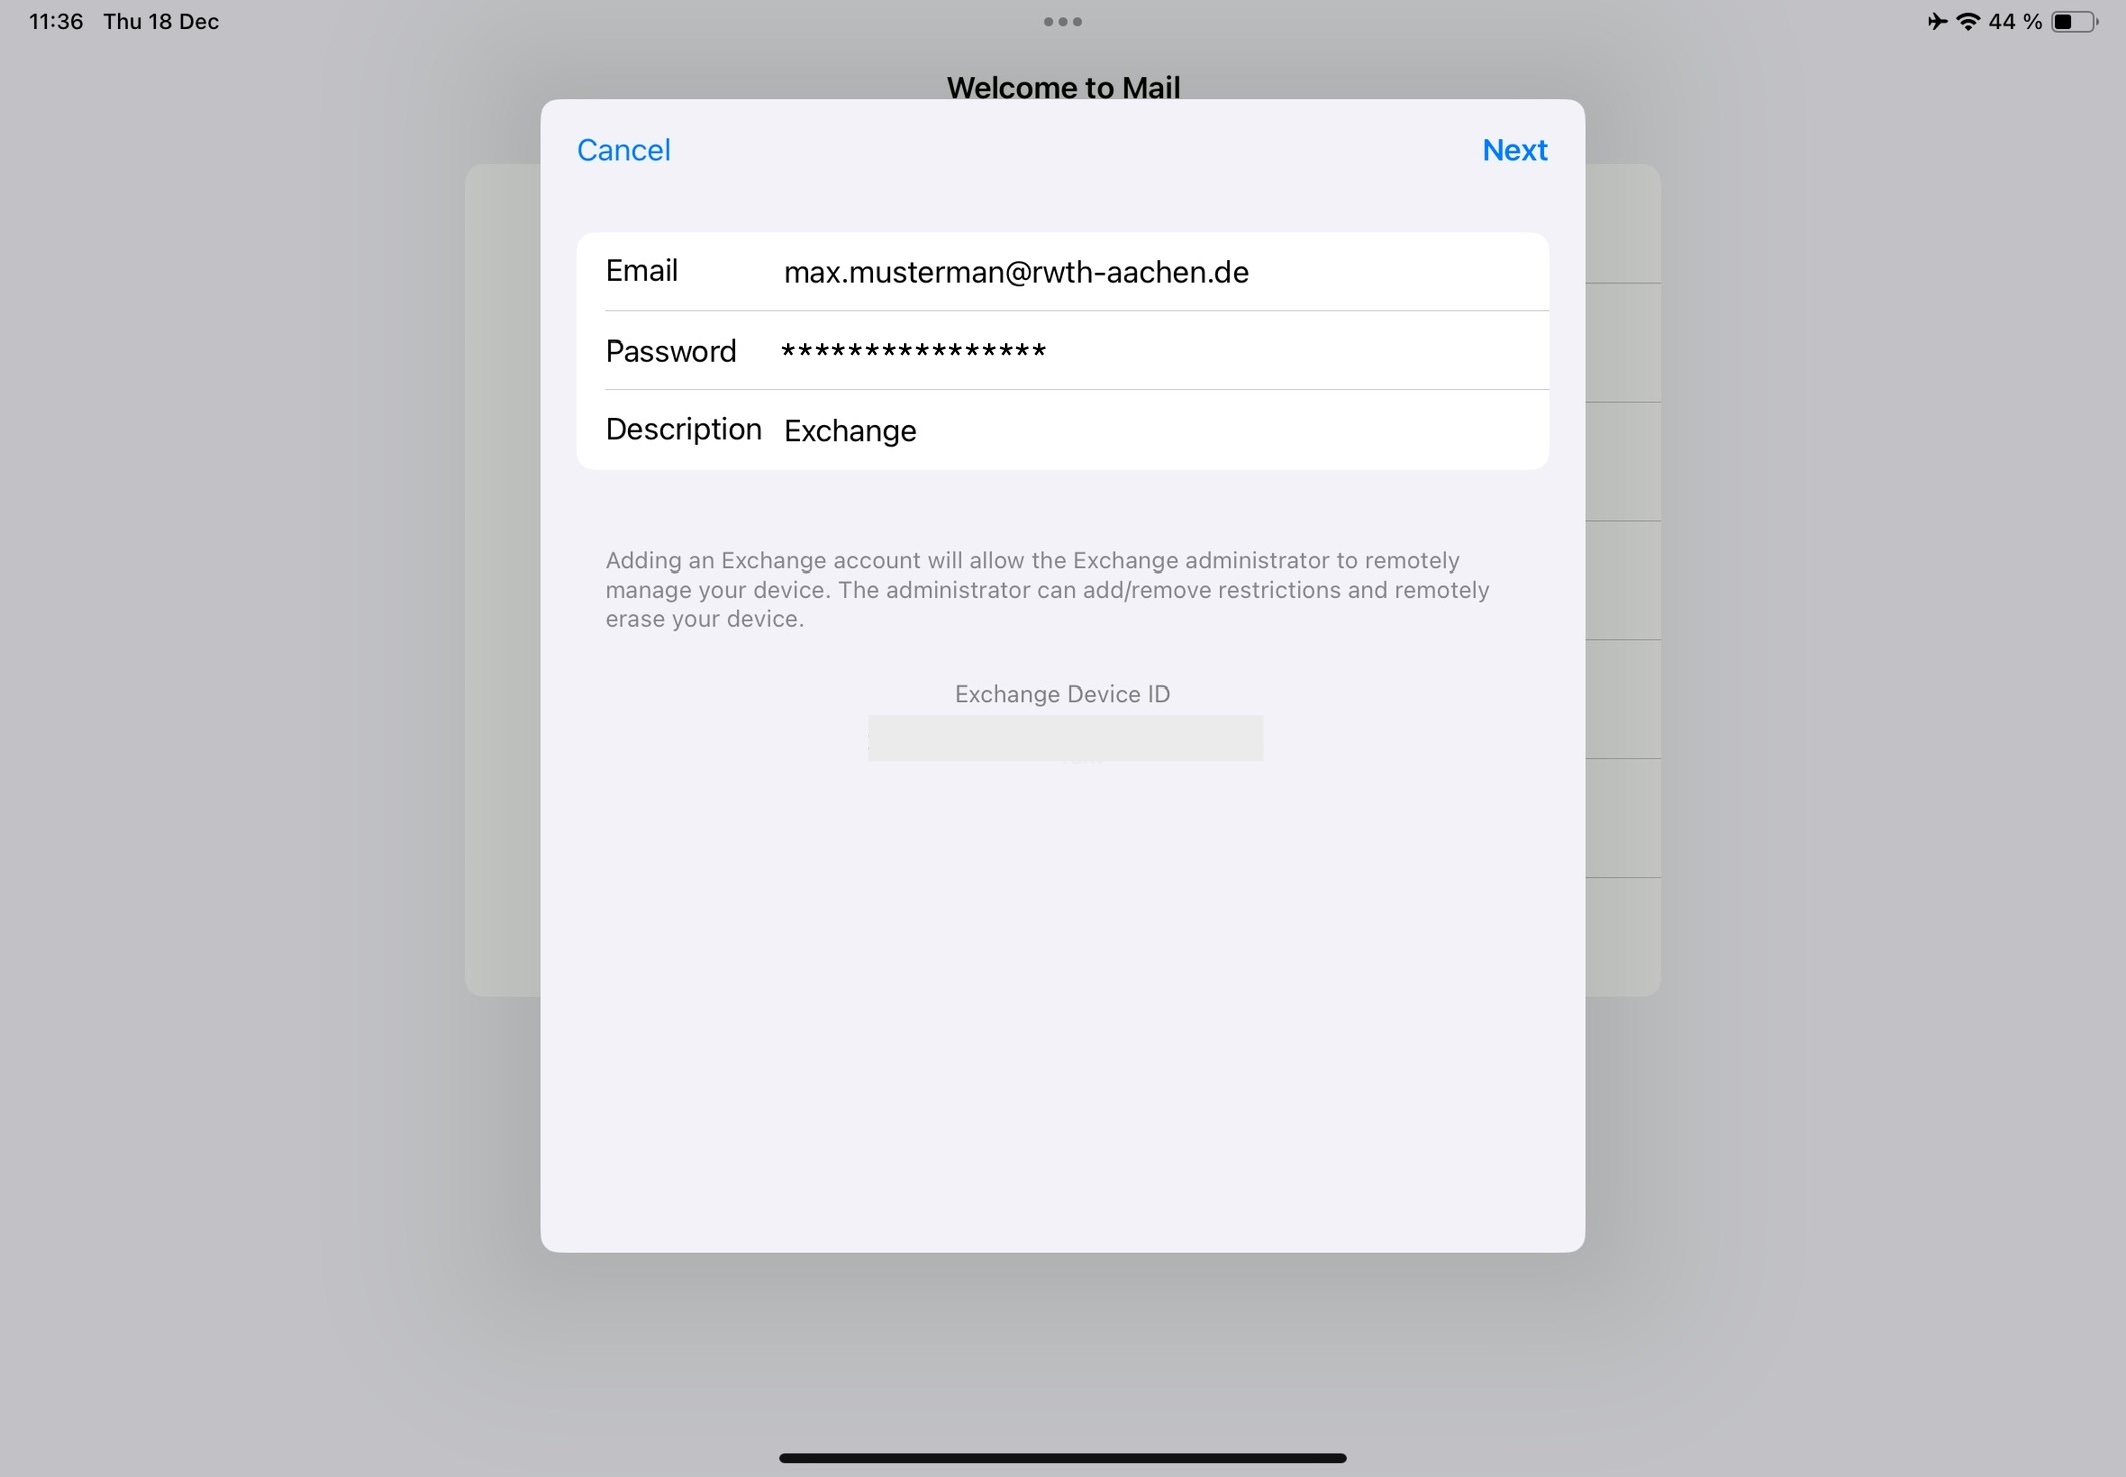
Enter the password for the RWTH email account.
Step 5
Enter your username in the format ab123456@rwth-aachen.de or ab123456@institute.rwth-aachen.de and enter mail.rwth-aachen.de for the server.
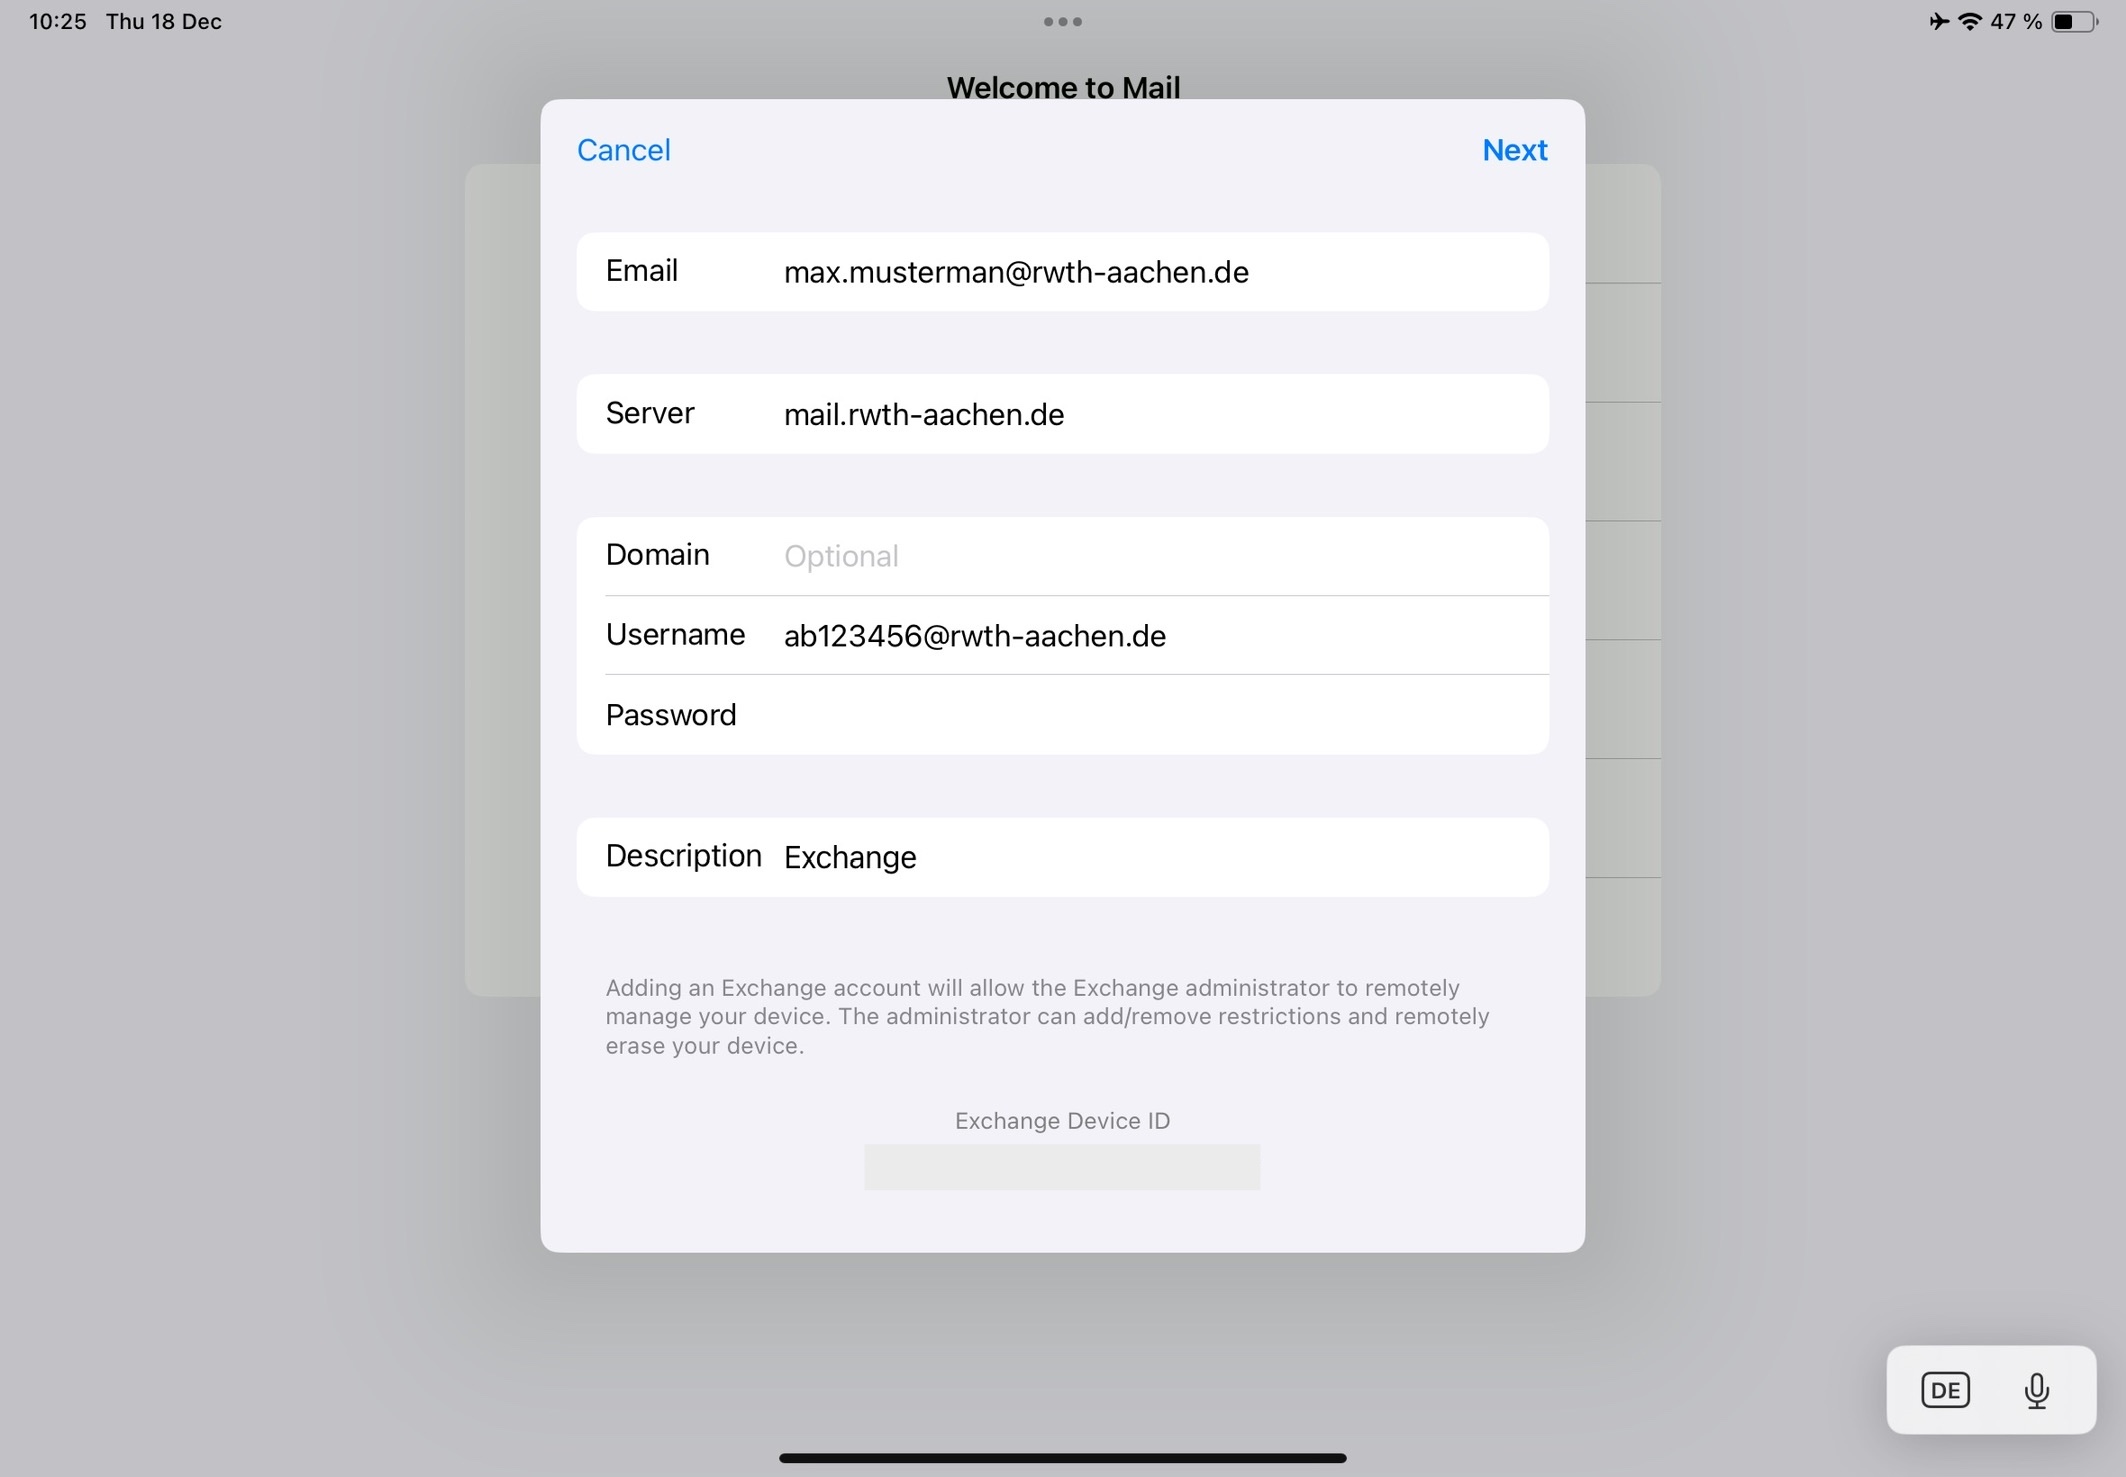
Step 6
Finally, select what you want your account to synchronise.
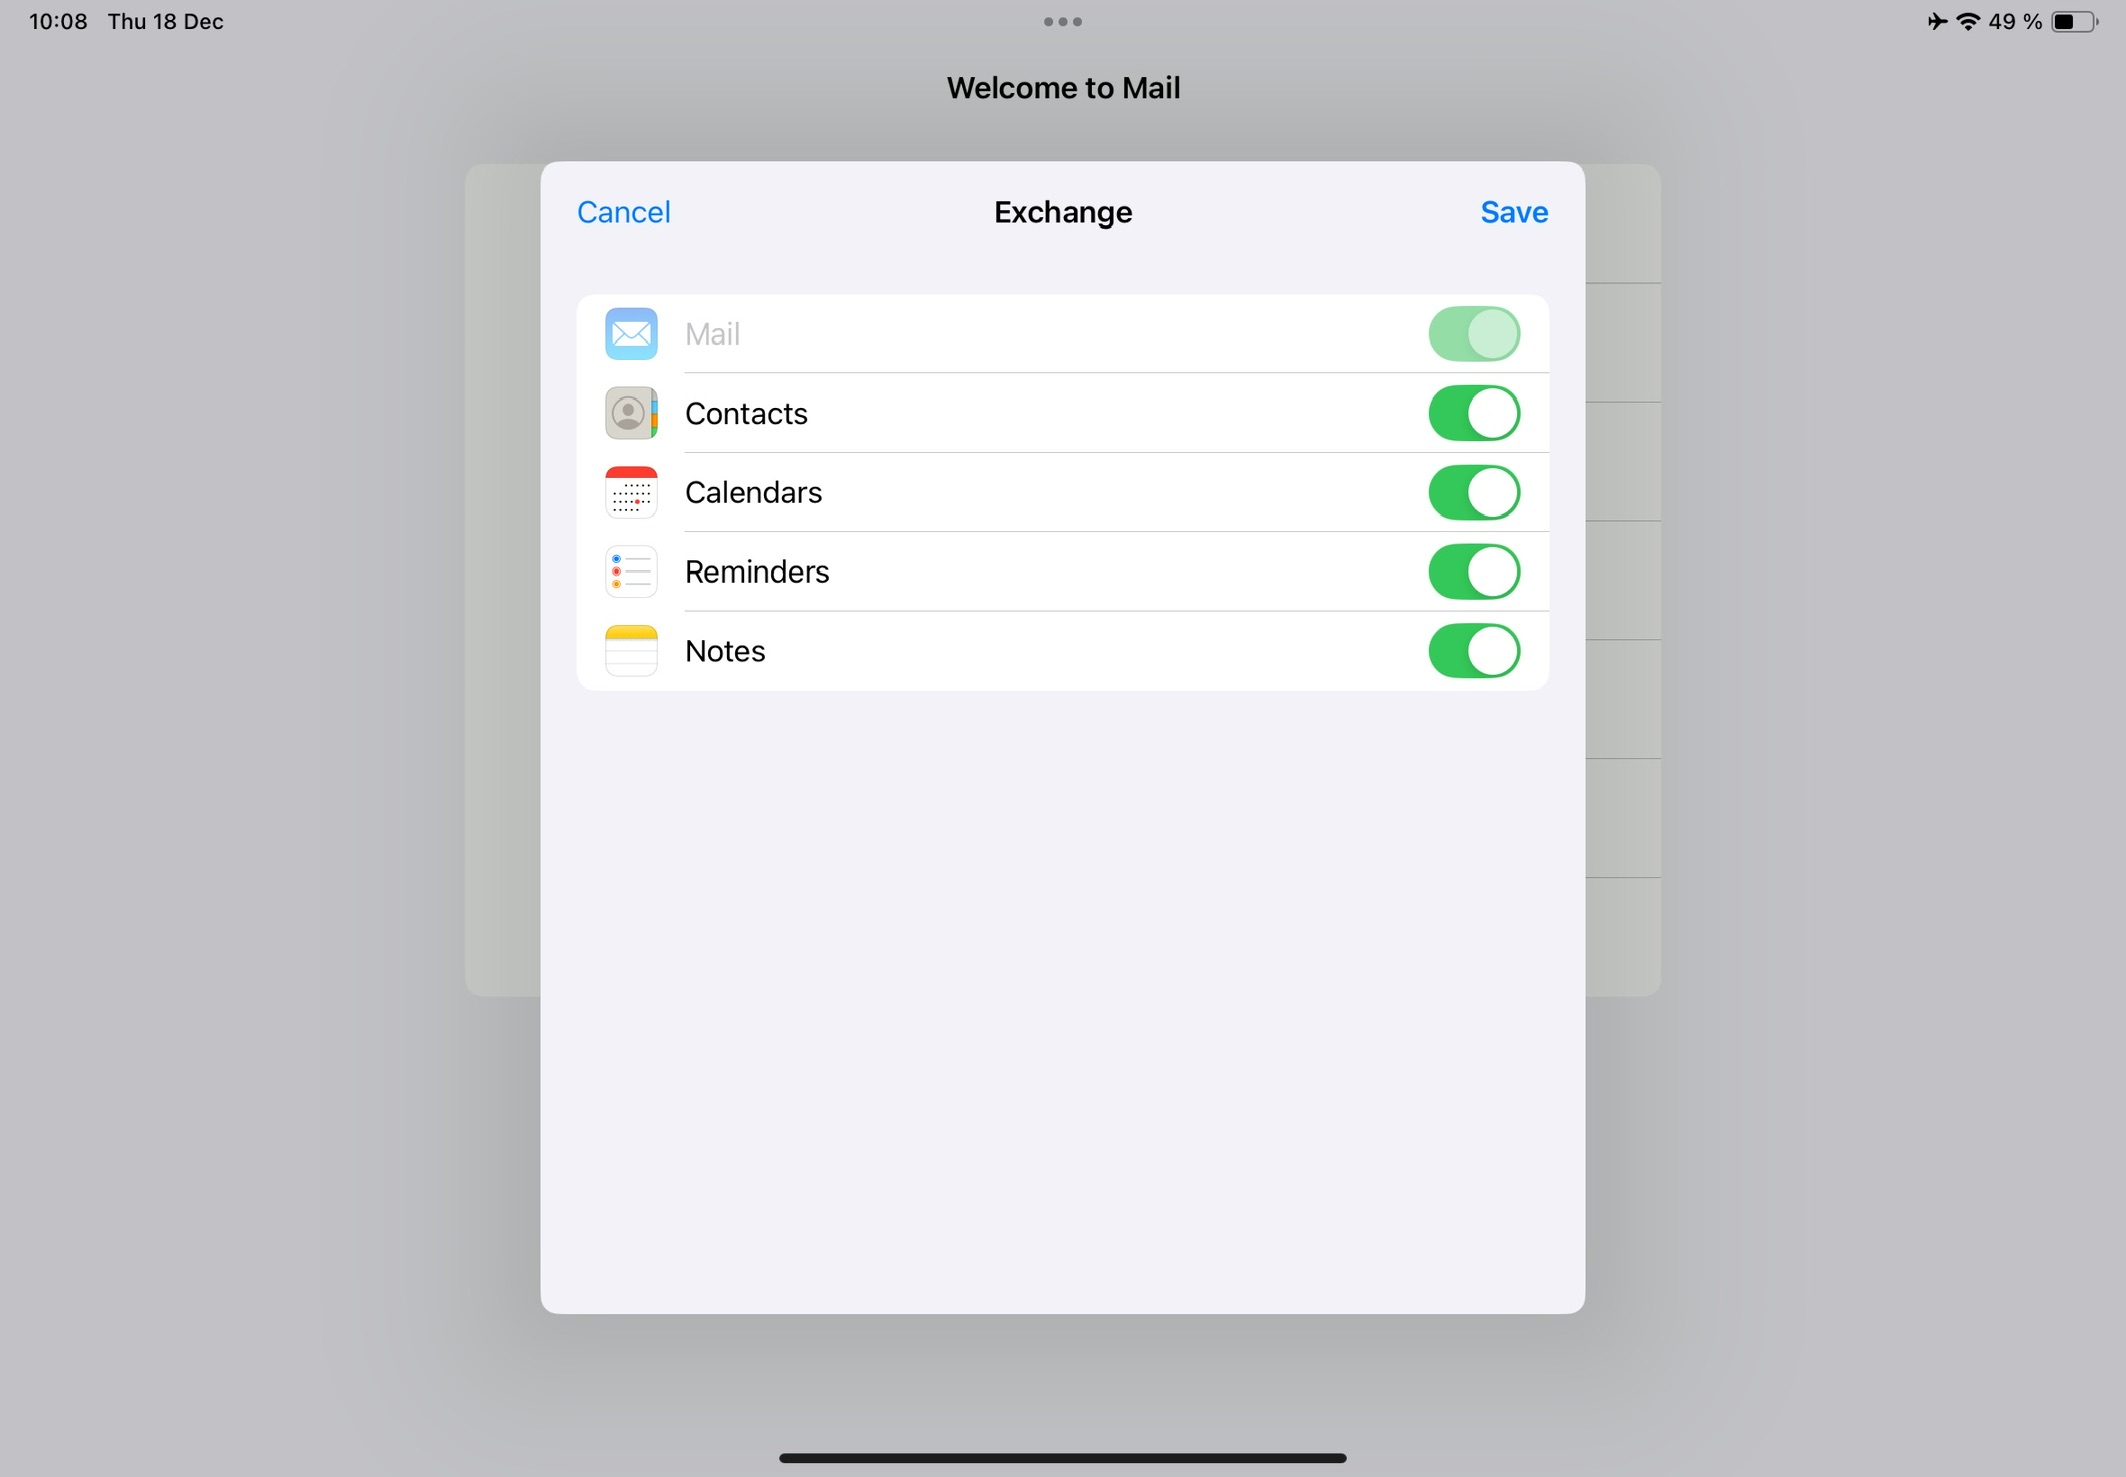
Step 7
Click on Save to complete the setup.
