Sharing Calendar

In diesem Artikel wird erklärt, wie Sie in ihrem E-Mail Client Kalender freigeben können.
- Sharing Calendar in Outlook
- Sharing Calendar in the RWTH MailApp
- Sharing Calendar in Thunderbird (via TbSync)
Sharing Calendar in Outlook
Please note:
In Outlook, calendars can only be shared with other accounts within your own domain.
If you want to assign authorisations for mail accounts outside your own domain, you must set up calendar sharing using the RTWH MailApp.
The authorisation level None should be set for the Standard user, as otherwise any user of the central mail server can view your calendar.
Within the Outlook e-mail client, you can make your calendar visible to other people in several ways.
Outlook also allows you to edit your own calendar and, after assigning the appropriate authorisations, the calendars of other people.
You have the following options to share the calendar with other people:
To view or edit shared calendars, you have the following options:
Change calendar authorisations (recommended)
Step 1
Start Outlook and navigate to the Calendar tab.
Step 2
Now click on Calendar Permissions in the top navigation bar under Share.

Step 3
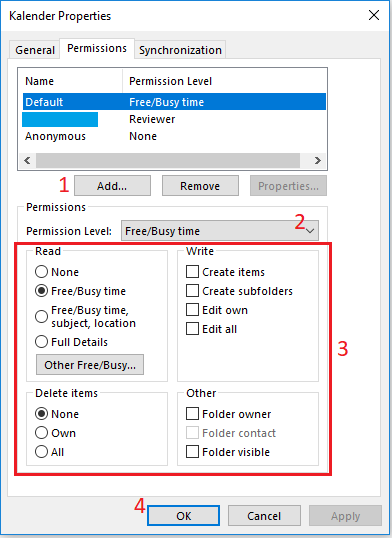
Here you can edit the properties of your calendar.
Under (1), you can add, remove or change the properties of existing entries for persons and groups of persons to whom you want to grant calendar authorisations.
As soon as an entry has been added or an existing entry has been selected, you can select presettings for the authorisations under (2).
If you want to set the authorisations yourself, you can do this under (3). The following options are available:
- Read authorisations for your calendar
- Write authorisations for entries in your calendar
- Delete authorisations for entries in your calendar
- Other viewing rights
So that other users can now integrate your calendar into Outlook, the Folder visible permission must be set at the mailbox level for this calendar.
As soon as you have created new entries and are satisfied with the settings, select (4) Apply and save the settings.
Step 4
Click (4) OK to complete the process and activate the assigned authorisation.
Share calendar
Step 1
Start Outlook and navigate to the Calendar tab.
Step 2
Now click on Share calendar in the top navigation bar under Share.

Step 3
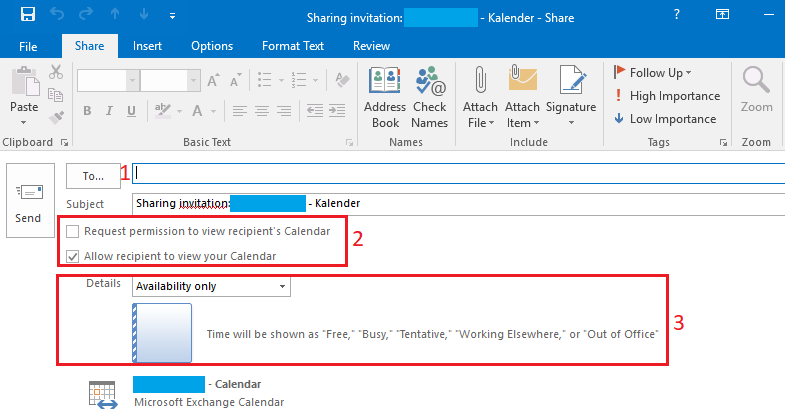
Choose the person with whom you want to share your calendar.
- Under (1), enter the email address of the recipient who is to receive the authorisation.
- Under (2) you can send the authorisation and at the same time select whether you would like to request authorisation to access the recipient's calendar.
- Under (3) you can choose between different authorisation settings:
- Available only: Only Booked or Free is displayed.
- Restricted details: Availability and subject are displayed.
- All details: All details are displayed
Step 4
If you are happy with the settings, send the authorisation by clicking on Send.
Confirm the enquiry with Yes.
Add an additional mailbox
Step 1
Start Outlook and click on the File tab.
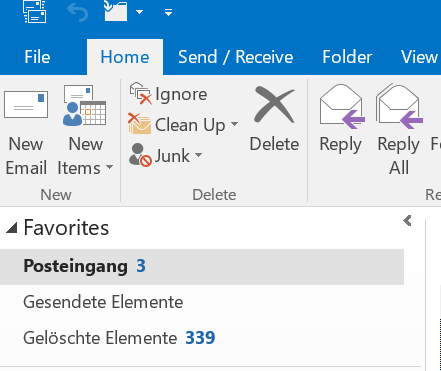
Step 2
Then click on Account Settings and Account Settings.
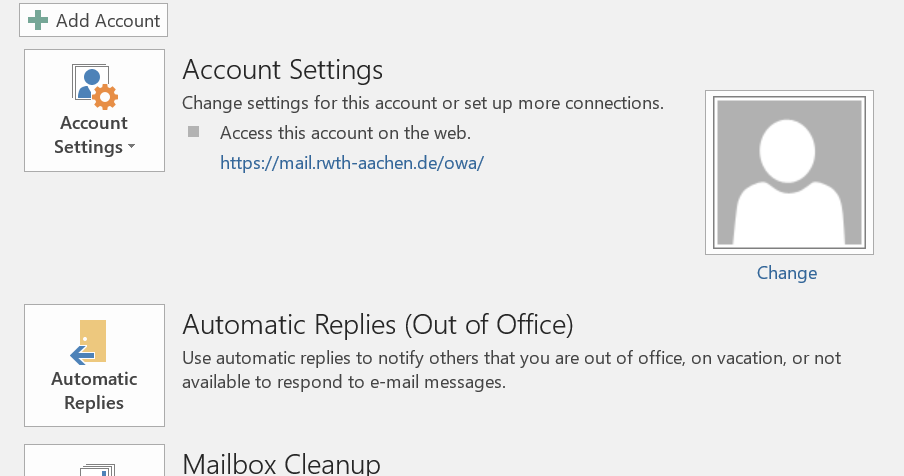
Step 3
Now select your e-mail address.

Step 4
Then click on Change.

Step 5
You must now click on More Settings.
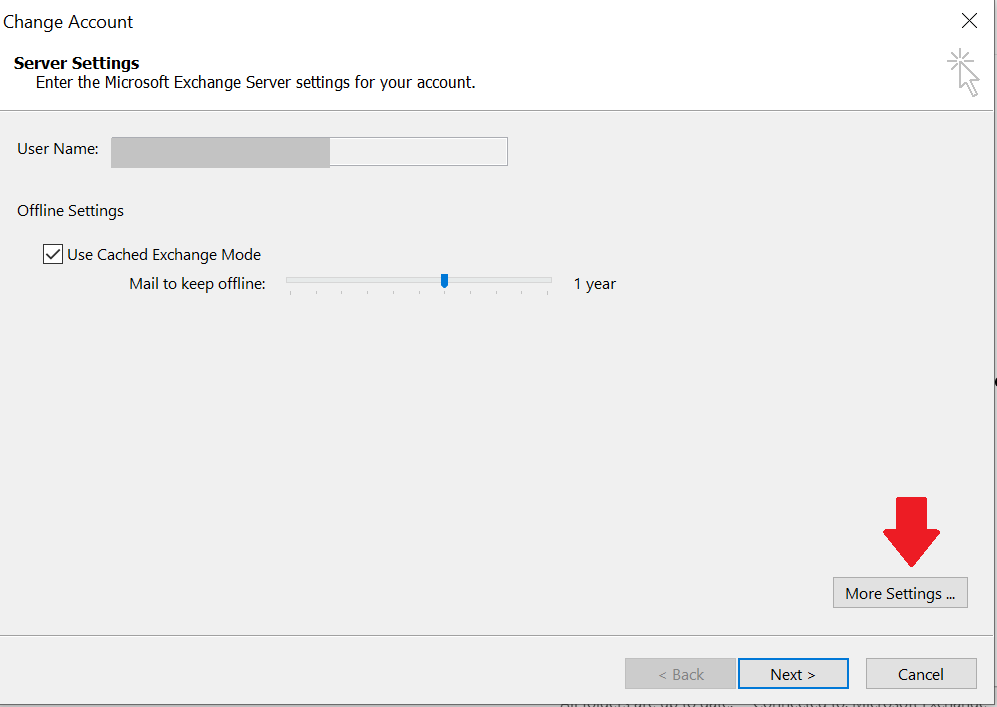
Step 6
Now please select the tab Advanced.
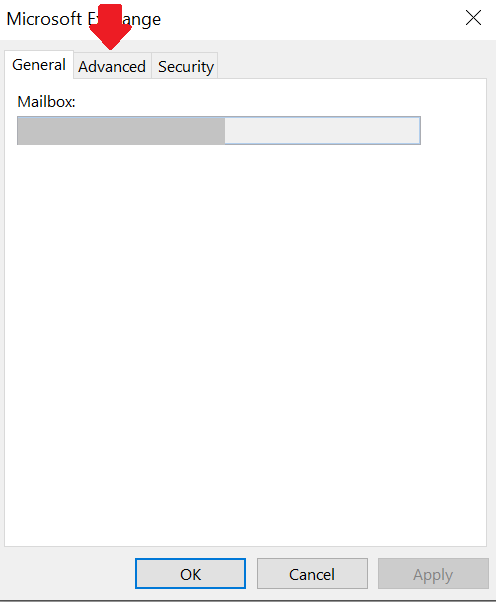
Step 6
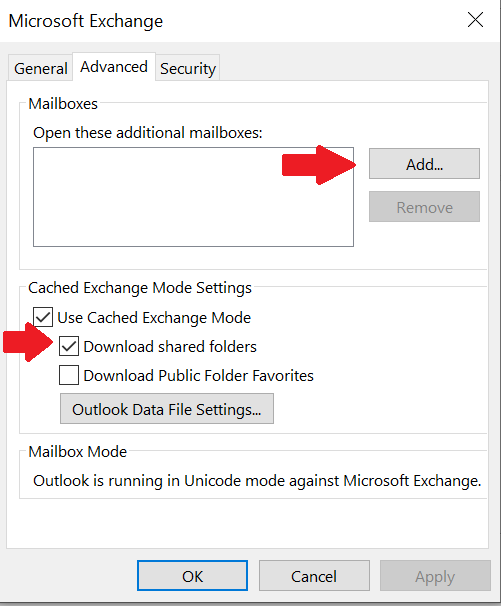
Click on Add... and enter the email address of the person with whom you want to share your calendar.
Then remove the tick next to Download shared folders.
Step 7
If you now click on Calendar in the left-hand navigation bar in Outlook, you will also see the calendar of the e-mail address entered in step 6.
Open calendar
Step 1
Start Outlook and navigate to the Calendar tab.
Step 2
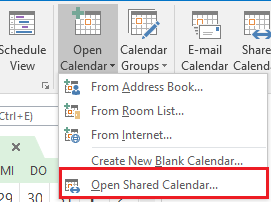
Under Manage calendar, click Open calendar

Step 3
Select Open Shared Calendar.
Step 4
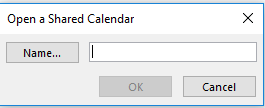
Enter the name of the person, whose calendar you would like to open and click OK to confirm your entry.
Step 5
You will now find the selected calendar under Shared calendars in your Calendar tab.

Delete an opened calendar
If you want to delete one of the opened calendars, right-click on the name of the owner and select Delete Calendar.

Sharing Calendar in the RWTH MailApp
In the RWTH MailApp - in contrast to the Outlook client - you can also assign authorisations to view calendars for mail accounts outside your own mail domain.
You can also grant authorisations to other people or groups of people, provided that both domains are located on the university's central Exchange.
You can also make your calendar visible to other people in several ways in the RWTH MailApp.
You have the following options for sharing your calendar with other people:
To view or edit shared calendars, you have the following options:
Calendar sharing
Step 1
First log in to the RWTH MailApp. You can find separate instructions for loginin the RWTH MailApp here.
Step 2
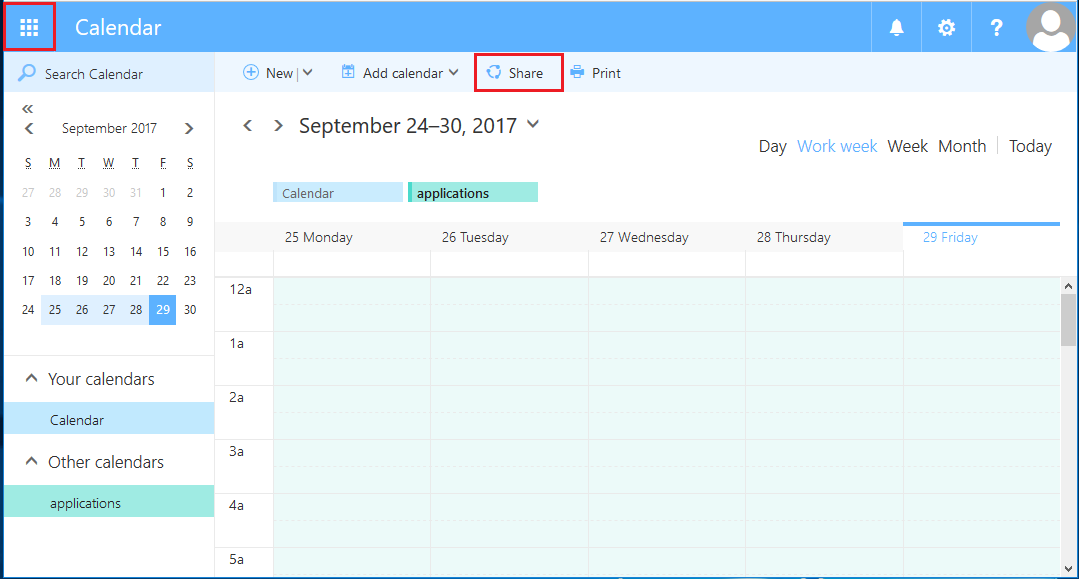
Click on the block symbol at the top of the RWTH MailApp and select the Calendar module.
Step 3
As soon as you are in the calendar, select Share at the top.
Step 4
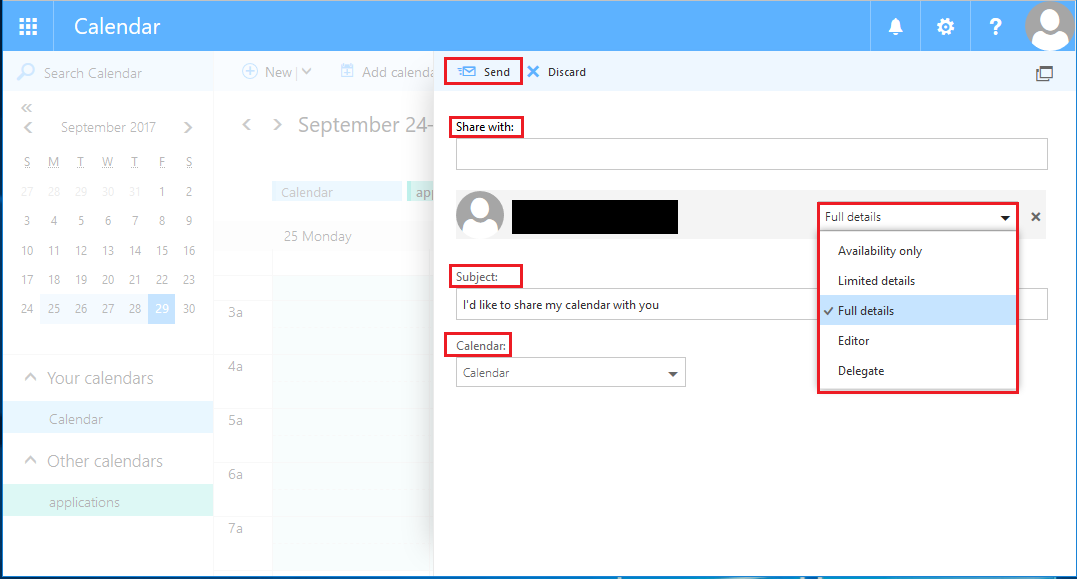
Under Share with, you can enter the email address or name of the person you want to share your calendar with.
Select which authorisation the person should receive and for which calendar this release applies.
If you wish, you can also change the subject of the sharing e-mail.
Step 5
Click on Send to send the e-mail and approve it.
Internet calendar sharing
The RWTH MailApp also offers the option of sharing a calendar via a web link. This means that calendars can also be viewed outside the central exchange.
- Internet calendar sharing can only be set up via the RWTH MailApp and only for functional mailboxes.
- Internet calendar sharing is not possible for personal mailboxes for data protection reasons
Step 1
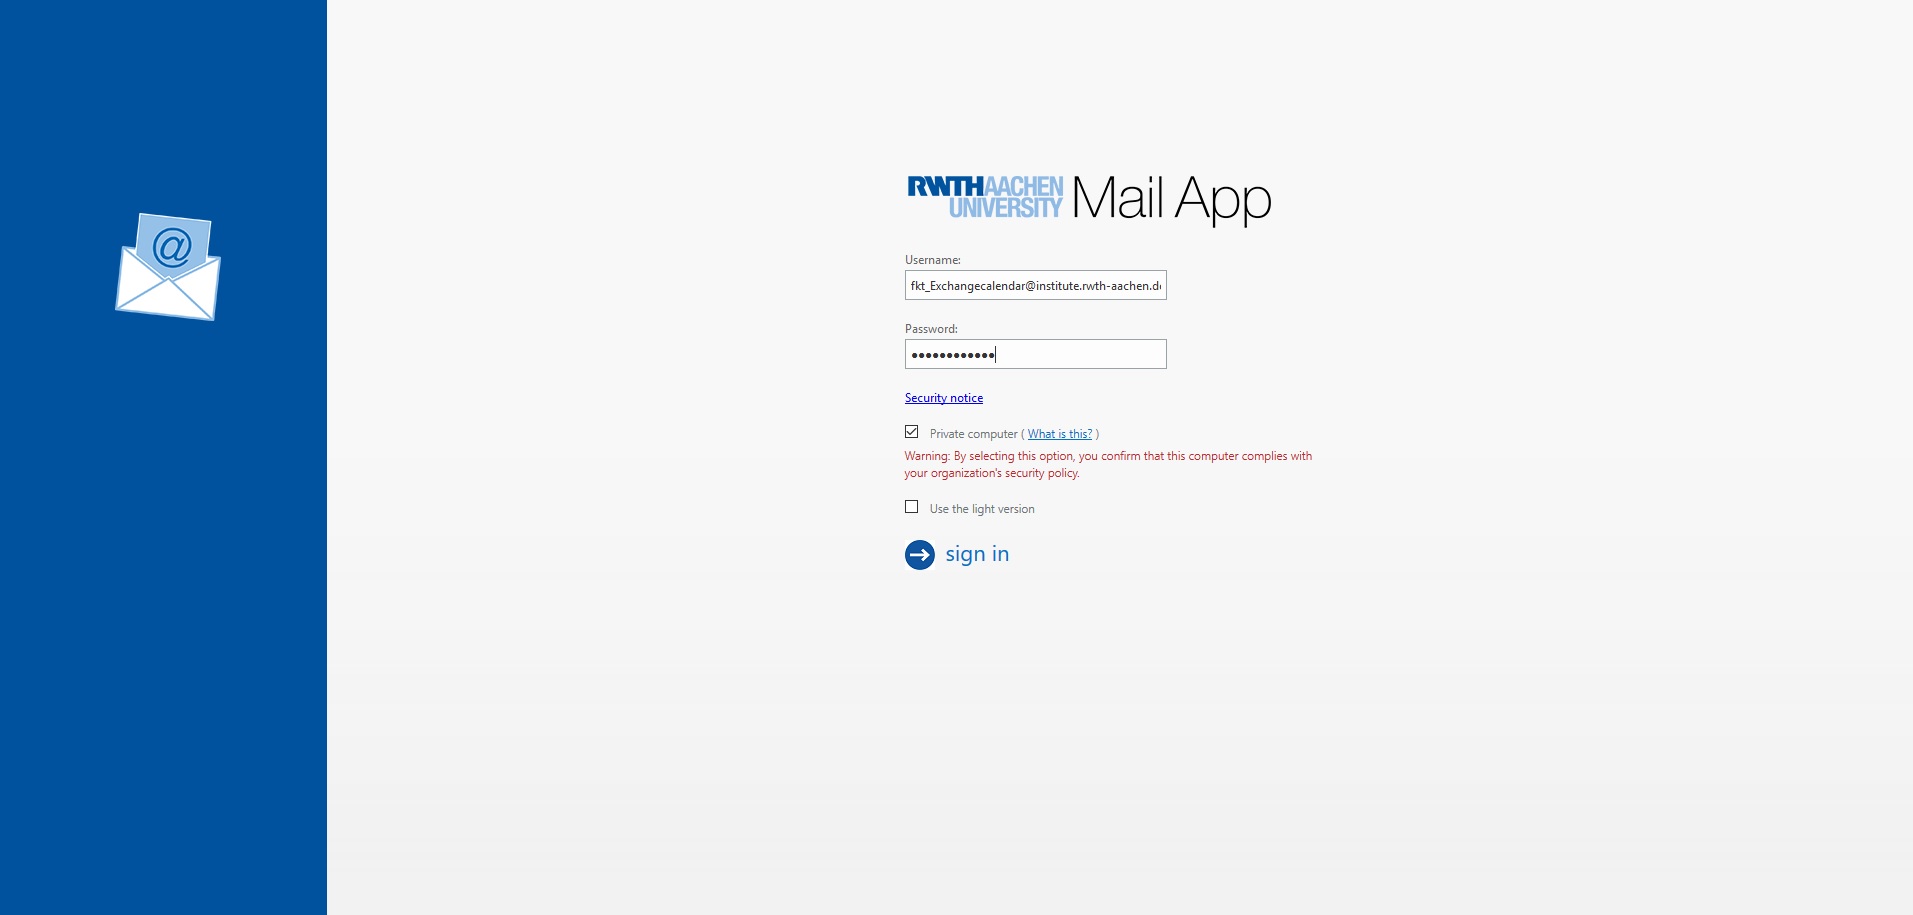
First log in to the RWTH MailApp. You can find separate instructions for loginin the RWTH MailApp here.
Step 2
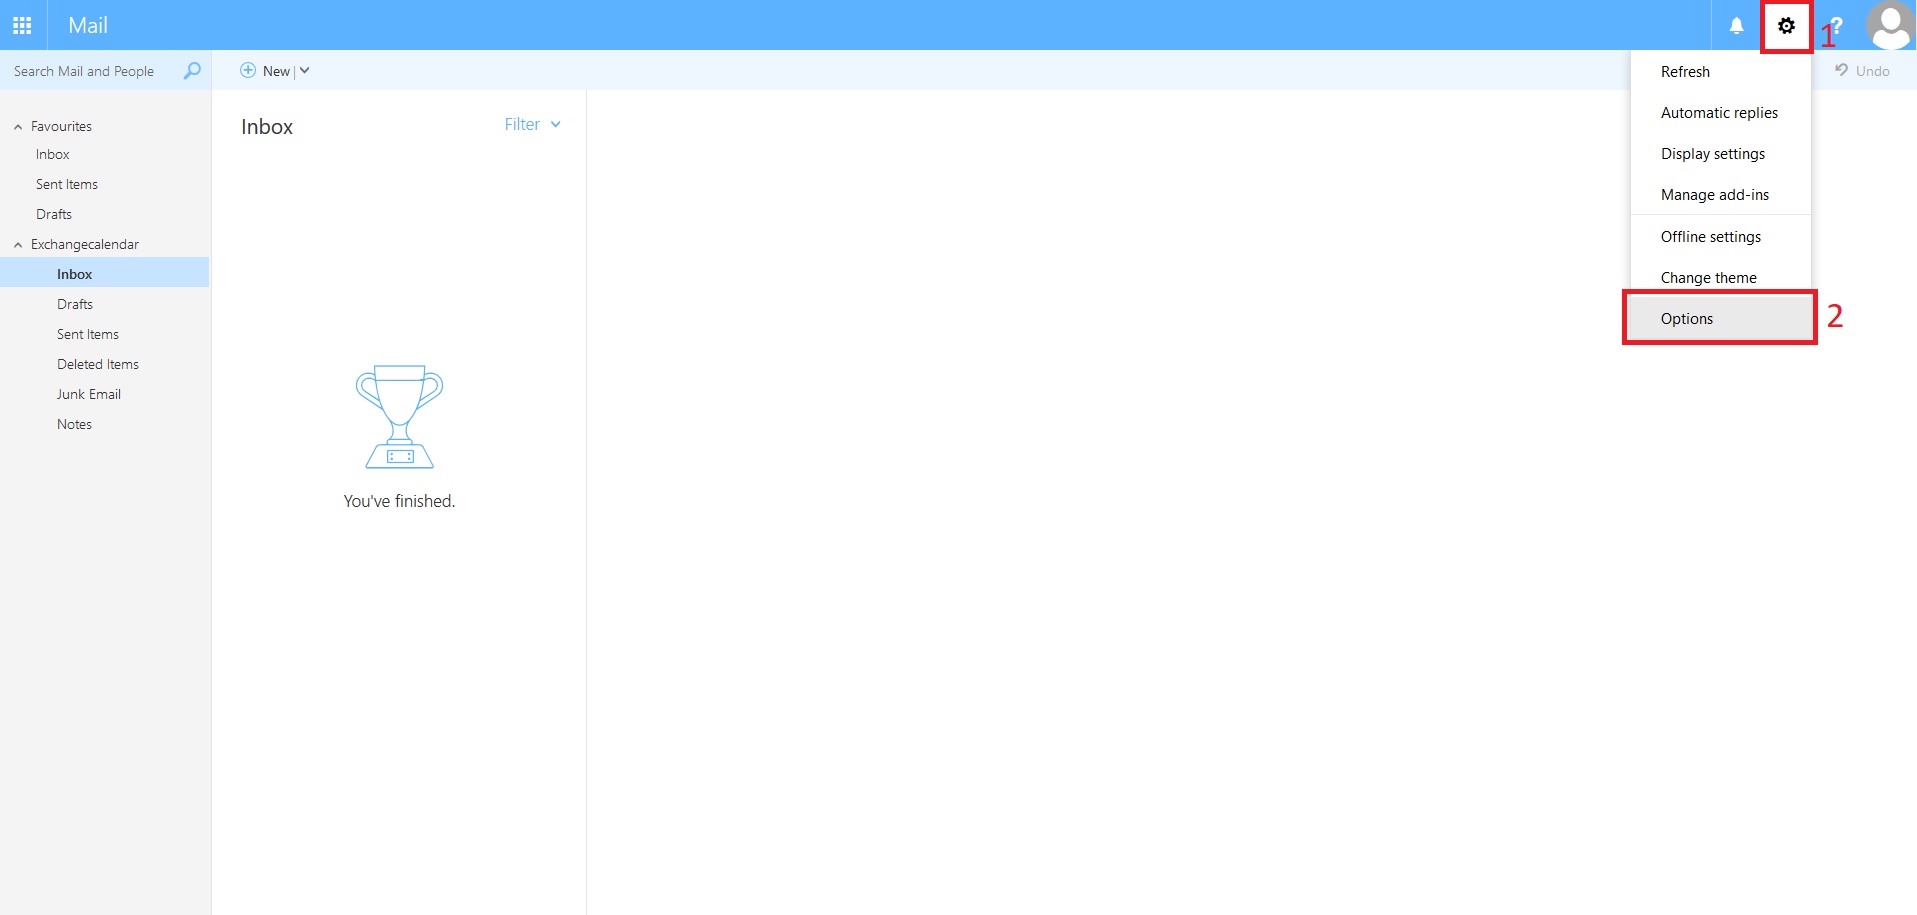
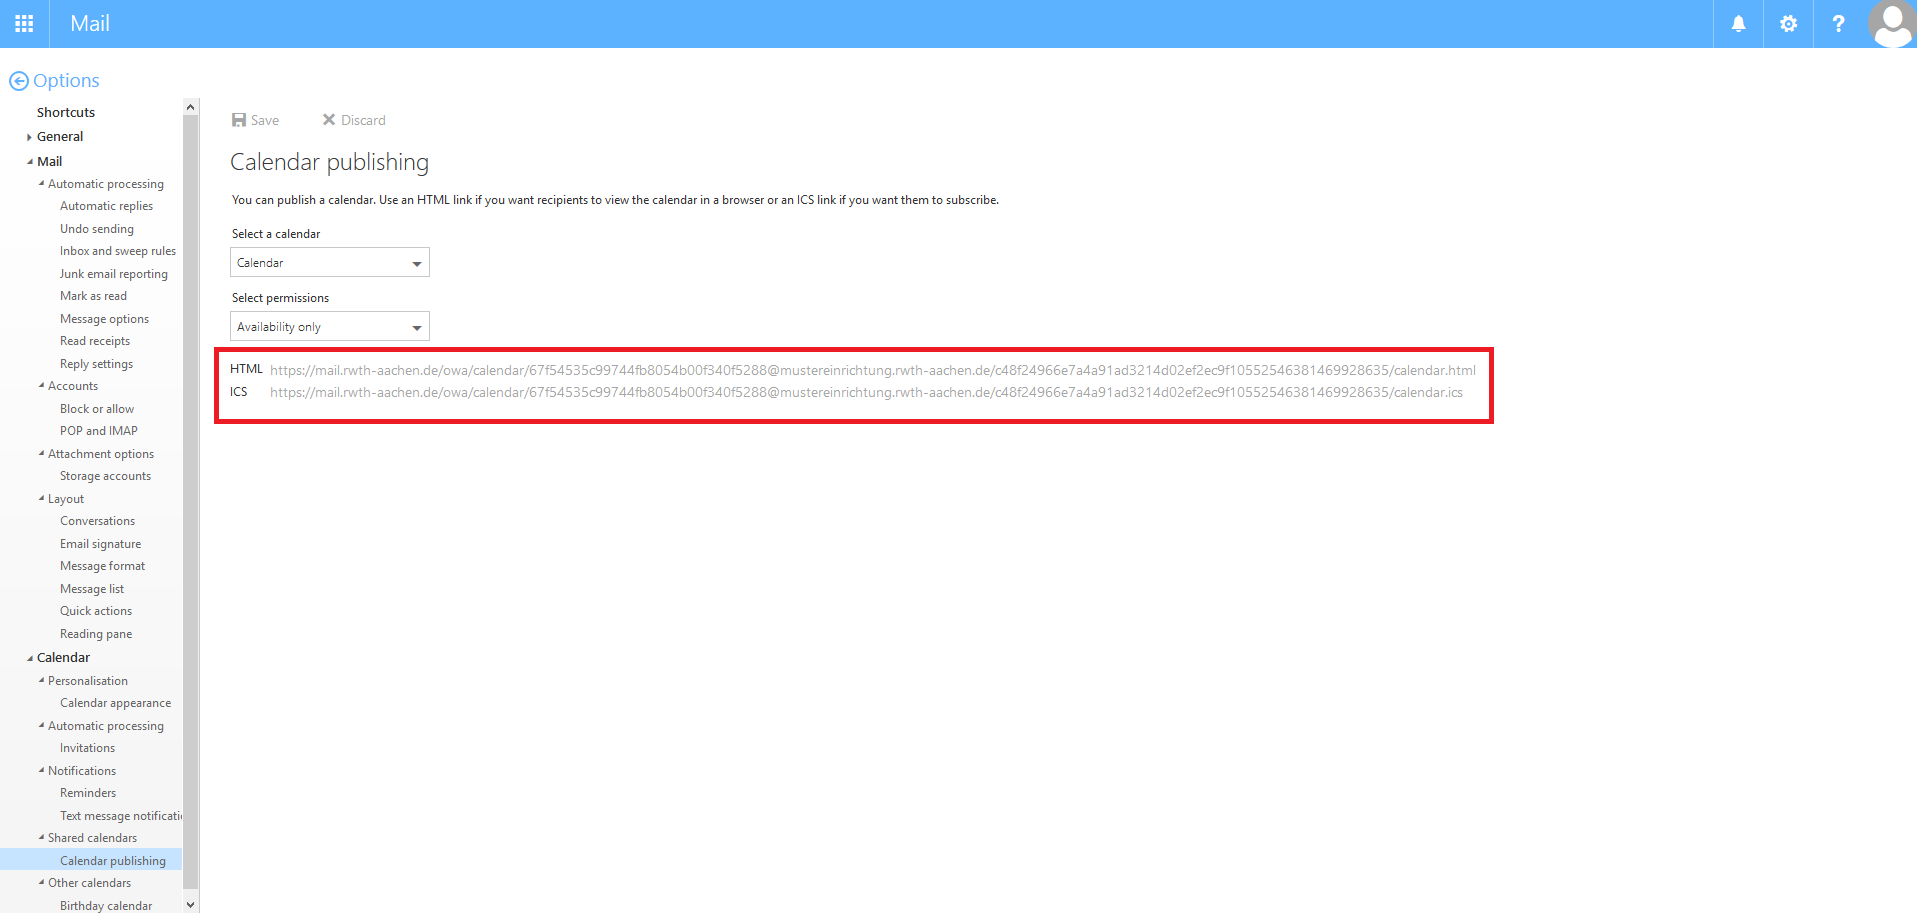
Now, click on the Gear icon (1) at the top left corner of the window and select Options (2).
Step 3
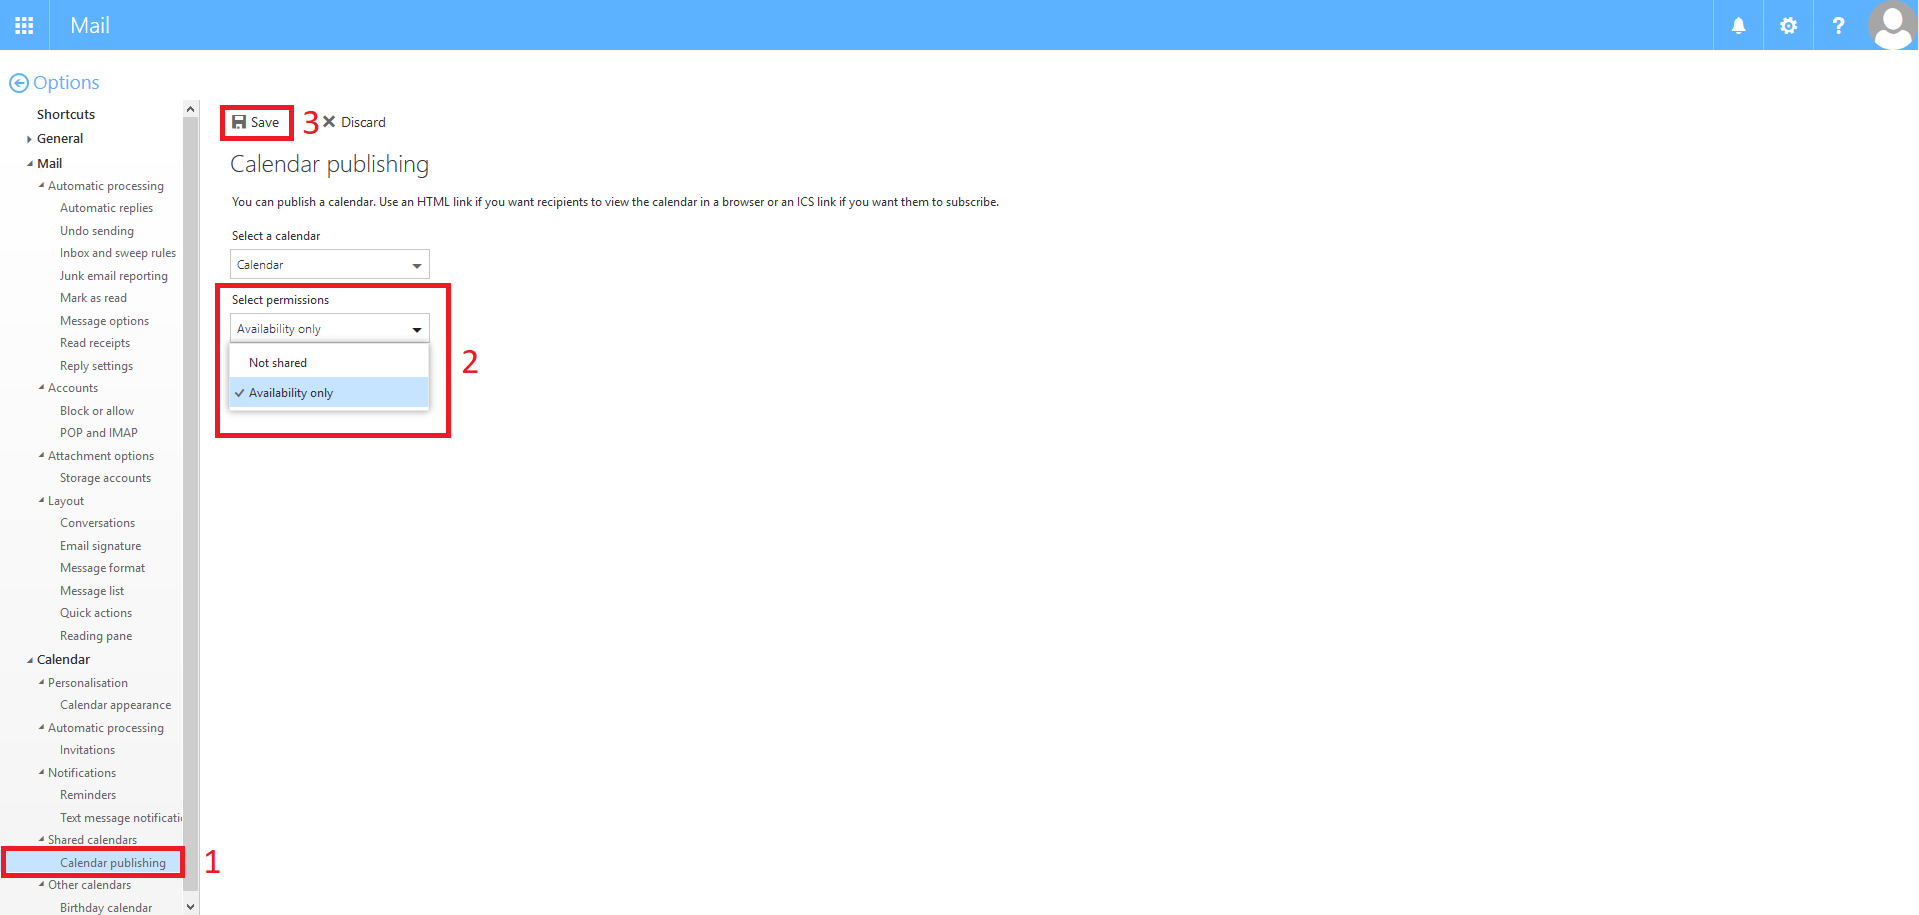
In the options under Calendar -> Shared calendars you will find the Calendar publishing (1).
Under Select Permissions, select the Availability only (2) configuration and click Save (3).
Step 4
The calendar can now be accessed via the generated web links.
These can then be forwarded to the desired persons.
Calendars shared via web links can only be viewed but not changed.
Add an additional mailbox
To access another person's calendar, you can also integrate another inbox into the RWTH MailApp.
Step 1
First log in to the RWTH MailApp. You can find separate instructions for loginin the RWTH MailApp here.
Step 2
Click on the avatar icon or your profile picture in the top right-hand corner and select Open another mailbox... item.

Step 3
Enter the e-mail address or the name of the person whose inbox you want to include or open.

Step 4
Confirm the entry with Open.
The opened inbox is now located in the left bar under your own mailbox.
You should now have both calendars to choose from in the Calendar tab.
Change sharing permissions
You can only view and edit existing permissions in the RWTH MailApp via the calendar sharing permissions and not distribute additional new authorisations as in Outlook.
Step 1
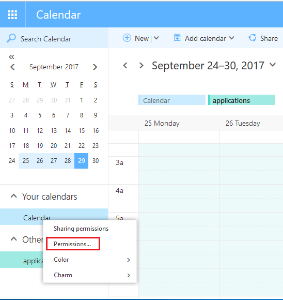
To change the permissions, right-click on your calendar in the left-hand column and select Permissions.
Step 2
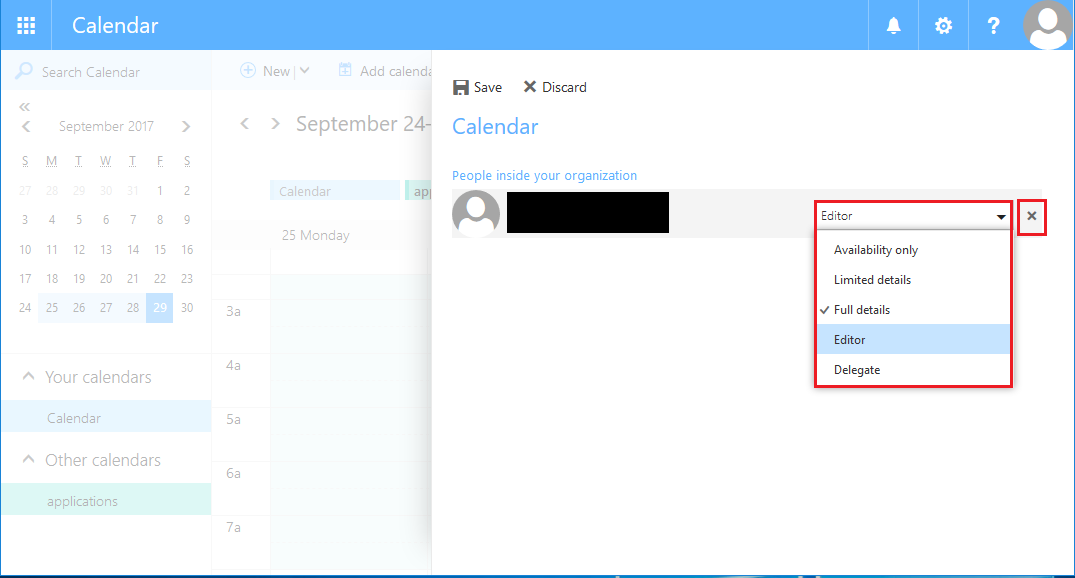
To change the authorisation level of a person or to delete a person and their permissions, click on the person and select the new permission you want to apply in the drop-down list.
To delete a permission, click the X.
Open calendar
Step 1
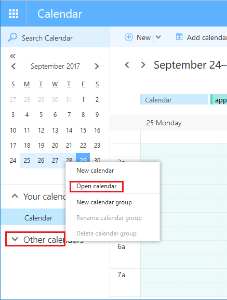
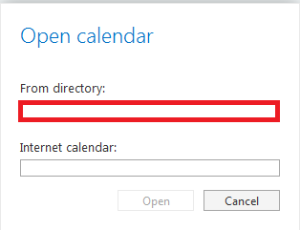
To add a calendar, right-click on Other Calendars in the left-hand column and select Open Calendar.
Step 2
Enter the name of the person whose calendar you would like to open under From directory.
Step 3
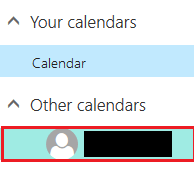
The calendar opens and is shown in the left-hand column.
Remove calendar
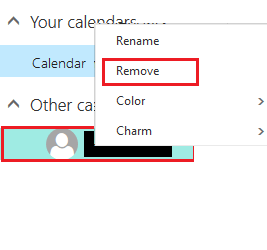
To delete an existing calendar, right-click on it and select Remove.
Sharing Calendar in Thunderbird (via TbSync)
The add-ons named in this guide are not an official part of Microsoft's offering in connection with Microsoft Exchange.
Therefore, no guarantee can be given that the functionality and security will be maintained in the long term. Their use is your own responsibility.
These instructions were created with Thunderbird version 102.6.1. In general, however, the latest versions should be used.
- The Lightning add-on does not need to be installed as it has been integrated since Thunderbird 38.
- A possible alternative in case of problems with other versions is the ExQuilla AddOn
- Or the successor version OWL. However, these are subject to a charge
To be able to share calendars, please follow these steps:
Install TbSync
Step 1
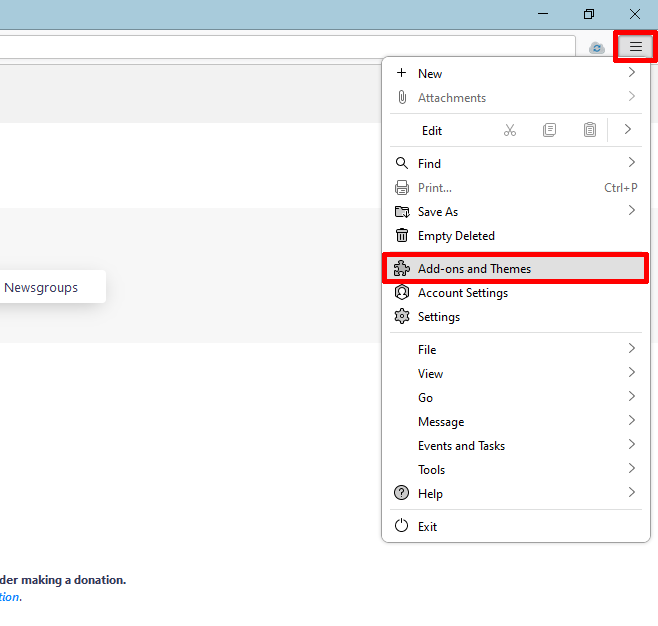
In Thunderbird, click on the button with three dashes in the top right-hand corner of the window and then select the Add-ons and Themes field.
Step 2
Enter TbSync into the search field and confirm.

The add-on is at the top of the newly opened tab and can be installed by clicking on the Add to Thunderbird button (1).
For the latest version, the Provider for Exchange ActiveSync add-on is also required in addition to the TbSync add-on. Select Add to Thunderbird (2) here as well .

Step 4
Select Add in both pop-ups.
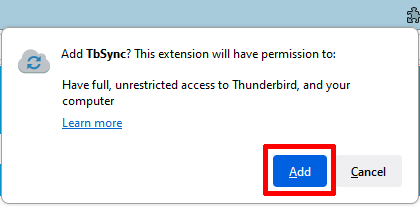

Step 5
If you want TbSync to be updated automatically as soon as an update is available, select add-on management Extensions.
Then click on the gear icon to the right of Manage add-ons. Then click on Update add-ons automatically.

Integrate Exchange calendar
After TbSync installation and update, Exchange calendars can be added.
Step 1
Click on the status message of the TbSync add-on at the bottom right of the application to open the settings.
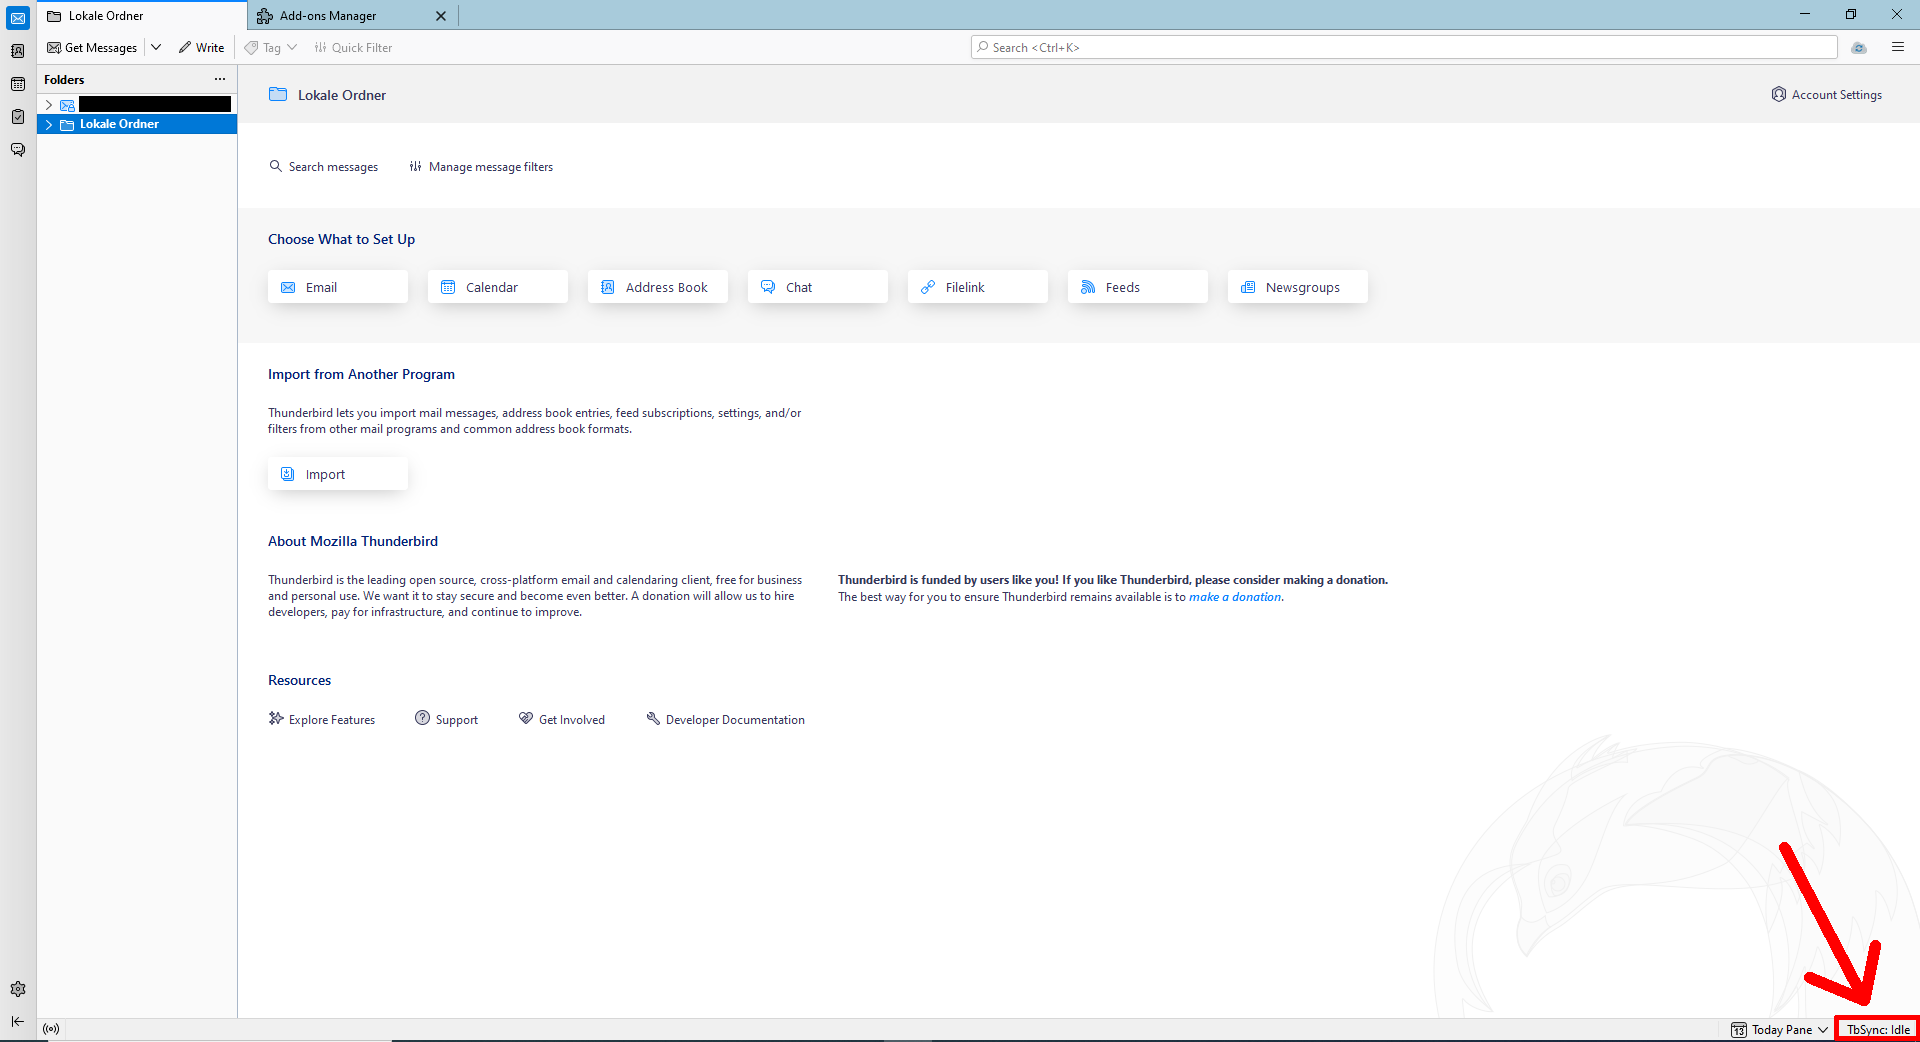
Step 2
In a new window, choose Account actions and add a new Exchange ActiveSync (EAS) account.
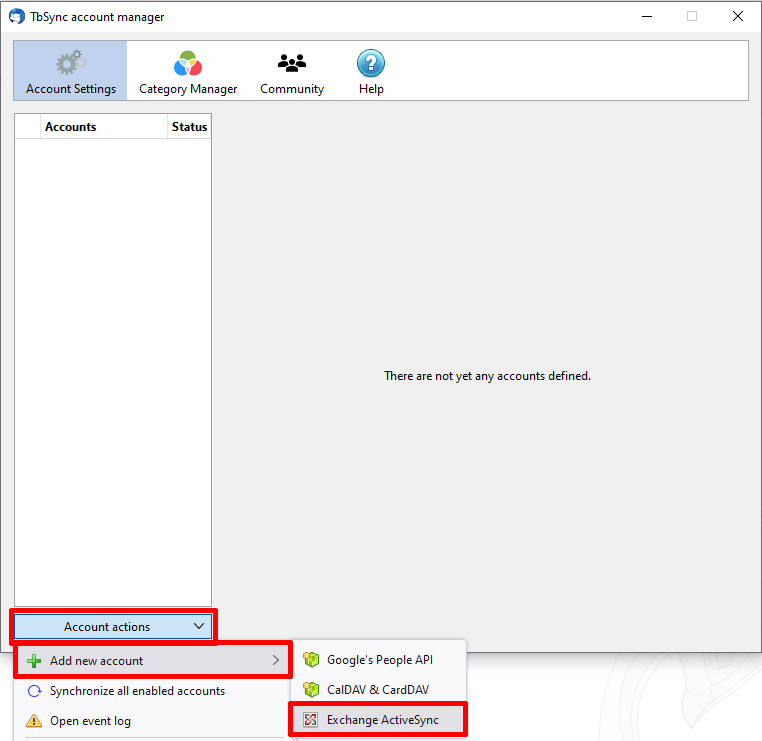
Step 3
Enter the following account details:
- (1) The Server configuration is to be set as Custom configuration.
- (2) Account details
- Account name (display name of the new calendar)
- User name (user name for the OWA. E.g. ab123456@institute. rwth-aachen.de)
- Password (the password for the OWA. You can change it in the Selfservice)
- Server address: mail.rwth-aachen.de
- Then click Add account (3)
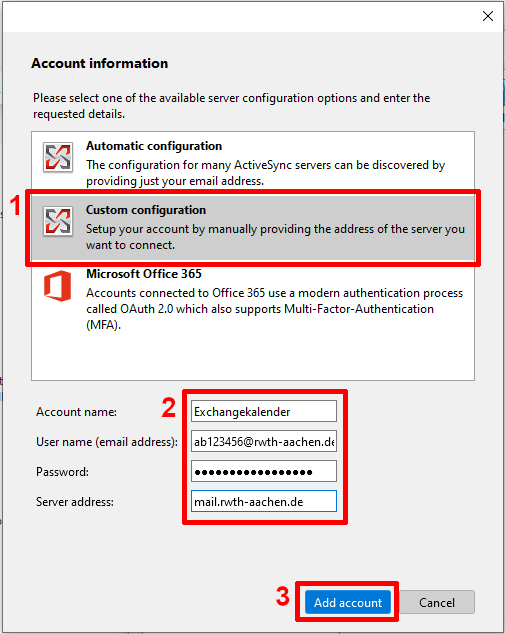
Step 4
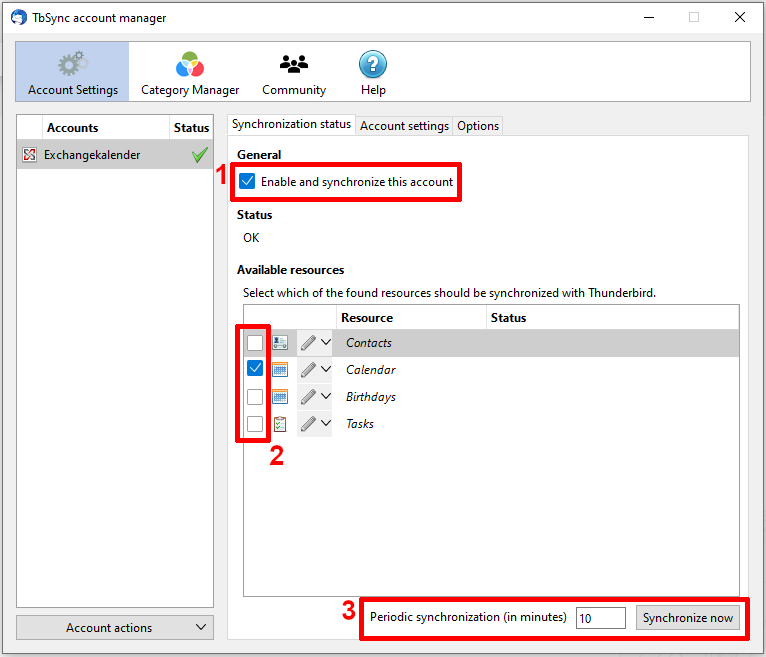
The last step is to enable the account (1).
Select the desired resources to be synchronised (2).
Select any synchronisation interval (3).
Step 5
Your Exchange calendar can now be integrated and synchronized.
Step 6
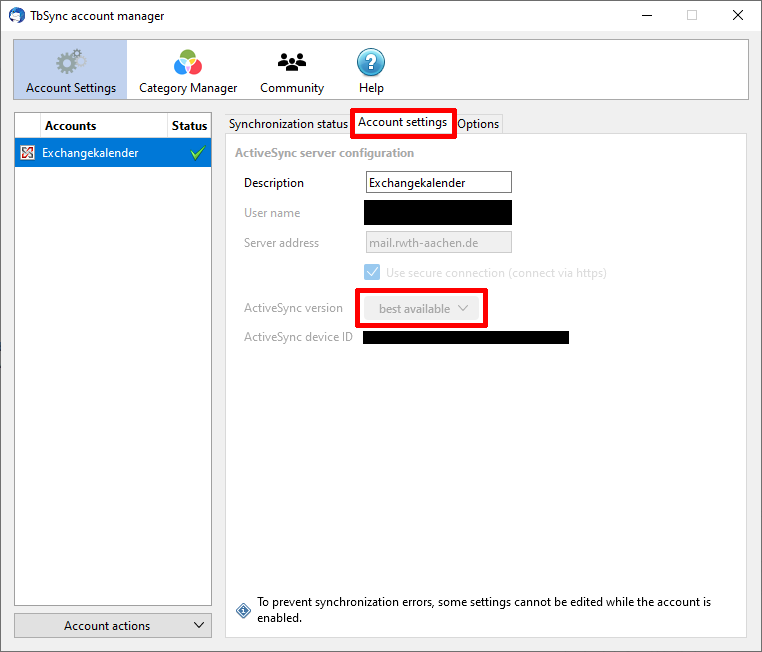
By default, the best possible ActiveSync version is selected. If the sync does not work, select one of the two available versions.
Please ensure that Use secure connections (via https://) is ticked under Server address.
Step 7
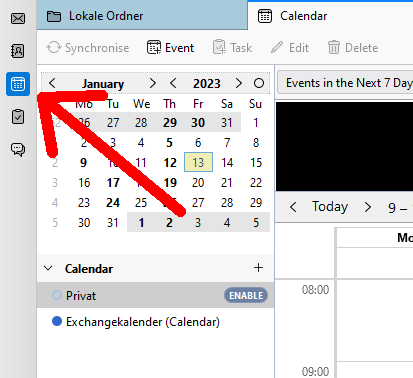
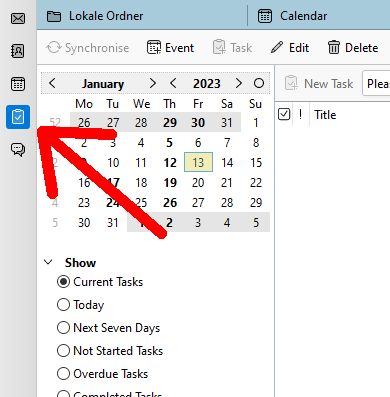
Once the new calendar has been integrated and synchronised, you can display your appointments and tasks from the Exchange calendar using the corresponding button in the top left-hand corner of the window..
