


Email Redirection in IdM Selfservice


Please note:
If any mailboxes still have an automatic redirection on 21 April, the IT Center will convert them into an inbox rule redirecting to the previously stored target e‑mail address and will remove the automatic redirection in the Self‑service.
On this page you will find information about the discontinuation of the function for setting up automatic e‑mail redirection via the IdM Self‑service and the alternatives.
- Information about the discontinuation
- Remove forward in IdM Selfservice
- Set up forwarding via RWTH MailApp
- Enable automatic trash cleanup
Information about the discontinuation
On April 21, 2026, the feature for setting up automatic email redirection via the IdM SelfService will be permanently disabled and will no longer be available after that date. If you still want emails from your RWTH address to be redirected, you must set this up using an inbox rule in the RWTH MailApp or in your email client. To prevent the mailbox from filling up, it is recommended to add a delete action to the rule and enable automatic emptying of the trash folder via the checkbox in the IdM SelfService (feature available starting April 21, 2026).
Remove forward in IdM Selfservice
To view and remove the forwarding, please follow these steps:
1. Log in to IdM Selfservice. Log in using your RWTH username in the format ab123456 and your password.
2. Navigate to the menu item Accounts and Passwords > Account Overview and search for the email account that has the forwarding set up (you have received a notification email to the email addresses that have forwarding enabled).
3. Click the pencil icon (Edit Account) in the row of the RWTH email account.
4. Scroll all the way down until you reach the Forwarding section.
5. Change the forwarding option to Save locally.
Set up forwarding via RWTH MailApp
To set up forwarding as an alternative, please follow these steps:
1. Log in to the RWTH MailApp. Use your RWTH username in the format ab123456@rwth-aachen.de and your password.
2. Open the settings via the icon (1) and select Options from the dropdown menu.
3. Navigate to Mail > Automatic processing > Inbox and sweep rules (2).

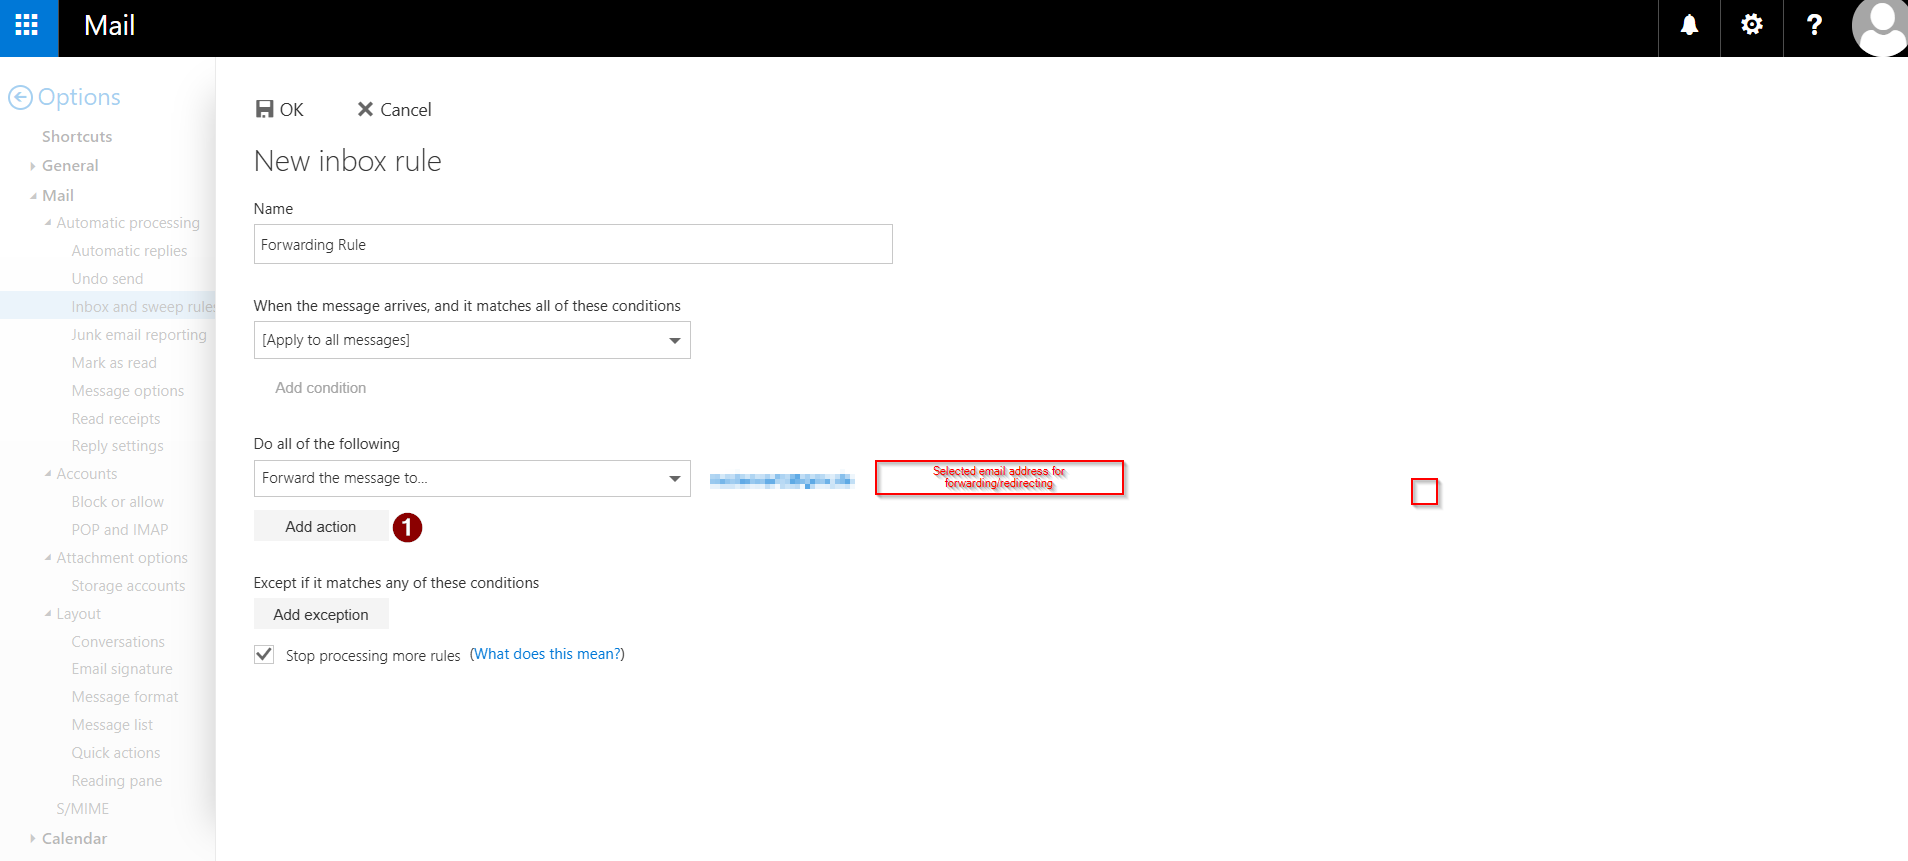
4. Click on the +-icon (1). This opens the form for creating a new inbox rule:

5. Give the rule an appropiate name (1).
6. In the dropdown menu, select Apply to all messages (2).
7. Under Do all of the following, choose Forward, redirect, or send (3). Here you can select between: option 1: Forward the message to… and option 2: Redirect the message to…

The following steps are the same for both options.
8. Click on the text field next to Forward the message to (1) and enter the email address to which messages should be forwarded or redirected in the future.
9. Confirm by clicking on Save (2):

You should now see the new inbox rule. The email address to which messages are forwarded or redirected appears in blue color next to Forward the message to...
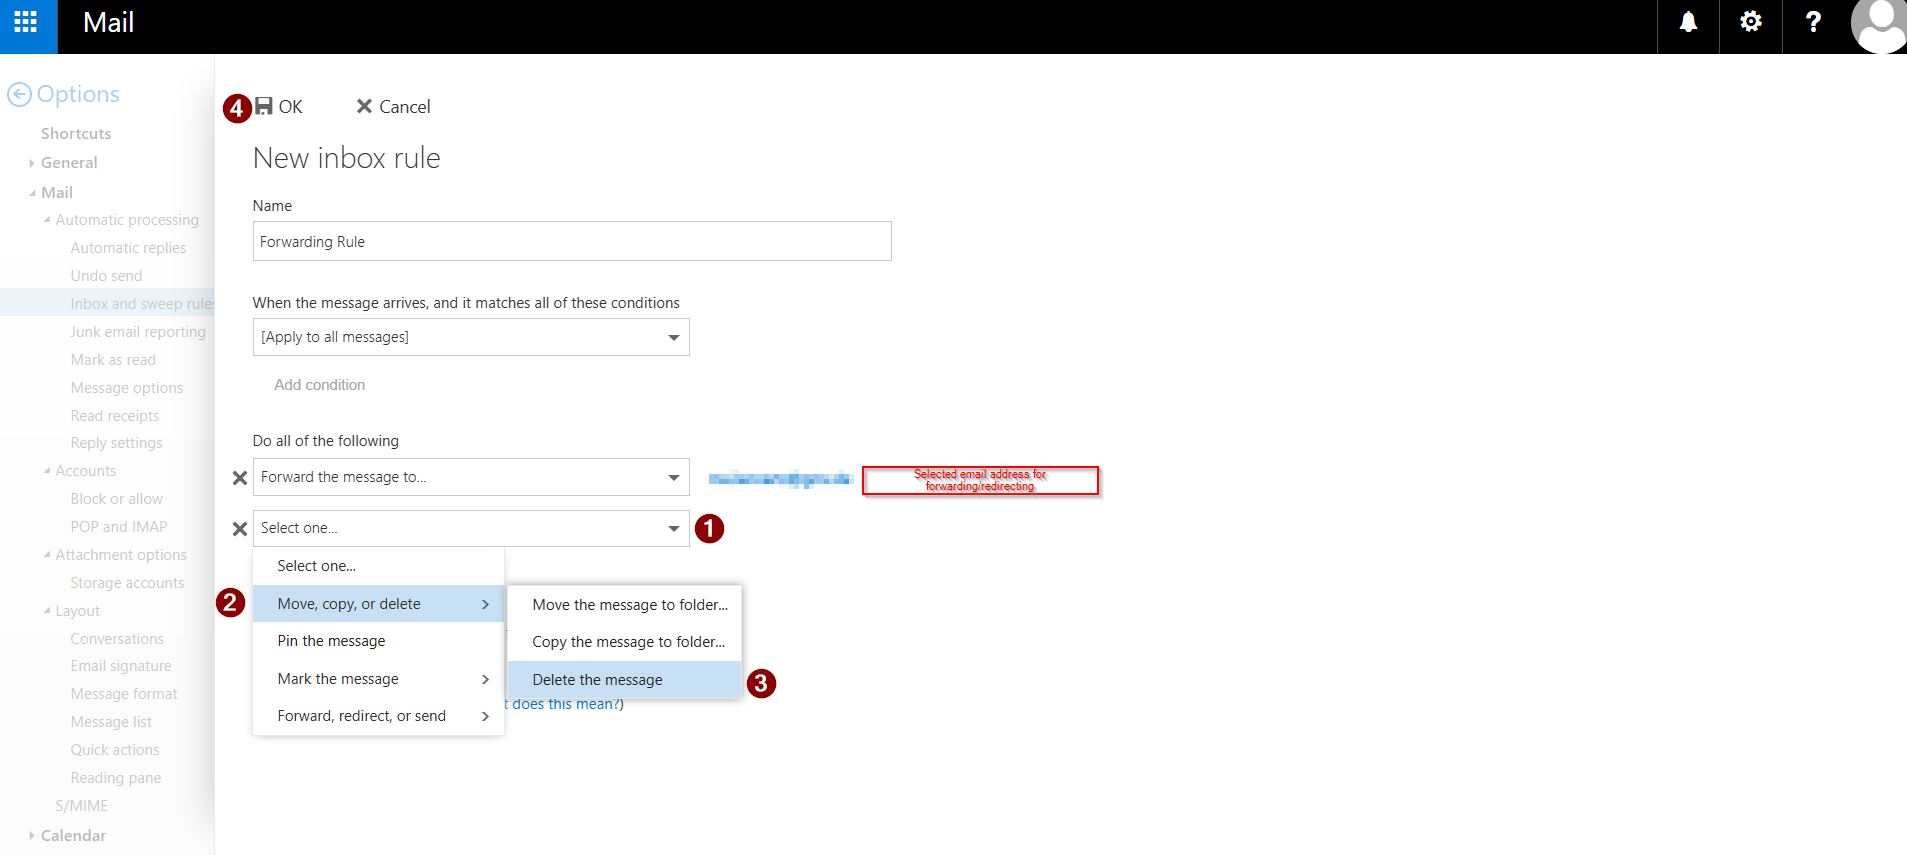
10. Click on Add action (1):
11. Under Do all of the following (1), select another action.
12. In the dropdown menu, click on Move, copy, delete (2).
13. Then select Delete the message (3).
14. Confirm by clicking Save (4):
Enable automatic trash cleanup
The following steps will only be available starting April 21, 2026:
15. Enable the checkbox in IdM SelfService so that the system folder Deleted Items is automatically cleaned.
16. Under Accounts and Passwords > Account Overview, click on the pencil icon next to RWTH E-Mail.
17. Check the checkbox.
18. Confirm by clicking Save.
