eduroam on Windows 10

This page contains a step-by-step guide to the setup for eduroam on your windows 10 device.
eduroam on Windows 10
The easiest way of configuring your the eduroam WiFi network is the eduroam configuration assistant tool (https://cat.eduroam.org/).
If you want to configure your network manually, please follow this guide.
Before you can configure the network on your device, you need to create eduroam login data for it. A guide to that process can be found here.
Please note that user names created using the eduroam device manager use different suffixes based on your organisation:
- members of the RWTH get user names ending in @rwth.edufi.de
- members of FZ Jülich get user names ending in @fzj.edufi.de

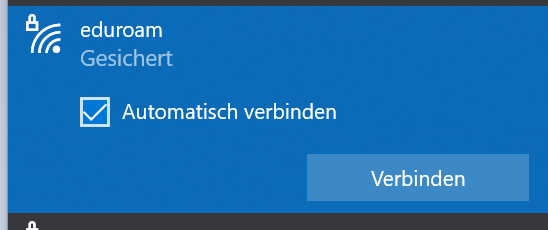 | Step 1: Choose "connect automatically" for eduroam |
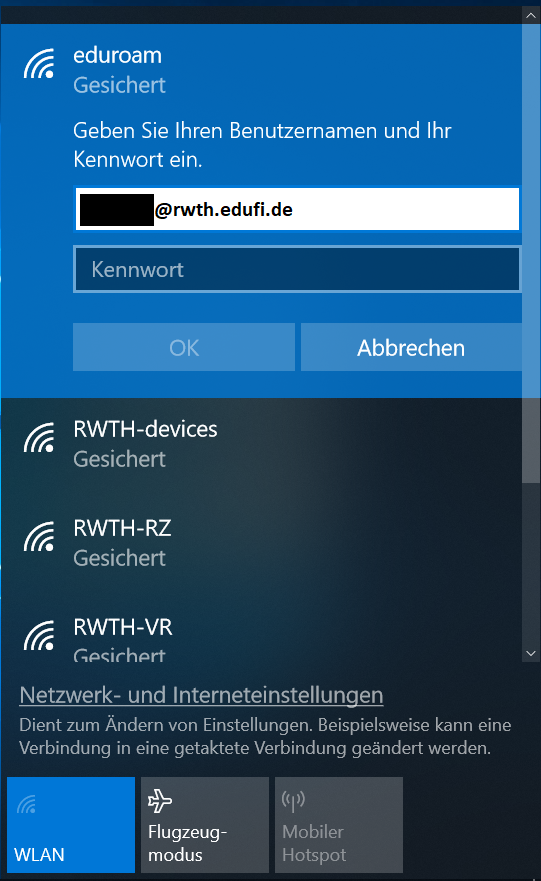 | Step 2: Enter your eduroam login data (generated in eduroam device manager) |
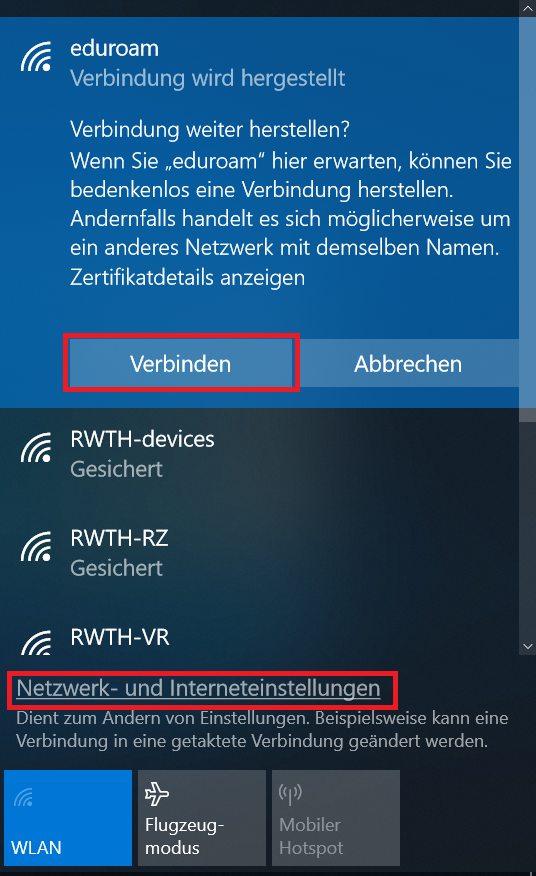 | Step 3: If you are in an RWTH facility, or a facility of any other participant of the eduroam programme, you may safely connect to the network. If you are not, click on "view certificate details" By clicking "connect", you can now complete your first-time setup. This is necessary in order to access the configuration of your network. Click on "Network & Internet settings". |
 | Step 4: These are the certificate details for the RWTH Radius server. The fingerprint shown here can be validated by comparing it to the "SH256 Fingerprint" of the Radius certificate. |
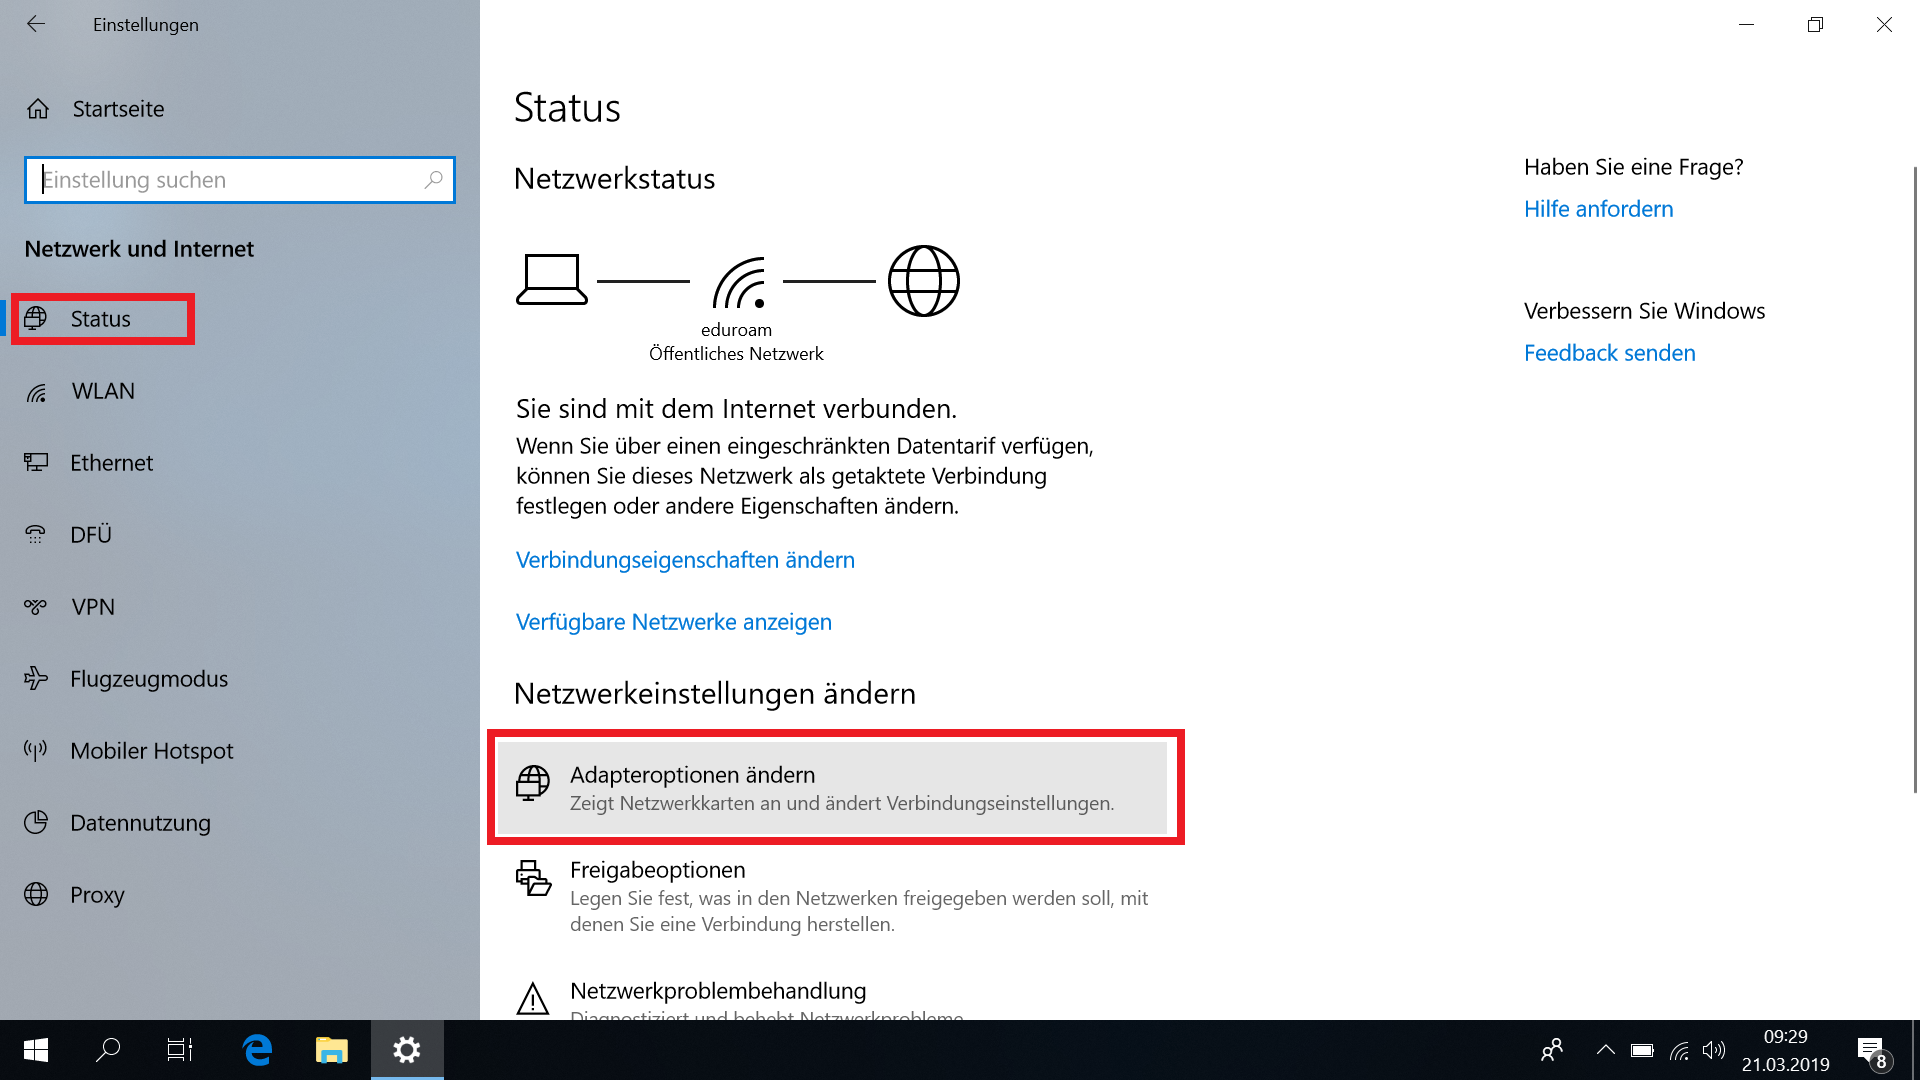 | Step 5: Network and Internet settings Click on "Change adapter options" and choose the WLAN adapter in the window that pops up. |
 | Step 6: Click on "View status of this connection". |
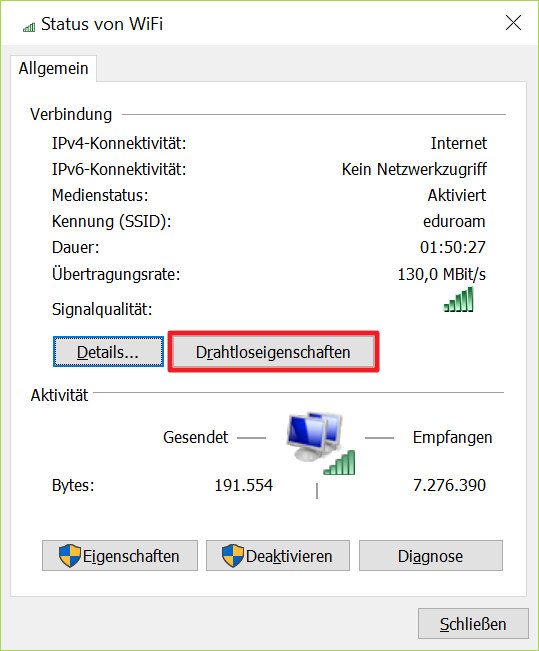 | Step 7: Check Settings Hit "Wireless Settings". |
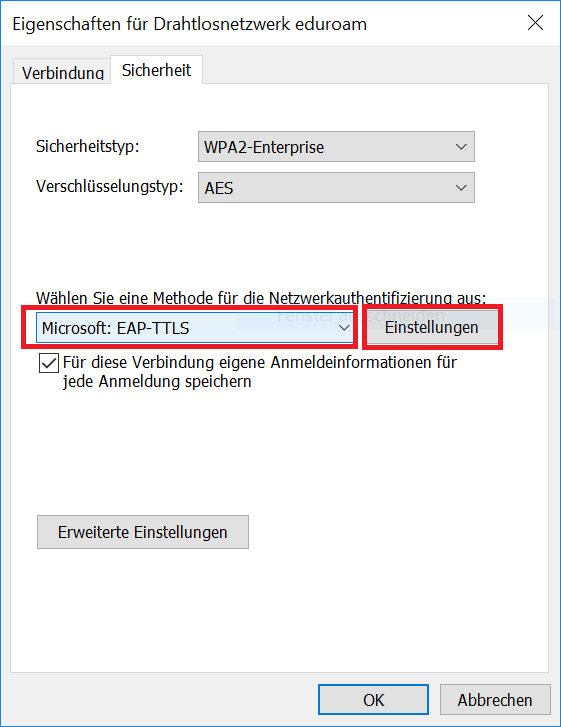 | Step 8: Navigate to the "Security" tab and check the following settings: Security type: WPA2-Enterprise Encryption type: AES Network authentification method: Then click on "settings" |
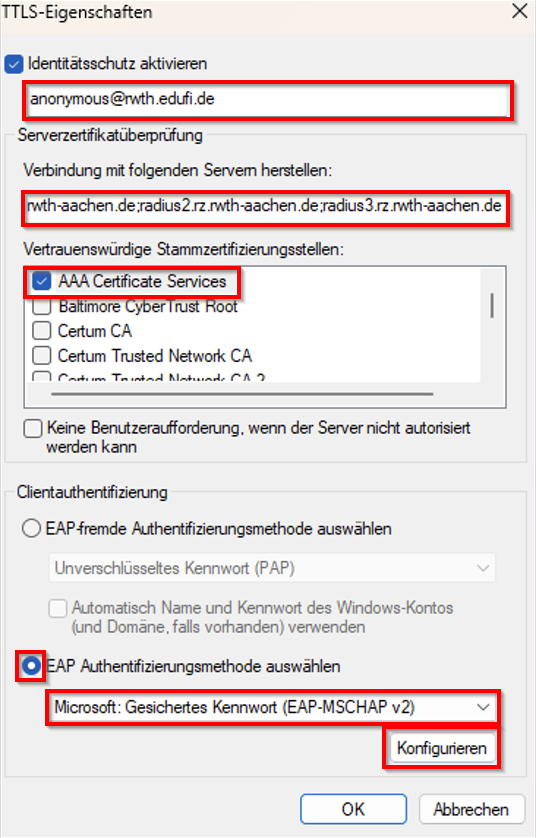 | Step 9: Choose Authentification Method Under "activate identity protection", enter Under "connect to the following servers", enter Under "Trusted Root Certification Authorities", check the box of the Root Certificate (Built-in-Token) of the current Radius certificate chain. Choose "Encrypted Password (EAP-MSCHAP v2)" as your EAP-Authentification method. Finally, click on "configure" and move to the next step. |
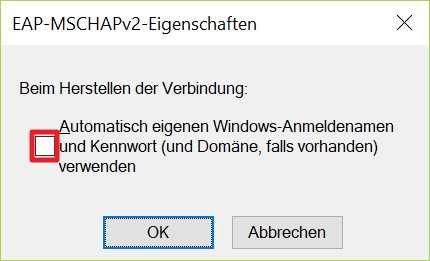 | Step 10: Deactivate Automatic user data selection If the box in this window is checked, remove that check and hit 'OK' twice to return to the security menu shown in step 5. |
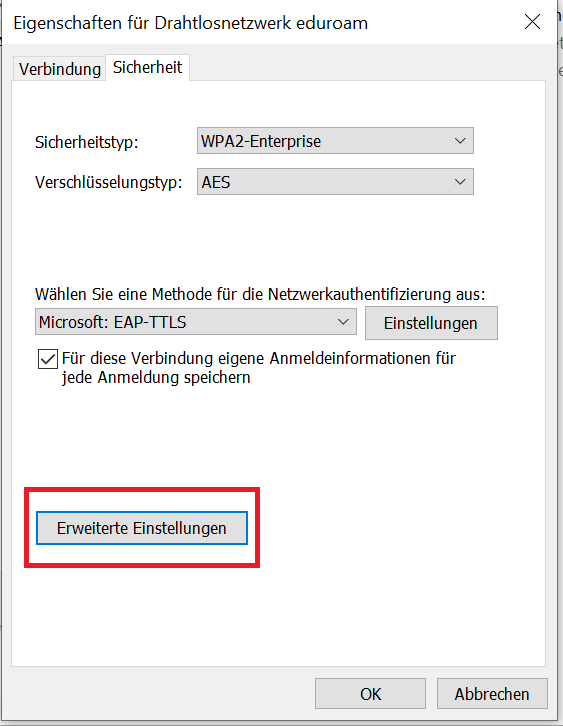 | Step 11: Now click on "advanced settings" |
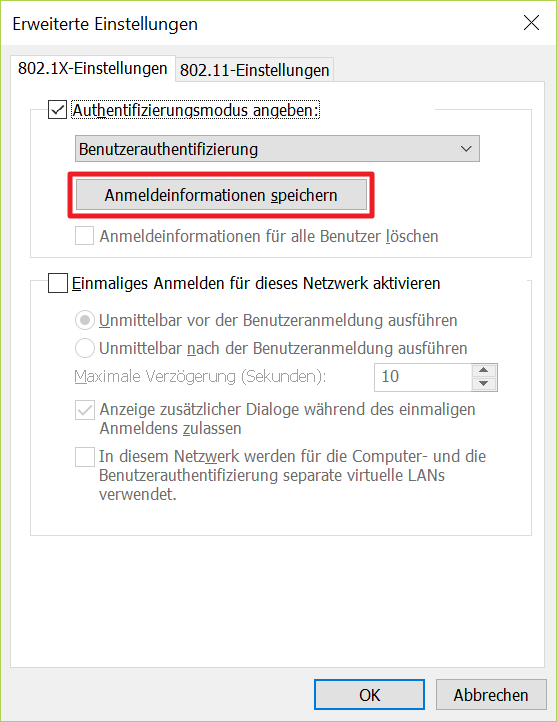 | Step 12: Configure Advanced Settings Check the box for "specify authentification mode", then choose "user identification" in the drop- down menu. Now click on "save login data". |
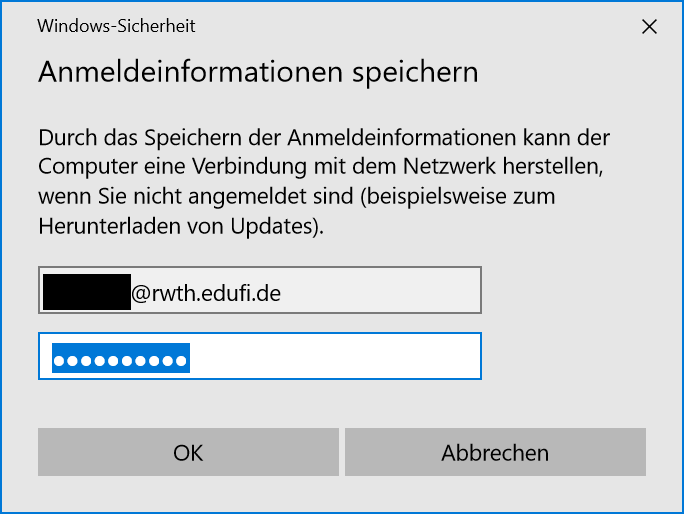 | Step 13: Enter your device manager generated login data once more. |
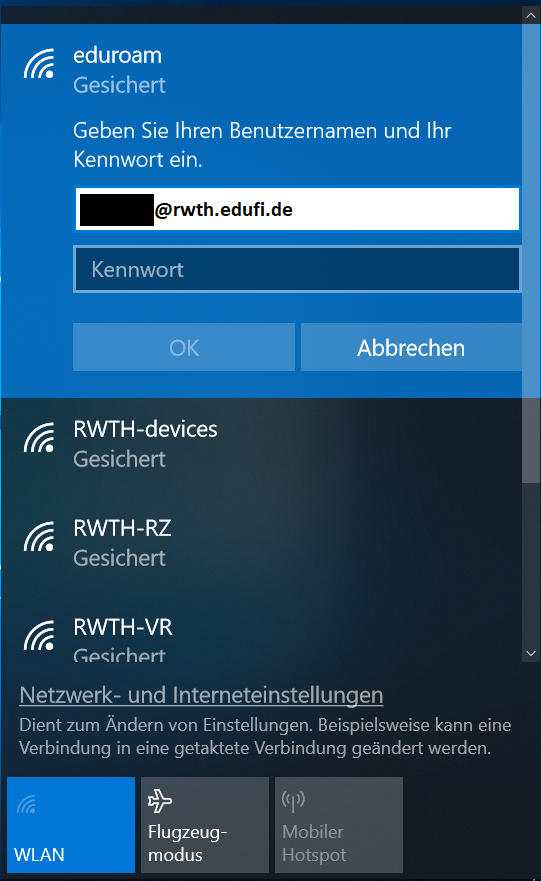 | Step 14: Enter login data In some cases you may be asked for your login data again on your first attempted connection to an eduroam network. |
Please Note:
If in step two, a popup on "Windows Security" is preventing you from entering your login data, please delete the WLAN profile and attempt to connect again.
The following is a step-by-step guide on how to delete a WLAN-profile.
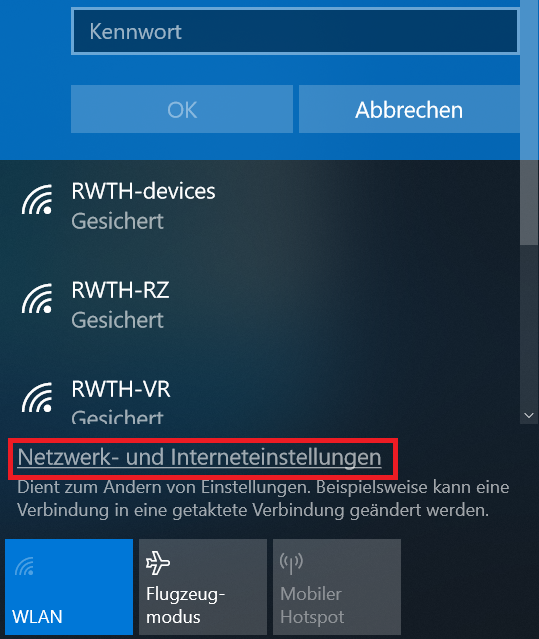 | Step A: Open Network& Internet settings |
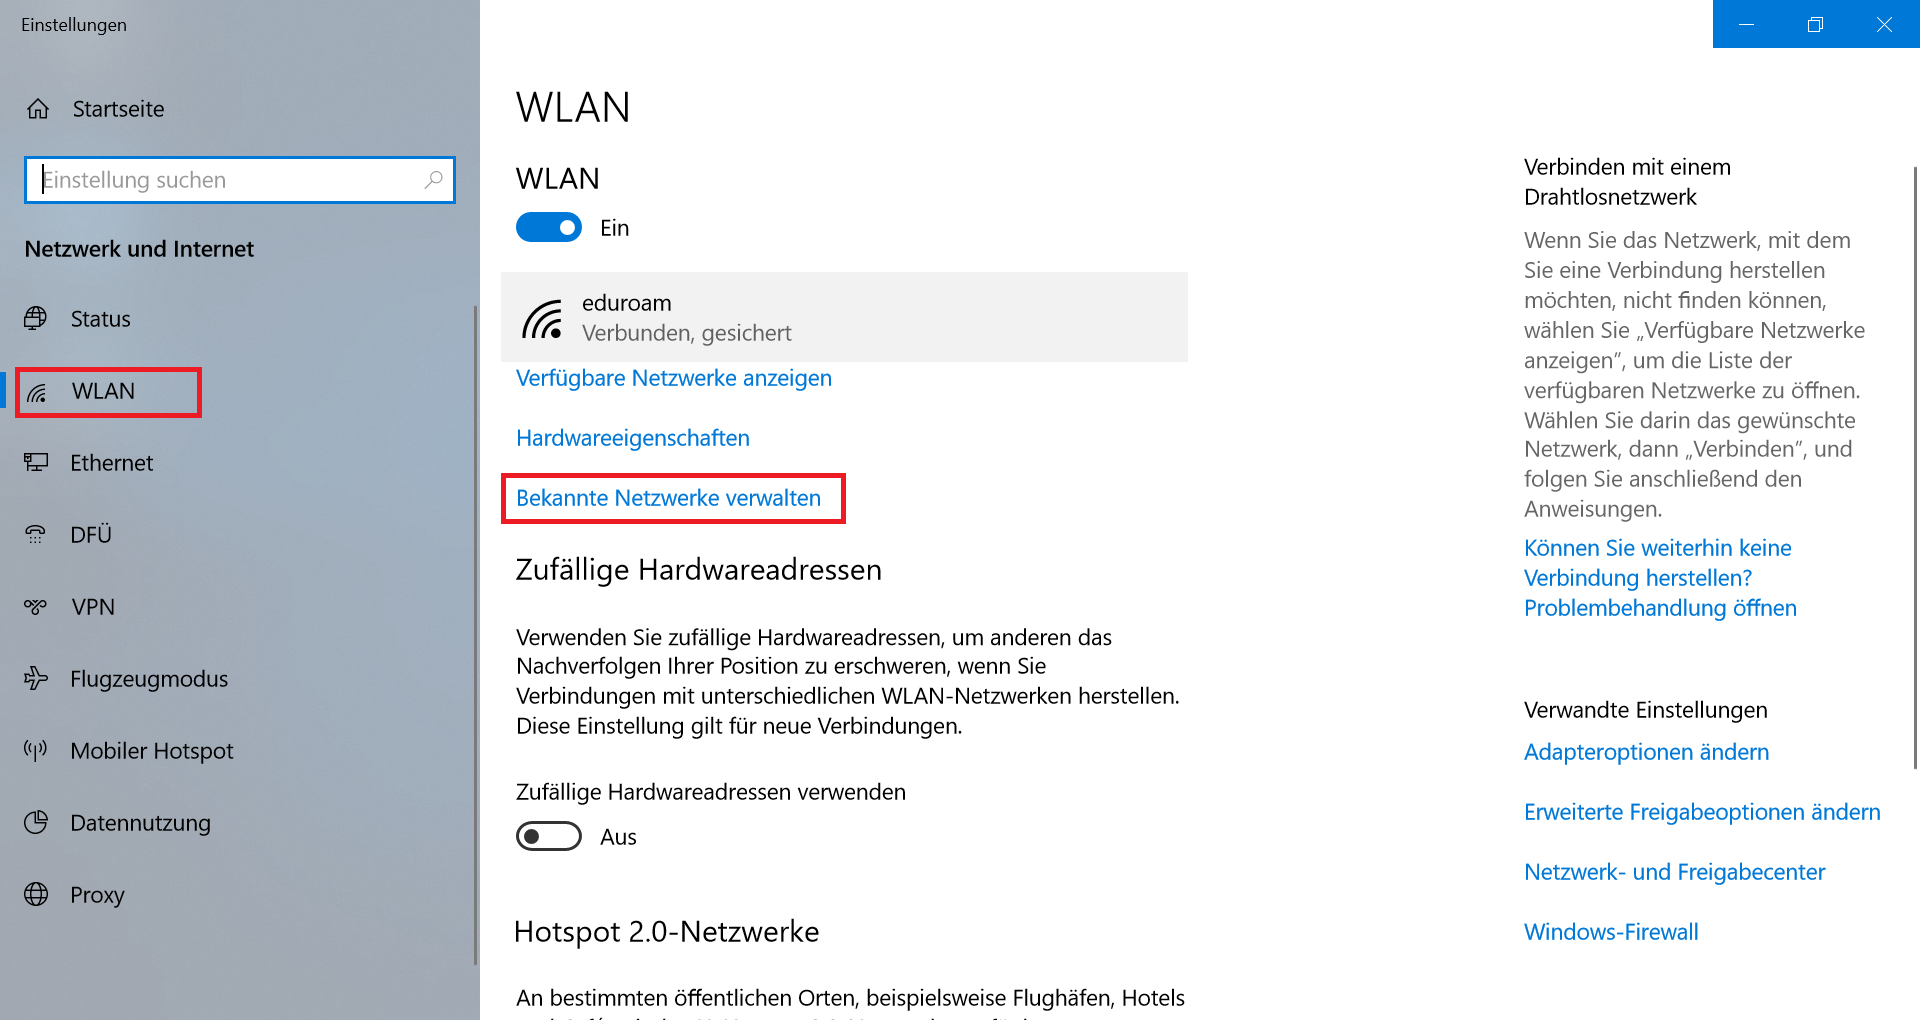 | Step B: Click "Manage known networks" |
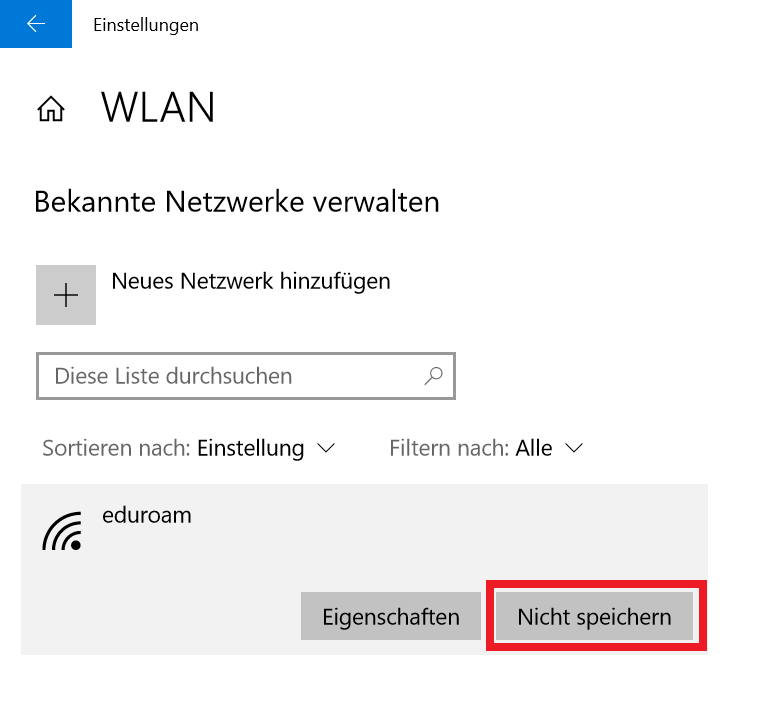 | Step C: Delete eduroam from this list |

