


Managing Distribution Groups

This article explains how you can set up, edit, disable and manage distribution groups for your domains in MailAdm.
A distribution group is a simple means of group communication and is based on multiple addressing of an email.
Members of a distribution group are managed by the owner of the distribution group via the RWTH MailApp.
Show Distributiongroups
The Show Distributiongroups menu item lists all distribution groups that belong to the selected domain (e.g., Mustereinrichtung.rwth-aachen.de).
- The search function (1) can be used to search for mailboxes by name.
- The overview displays the primary email address, active alias addresses, and visibility in the address book by default.
- You can use Layout (2) to customize what is shown in the overview. All options can be manually shown or hidden:
- Primary address
- Aliasaddresses
- Displayname
- Inside Addressbook
- You can open the action menu and disable a distribution group using the three-dot icon (3).
- Distribution groups can be edited using the small arrow (4) at the beginning of the respective line.
- By checking the box (5) in front of the primary email address, you can select multiple distribution groups for actions.
- If multiple selection is active, several distribution groups can be disabled (6) at the same time.
- By using the option Create distributiongroup (7), you can create a new mailbox and send the invitation to the user.
Create Distributiongroup
Distribution groups containing external email addresses cannot be set up on the central RWTH exchange. Such distribution groups must be set up via the Mailman mailing list.
Members can be added to a distribution group via the RWTH MailApp. Only mailboxes from the same email domain can be selected.
To create a new distribution group, please follow these steps.
Step 1
Click on the Create distribution group button at the top right.
Step 2
When creating distribution groups, certain fields must be filled in.
If you forget to fill in a required field, you will receive a message and cannot continue until the field is filled in.
The following points must be filled in when creating a distribution group:
- Displayname
- Primary Address
- Visibility in the address book
- Active by default, but can be changed using the switch.
- Manage Aliasaddresses
- An alias is an alternative address that refers to an existing distribution group.
- Any number of alias addresses can be set up for an existing distribution group.
- The alias addresses must always be in the same domain. It is not possible to create an alias outside the domain!
- Manage Owner
- The owner is the person who will primarily manage the distribution group after it has been created.
- Manage Members
- Here, the members of the distribution groups can be entered directly.
Step 3
Once you have entered all the information, you can complete the process by clicking Create.
The distribution group is created immediately; a link to the identity management system is not necessary.
Edit Distributiongroups
You can edit existing distribution groups retrospectively.
Step 1
Use the search function to find the name of the distribution group.
Step 2
Click on the small arrow at the beginning of the line of the mailbox you are looking for.
A drop-down menu will open where you can edit the mailbox.
Step 3
The process is the same for all types of mailboxes - personal mailboxes, functional mailboxes, room mailboxes, and equipment mailboxes.
Depending on the mailbox type, there are additional editing options.
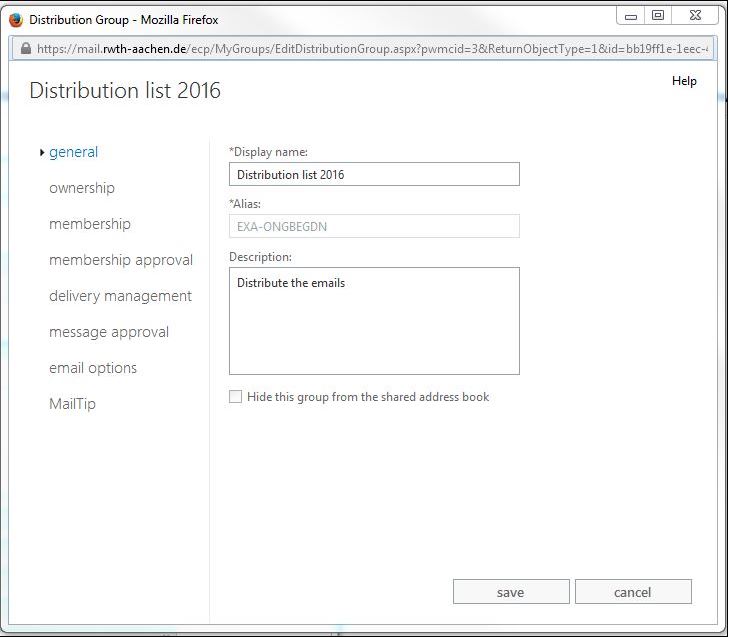
The following fields can be filled in when editing the distribution group:
- Displayname
- Primary Address
- Visibility in the address book
- Active by default, but can be changed using the switch.
- Manage Aliasaddresses
- An alias is an alternative address that refers to an existing distribution group.
- Any number of alias addresses can be set up for an existing distribution group.
- The alias addresses must always be in the same domain. It is not possible to create an alias outside the domain!
- Manage Member Of
- With the help of this option, a distribution group can be entered as a member of another distribution group.
- Manage Owner
- Here you can add more persons who will manage the distribution group via RWTH MailApp.
- Manage Members
- Here, additional members of the distribution groups can be entered directly.
- Accept Messages Only From
- Here you can specify which mailboxes (mailbox) or distribution lists or domains (distribution list) are allowed to write to the distribution group.
- By default, anyone can write an email to a distribution list. This also includes external email addresses.
Step 4
After you have made the desired changes, click Save.
Configure delivery options
Distribution group owners can configure delivery options independently via RWTH MailApp for distribution groups.
Step 1
Please log in to the RWTH MailApp. Separate instructions for this can be found in the article Logging in to the RWTH MailApp.
Step 2
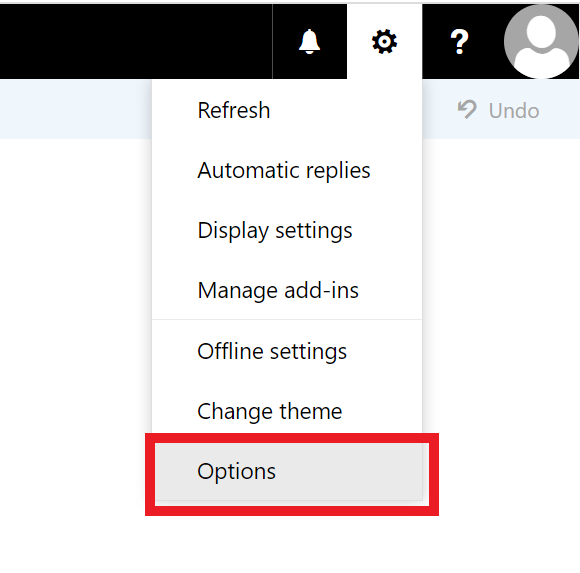
After you have successfully logged in, click on the gear icon in the upper right corner and select Options.
Step 3
Select the General (1) tab then Distribution Groups (2) and Edit Distribution Group (3).

Step 4
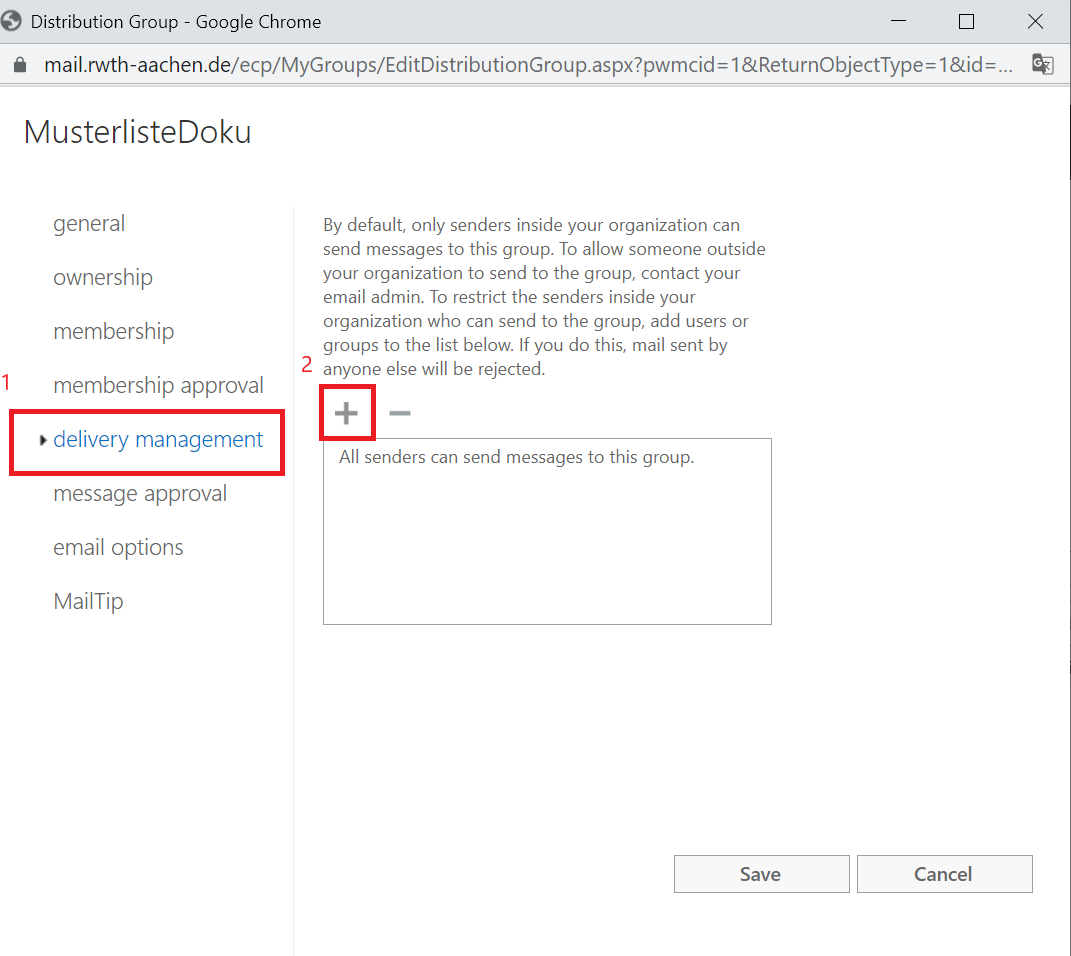
Select Delivery Management (1) then click the + (2) to add a group of your choice.
Step 5
To complete the process, click Save.
Add members

Please note:
If you need a distribution list that contains more than just email addresses from your email domain, please create a mailing list. Then you can create a function mailbox on the central mail system which is forwarded to the distribution list that you created earlier.
foreign domain members are no longer displayed on the distribution list. We will be happy to assist you in determining the current members. Please contact the IT-ServiceDesk.
The owner of a distribution group is able to administrate the distribution group via the RWTH MailApp. Only the administrator of the institute is able to nominate somebody as the owner of a distribution group.
Information regarding this procedure can be found in the manual "Editing a distribution group".
Once this is done, you can continue with the following steps:
Step 1
Please log in to the RWTH MailApp. Separate instructions for this can be found in the article Logging in to the RWTH MailApp.
Step 2
Once you have successfully logged in, click on the gear icon in the upper right corner and select Options.

Step 3
In the overview that now opens, please click on the menu item Distribution Groups.
Step 4
You will now see the distribution groups you belong to (Verteilergruppen, denen ich angehöre) and those you own (Verteilergruppen, die ich besitze).
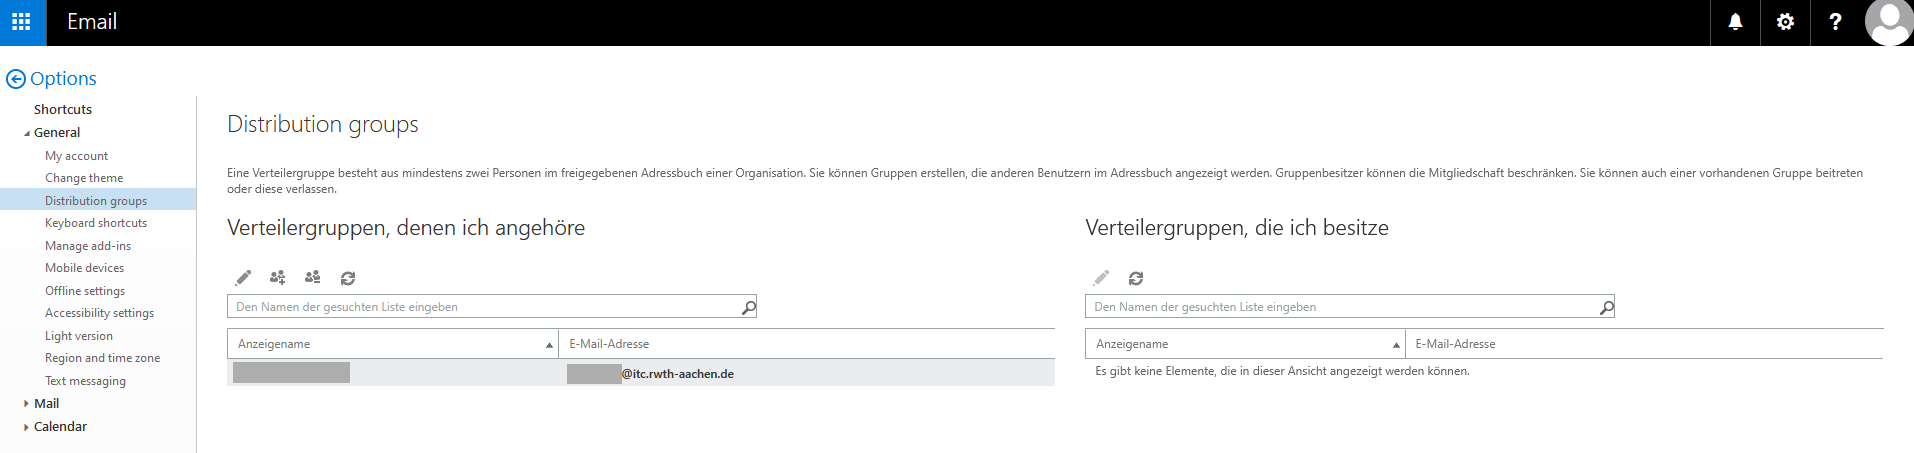
Double-clicking on the desired mailing list opens a view that allows you to manage your distribution group.
Step 5
Click on the Membership menu item on the left side of the screen. After clicking on the + button, another window will open where you can select the members of the distribution list.
As the owner, you can only select mail accounts in the same context. Now select the desired person.
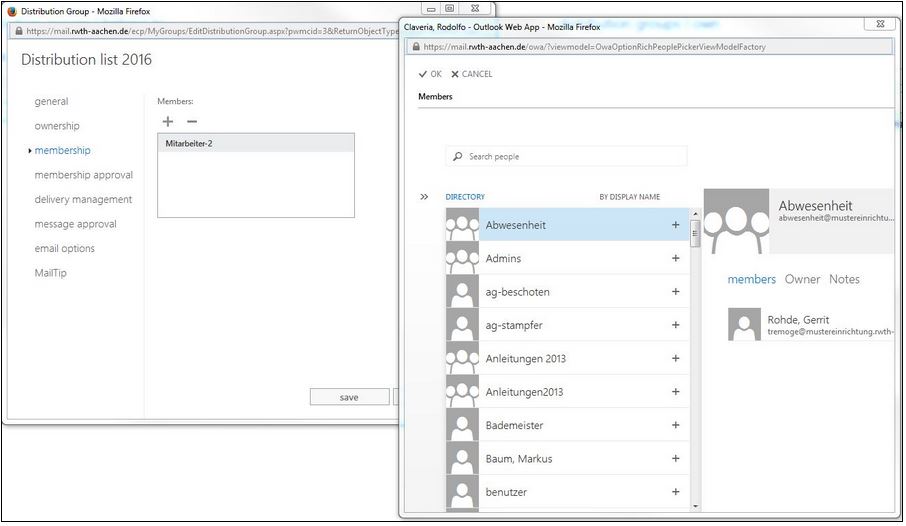
Step 6
Once you have added the desired user, they will appear in the Members field.

Step 7
If you want to remove a person, you can do so by clicking on the - button.
The process is similar to that of adding a user.
Disabled Distributiongroups
The Disabled Distributiongroups menu item displays all groups that have already been disabled and can currently be reactivated without loss.
- You can search for disabled distribution lists using the search field (1).
- You can use Layout (2) to customize what is shown in the overview. All options can be manually shown or hidden:
- Display name
- Primary address
- Alias addresses
- Disabled since
- Use the three-dot icon (3) to open the action menu and restore or permanently delete a distribution list.
- By checking the box (4) in front of the distribution lists, multiple lists can be restored or deleted (5) at the same time.
