


Configure delegate access for your mailbox

This page describes how to assign access rights for your personal mailbox and how people with access rights can access the mailbox.
There are several scenarios in which it makes sense to share mailbox content between colleagues. There are different approaches here:
- Assign access rights for substitutes
- Assign access rights to individual folders
- Assign full access to the mailbox
The persons who have been granted rights to the mailbox can access the shared mailbox from their own mailbox:
- Open shared mailbox
- Integrating a mailbox or removing it
- Integrating functional mailboxes with full access
In Outlook for Microsoft 365, the error message “You do not have permission to send the message on behalf of the specified user” may appear even though the appropriate permission has been set in MailADM.
Assign access rights for substitutes
This option is suitable for personal mailboxes and is configured by the mailbox owner. Within this configuration, you can determine which rights the deputy should have and for which folders.

Note
Delegate permissions can usually be configured via Outlook.
Step 1
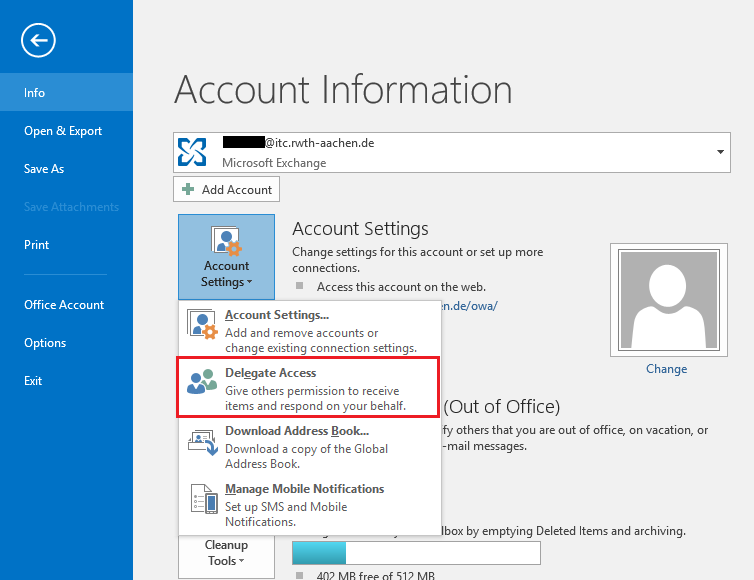
To do this, start Outlook and then call up the menu item File with the option Account settings - Delegate Access.
Step 2
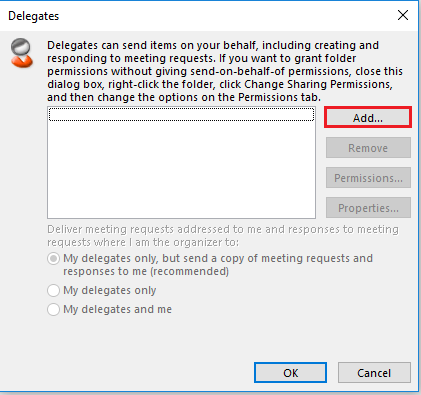
Select Add to search for a person from your address book to whom you want to grant proxy rights.
Step 3
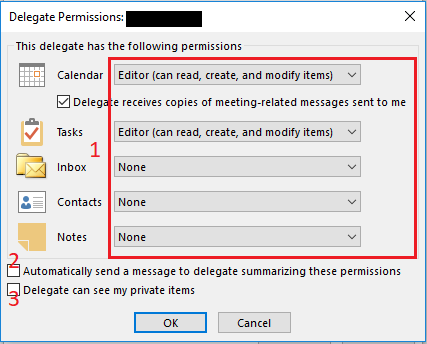
Once you have done this, you can determine the user rights with which this person should have access to your mailbox in a second step.
- (1) You can select the authorization level here.
- (2) By activating this field, deputies will receive an e-mail with a summary of the assigned authorizations.
- (3) By activating this field, substitutes can access your private elements.
If you assign “Author” rights for the “Inbox”, your delegate can also send emails in their name.
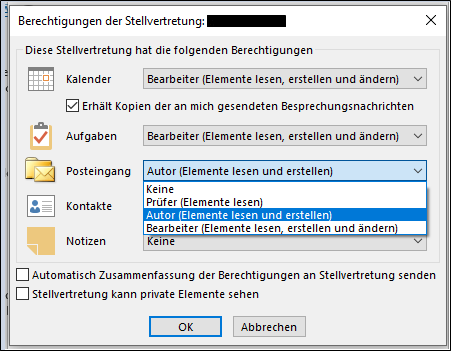
Due to several mail header fields, this mail is displayed to the recipient with the attachment “[...] on behalf of [...]”.

Step 4
Confirm your selection with OK.
The access rights are now assigned. Your deputy only needs to integrate your mailbox into their own Outlook profile and can access your mailbox content in accordance with the configured rights.
- If further folders and their contents are to be made available to the deputy, access rights must be explicitly configured for this.
Assign access rights to individual folders
You can also assign access rights to certain folders without having previously assigned deputy rights.
Step 1
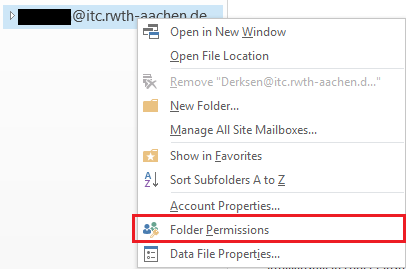
Right-click on your mailbox to open the “Folder permissions” menu item.
Step 2
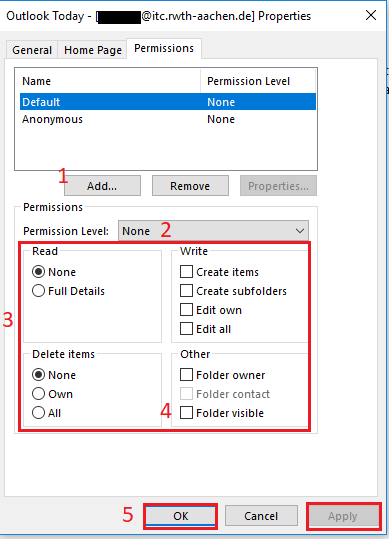
In the new window, you can add people and customize their permissions.
- (1) Here you can select the person from your address book who should have permanent access to your mailbox.
- (2) You can select the authorization level here.
- (3) The authorization level settings are displayed here. You can also change or adjust the authorizations yourself if necessary.
- (4) To ensure that the person to whom you want to grant permissions can also see your mailbox or folders, the “Folder visible” checkbox must be ticked.
- This setting means that folders to which a person has access are displayed in the case of the integrated mailbox. If this right is missing, no folders in the mailbox can be displayed regardless of the individual permissions configured for the folders. Please also note that folder permissions are inherited by newly created subfolders.
- (5) Finally, click on “Apply” and “OK”. Your settings have now been applied and your deputy has permanent access to your mailbox.
Step 3
The authorized person can now open and integrate your mailbox in Outlook.
Assign full access to the mailbox
This option is only available for functional mailboxes and can only be configured for the entire mailbox.
If people should only have access to certain content, the owner of the mailbox can resolve this via access rights.
Full access is set up via MailAdM by persons with the role “RWTH-E-Mail administration”.

Persons with "full access" to the mailbox have read access to the mailbox contents.
The “Send as for” option must also be set so that people can also send emails with the sender address of the functional mailbox.

Open shared mailbox
As a deputy, you must always open the inbox of the person you are deputizing for if you want to view it. To open a shared mailbox, please proceed as follows:
Step 1
Select File and click on Folder of another user under Open and export.

Step 2
In the new window, enter the person whose mailbox you want to open and then click on OK.

You will now see the person's mailbox.
As soon as you click on another module or your mailbox, the mailbox of the open person closes. You will then have to repeat the process.
For this reason, we recommend that you integrate the mailbox into Outlook. You can remove the integrated mailbox at any time.
Integrating a shared mailbox
Step 1
Select File and click on Account settings under Account settings.

Step 2
Select the mailbox with which you have been granted rights to a mailbox to be substituted and click on Change.

Step 3
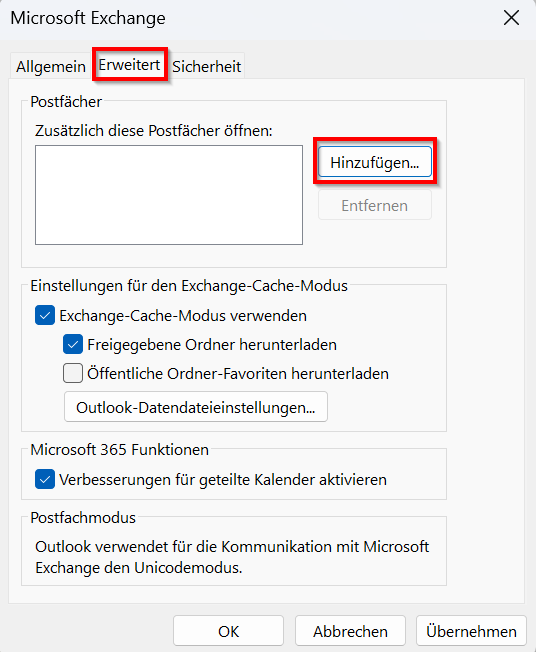
Click on Advanced settings and select Advanced in the next dialog box.
Step 4
Click on Add to include the shared mailbox.
Step 5
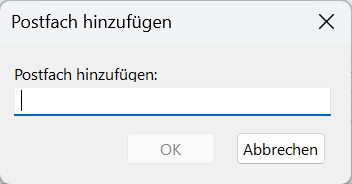
Now enter the name of the person whose mailbox you want to integrate and confirm the entry with OK.
- The name alone is sufficient here, as the name is searched for on the Exchange server.
- If this is not found, an error message is displayed.
Step 6
The “Download shared folders” setting is selected by default. We recommend that people who want to access a shared mailbox remove this option.
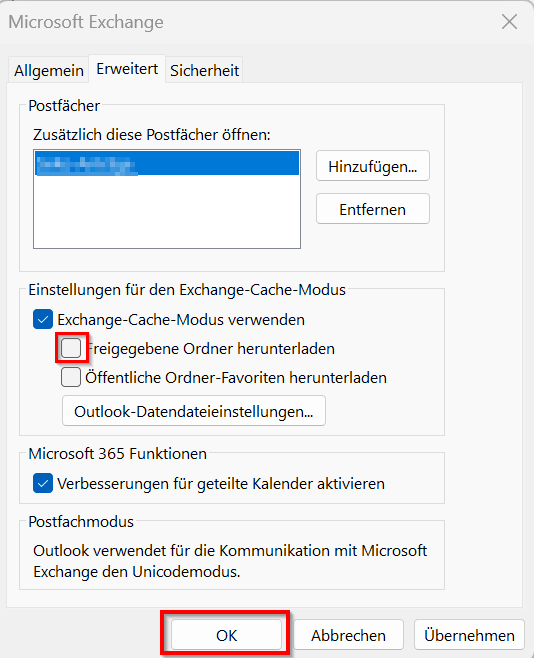
Step 7
To confirm the entry, press “OK”.
The Microsoft Exchange window closes and the mailbox is integrated.
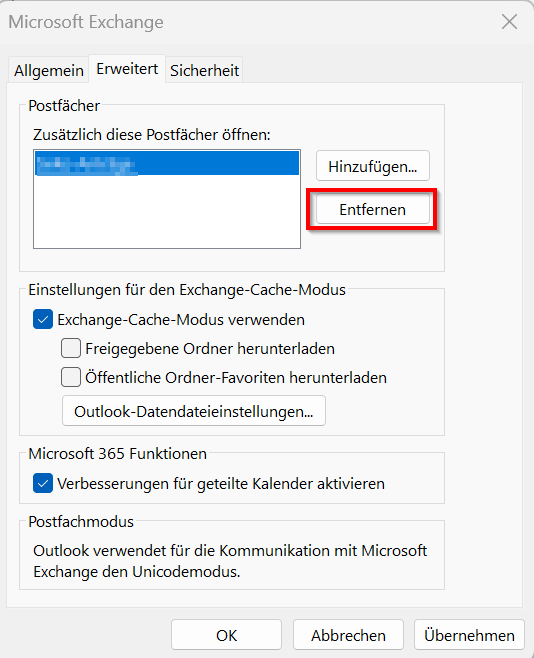
To remove the mailbox again, navigate to the advanced settings as described above and click Remove.
Integrating functional mailboxes with full access
If you have full access rights to a functional mailbox, this mailbox does not need to be explicitly integrated. The mailbox opens automatically as soon as you log in to your personal mailbox.
Workaround: “Send as” in Outlook for Microsoft 365
If the “Send as” right is set in MailADM but the sender email address is not displayed in the address book, sending an email in Outlook for Microsoft 365 may fail. The following error message appears: “You do not have permission to send the message on behalf of the specified user.”
As a workaround, the address for which the “Send as” right is configured must be displayed in the address book. The address must then be selected from the address book as the sender address in the dialogue when writing a new email ("From" → “Additional email address...” → “From...”).
