


Booking resource accounts

This article explains how you can book (room) resources and add them to a meeting.
Booking via Outlook
Step 1
First, log in to Outlook or open your mailbox.
Step 2
Select the second icon Calendar on the left-hand side of the screen for the calendar view.

Step 3
Select the New appointment option or create an appointment by double-clicking in the calendar.
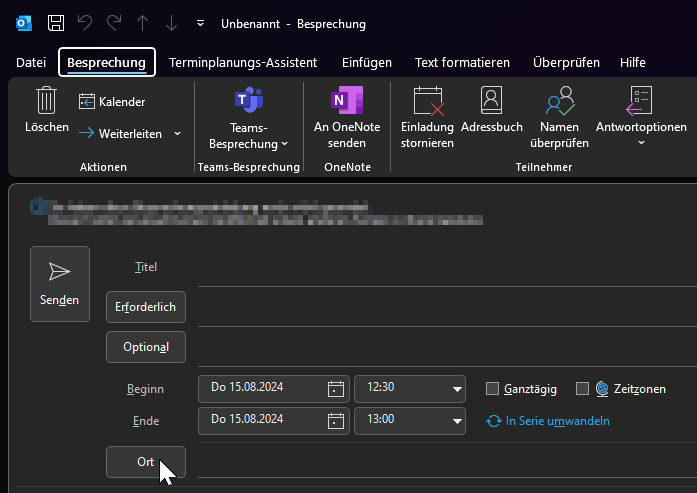
Step 4
Then select the Location option
Step 5
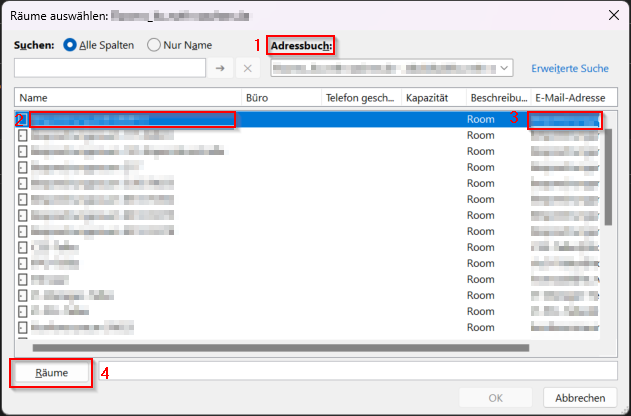
In the window that opens, you can now book (room) resources and add them to the appointment:
- By selecting Address book (1), you can select your organization's address books or the global address list
- The display area then shows all the assigned resources with their names (2)
- You can also use the search functions to search directly for specific (room) resources
- An email address (3) is assigned to each (room) resource so that you can add it to the appointment
- As soon as you have selected a (room) resource and click on Rooms (4), it will be added to the appointment.
Managers of the (room) resource are then shown the appointment invitation and can accept the appointment or cancel it if it overlaps.
Booking via RWTH Mail App
Step 1
Log in to the RWTH MailApp. You can find separate instructions for logging in to the RWTH MailApp here.
Step 2
Select Calendar after clicking the Icon in the top left corner of the screen for the calendar view.

Step 3
Select the + New option or create an appointment by double-clicking in the calendar.
Step 4
Then select the Add a location or room option.
A list opens in which all rooms of your organization are displayed.
Once you have selected the desired room, confirm by clicking Add room.

Step 5
Once you have added a (room) resource, you can book the appointment by clicking Save at the top of the window.
Managers of the (room) resource are then shown the appointment invitation and can accept the appointment or cancel it if it overlaps.
Booking via Thunderbird
Step 1
First, log in to Thunderbird or open your mailbox.
Step 2
Select the New Event option
Step 3
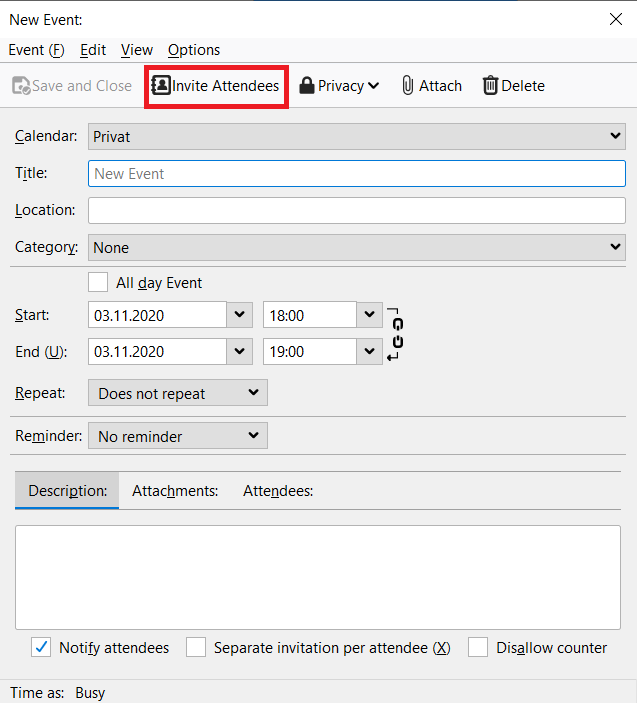
A new window opens in which information such as title and location can be entered.
Select the Invite attendees option in this window.
Step 4
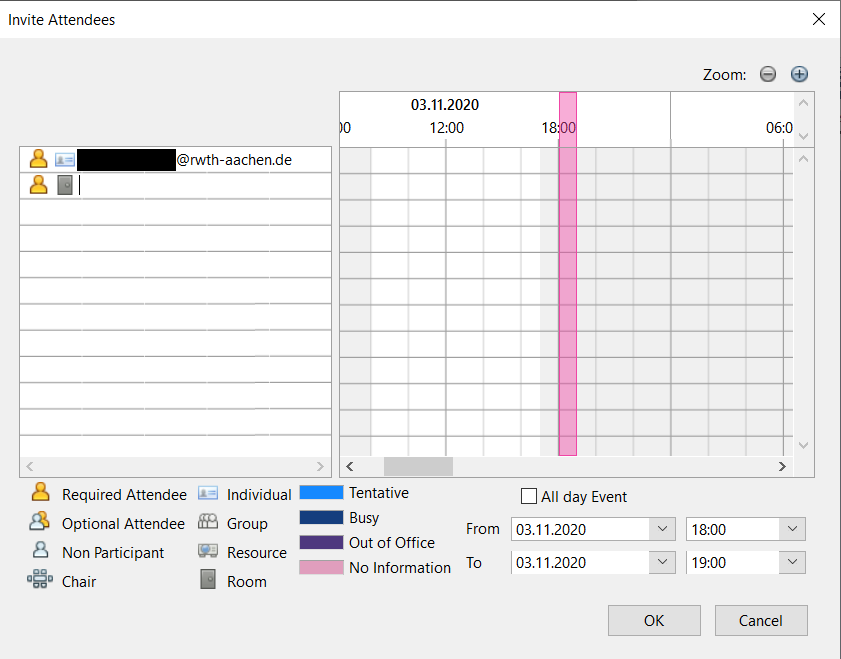
(Room) resources can also be added as participants to an appointment.
You can now find the (room) resource using the legend below so that you can make the right selection.
If the (room) resource has not yet been booked, i.e., no entry is visible, you can add the resource.
The (room) resource must be entered manually in order to be used.
Step 5
Once you have found and selected the desired (room) resource, confirm with OK.
The appointment can only be viewed once it has been booked.
Managers of the (room) resource are then shown the appointment invitation and can accept the appointment or cancel it if it overlaps.
