


Automatic reply

This article explains how you can configure auto-notifications for your RWTH e-mail inbox.
If emails are sent to you while an auto-notification is active, the sender of the email will automatically receive a predefined message as feedback.
This setting can be activated, for example, for times when incoming emails are not (or cannot be) read by the mailbox owner. For example, during vacation or sick days.
Configuring auto-notifications in Outlook
Step 1
First log in to Outlook or open your mailbox.
Step 2
Then click on File at the top left.
Step 3
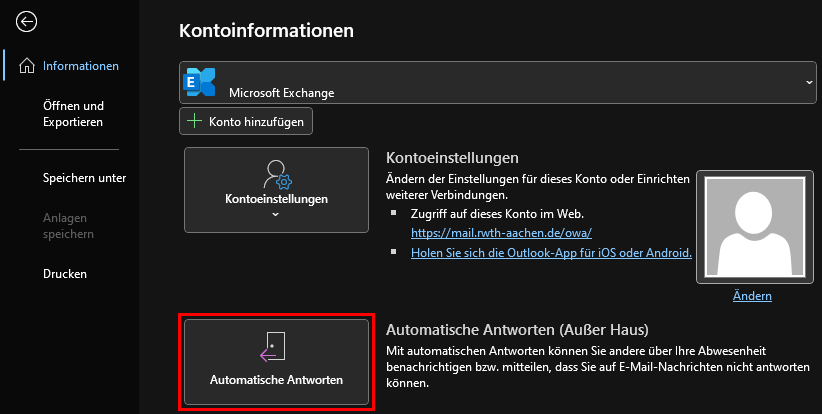
Then select Automatic replies.
Step 4
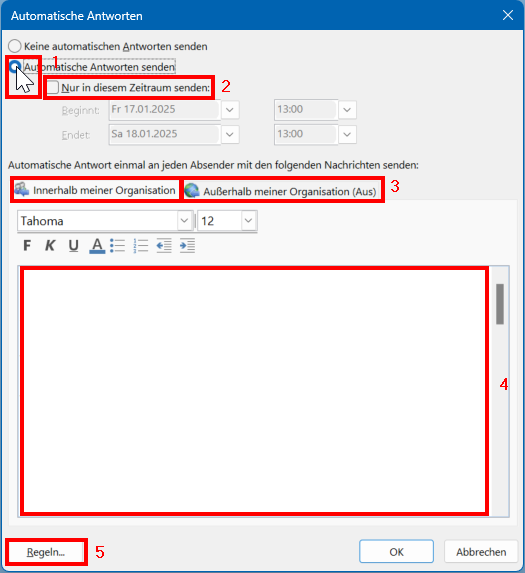
A new window opens, first check the box next to Send automatic replies (1) to be able to edit the auto-notification.
- Under (2) you can, if desired, set a specific time period during which the auto-notification should be active if you also check this option.
- Under (3), you can differentiate between auto-notifications for email addresses from your own domain or outside this domain and edit them separately.
- Under (4), you can create and edit the text that is displayed to recipients of the auto-notifications.
- Under (5) you can create additional rules for incoming messages. You can find separate instructions for creating rules here.
Step 5
Click on OK to activate the auto-notification.
If you do not want to activate the auto-notification immediately after editing, check the No automatic replies box at the top again.
Then no auto-notification will be active at first, but the settings will be saved until the next activation.
Configure auto-notifications in the RWTH MailApp
Step 1
Log in to the RWTH MailApp. You can find separate instructions for logging in to the RWTH MailApp here.
Step 2
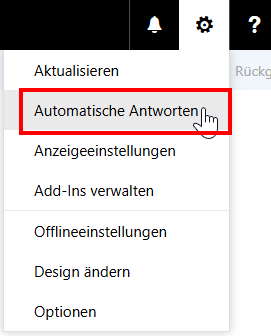
Click on the gear wheel symbol at the top right and choose Automatic responses.
Step 3
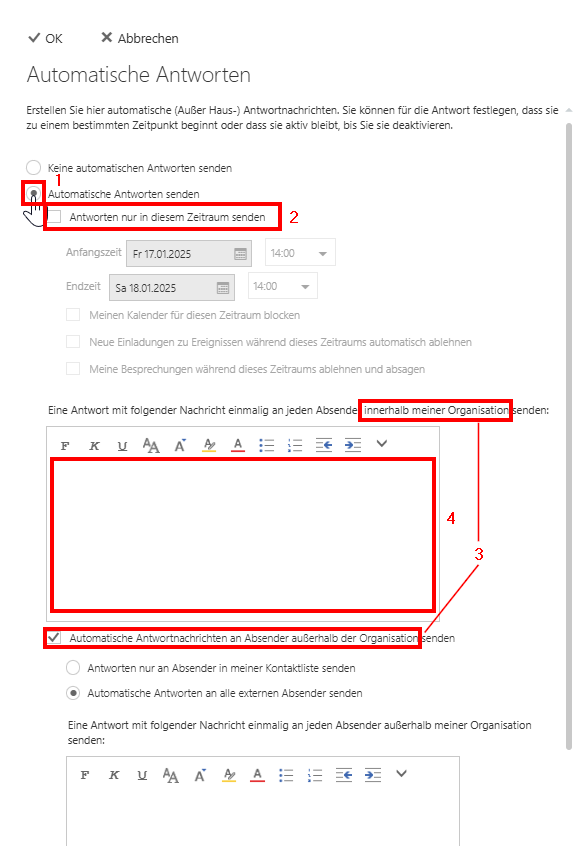
A new window opens, first check the box next to Send automatic replies (1) to be able to edit the auto-notification.
- Under (2) you can, if desired, set a specific time period during which the auto-notification should be active if you also check this option.
- Under (3), you can differentiate between auto-notifications for email addresses from your own domain or outside this domain and edit them separately.
- Under (4), you can create and edit the text that is displayed to recipients of the auto-notifications.
Step 4
Click on OK to activate the auto-notification.
If you do not want to activate the auto-notification immediately after editing, check the No automatic replies box at the top again.
In this case, no auto-notification will be active at first, but the settings will be saved until the next activation.
