


Configuring forwarding rules

This article explains how you can configure forwarding rules for your e-mail address. The configuration for a redirect works in the same way.
In the case of a forwarded email, the original sender is replaced by the email address of the forwarding mailbox to which the original email was sent. In the case of a redirect, the sender address of the original email remains unchanged. Both options can be set up in Outlook or the RWTH MailApp.
If a redirect via IdM Selfservice was previously activated against out recommendation, it must first be deactivated or removed.
Configuring forwarding in Outlook
Step 1
First log in to Outlook or open your mailbox.
Step 2
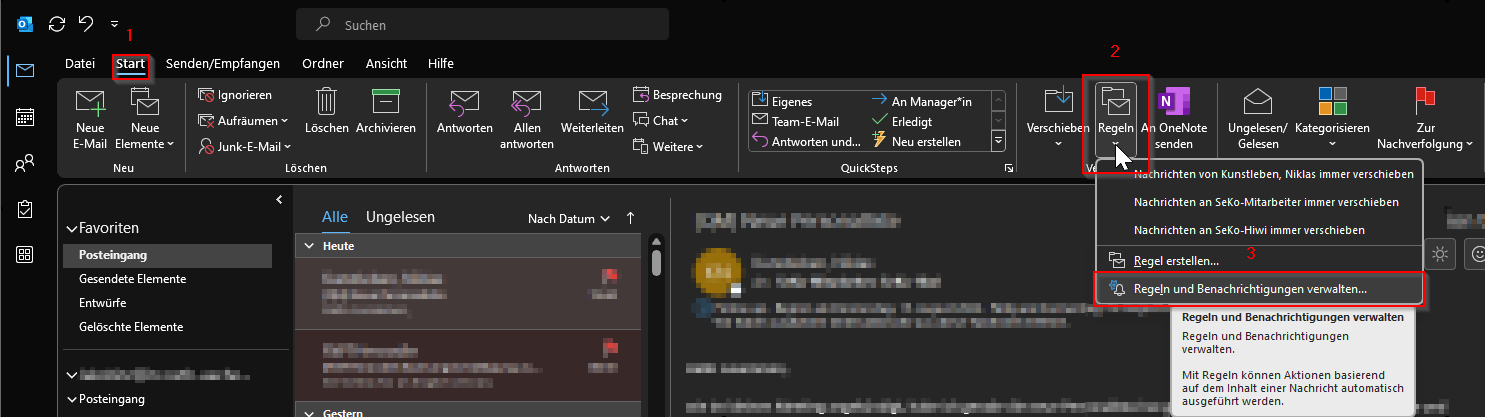
If you are not already there, click on Start (1) in the Outlook mailbox, select Rules (2) in the middle of the top navigation bar and then Manage rules and notifications... (3).
Step 3
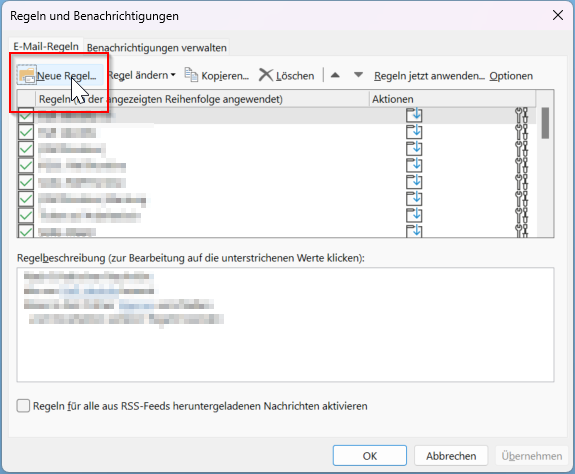
In the Rules and notifications tab, you can view and edit all the rules you have defined for the mailbox.
Step 4
To follow these instructions, click on New rule... at the top left.
Step 5
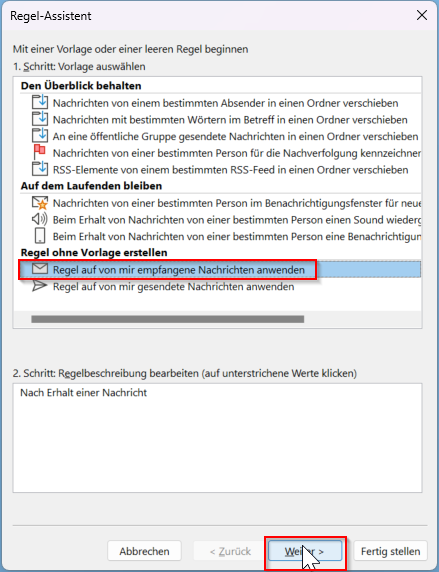
Under the section Create rule without template, click on Apply rule to messages I receive.
Step 6
Now click on Next.
Step 7
Now specify the criteria under which the message should be forwarded, for example by specifying a particular sender or subject.
If you simply want to forward all messages, do not select an option here and click on Next.

Step 8
Now click on Next.
Step 9
In the next step, select the option Forward this to a person/public group.
In the lower window, click on the text to a person/public group highlighted in blue.
Optional:
- Automatically delete emails after forwarding (A)
- You can automatically move forwarded emails to the trash by adding the additional rule “Delete this”. Alternatively, you can permanently delete the emails from the forwarding mailbox using the rule “Delete this permanently". Please note: If forwarding fails, the emails may not be recoverable.
- Set up redirect (B)
- As an alternative to forwarding, you can set up a redirect by selecting the option “Redirect this to a person/public group.” Here, the original sender of the email is retained. The remaining configuration is the same as that for forwarding.

Step 10
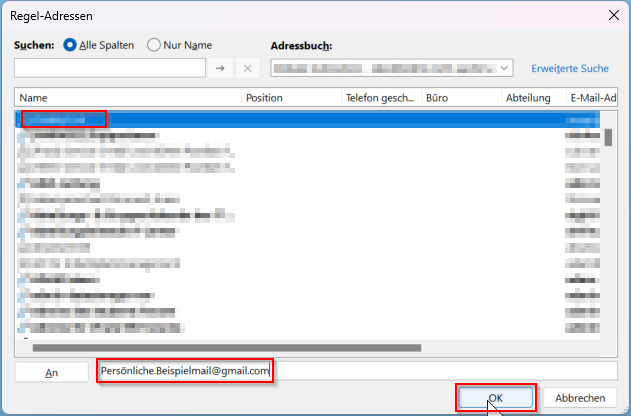
Now select a contact or enter the corresponding e-mail address directly in the To field below and confirm with OK.
Step 11
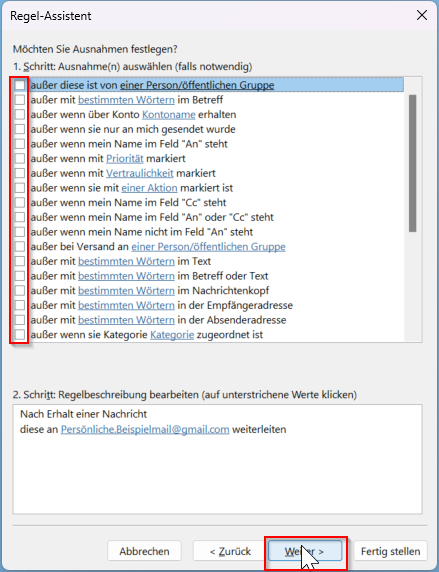
You can then specify which messages you want to exclude from the rule - for example, a particularly important message or emails with certain words in the text.
To do this, place a tick in front of the respective exception or exceptions that are to be active. Then click on Next.
Step 12
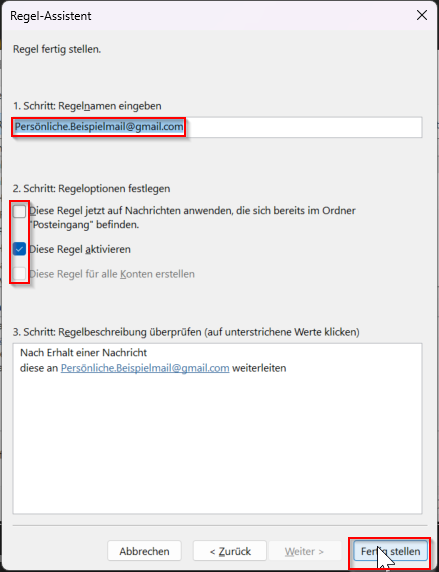
In the last step, you can assign a name for the rule
You may also decide whether previously received emails should also be forwarded or not.
Step 13
As soon as you are happy with the settings, click on Finish.
Automatic forwarding is now set up.
Configuring Forwarding in the RWTH MailApp
Step 1
Log in to the RWTH MailApp. You can find separate instructions for logging in to the RWTH MailApp here.
Step 2
Click on the gear wheel symbol at the top right and choose Options.

Step 3
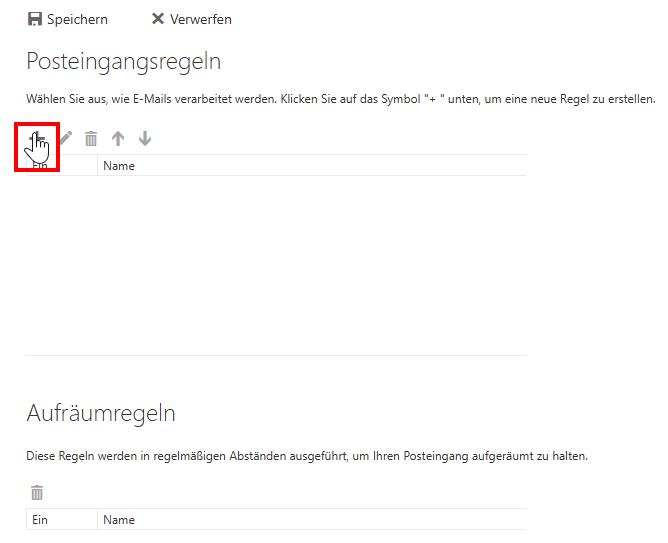
Click on E-Mail > Automatic processing and then Inbox and clean-up rules in the navigation bar on the left.

Step 4
Then select the plus sign under Inbox rules.
Step 5
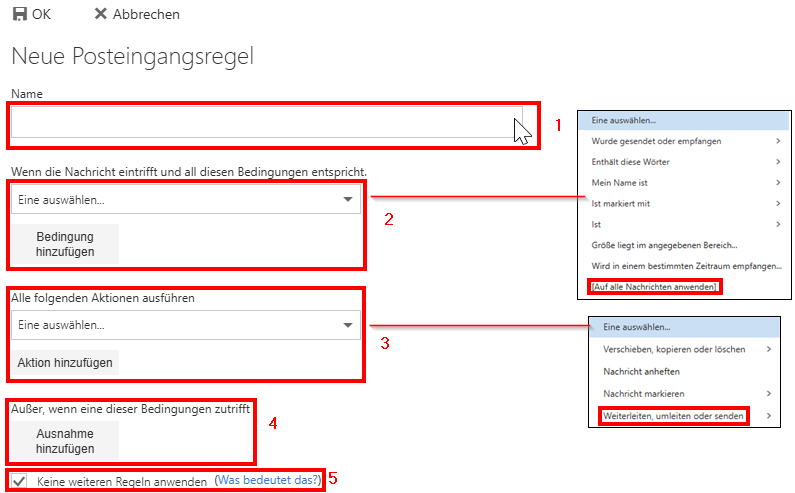
You can now define the forwarding:
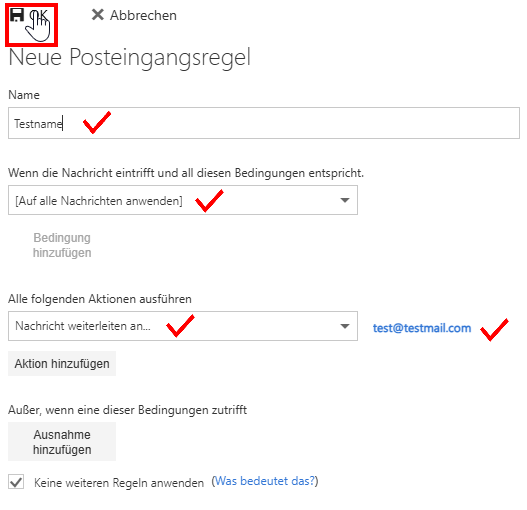
First define a name (1) for the rule. This will help you to differentiate if you create several rules.
If desired, you can configure the conditions (2) according to which the messages are forwarded or not forwarded
Select [Apply to all messages] here (or select another option if you only want to forward certain messages).If desired, different actions (3) can be carried out with the selected emails
- Select Forward, redirect or send > Forward message to... here.
- Alternatively, you can set up a redirect with Forward, redirect, or send > Redirect message to... In this case, the sender of the original email is retained.
- Emails can be automatically deleted from the forwarding mailbox after forwarding using the Move, copy, or delete > Delete message action.
If desired, additional exceptions (4) can be set
Do not select any settings here (or create an exception option if you want to exclude certain messages).If desired, you can select that other and existing rules are overwritten by this rule (5)
Leave the box checked (or uncheck it if you have already created other rules that should be applied first).
Step 6
As soon as you have selected the option Forward, redirect or send > Forward message to... you can select the e-mail address to which the e-mails are to be forwarded.
You can either enter an e-mail address yourself (1), search for people from your contacts (2) or go through the structure of your address books yourself and select a contact (3).
As soon as you have selected an e-mail address, click on Save (4).

Step 6
As soon as you have set everything as desired, confirm this by clicking OK.
Automatic forwarding is now set up.
