


Evolution

In this guide you will learn how to integrate RWTH-E-Mail into the Evolution email client under Linux.
To successfully integrate your RWTH-E-Mail under Linux, you will need the Evolution-ews package in addition to the Evolution mail software.
These instructions were created with Evolution 3.54.2 under Ubuntu 24.10, so the appearance may differ for other Linux distributions and other versions of Ubuntu.
To set up your email in the Evolution email client, follow these steps.
Step 1
Proceed as follows to install the Evolution-ews package:
- Open the terminal.
- Enter the command ‘sudo apt-get install evolution-ews’ and press Enter.
- Enter your administrator password.
- Confirm the installation with J.
Step 2
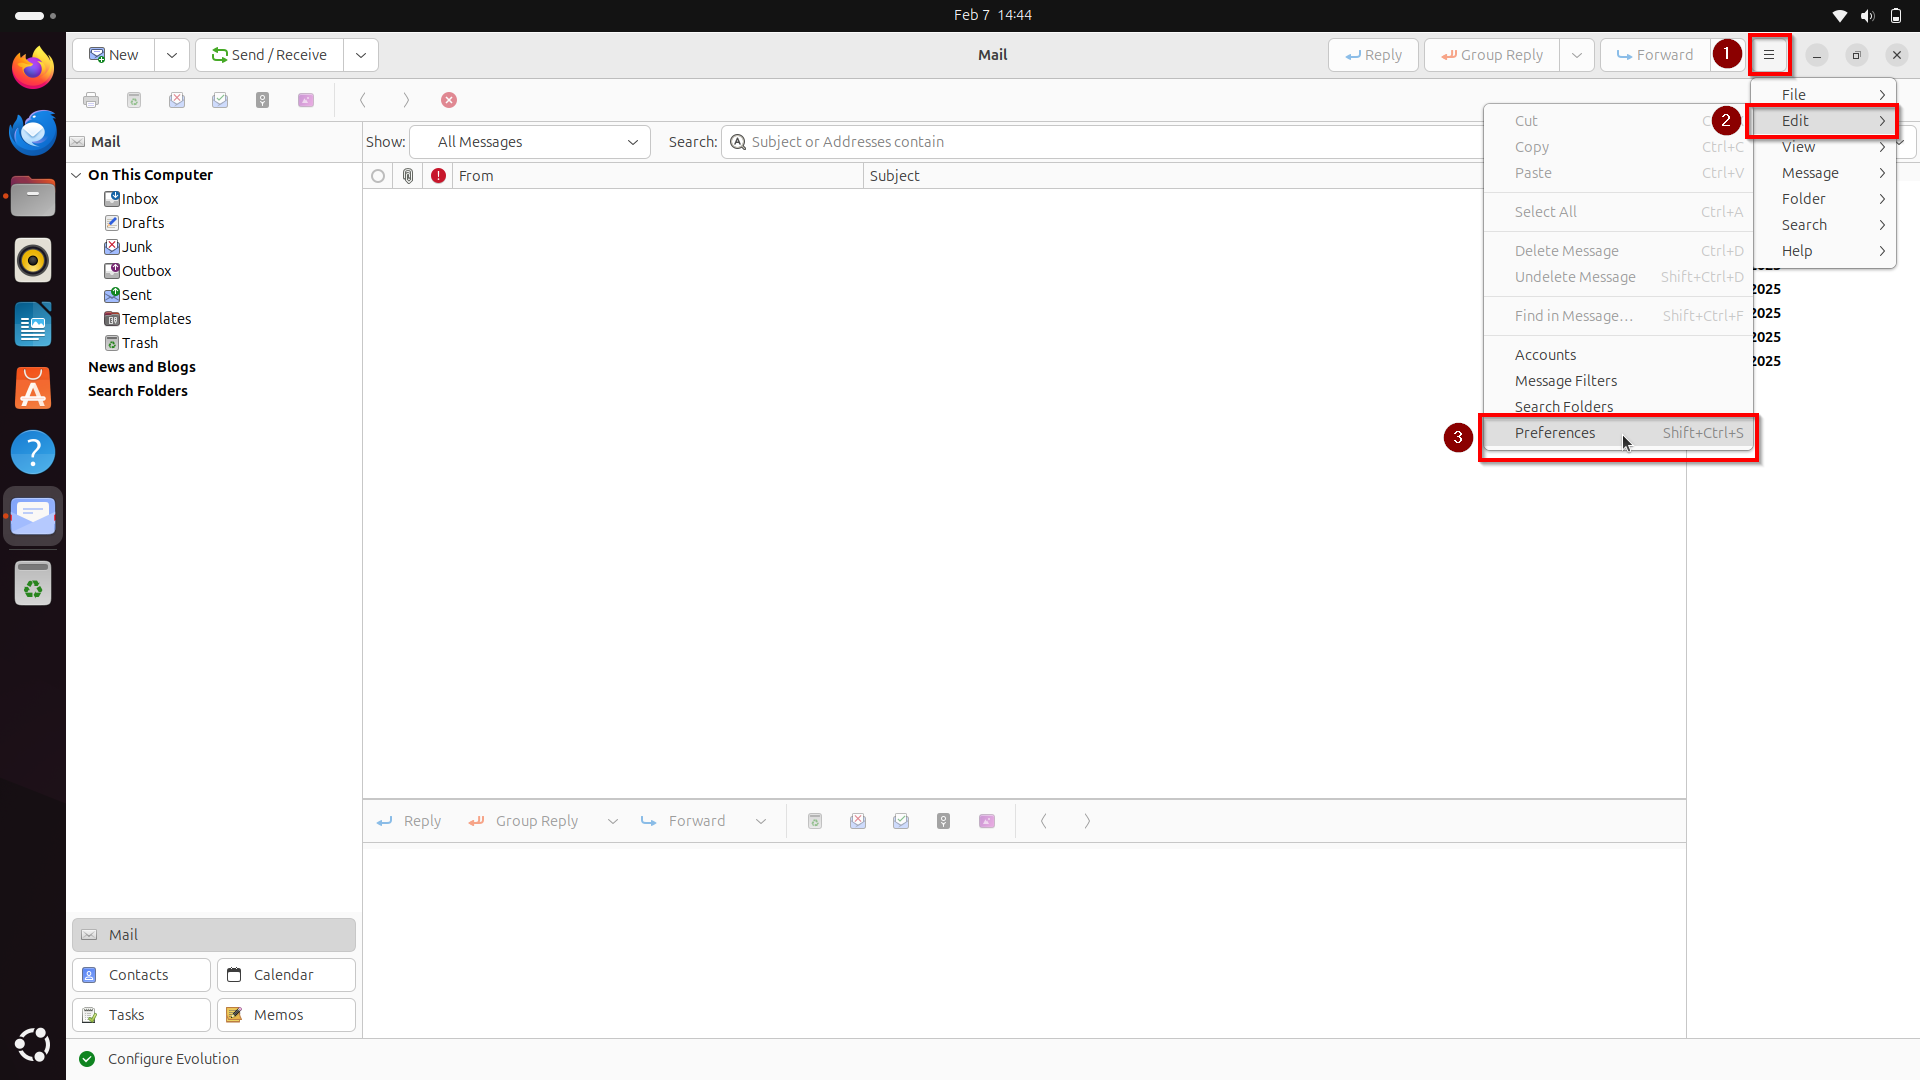
Start Evolution and click in the ‘Burger’ menu (1) at the top right on
Edit (2) > Preferences (3)
Step 3
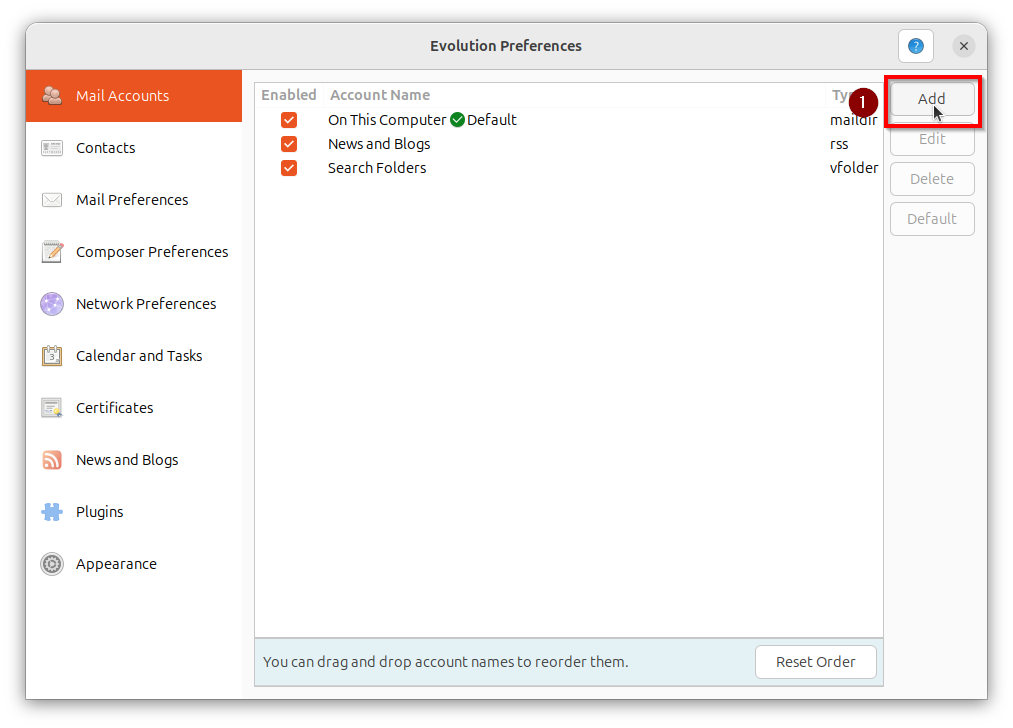
In the ‘Evolution settings’ window, click on Add (1):
Step 4
In the ‘Welcome’ window, click Next (1):

Step 5
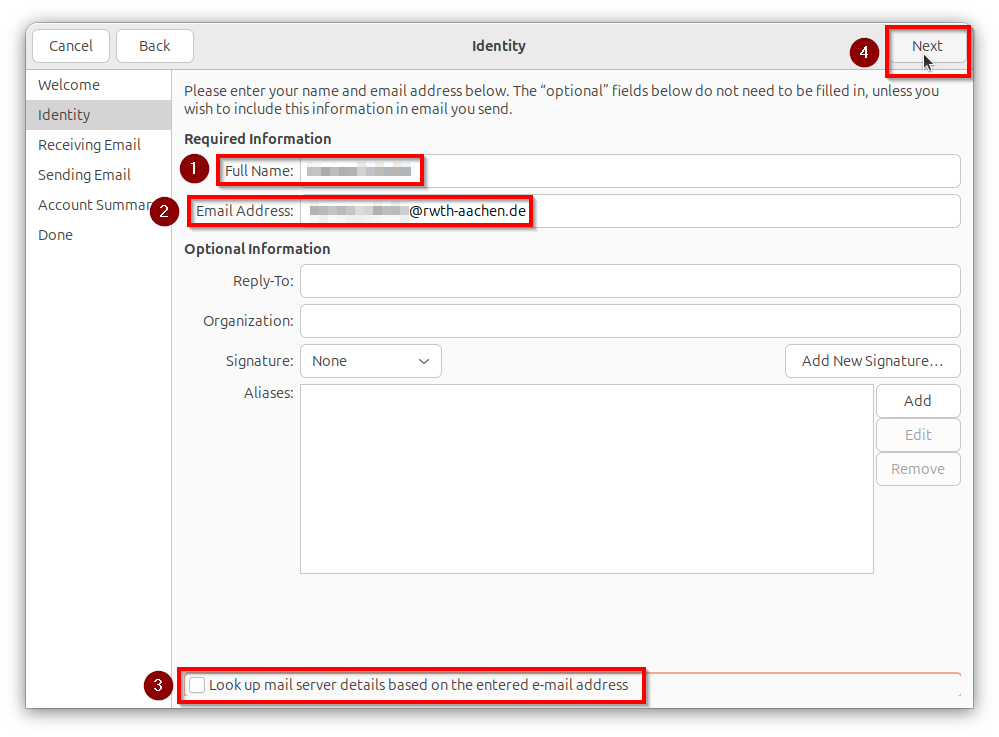
Enter the following information in the ‘Identity’ window under ‘Required information’:
(1) Full name: First name Last name
(2) E-mail address: vorname.nachname@rwth-aachen.de
(3) Remove the tick from ‘Look Up mail server details based on the entered email adress’ at the bottom of the window.
Then click on Next (4).
Step 6
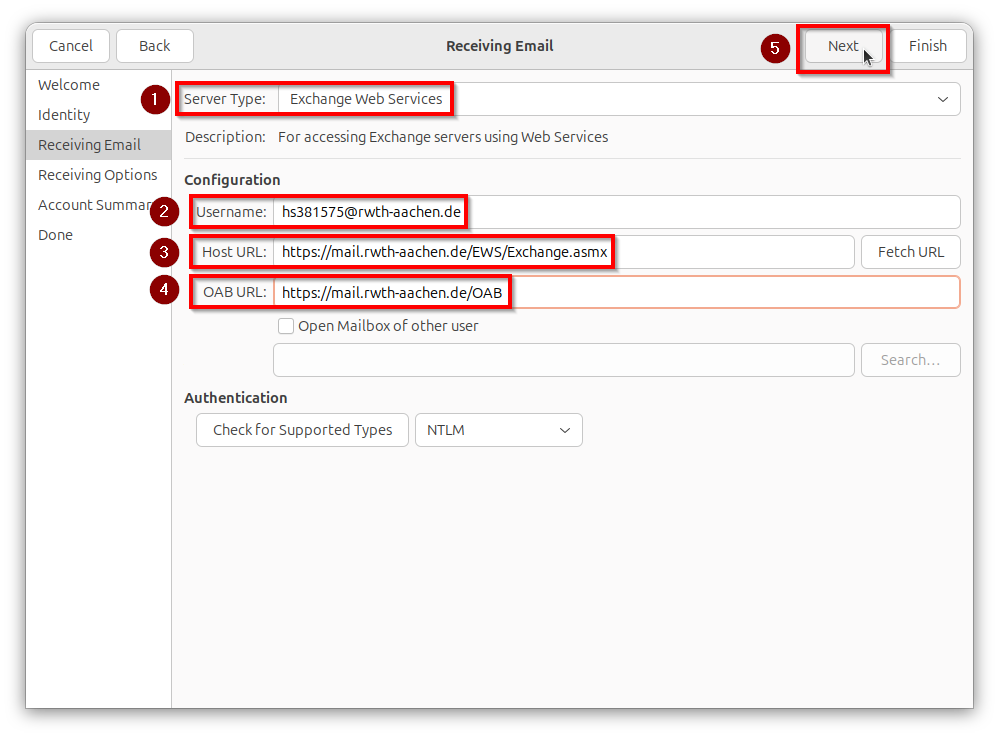
Enter the following information in the ‘Retrieve emails’ window:
(1) Server type: Exchange Web Services
(2) User name: ab123456@rwth-aachen.de
(3) Host URL: https://mail.rwth-aachen.de/EWS/Exchange.asmx
(4) OAB URL: https://mail.rwth-aachen.de/OAB
Then click on Next (5).
Step 7
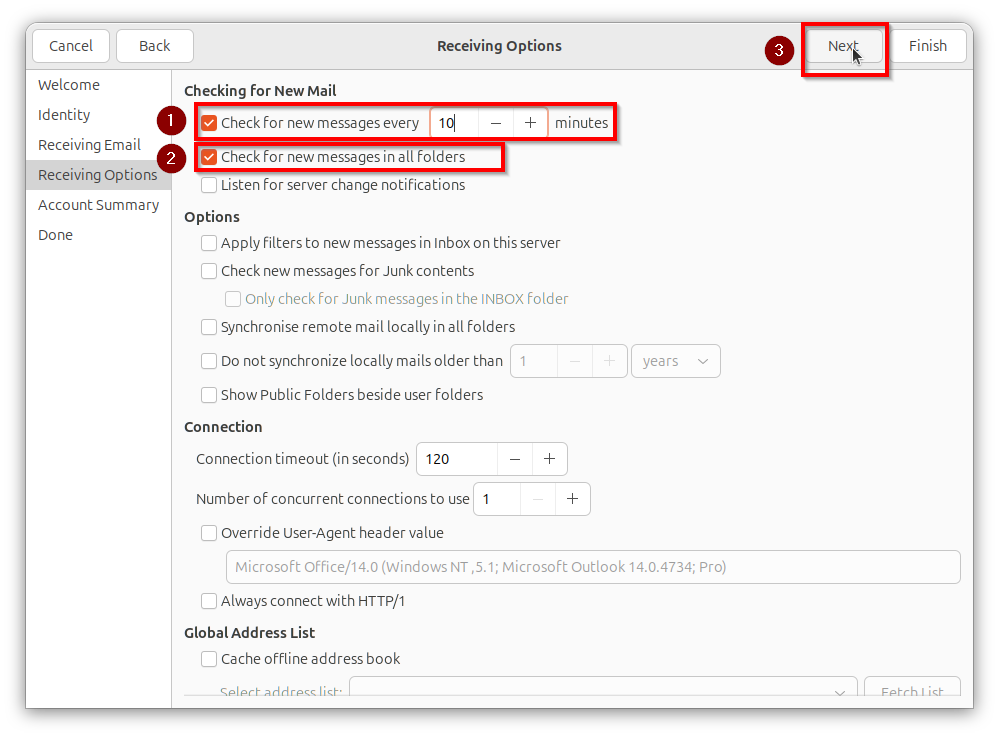
Select the following options in the ‘Receive options’ window under ‘Check for new emails’:
(1) ‘Check for new messages every X minutes’
(2) ‘Check for new messages in all folders ’
Then click Next (3).
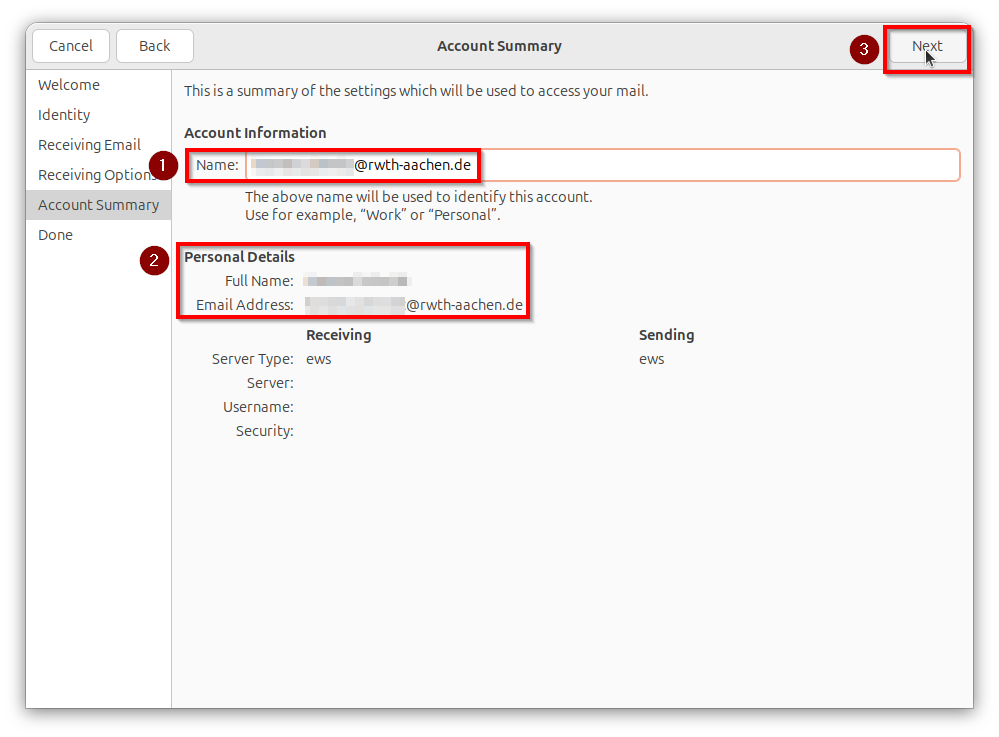
Step 8
In the ‘Account summary’ window (1), enter any name for your e-mail account in the ‘Account information’ area and check the details under ‘Personal details’ (2).
Then click on Next (3).
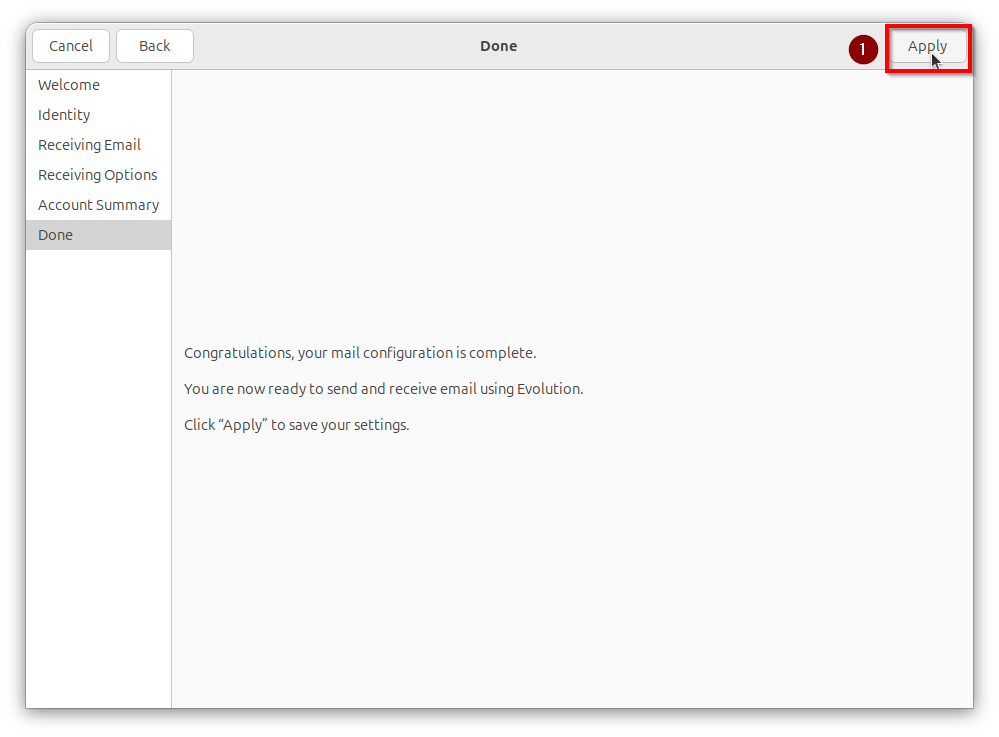
Step 9
In the 'Done' window, click on Apply (1)..
Step 10
In the ‘Authentication request’ window, enter your user name in the format ab123456@rwth-aachen.de and the corresponding password (1).
Click OK (2) to confirm.

Your RWTHmail is now set up in your Evolution e-mail client.
[[f14f32b623954416b47969c0bdf688cc]]
Additional information
