


Configuring filter rules

This article explains how you can create different filters or filter rules for your mailbox.
Configuring filter rules in Outlook
Step 1
First log in to Outlook or open your mailbox.
Step 2
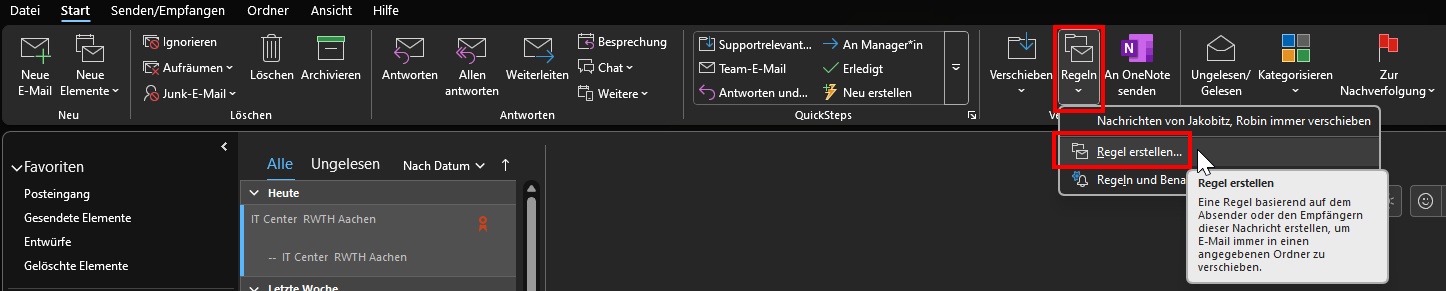
If you are not already there, click on Start in the Outlook mailbox and select Rules in the top navigation bar on the right and then Create rule... on the right.
Step 3
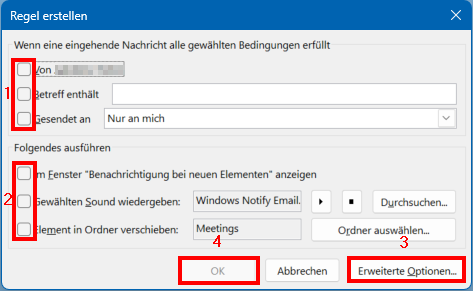
A new window opens in which you can select what effect the new rules should have.
You can choose between various predefined conditions (1):
- Incoming emails from the sender address of the selected email.
- Incoming emails with the entered subject (this can be adopted or entered manually).
- Incoming emails that are sent to you or selected recipients
You can also choose between predefined actions (2), which are then applied to the incoming e-mail:
- A pop-up window is created as soon as an e-mail that meets all the specified conditions is received
- A special sound is played as soon as a mail that meets all the specified conditions is received
- As soon as a mail meets all the specified conditions, it is automatically moved to a selected folder
You can use Advanced options (3) to create your own rules and add your own conditions, actions and exceptions.
To do this, follow the steps on the screen.
Step 4
Once you have set everything as desired, click OK (4).
Step 5
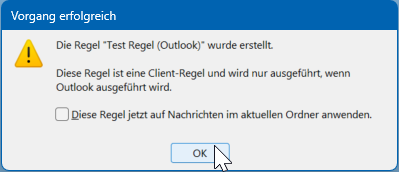
The rule has now been created.
If you check Apply this rule now to messages in the current folder, the actions you have set will be applied to emails already received that meet the conditions you have set.
Click OK to complete the process. The rule is now active.
Configuring filter rules in the RWTH MailApp
Step 1
Log in to the RWTH MailApp. You can find separate instructions for logging in to the RWTH MailApp here.
Step 2
Click on the gear wheel symbol and select Options.

Step 3
In the left-hand column, choose Inbox and sweep rules. Then go to the Inbox rules and click +.

Step 4
Select the corresponding condition under When the message arrives, and it matches all of these conditions.
In this example: It was sent or received > received from….


Plese note:
Step 5
The address register opens. Here you select the e-mail address of the person that the rule should be applied to.
To do so, enter the name of the person in the search line and click +.
If you need an overview of all persons in your domain, please click the double arrow and select the desired address list under Directory.

Step 6
In the next step you select the corresponding act under “Do all of the following:”
In this example Move, copy, or delete > Move the the message to folder… .

Step 7
Now select the folder into which the e-mails are supposed to be moved.

Step 8
Confirm your selection by clicking "OK".
Step 9
Next you can add additional exceptions, conditions or actions and change the name of the rule.

Step 10
Click on OK to apply the rules.
Additional Information:
