


Generating eduroam login credentials

This page describes how to generate eduroam login credentials in the eduroam Devicemanager.
This guide is divided into 3 parts:
- How to log in to the eduroam Devicemanager
- How to generate login credentials for your current device
- How to generate login credentials for other devices
You can also watch our video on this topic.
1. How to log in to the eduroam Devicemanager
Step 1
Open the eduroam Devicemanager.
Please note
The Devicemanager is only accessible if your browser language is set to "German" or "English".
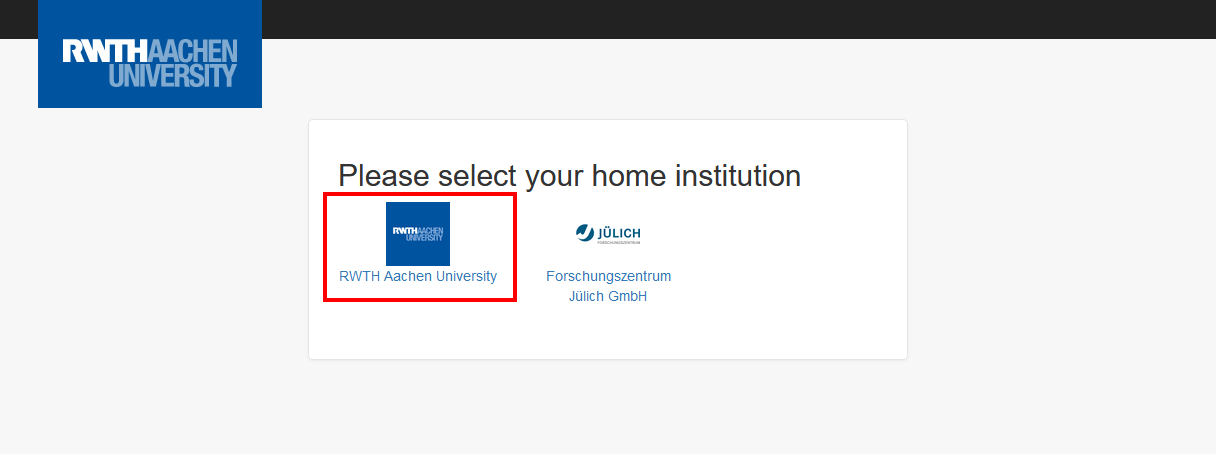
Step 2
Click on RWTH Aachen University.
Step 3
Log in with RWTH Single Sign-On.
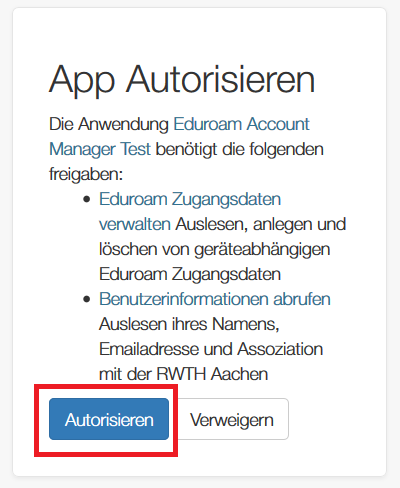
Step 4
If this is your first time logging into the Devicemanager, you will need to authorize the application. Click Autorisieren.
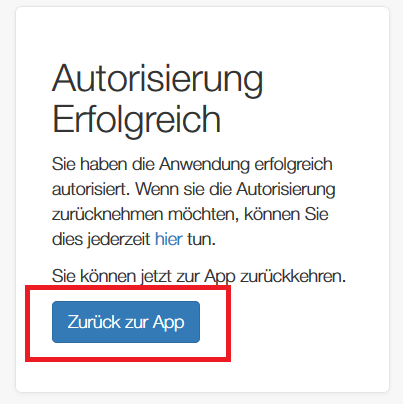
Step 5
Click Zurück zur App.
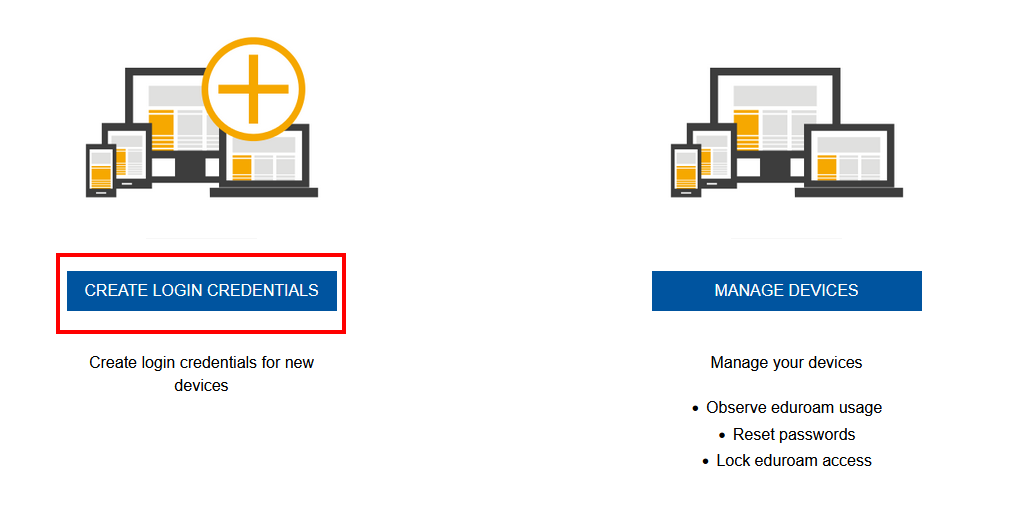
You are now on the home page of the eduroam Devicemanager.
You can either create login credentials for the device you are currently using or for a different device.
2. How to generate login credentials for your current device
Step 1
Click Create login credentials.
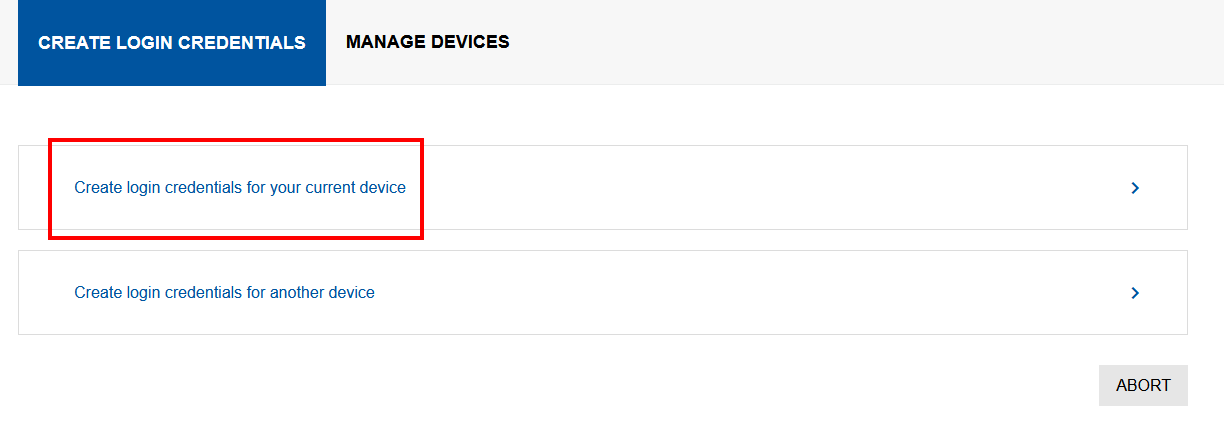
Step 2
Click on Create login credentials for your current device.
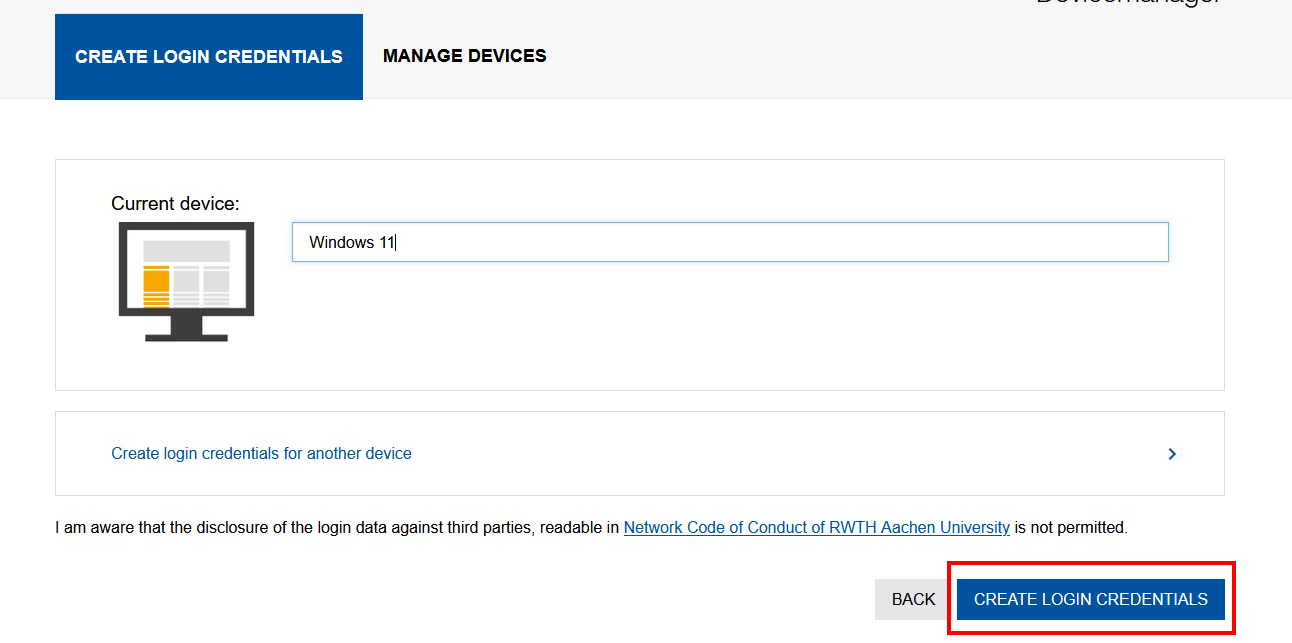
Optional
A device name is automatically generated under "Current device". You can click on it if you want to change it.
Step 3
Click Create login credentials.
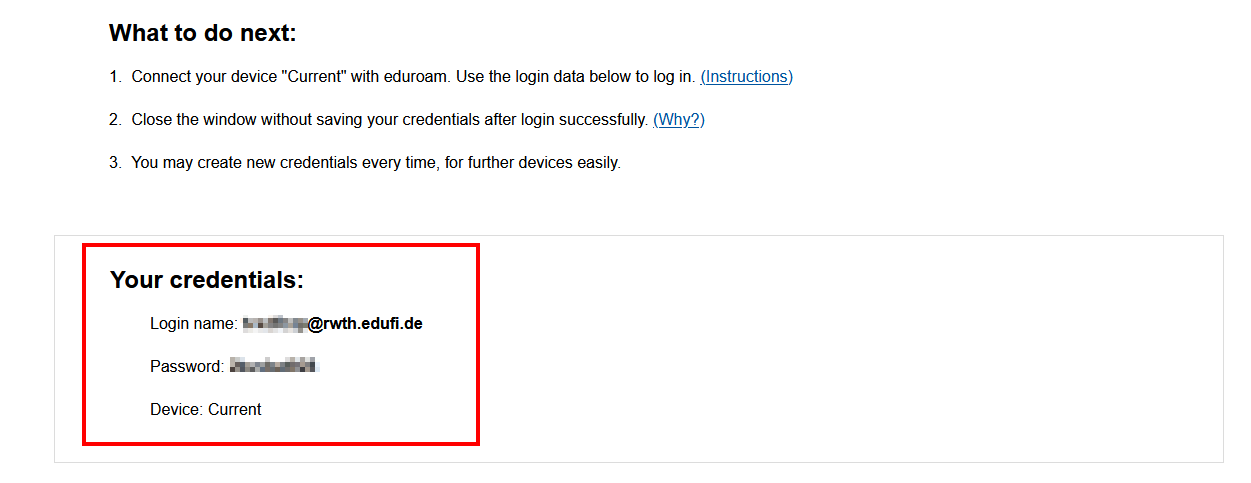
Step 4
You will find your username and password under 'Your credentials'.
Please note:
Remember this password. It will only be displayed once.
Please note
To connect your device to eduroam, you must first configure it. See Next Steps for instructions.
3. How to generate login credentials for other devices
Step 1
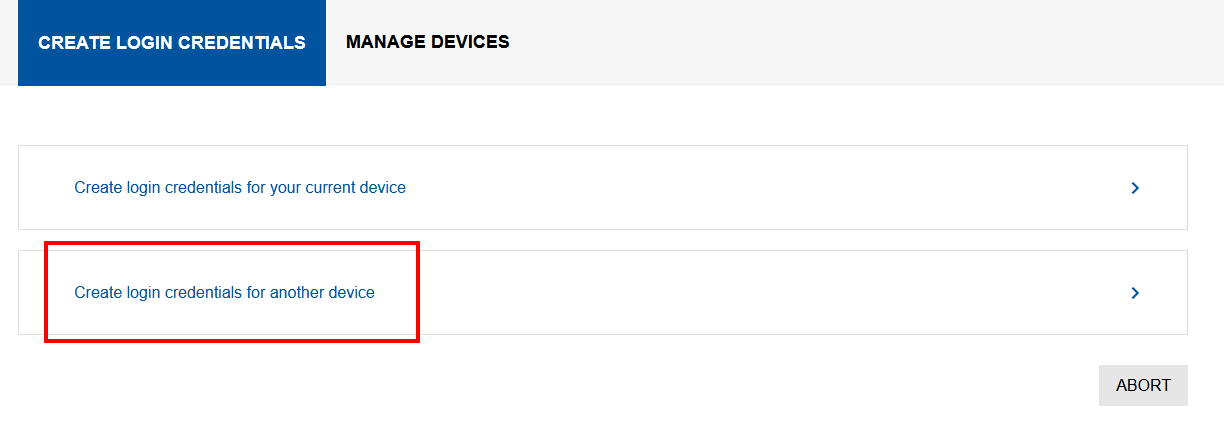
Click Create login credentials.
Step 2
Click Create login credentials for another device.
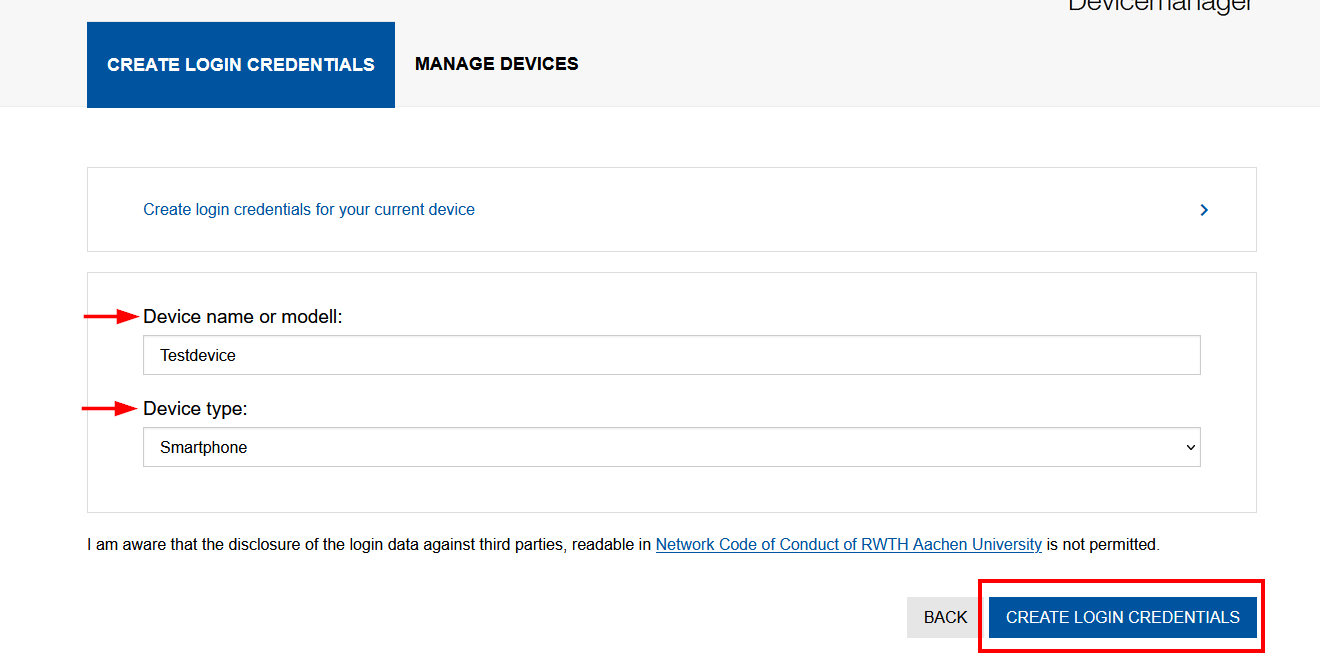
Step 3
Enter the Device name or model and select the Device type from the drop-down menu.
Step 4
Click Create login credentials.
Step 5
You will find your username and password under 'Your credentials'.
Please note:
Remember this password. It will only be displayed once.
Please note
To connect your device to eduroam, you must first configure it. See Next Steps for instructions.
