Restoring deleted E-mails

This article explains how you can recover deleted emails in your email client.
Restoring in Outlook
Step 1
Open Outlook and select the menu item Folder.

Step 2
Click Recover Deleted Items.

Step 3
A new window opens. Here you will find your deleted emails. They are sorted by the date they were deleted on.
Please note that a recovery is only possible for emails that were deleted less than a month ago.
Step 4
Select the email that you want to recover and click on the button Restore Selected Items.
You can select multiple emails at once by pressing and holding the Ctrl key on your keyboard.

Step 5
You can now close this window. The emails will reappear in the folder in which they were located before their deletion.
Restoring in the RWTH MailApp
Step 1
Log in to the RWTH MailApp. Separate instructions for this can be found in the article Logging in to the RWTH MailApp.

Step 2
Afterwards please right-click on the button Deleted Items and select Recover Deleted Items.

Step 3
A new window opens. Here you will find your deleted emails. They are sorted by the date they were deleted on.
Please note that a recovery is only possible for emails that were deleted less than a month ago.

Step 4
Select the email that you want to recover and click on the button Restore Selected Items.
You can select multiple emails at once by pressing and holding the Ctrl key on your keyboard.
Restoring in Thunderbird
Step 1
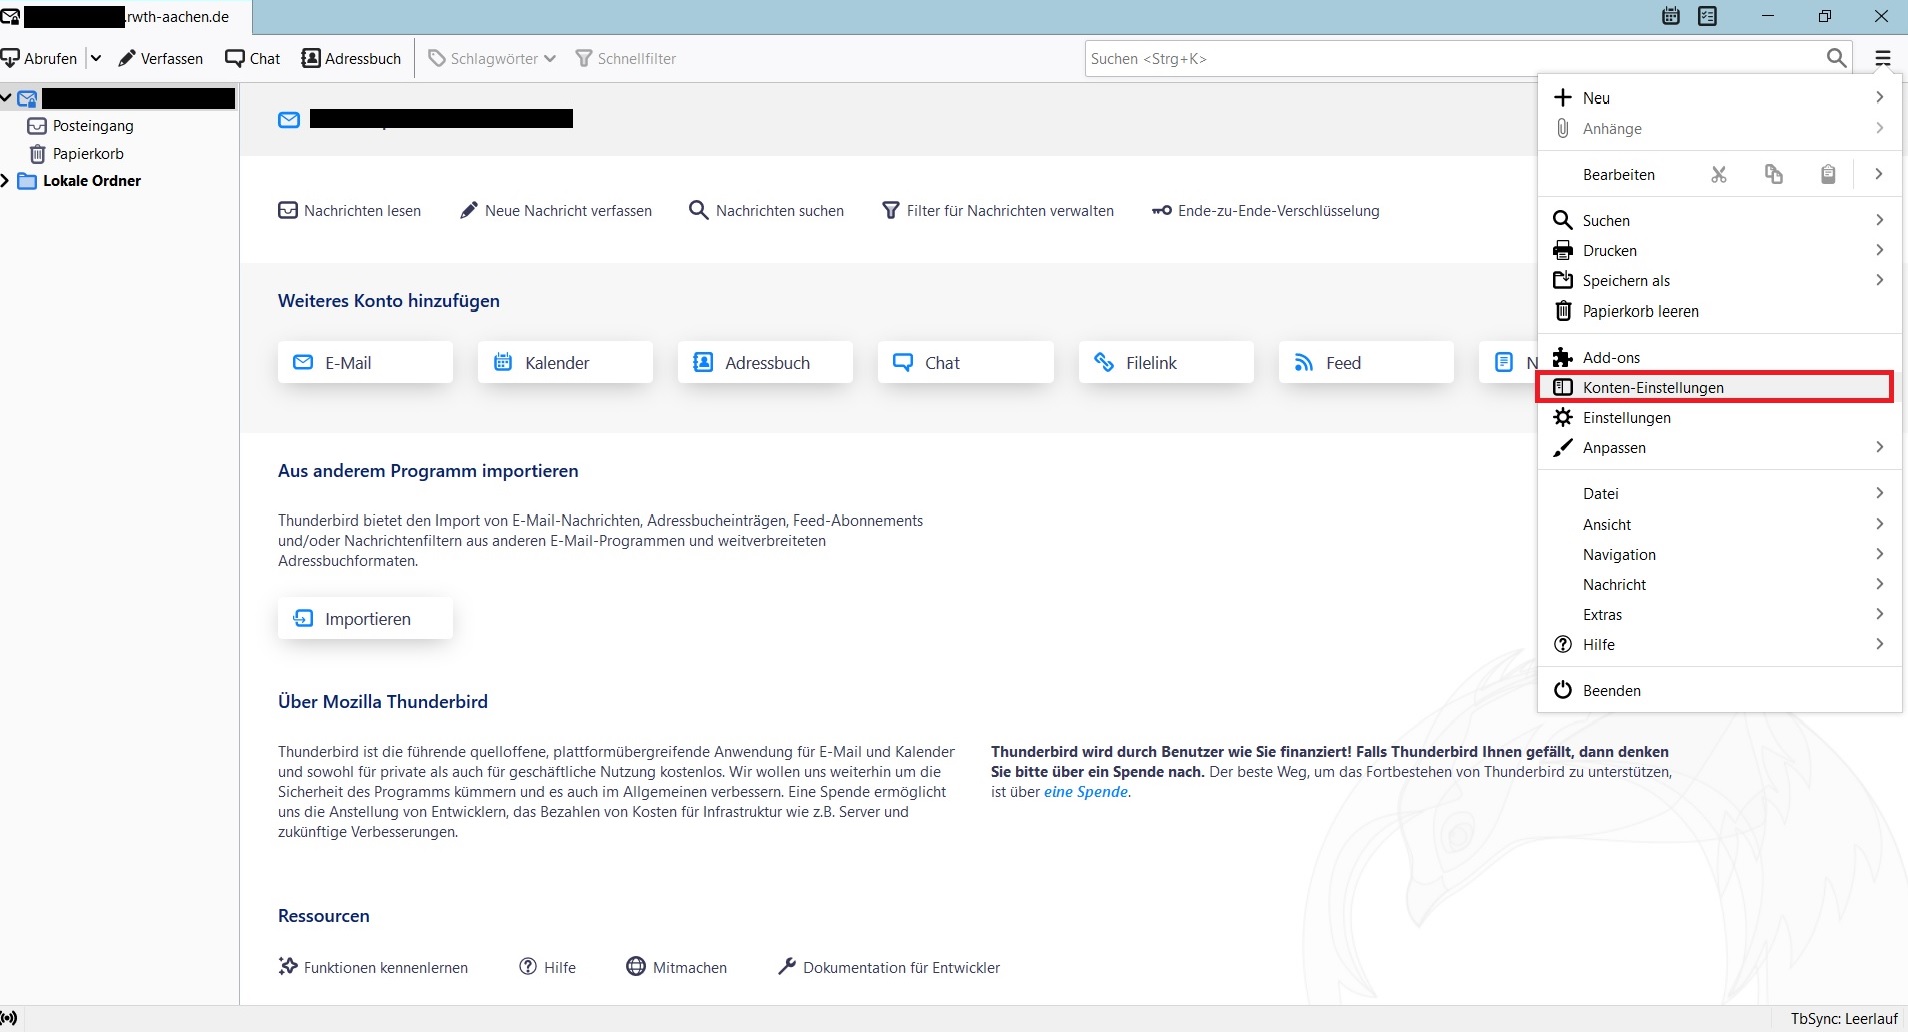
Open Thunderbird and choose the menu item Extras and then the item Account Settings ....
If the menu bar is not displayed automatically, you can activate it by pressing the Alt key on your keyboard.
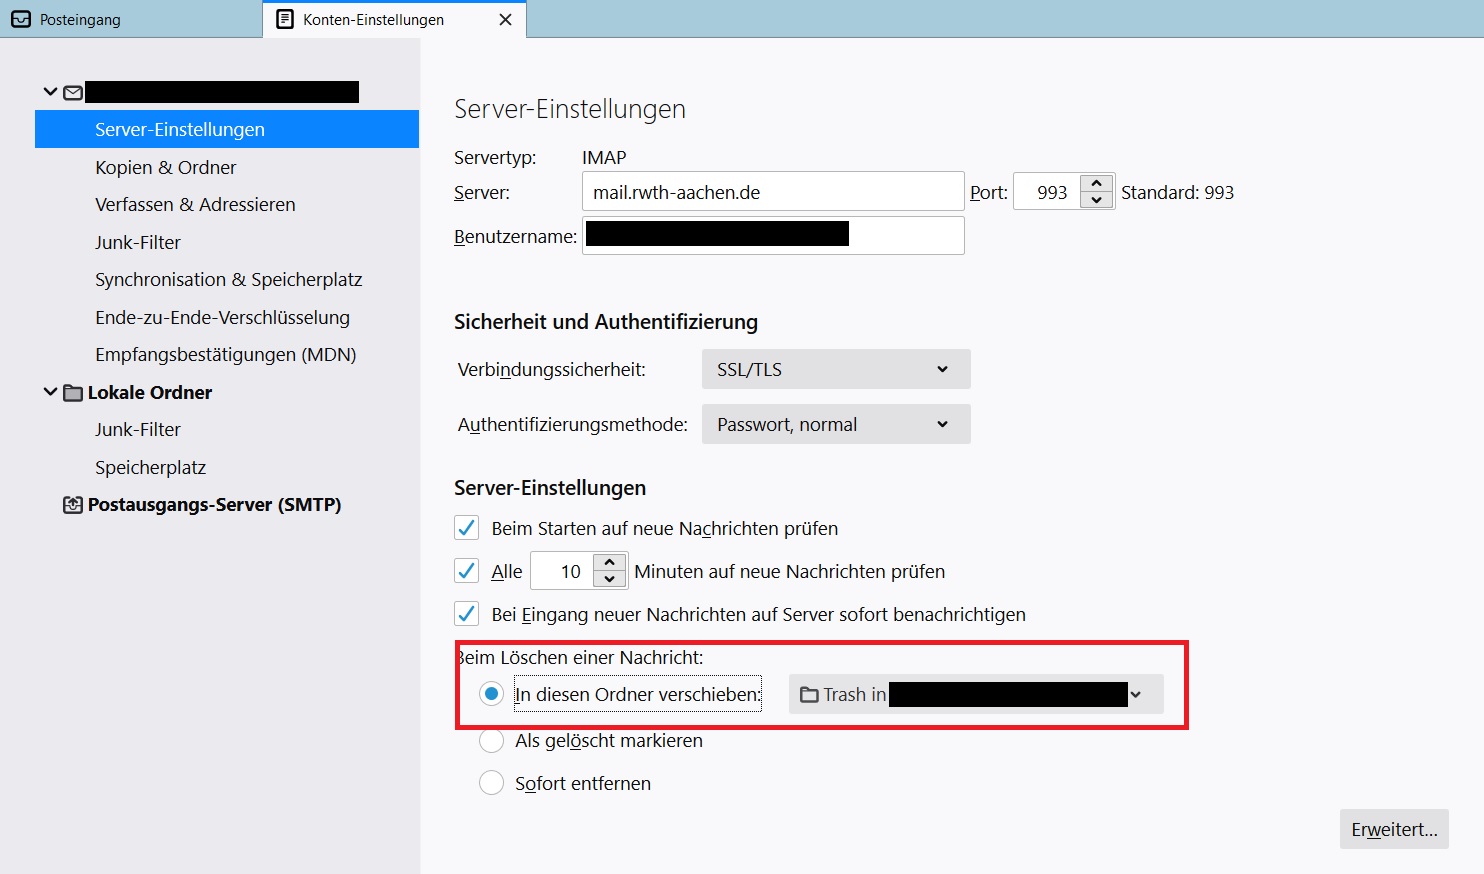
Step 2
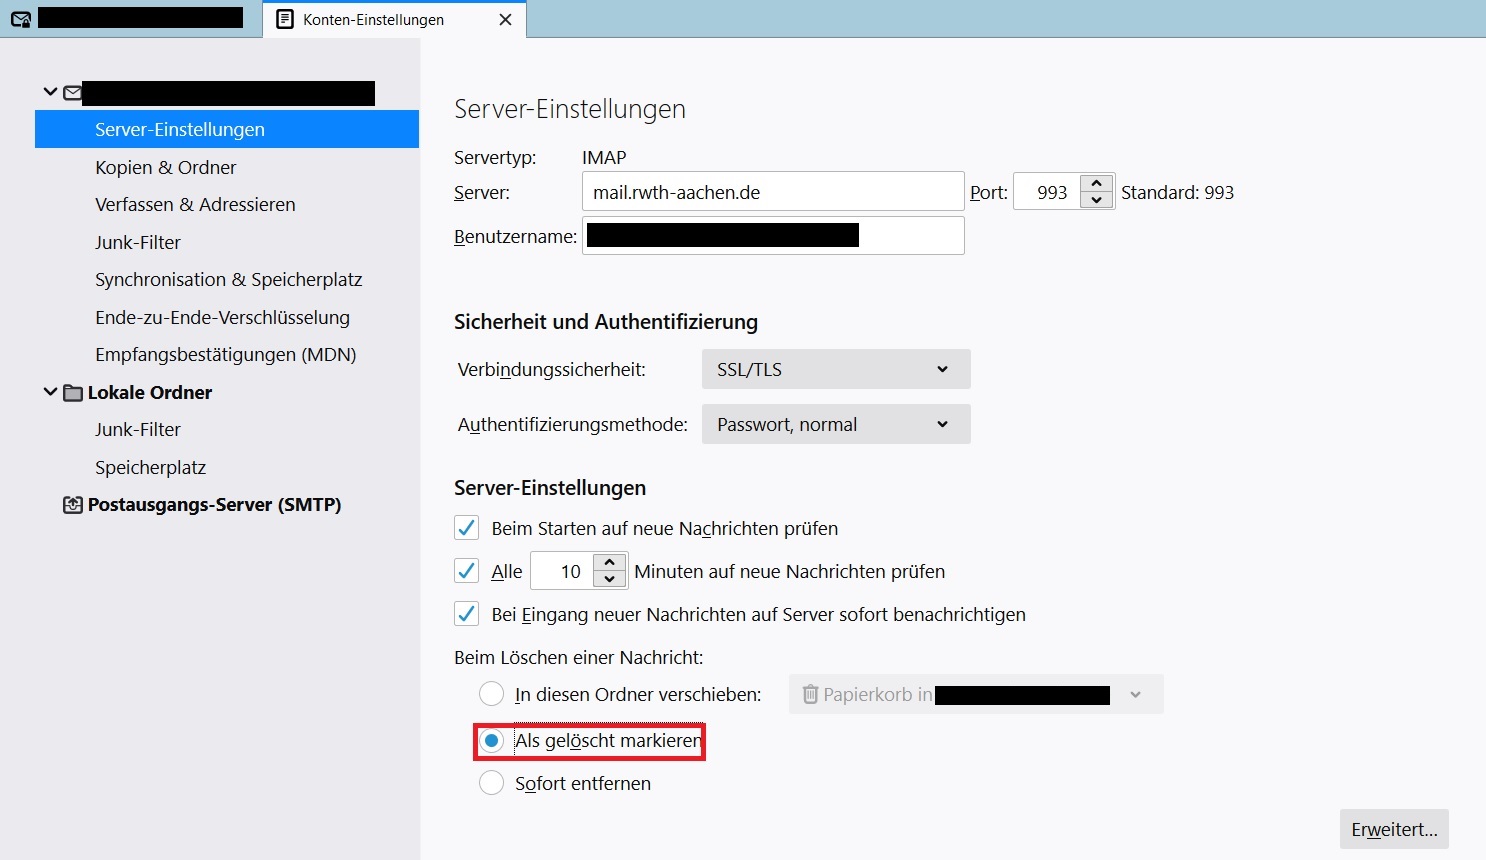
When the new window opens, click on Server Settings and change the setting under When deleting a message to the option Mark as deleted.
Step 3
Then close Thunderbird and perform the recovery using the RWTH MailApp.
To do this, please follow the steps for restoring in the RWTH MailApp.
Step 4
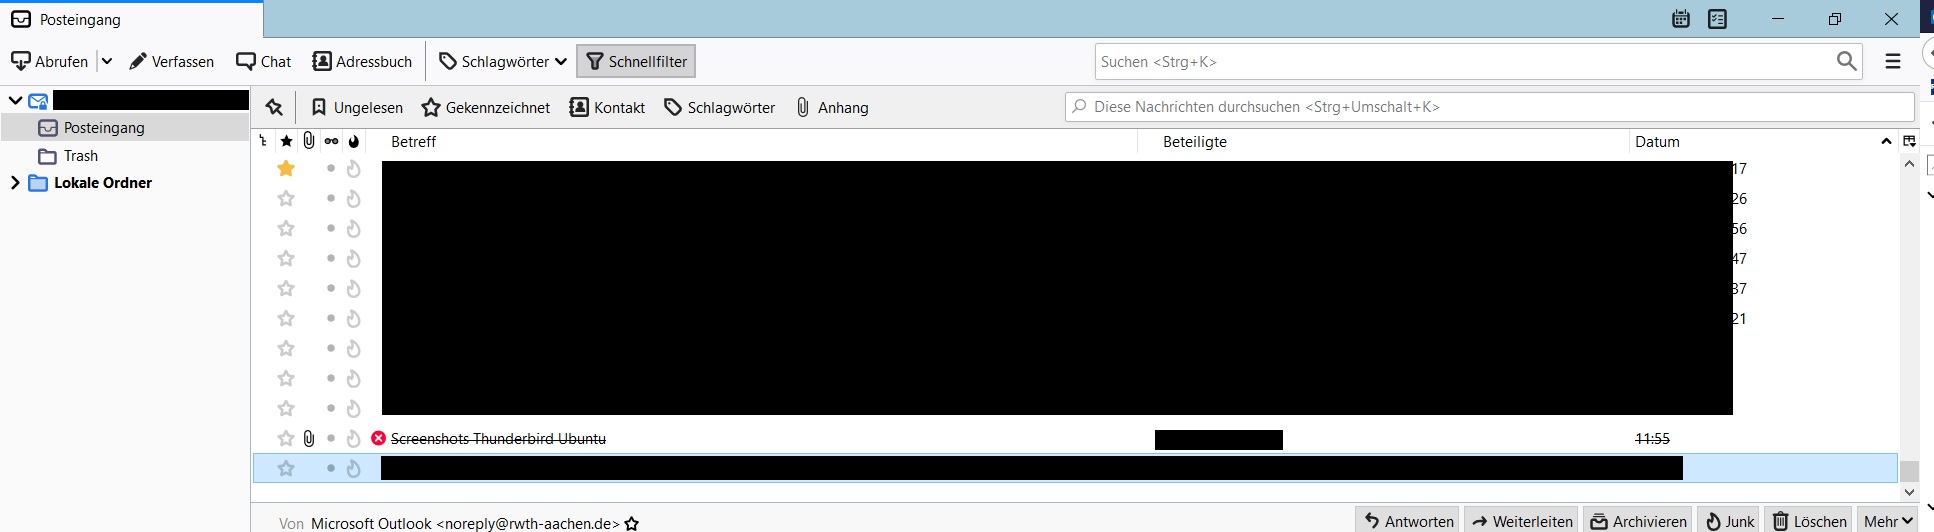
After you have completed this start Thunderbird again.
The emails that you have restored are now marked with a red "X".
You can remove this "X" by selecting the affected mail and then pressing the Del key on your keyboard.
Step 5
Now change the settings back to the original or desired state and restart Thunderbird.