[only relevant for IT admins] Import CSV My Email Domains RA-Portal

So that members of the institution can request user certificates for the email addresses of the associated email domain, the email addresses must be entered into the RA‑Portal.
You can either enter the email addresses manually in the RA‑Portal or import them from MailAdm.
Importing email addresses is carried out in two steps:
1. Export e‑mail addresses from MailAdm
To export the email addresses from MailAdm, follow these steps.
Step 1
Open MailAdm and click under Show mailboxes on Export mailboxes. All mailbox data for the domain shown in the top‑right corner will be exported.
Step 2
Click on RA‑Portal Export to download a CSV file.
Step 3
Review the CSV file. You can import it directly into the RA‑Portal or adjust it before importing.
The CSV file contains the following fields:
- Last Name and First Name are used as "Display Name" in RA-Portal.
- Primary E-Mail is the sender e-mail address for the mailbox.
- Alias addresses: Only include the alias addresses that are also used as sender e-mail addresses. You may enter a maximum of 2 alias addresses per primary email.
- Mailboxtype : Only mailboxtype "personal" and "functional" are imported.
- Applicant E-Mail should be the address of the person who should apply for the user certificate for a functional email address. Do not use it for "personal" rows.
- The Comment field, could be e.g the expiration date of the user's DFN-PKI certificate. Correct formatting makes dates sortable.
2. Import e‑mail addresses into the RA‑Portal
To import the e‑mail addresses into the RA‑Portal, follow these steps.
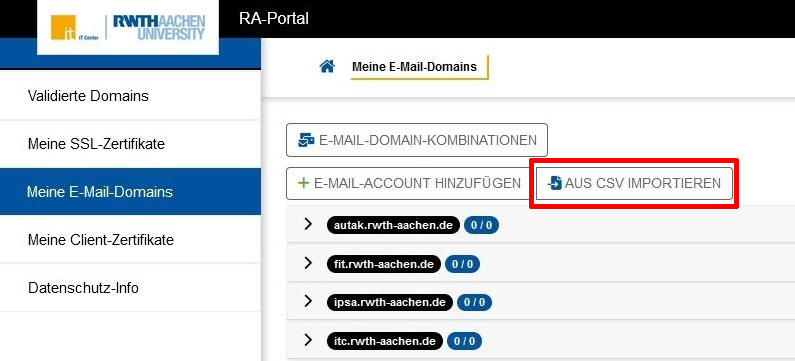
Step 1
Open the RA‑Portal and click on Meine E-Mail-Domains (My e‑mail domains). Here you will see the email domains for which you can manage email addresses.
Step 2
Click on Aus CSV importieren (Import from CSV).
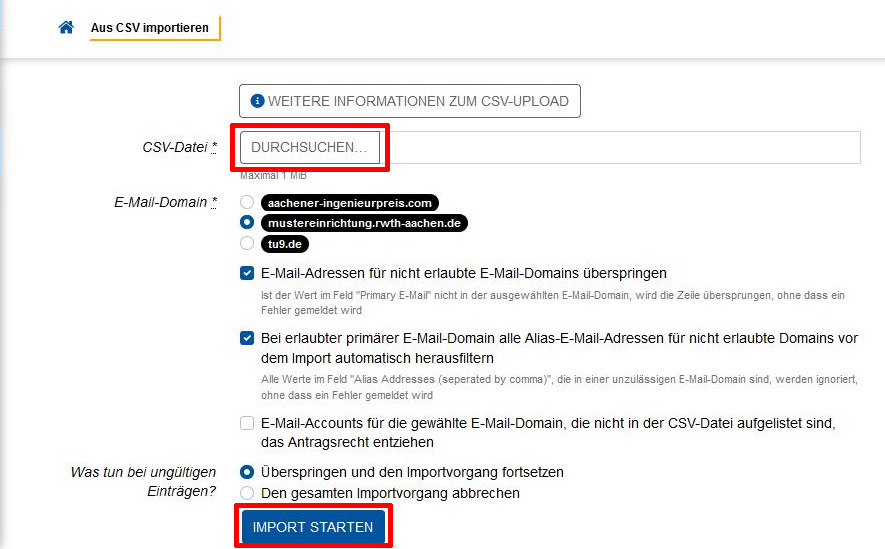
Step 3
Select your CSV file and the upload settings you want to use, then click Import starten (Start import).
The following settings are available to you:
- Email domain:
- Select the email domain for which your import applies.
- Skip email addresses for disallowed domains:
- If foreign mail domains appear in the Primary E-Mail column, these rows can be ignored.
- For allowed primary email domain, automatically filter out all alias email addresses in foreign domains before importing:
- For allowed primary email, non-allowed aliases will ignored, the row will be imported.
- Withdraw application right from email accounts for the selected email domain that are not listed in the CSV file:
- Row found in RA-Portal but not found in your CSV, will be deactivated. .
- What to do in case of invalid entries?
- skip invalid rows and continue with valid ones
- abort import