


Client assignment to groups

After successfully installing Commvault with the associated software package (installation on Windows or installation on Linux), it is necessary to add the client (the system to be backed up) to a user group. To do this, please use the "Assign Client to Group" or "Bulk Assign Client to Group" workflow in Commvault. The client will be registered in the Commvault system during the installation. Using the "Assign Client to Group" and "Bulk Assign Client to Group" workflows, you assign the installed systems to your organization unit (group name=ORG ID).
You will see all clients assigned to this organizational unit in the respective group.
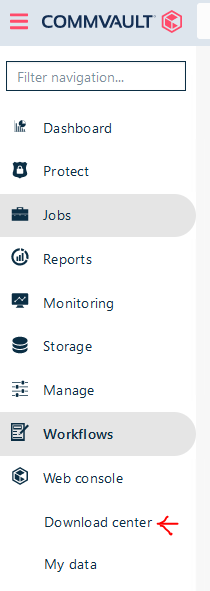
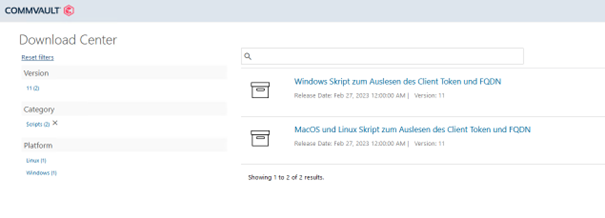
With the workflow "Unassign Client from Group", authorized persons are now able to undo a group assignment in the Commvault Backup System. For this process, the information Client FQDN and Client Token are required. These can be determined with the scripts that can be found in the Commvault Download Portal (Web console -> Download Center).
Token:
The group assignment process has been complemented by the request of a token.
Under the menu item "Workflows" on console1 "Assign Clients to Group", corresponding notes are included in the information text above the drop-down menu.
The corresponding scripts for reading the tokens and FQDN are available in the Download Center at console1.dasi.rwth-aachen.de/ under "Web console".
Requirements for using Commvault:
- Holding the Backup Admin role (DaSi_Local_Admin) in the context of an ORGID.
- You can find the ORGIDs to which you are assigned in Selfservice.
- A list of organizational units can be found at RWTHcontacts.
- Access to the Web Console is only possible via the RWTH network (VPN if necessary)

Step by step instructions for registering a new client in the Commvault Command Center (RWTH):
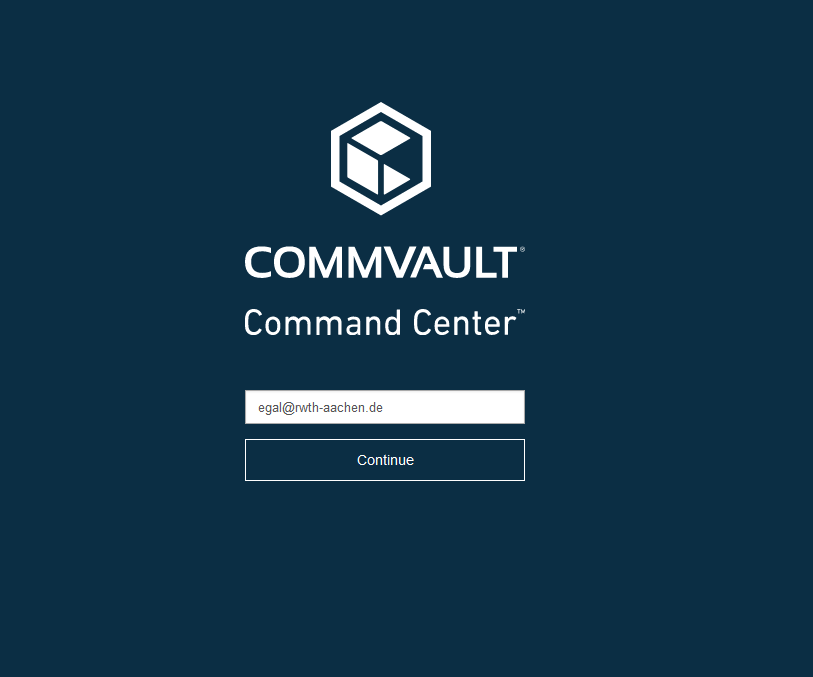
- Login to the Commvault Command Center at: https://console1.dasi.rwth-aachen.de/ with <egal@rwth-aachen.de>
Note: If you enter an existing e-mail address, a password will be requested directly. Forwarding to RWTH Single Sign-On will not work in this case. Please use e.g. "egal@rwth-aachen.de".
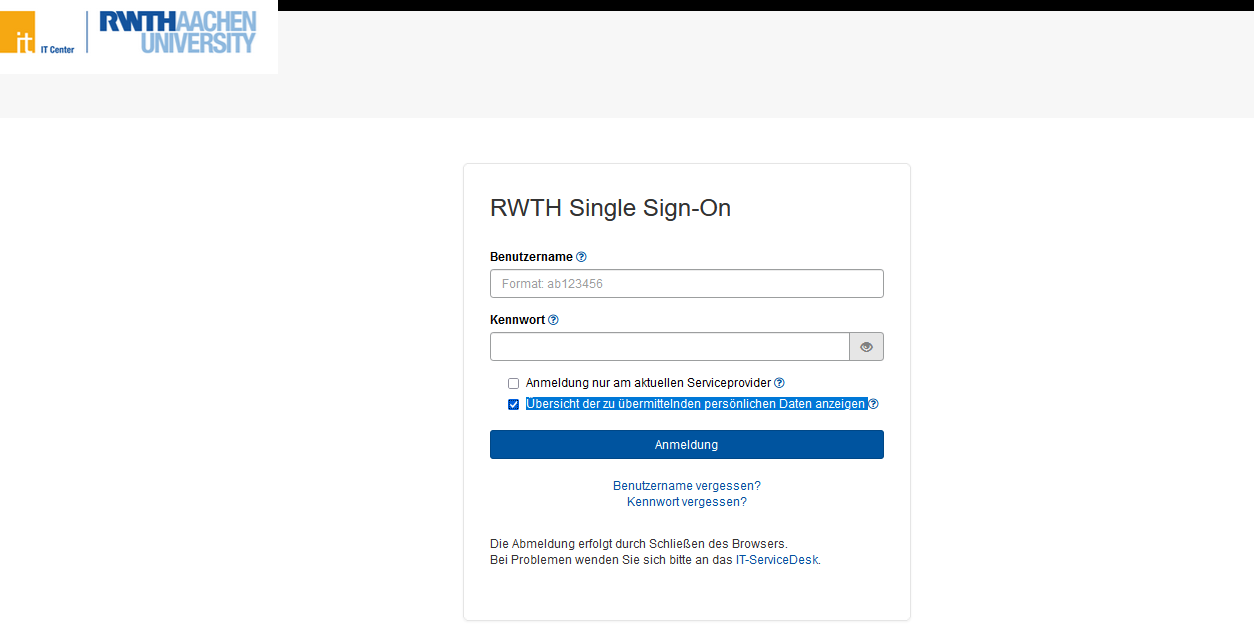
- Redirecting to RWTH Single Sign-On
Note:
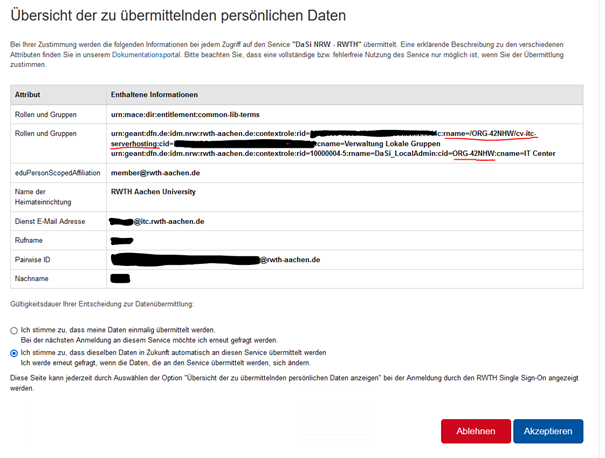
- Before entering the RWTH-ID (ab123456) and password, please check here that the transmitted personal data should be displayed.
- If necessary you can read your context ID (cid) from the line "Roles and groups" here. This information is equivalent to your group name in Commvault.
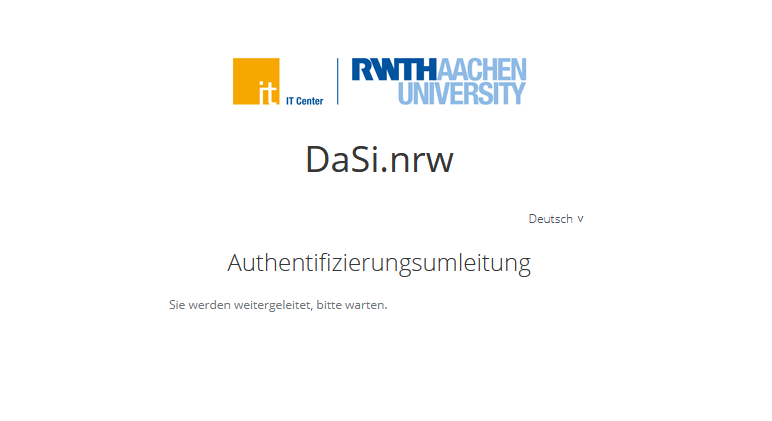
- Redirecting to Commvault: Workflow
- From the Commvault Command Center, you can see the registered systems in your group
- Click on "Workflows" in the navigation on the left side of the screen.
Note: If you don't see the "Workflows" button in the navigation bar, please log out and then log back in. You can also access the web form via "Forms" --> "Assign Client to Group" and then proceed as described below.
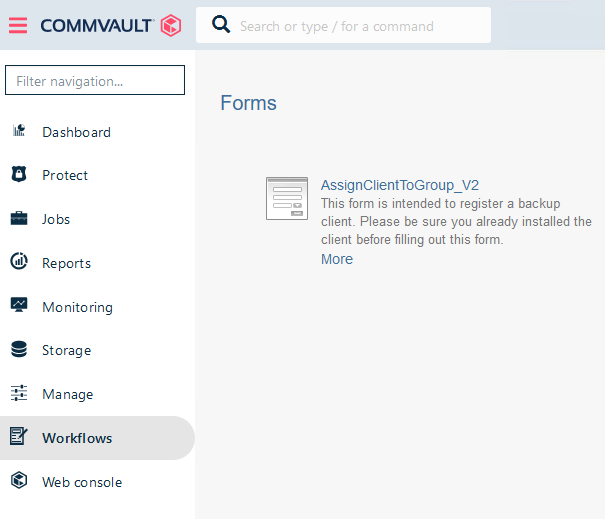
- Workflow: Assign Client to Group
- Select the "Assign Client to Group" workflow here.
- Confirm via "Ok" that you have already installed the software on the client. This is a necessary requirement for the further steps. Otherwise, the client will not be registered properly.

- Selection to group (Select Group)
- User Name: This field will be filled automatically.
- Group Name: The group name is filled in automatically. If you are assigned to more than one organizational unit, please select the appropriate context here for which you want to back up the system. The context is synonymous with the group. Please take the context ID (cid) from the transmitted personal information (see Redirecting to RWTH Single Sign-On).
- Client FQDN: The client name is a necessary requirement for the final steps. Enter a unique name of the system to be secured here. Find out more about FQDN.
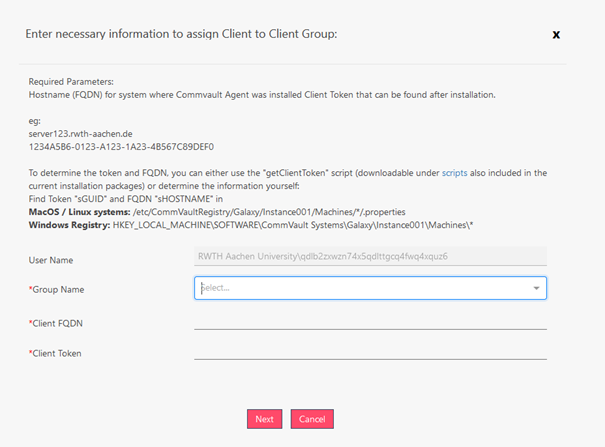
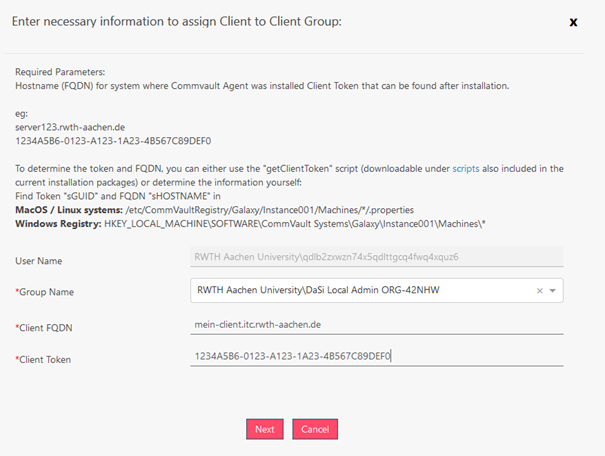
- Client Token: The required token can be determined by running one of the scripts (found in the download center) on the appropriate client.
- Confirm the client registration via "Next".
- The client registration is now complete. The client should now be visible in the Admin Console. If the newly registered client is not displayed in the Admin Console, we recommend that you log in again in the Command Center (https://console1.dasi.rwth-aachen.de/).
The visibility of the clients in the Admin Console after the group assignment can take up to 24 hours!
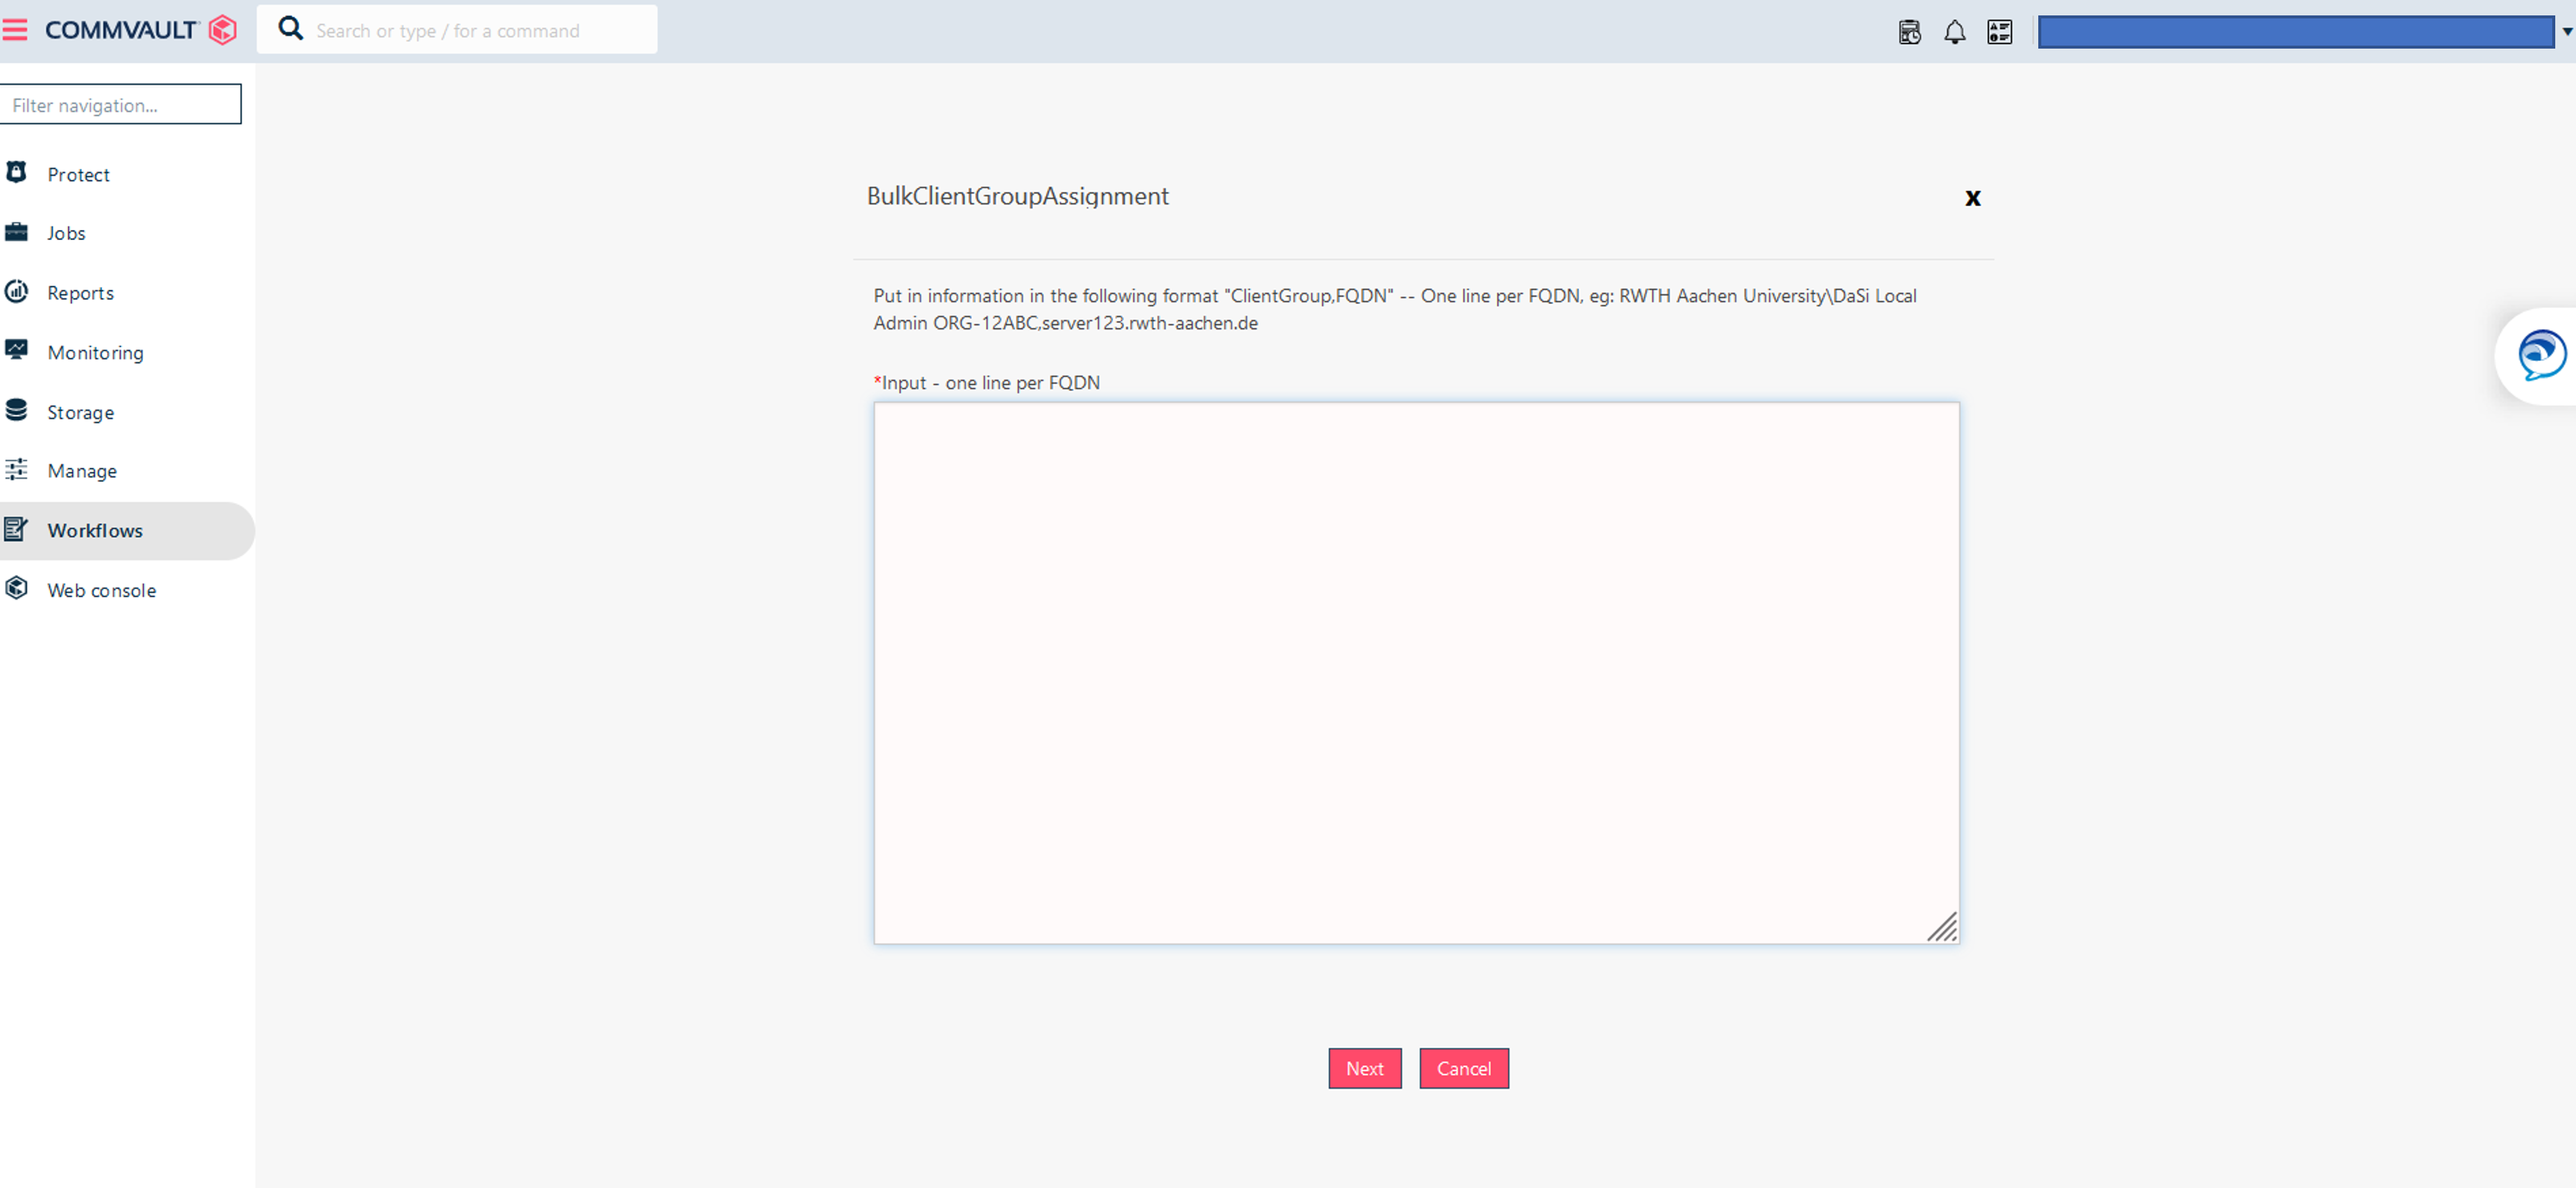
- Workflow: Bulk Client Group Assignment
The "Bulk Client Group Assignment" workflow allows you to assign multiple clients to a group at the same time.
The only difference between the "Assign Client to Group" and "Bulk Client Group Assignment" workflows is that the "Bulk Client Group Assignment" workflow provides a text field in which you can enter multiple client FQDNs for a faster client registration.
It is important to note that you can only list one FQDN per line during mass entry.

Related content:
