


Webex user interface

Below you will find a description of the functions available to you in the Webex user interface:
- Your Profile and Set Status
- Forwards and Backwards, Search Bar and Plus Button
- Messages
- Meetings
- Calls
- Teams
- Contacts
- Voicemail
- Further
- Settings and Help
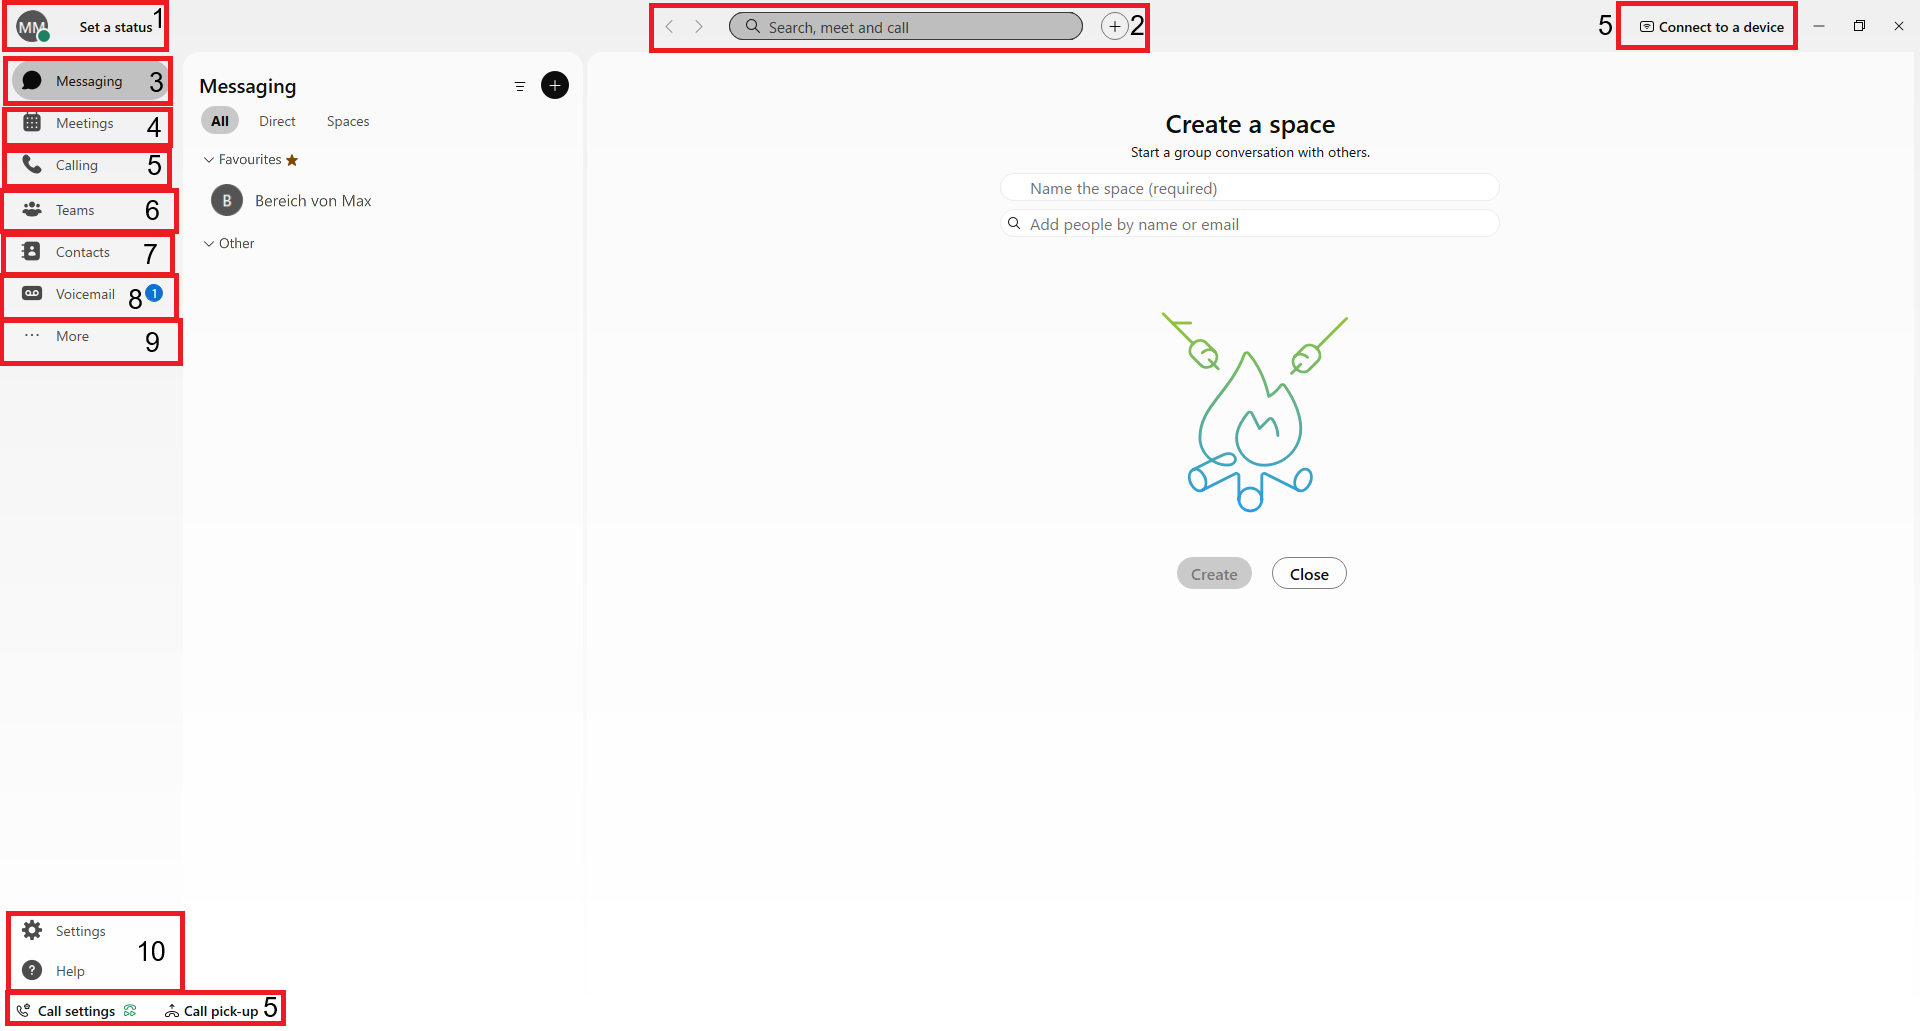
Your Profile
Click on your profile in the app header to update your picture and display name or to access your settings. You also have the option to set your status, availability and read receipts and to log out.
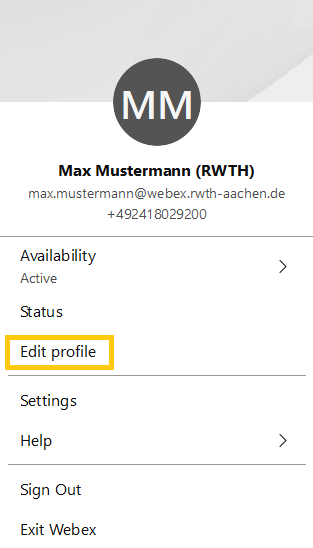
Edit profile
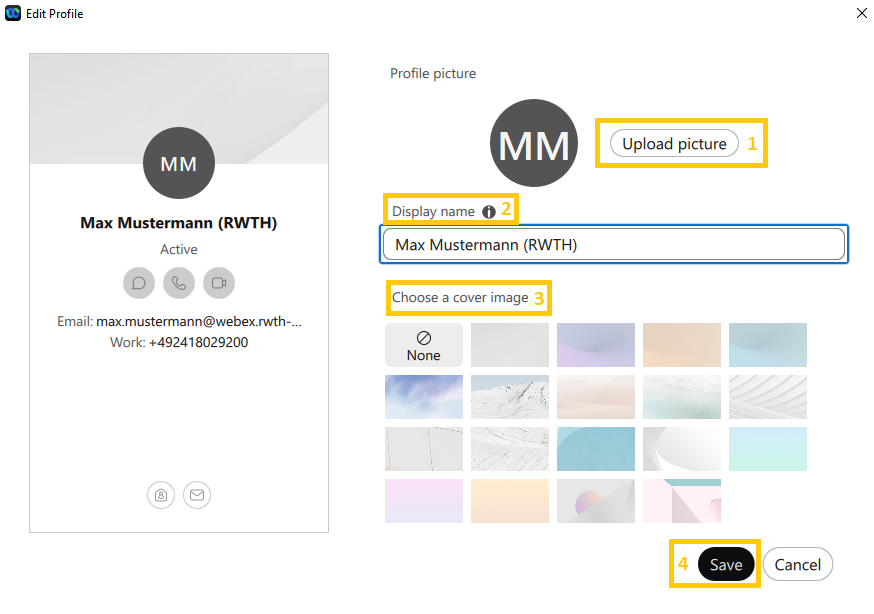
Under Edit profile you can edit your profile picutre (1) and cover image (3) as well as your display name (2).
Profile Picture
If you haven't added a profile picture, your initials will be displayed. To add a picture, click Upload Picture (1). If you already have a profile picture and want to change it, click Change Picture. This button appears in place of Upload Picture.
Display Name
Under the Display Name (2) section, you can view your display name. You can customize the format of your display name in the TK Portal under the Webex tab, in the Webex Display Name section.
Cover Photo
Under Select Cover image (3), you can choose the cover photo of your choice.
Then click on Save (4) to save your changes.
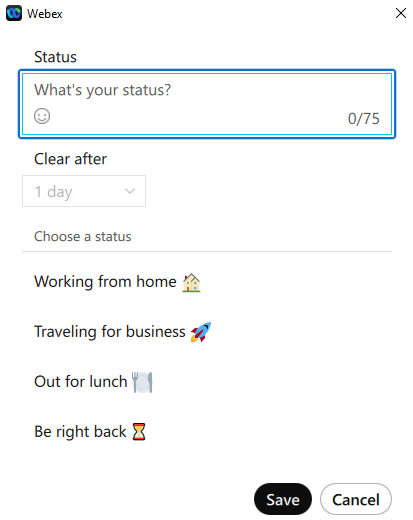
Status
Under Status you have the choice between four given status variants or an individual formulation of your own status. You have the option of deactivating the status in the privacy settings in your profile.
Forwards and Backwards
Via these buttons you can go back or forward between your send messages with a simple left-click. You can also right-click to display the history of activities.
Further information can be found on the Webex Help Center website (opens in new tab).

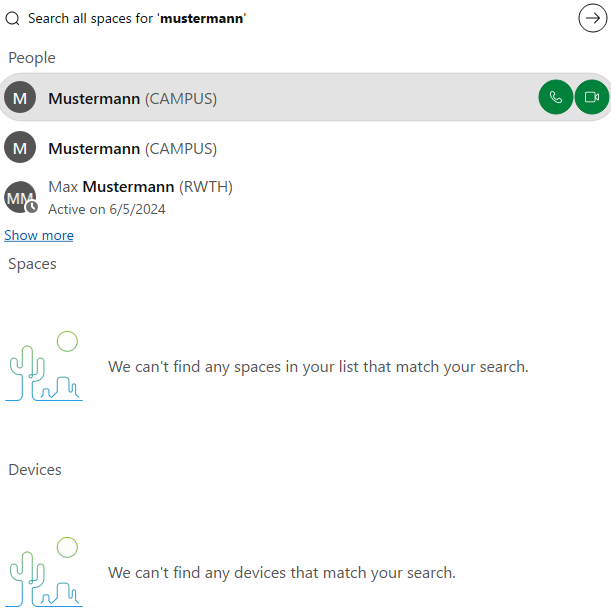
Search Bar
Use the search bar to find people, areas, messages, files and devices. You can also use it to call people directly.
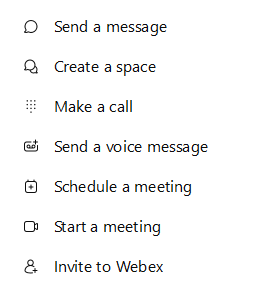
Plus Button
Using the plus button next to the search bar, you can easily send messages, make calls, schedule meetings or create a space.
Further information can be found on the Webex Help Center website (opens in new tab).
Messages
Under the Messages menu you will find a message overview in which all chats are displayed. You will see all individual conversations with other people in the "Direct" section. You can use the plus button to contact other people and create both spaces and space sections (opens in new tab).

Teams
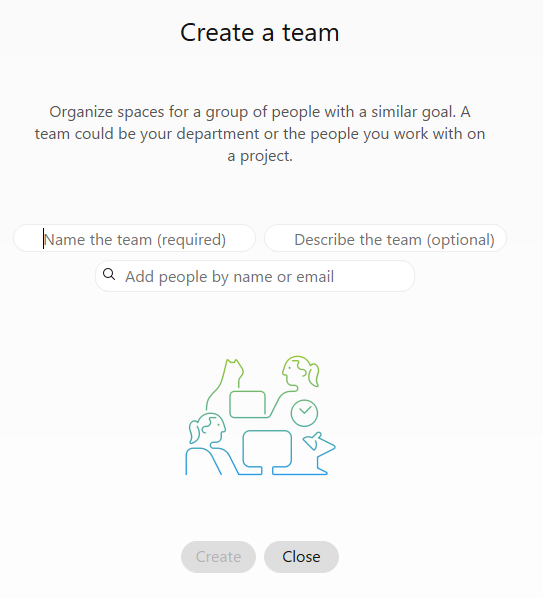
Under Teams you can find an overview of all teams and areas here.
Create a team
Contacts
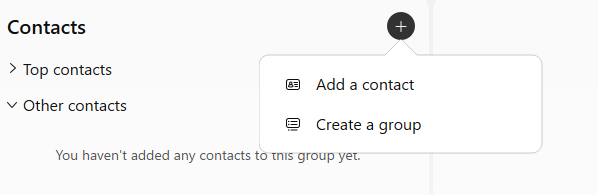
Here you can find an overview of your contacts and groups. Simplify the connection with the people you are in contact with most often. You can create contact lists, then create a group of these contacts and customize contact information.
Further
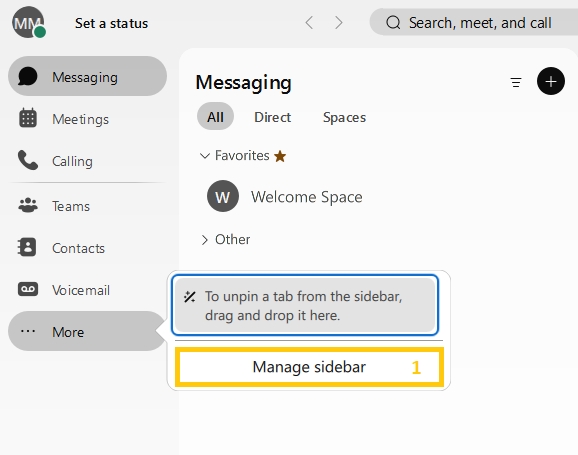
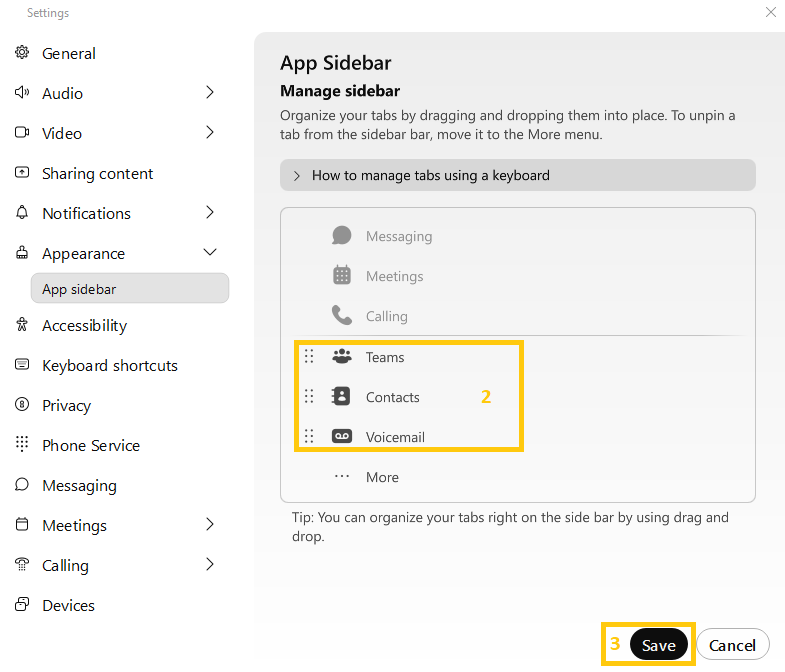
Here you can change the order of the menu items Teams, Contacts and Voicemail. To do this, click on Manage sidebar (1). Move the mouse to the 6 dots next to the respective menu item (2), hold down the left mouse button and move the menu items to a different position. You cannot move the grayed-out menu items. Then click on Save (3).
Settings
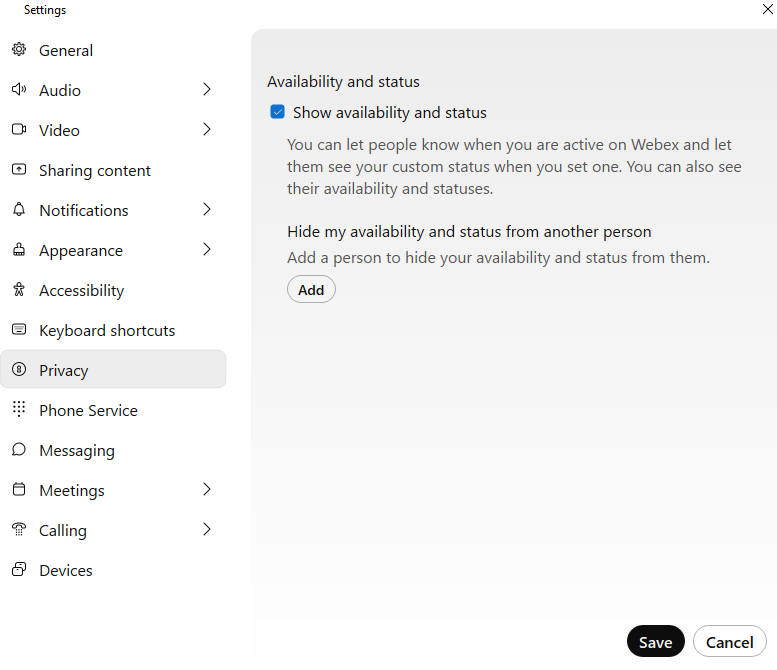
You can switch your availability and status on or off in the privacy settings.
You can switch read receipts on or off in the messaging settings.

Help
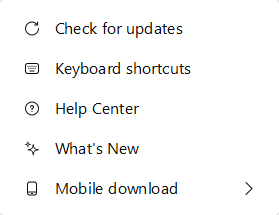
Here you will find access to the Webex Help Center and the option to check for updates, set up shortcuts and view new features in Webex by clicking on What's New.
Additional information:
Explanatory videos:
- Getting started with Webex Messaging - Part 1 (opens in new tab)
- Getting started with Webex Messaging - Part 2 (opens in new tab)
- Profile and status settings (opens in new tab)
- Making calls (opens in new tab)
- Creating a space (opens in new tab)
- Getting started with Webex Meetings (opens in new tab)
- Screen sharing (opens in new tab)
- Audio settings as host / co-host (opens in new tab)
- Joining a meeting (opens in new tab)
- Schedule meetings on behalf of someone else
