


Schedule Meetings from Outlook

On this page, you'll learn how to schedule a Webex meeting through Outlook and send the invitation to other participants.
To be able to plan meetings from Outlook, proceed as follows:
Step 1
Activate the Meetings Organizer in the TK Portal (opens in new tab) by clicking on the slider.

Step 2
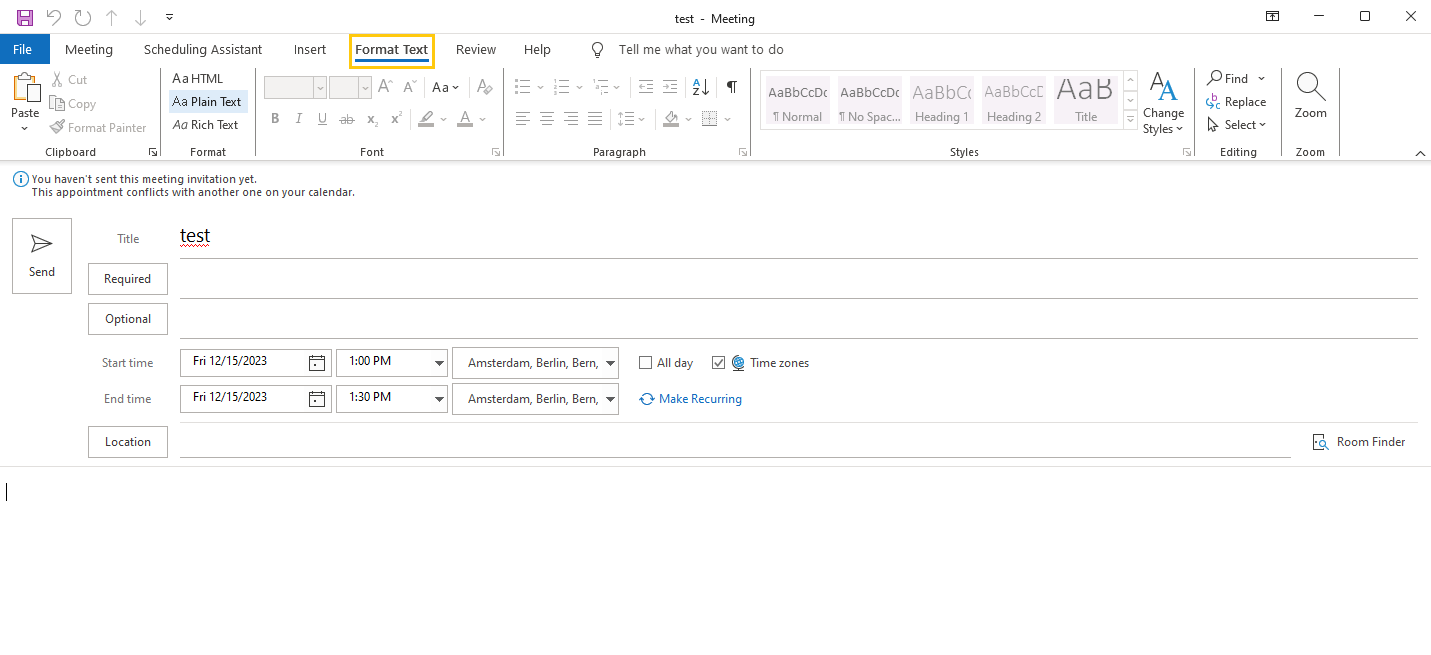
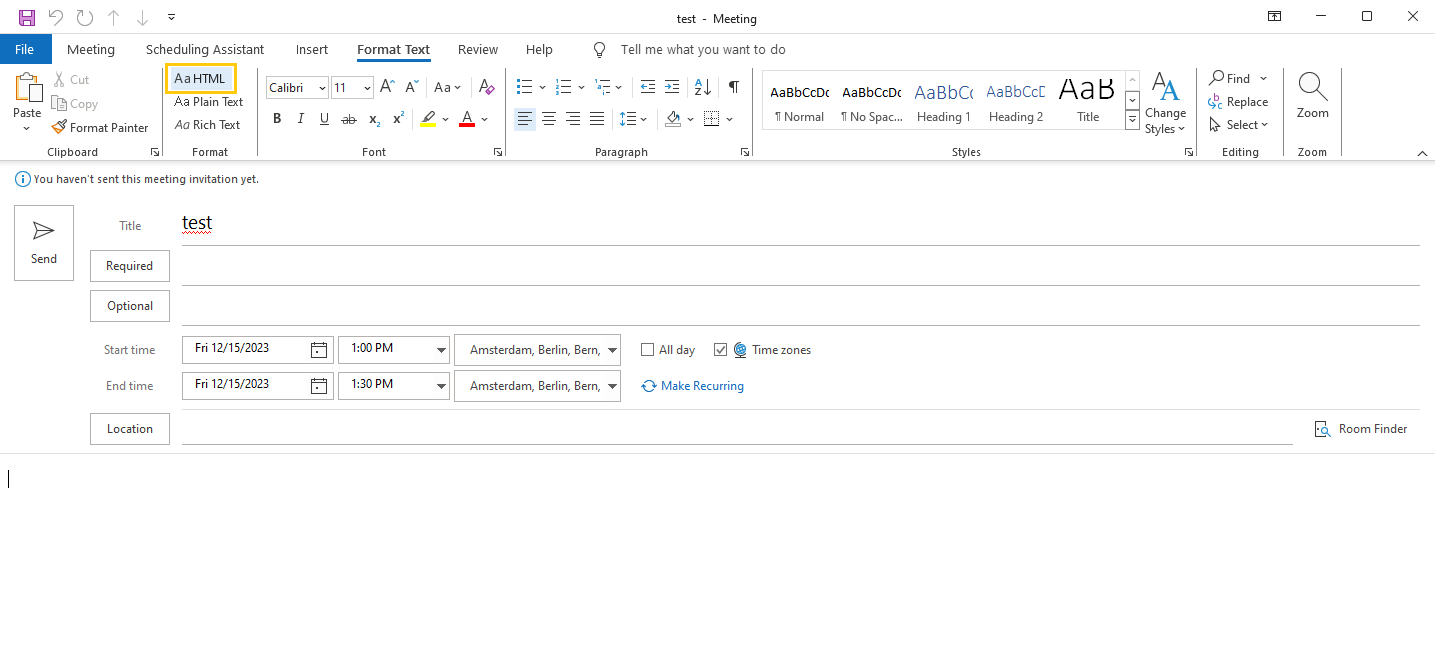
To ensure that meeting organization runs smoothly, the HTML format must be enabled in Outlook.
To enable HTML format, click on New Meeting in the Outlook calendar and change the setting from Plain Text to HTML in the Format Text tab.
Step 3
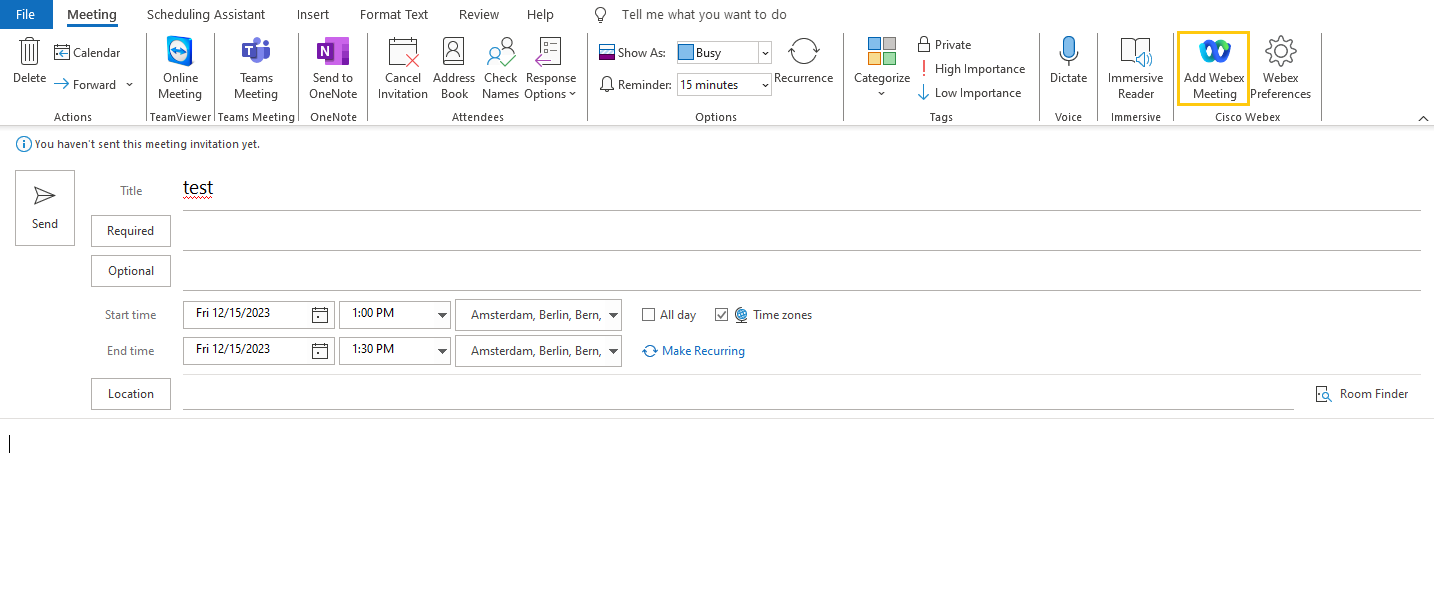
Select the Meeting tab and click Add Webex Meeting in Outlook to generate a link for the meeting.
Step 4
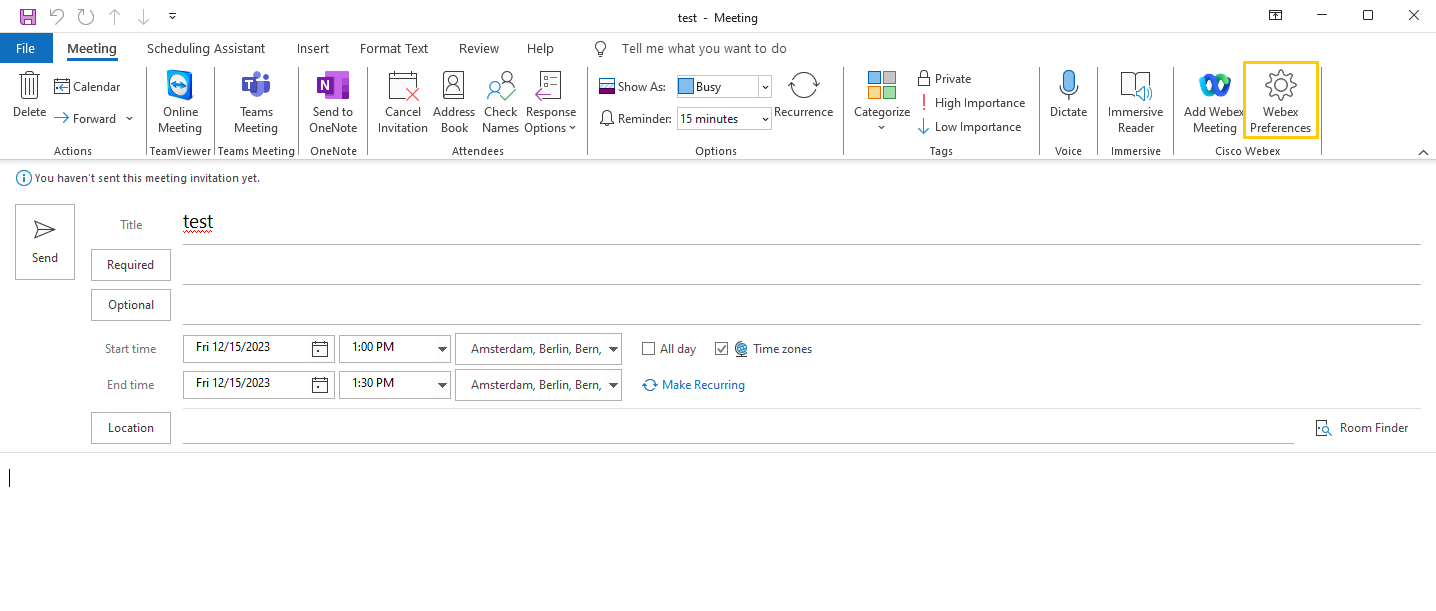
Click Webex Preferences to set preferences for the meeting.
Step 5
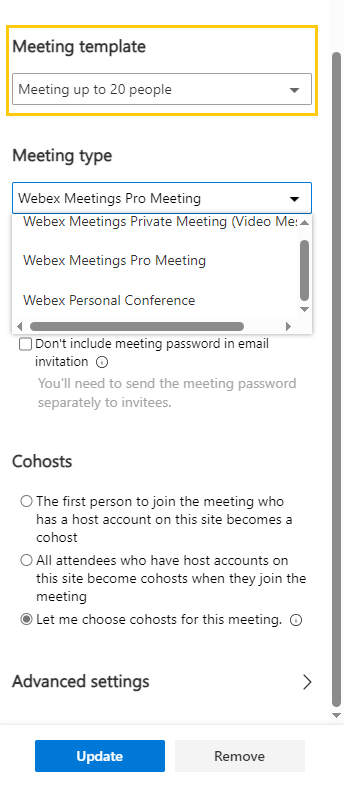
You can select which meeting template you would like to use. Here you can choose between a meeting up to 20 people and a conference for 20+ people.
Step 6
The following option is to select a meeting type.
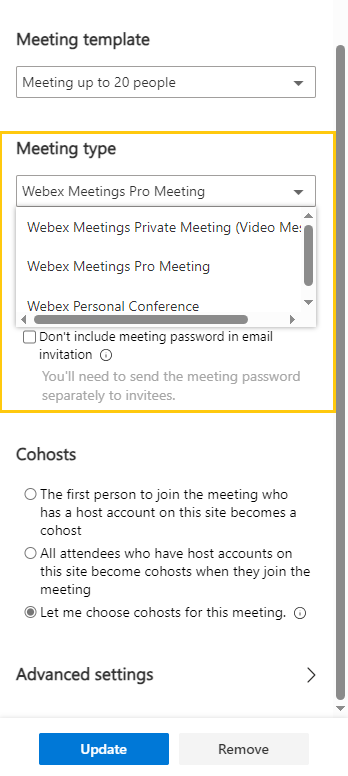
Webex Meetings Pro Meeting
This is the default setting in Webex. When you schedule a meeting via Outlook, a unique link is created for this meeting to which only the invited persons have access. It is possible to schedule both individual and recurring meetings.
Webex Meetings Private Meeting (Video Meeting)
All participants in a private meeting must belong to your organization (RWTH Aachen University). They can join via the Webex app or an authenticated video system. Participants with VPN can also join a private meeting on your network. However, no one can join a private meeting from outside your network. Therefore, only members of RWTH Aachen University can be invited to private meetings.
Webex Personal Conference
In a personal conference meeting, it is only possible to communicate with each other via audio. This means that it is an audio meeting where you cannot see each other.
Further information on the differences between the various meeting types can be found in the Webex Help Center (opens in new tab).
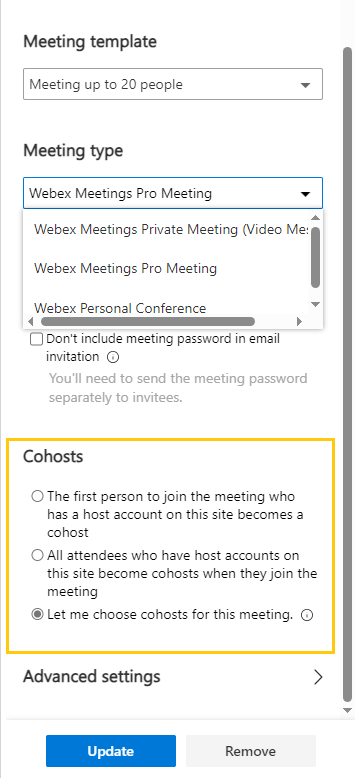
To make participants a co-host for a meeting, regardless of the meeting type, the corresponding setting must be made for the co-host.
Advantage: You receive a pop-up from Webex with the meeting invitation a few minutes before the meeting so that you can join the meeting directly. However, an important prerequisite for this pop-up is the host role. You can obtain this by setting up the meeting yourself or by assigning the co-host role to individual people in the Outlook add-in .
Step 7
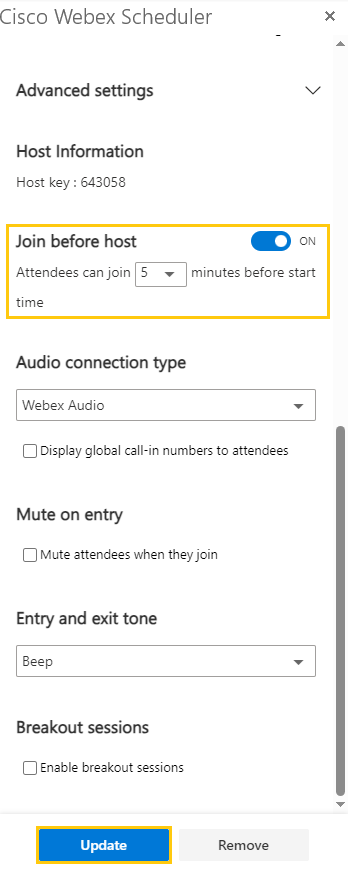
Under Advanced Settings, you can select which individuals should participate in the meeting as co-hosts.
In order for participants to join a meeting before the host, you must turn on Join Before Host.
Then click on Update.
Step 8
The meeting is created and you can add participants, the title of the meeting and a location as usual. Finally, you can send the appointment to the participants.

