FAQ - Microsoft 365
last changed on 28.04.2023
How did this content help you?
last changed on 14.07.2022
How did this content help you?

last changed on 22.07.2022
How did this content help you?
Employees, scholarship holders, relatives FB-10 (m365.rwth-aachen.de)
If there is a connection between the personal data in the Identity Management and the data in the RWTH Person Directory, the official address from the RWTHcontacs entry is taken over in MS Teams.
Change: In order to change the stored address, the mail address in the RWTHcontacts entry must be adapted.
If there is no connection, the contact mail address is transferred from RWTH Selfservice to MS Teams.
Change: Change the contact mail address in the Selfservice.
Students (students.rwth-aachen.de)
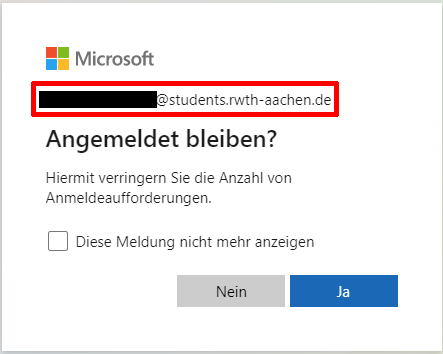
Since students have a RWTH e-mail address, this is automatically transferred.
There is no possibility to change this.
last changed on 03.07.2023
How did this content help you?
For all files (except OneNote notebooks) please use Mover as migration tool. For this, please follow our instructions.
last changed on 26.01.2023
How did this content help you?
To save your data locally, proceed as follows:
1. Log in to www.office.com.
2. Click on the dots at the top left to expand the menu and then on the OneDrive icon.
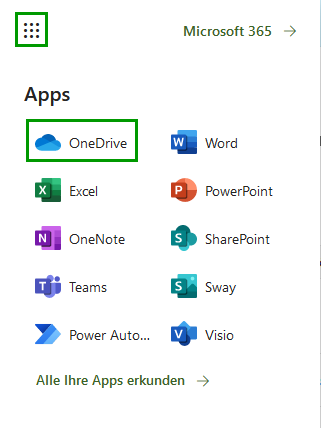
3. A new page/tab will now open in your browser. Go to the "My files" section. Here you can now select the files you would like to download.
4. Once you have selected the desired files, click on "Download" in the menu bar above.
last changed on 29.02.2024
How did this content help you?
Option 1: Via OneNote
1. Open the website https://www.office.com/ in your browser and click on the button "Login".
2. Enter your login data in the login window (RWTH-Tenant: firstname.lastname@rwth-aachen.de/ Tenant for students: egal@students.rwth-aachen.de).
3. After logging in, you will be taken to the home page of your Microsoft account. Now click on "OneNote" in the navigation on the left.
4. Open your OneNote notebook and select "Edit" > "Open in desktop app" from the menu bar.
5. After your OneNote notebook has been opened in the corresponding desktop app, you can now export either the page, a section or the entire notebook in various file formats via "File" > "Export".
Notice: Unfortunately, the export of OneNote notebooks is only possible with certain versions of OneNote. Should you be using the standard version of OneNote that comes preinstalled with Windows 10, you will not be able to use the export method above. In this case, we recommend uninstalling this version and installing the latest version – contained in the office package - from the Office Store found on office.com instead. Subsequently, you can use this guide to export and save your data. |
Option 2: Via OneDrive
- Go to the office.com website in your browser and click on the "Login" button. In the login window, enter egal@students.rwth-aachen.de to login to the Student Tenant.
After logging in to the Tenant for Students, you will be redirected to the Single Sign-On you are familiar with, where you can log in normally with your user ID and password.
After logging in, you will be taken to the home view of your account.
Here please click on OneDrive in the menu on the left side.
You are now in the OneDrive in the area of your own files.
If you have your OneNote files here in a folder of their own, go into that folder and then follow the steps below.
Go to your OneNote file and click on the three dots to open the context menu and select "Rename". 8.
Copy the name of the file in the pop-up by right-clicking on the name to open the menu and click on "Copy".
Click on "Cancel" afterwards
Go to the end of the address line of the browser
Enter here first a slash (/), followed by the previously copied name of the OneNote file and another slash (/)
Press the enter key so that the page is loaded.
Now you will see OneNote files here
Highlight the entire content and click on "Download".
This will open a pop-up where you must first click "Save File" and then click "OK" to download the files. Since you had selected multiple items, they will be downloaded packed as a ZIP file.
The included files can be opened locally in OneNote 2016.
last changed on 27.03.2023
How did this content help you?
If you have a OneNote notebook stored locally on your computer that you want to move to the cloud, go to File > Share in OneNote, select a web location such as OneDrive, and then click Move notebook:
last changed on 13.05.2024
How did this content help you?
If you create a new file in one of the M365 Office programmes, e.g. in Word, and want to save it directly locally on your computer instead of in OneDrive first, you must proceed as follows:
- For newly created files, click on the ‘Save’ icon at the top (otherwise go to ‘File’ - ‘Save as’).
- A pop-up window will then appear where you can click on the small arrow on the right in the ‘Select location’ area to expand the menu:

- In the expanded menu, click on ‘Other storage locations’:

- You will then be taken to the ‘Save as’ area. Click on ‘This PC’ on the left side under ‘Other storage locations’. Here you will see previously used storage locations:

- If you cannot find the desired folder here, click on ‘Browse’ on the left hand side under ‘Other storage locations’, whereupon a window will open in which you can select the folder on your computer where the file should be saved:

last changed on 26.07.2024
How did this content help you?
Employees are not able to install additional add-ins using the M365-Tenant.
This is because add-ins have to be downloaded from the Office Store, which needs to be manually curated by the administrators. This would necessitate a check for every app, to see whether it can be used according to the terms of data privacy protection.
Students can install add-ins from the Office Store using the Students-Tenant. It is not possible to install Apps from third parties, such as Apps that automatically save files to OneDrive (e.g. Notability).
last changed on 14.07.2022
How did this content help you?
It means that M365/MS Teams cannot assign you yet.
This occurs when
- the registration has not been done yet
- the registration has been done, but the waiting time of 24 hours after registering has not been met yet
- you do not have a status that entitles you to use M365
last changed on 14.07.2022
How did this content help you?
If you have been added to one or several Teams, you will see all of them if you click on the corresponding icon. It may take several minutes after the first login until you can see all the icons.
![]()
last changed on 27.03.2023
How did this content help you?
It is possible to change your status so that your colleagues may see if you are available or not. For this purpose, please click on the icon with your initials and choose the item "Available". If you want to change your status, you may switch on to "Show as absent".

last changed on 27.03.2023
How did this content help you?
- To plan a new meeting including external participants, please create a new team. You can add new participants, internal participants or external guests, into this team. It is to be noted that while creating invitations for guests a complete e-mail address is to be entered. Guests will receive an e-mail with a link to the Team. They should follow the link and instructions to accept the invitation. After the invitation has been accepted, it is possible to start, for example, a video conference with your guests.
The following screenshots demonstrate this process:


last changed on 14.07.2022
How did this content help you?
- The contacts that you see in MS Teams are delivered from the server.
The e-mail address that you see is therefore the contact e-mail address from the Identity Management.
last changed on 28.04.2023
How did this content help you?
- When you search users to add them into a team, there is an ID shown together with a name. If it is not clear which user is to be chosen, it is advisable to contact the user and ask to provide their ID.
To find out their ID, users should proceed as follows:
- Log in on https://teams.microsoft.com as it is described here: Access
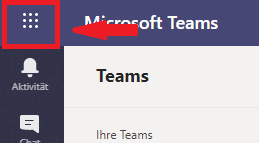
- Click on the menu symbol on the top right
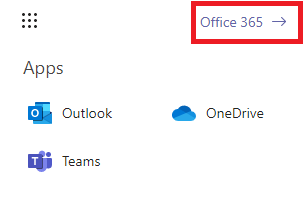
- Click on the link to Office 365
- Then click on the symbol with the initials on the top right
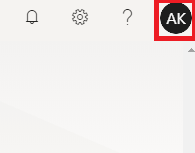
- The ID will be shown in the menu in front of the @m365.rwth-aachen.de. The user can then tell you their unique ID.

last changed on 27.03.2023
How did this content help you?
- To search through your contacts, you should enter the last name of the user very slowly and then click on "Search".
last changed on 28.04.2023
How did this content help you?
- As soon as you have established a connection with your communication partner, you can share your screen. To do so, please choose the icon on the top right as marked on the screenshot.

Limited Functionality This function is not supported by all devices or apps. |
last changed on 27.03.2023
How did this content help you?
- Yes, it is possible. To do so, please create a meeting using Outlook (see "How can I start and plan a meeting using outlook?")
last changed on 14.07.2022
How did this content help you?
- The Teams button in Outlook does not work because the Outlook-Addins and other extended functions are possibly blocked by the institute.
To be able to see the Teams button, you should enable the Teams-Addins. Please contact your IT administrator for this.
last changed on 14.07.2022
How did this content help you?
- The following error may occur when you try to log in on Linux (especially Dual Boot): "Login not possible. Please try again later".
This error is caused by the wrong time zone. The local time, not the UTC time, should be set. More information about this topic.
last changed on 28.04.2023
How did this content help you?
Since Microsoft constantly expands/updates its software/app offering and then makes it directly available to everyone, checks are always carried out so that Teams complies with the specifications. This means that all functions that have not been officially released for the M365 tenant (in this case, only Teams for chat and audio/video communication) must be deactivated. This also includes the apps in Teams. Since this process is performed manually, there may be time windows during which the apps are usable for a short time. Re-activation after deactivation is not possible.
last changed on 15.10.2021
How did this content help you?
First, please test in advance whether you can log in via https://teams.microsoft.com. If the login works, the problem lies in the installed Microsoft Teams app.
Please try out the following two options:
Option 1:
- Please log out of the MS Teams app and clear the cache according to the following instructions: https://www.uvm.edu/it/kb/article/clearing-teams-cache/
- After clearing the cache, please try logging in again.
If option 1 does not work:
- Uninstall the MS Teams app and then delete the %appdata%\Microsoft\Teams folder on your device.
- Open Windows Explorer
- Type %appdata%\Microsoft\ in the address bar,
- Find the "Teams" folder
- Delete the "Teams" folder
- Afterwards, install MS Teams and try logging in again.
If the problem occurs when switching tenants:
The problem is probably due to an incorrect invitation. Please follow these instructions to be invited to the external team correctly.
last changed on 14.07.2022
How did this content help you?
With the introduction of multifactor-authentication for RWTH Single Sign-On, you may find yourself in a continuous loop when signing in to Microsoft Teams. This can be avoided by selecting "No, only sign in to this app" during the sign-in process.
If you continue to experience problems, please delete the Microsoft Teams cache. You can find the instructions for this under the following link in the "New Teams" section.
If the problem persists, please contact the IT-ServiceDesk.
last changed on 11.07.2024
How did this content help you?
Please try the following methods to solve the problem:
Method 1: Sign out, activate the software and then sign back in.
1) Open the affected application on your Mac.
2) Click on the name of the respective application e.g. Word
3) Select "Sign out" from the drop-down menu.
4) Click on "log in" or "activate". If the latter is an option, you can skip straight to step 6.
5) Instead of signing in, select "activate" at the bottom left. Alternatively, you can select "activate" at the bottom left of the start screen.
6) Select that you have a subscription.
7) Sign in with something@students.rwth-aachen.de.
8) If necessary, log in again in the usual way.
The exact layout and options may vary slightly depending on your device.
Method 2: Completely uninstalling Microsoft Office 365 (including license files)
Follow the instructions below to do this:
1) Uninstalling Office 365 for Mac:
https://support.office.com/de-de/article/deinstallieren-von-office-2016-f%C3%BCr-mac-eefa1199-5b58-43af-8a3d-b73dc1a8cae3
2) Removing license files:
https://support.office.com/de-de/article/entfernen-von-office-lizenzdateien-auf-einem-mac-b032c0f6-a431-4dad-83a9-6b727c03b193
3) If you reinstalled Office afterwards, please install Teams as well:
https://www.microsoft.com/de-de/microsoft-teams/log-in
4) Please log into Teams with egal@students.rwth-aachen.de (for students) or egal@m365.rwth-aachen.de (for employees).
5) After that, log in to Office programs with your CloudID (Microsoft ID).
To find your CloudID, log in to www.office.com with egal@students.rwth-aachen.de (for students) or egal@m365.rwth-aachen.de (for employees) and click on the profile icon in the upper right corner.
The account name is e.g. "abtdebg163h8j@students.rwth-aachen.de" (for students) or "abtdebg163h8j@m365.rwth-aachen.de" (for employees).
https://support.office.com/de-de/article/entfernen-von-office-lizenzdateien-auf-einem-mac-b032c0f6-a431-4dad-83a9-6b727c03b193
last changed on 29.01.2024
How did this content help you?
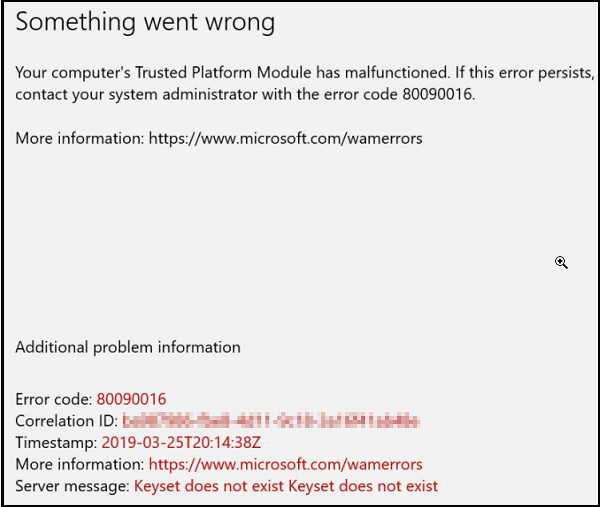
We found the following solution during our research on the Internet (source):
- Log in to the Windows client as admin and open the following folder of the user account in the file explorer:
C:\users\USERNAME\AppData\Local\Packages\.
- There you open the folder
C:\users\USERNAME\AppData\Local\Packages\Microsoft.AAD.BrokerPlugin_cw5n1h2txyewy
rename it to something such as
C:\users\USERNAME\AppData\Local\Packages\Microsoft.AAD.BrokerPlugin_cw5n1h2txyewy-ALT".
- After that, first log out again and then you can log back in to the Windows client with the user account.
After that the Microsoft products (Teams, Word, ...) should be starting again and the login should once again work.
- If this was successful, you can remove the previously renamed folder, since a new folder has now been created by the new logon.
last changed on 04.08.2023
How did this content help you?
When signing in to Teams, you may receive the error code "multiAccountForbidden".
In this case, it can help to delete your Teams cache to remove any old profiles that have been saved.
Windows:
- End teams
- Start the "Run" app
- Enter %appdata%\Microsoft\Teams and select "OK"
- Delete all files and folders in the %appdata%\Microsoft\Teams directory. Ctrl + A, then Delete
- Start Teams
macOS:
- End Teams in the dock or by using Cmd (⌘) + Q
- Open the folder /Applications/Utilities in Finder and open "Terminal" by double clicking it
- Enter rm -r ~/Library/Application\ Support/Microsoft/Teams and use the Enter key to execute the command
- Start Teams
last changed on 09.11.2023
How did this content help you?
You can find out where to set it up and which token types are available for setting up multifactor authentication on the page Protected Services and respective Token Procedures.
last changed on 28.03.2024
How did this content help you?

