


Editing the central address and contacts

On this page you will learn how to add and edit the central address and other contacts of your organization in the RWTH Organization Directory (OVZ).
Opening the editing view in the OVZ
Step 1
Go to the OVZ and log in using RWTH Single Sign-On.
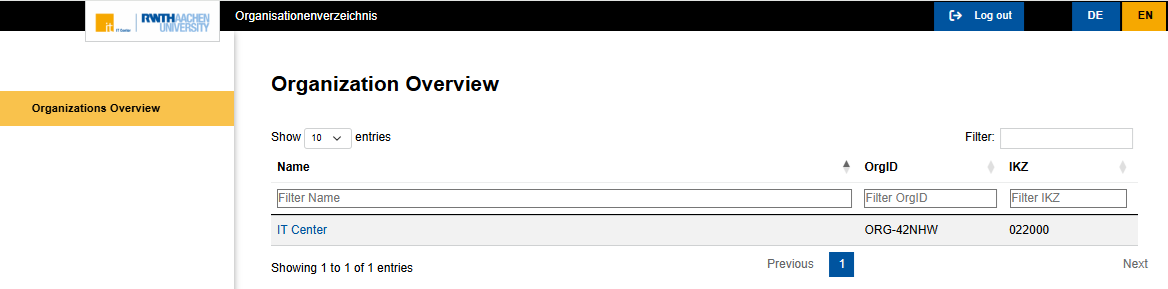
You will see a list of the organizations for which you have the role Administration Organization:
Step 2
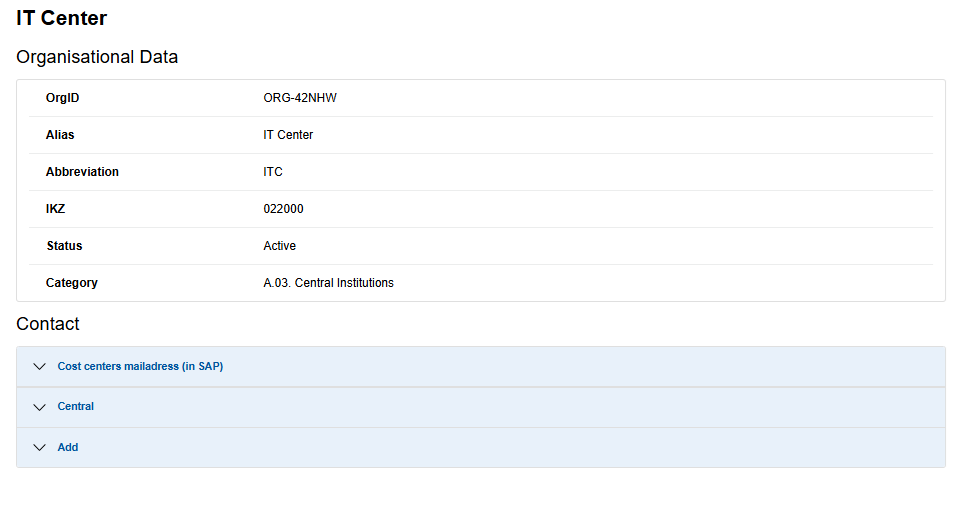
Click the name of your organization to switch to the organization's detailed view.
- In the Organizational Data area, you will see the master data of your organization. This data is maintained by Department 5.1 and can only be changed by that department.
- In the Contact(s) area, you can add, update, or delete contacts for your organization:
Adding a contact
Step 1
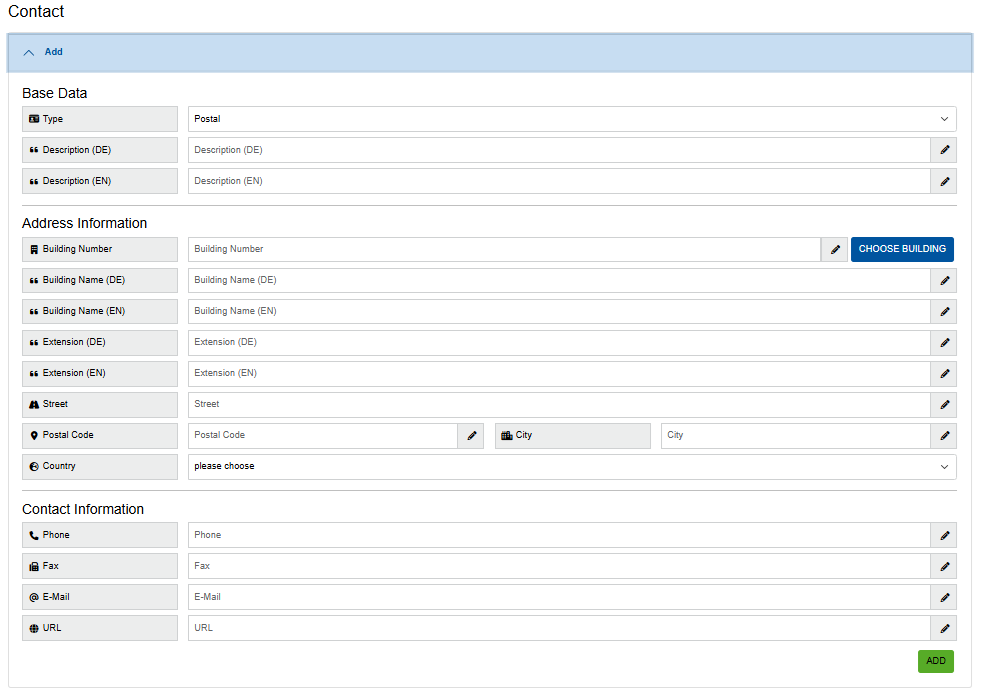
To add a contact, expand the Add area:
Step 2
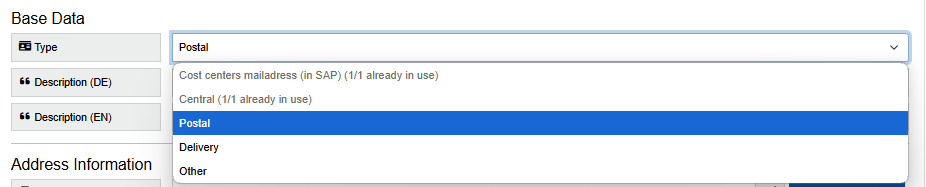
In the “Base Data” area, select a contact type.
- The contact types Cost centers mailadress (in SAP) and Central can only be added once.
- Use the Description field for contacts of type Other:
Note on multilingualism
- Input fields with the suffix (DE) are displayed in web applications if the user has selected the language setting German in the browser.
- Input fields with the suffix (EN) are displayed in web applications for all other browser language settings.
Step 3
In the Address Information area, click Choose building to automatically populate all address input fields with the stored data. You can adjust the pre‑filled data if necessary.
- The data source for buildings is the central building management system of Department 10.0 - Facility Management:
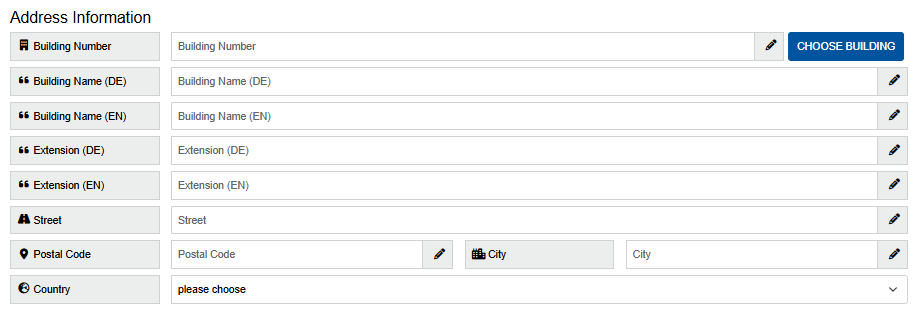
Note on multilingualism
- Input fields with the suffix (DE) are displayed in web applications if the user has selected the language setting German in the browser.
- Input fields with the suffix (EN) are displayed in web applications for all other browser language settings.
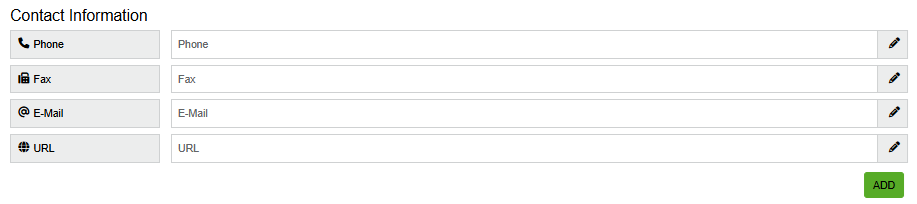
Step 4
In the Contact Information area, you can enter your organization’s contact details.
Click Add to save the contact:
Updating or deleting a contact
Step 1
Expand the existing contact to edit it:
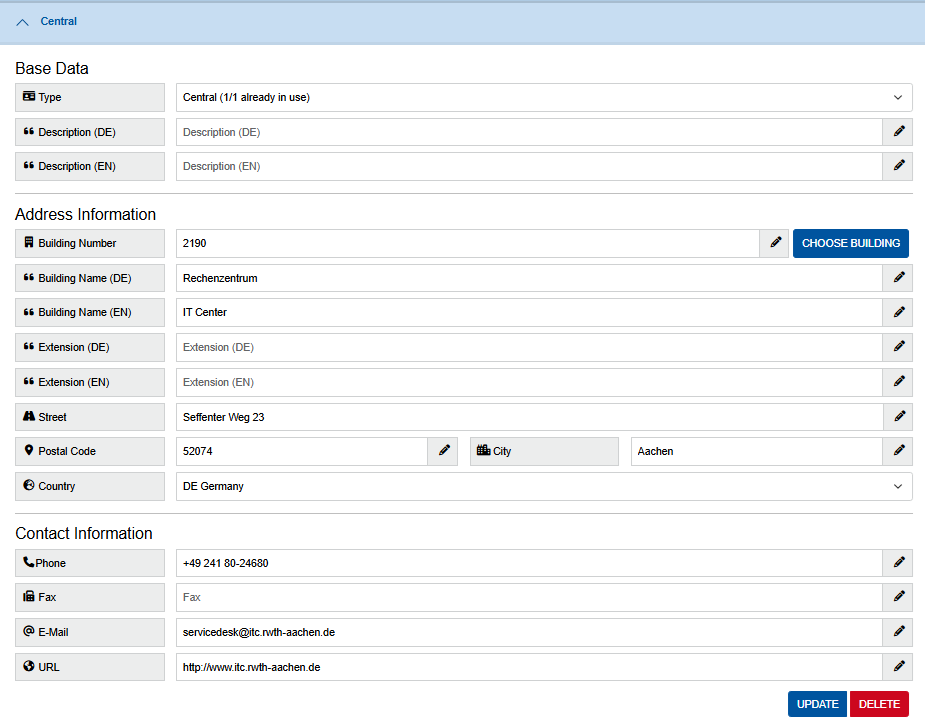
Step 2
Change the desired contact information and click Update to save the changes.
To delete the contact permanently, click Delete.
