


Security Key as Hardware Token for RWTH Single Sign-On (WebAuthn/FIDO2)

The hardware token for RWTH Single Sign-On (WebAuthn/FIDO2) is used with a physical (hardware) security key by default.
This token requires initialisation in the Token Manager and verification outside of it.
- Requirements for using a hardware token
- Configuration in the Token Manager
- Verification outside the Token Manager
- Login with a security key
1. Requirements for using a hardware token
- You have a hardware security key (hardware token).
- Compatible with both token types Hardware token for VPN and RWTH Single Sign-On (HOTP) and Hardware token for RWTH Single Sign-On (WebAuthn/FIDO2) are e.g. YubiKeys, Nitrokeys (Pro 2 and 3) and selected Feitian Keys.
- The support of the WebAuthn/FIDO2 protocol is a minimum requirement for setting up this token.
2. Configuration in the Token Manager
Video tutorial on token setup for the RWTH Single Sign-On.
Step 1
Insert your security key into a USB slot of your PC.
Step 2
Open the Token Manager (opens in new tab).
Step 3
Log in with RWTH Single Sign-On.
Step 4
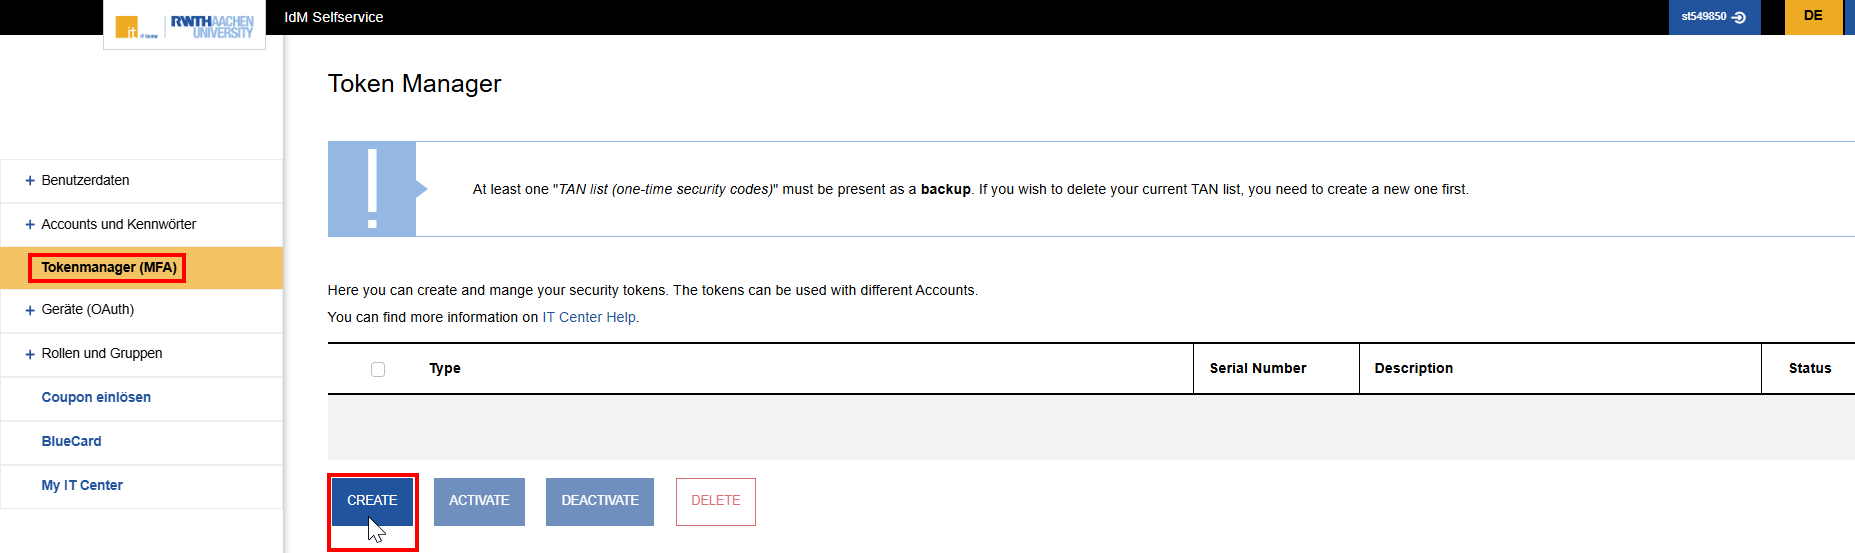
Click on the blue Create button at the bottom left of the Token Manager.
Step 5
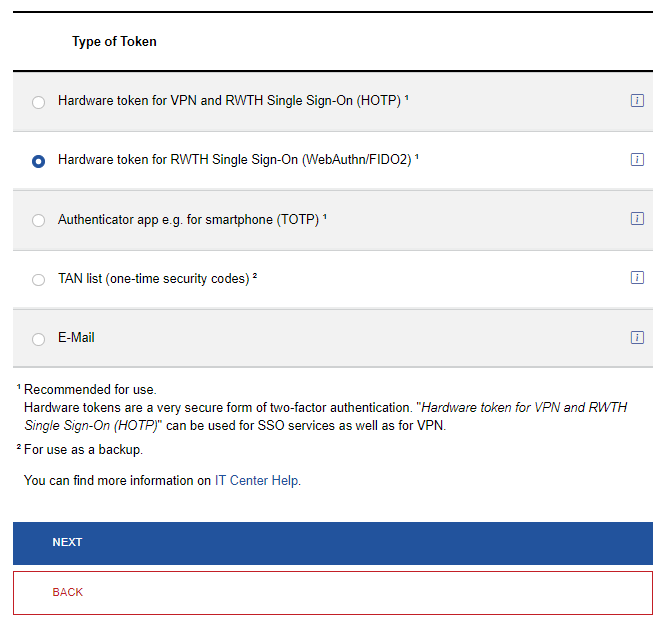
Choose Hardware Token for RWTH Single Sign-On (WebAuthn/FIDO2).
Step 6
Click on Next.
Step 7
Enter a unique description for the security key (e.g. My hardware key). This helps you to differentiate between tokens, especially if you have created several.

Step 8
Click on Create.
Step 9
Start the verification process for the hardware token in the Credential Manager or browser by clicking on Register.

3. Verification outside the Token Manager
By clicking on Register, you leave the Token Manager and must now confirm the token.
You can either carry out the verification with a Credential Manager or do it in the browser on your end device. How you proceed is up to you, but options may vary depending on the end device.
The following instructions provide examples of verification:
Verification using Windows Credential Manager
Step 1
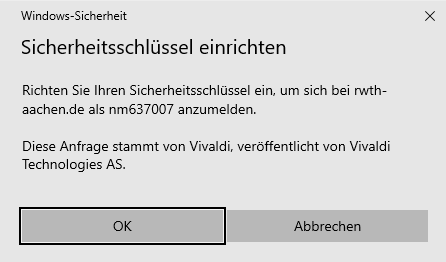
To set up your hardware token, please follow the on-screen instructions.
Step 2
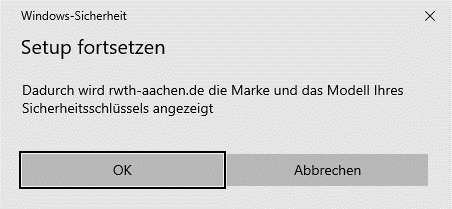
If the data is correct, confirm with OK.
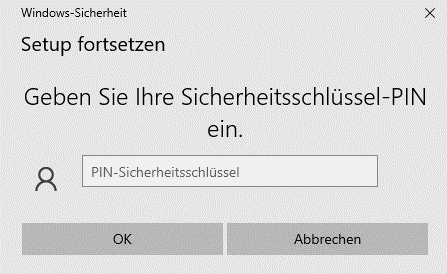
Step 3
If the hardware key was previously used, it might require a PIN code.
If the PIN is required, enter it and confirm with OK.
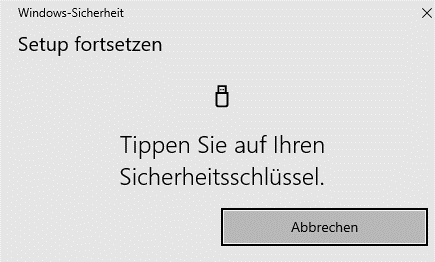
Step 4
Follow the instructions on screen and tap the security key.
On the Yubikey, tap the circular recess with the Y.
If your operating system does not have its own version of the Credential Manager, the tokens are set up by your web browser.
Verification using Firefox
Step 1
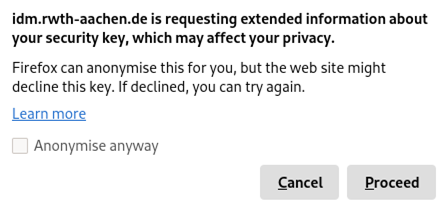
Do not anonymize your data in the first step, otherwise the token setup will fail.
Step 2
Click on Proceed.
Step 3
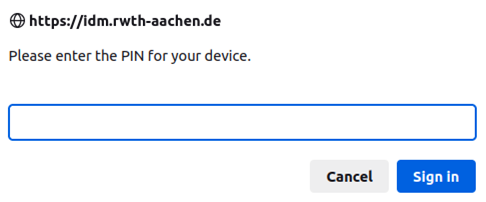
If the hardware key was previously used, it might require a PIN code.
If the PIN is required, enter it and confirm with Sign in.
Step 4
Complete the process by tapping the security key.
On the Yubikey, tap the circular recess with the Y.
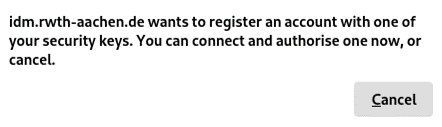
Verification using Chrome
Step 1
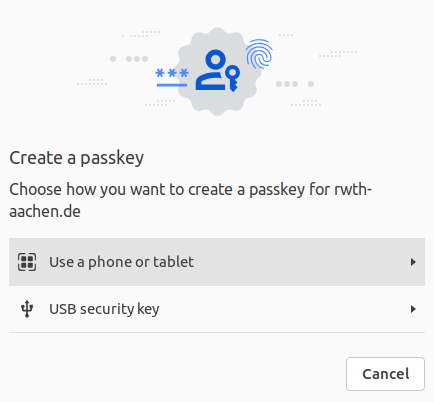
If there is no key connected to the system yet, you will be asked for the type of device to be used. Please select USB security key.
Step 2
Then follow the instructions on your screen.
4. Login with a security key
To use a security key for login with MFA, please proceed as follows:
Step 1
Insert the security key into a USB port of your device.
Step 2
When the application prompts you to enter a one-time security code, tap the security key with your finger.
On the Yubikey, tap the circular recess with the Y.
- If slot 1 has been configured, tap once briefly.
- If slot 2 has been configured, press and hold the security key.
Step 3
A code is generated and the process is completed automatically.
Please contact the IT-ServiceDesk if you experience any further problems.
