


s3 connection using Cyberduck (Windows)

Here you will find an example guide for configuring Cyberduck, a popular S3 client. Cyberduck is free open-source software. There are many other S3 client software options available for data access. Unfortunately, we cannot assist you with the configuration of each client. However, the general workflow should not differ too much from client to client, allowing you to make the necessary adjustments for your chosen S3 client after working through this guide.
- Installation
- Configuring a New Connection
- Establishing a Connection
- Downloading Files
- Uploading Files
- Transfer Optimization
Cyberduck (Windows) Based on Cyberduck version 7.9.1
Installation
Download the client software and install it on your computer:
https://cyberduck.io/download/ (opens in new tab)
You will need admin rights for this.
Alternatively, if you have the necessary know-how, you can also compile your own version. The source code can be found at https://github.com/iterate-ch/cyberduck (opens in new tab).
Configuring a New Connection
Step 1
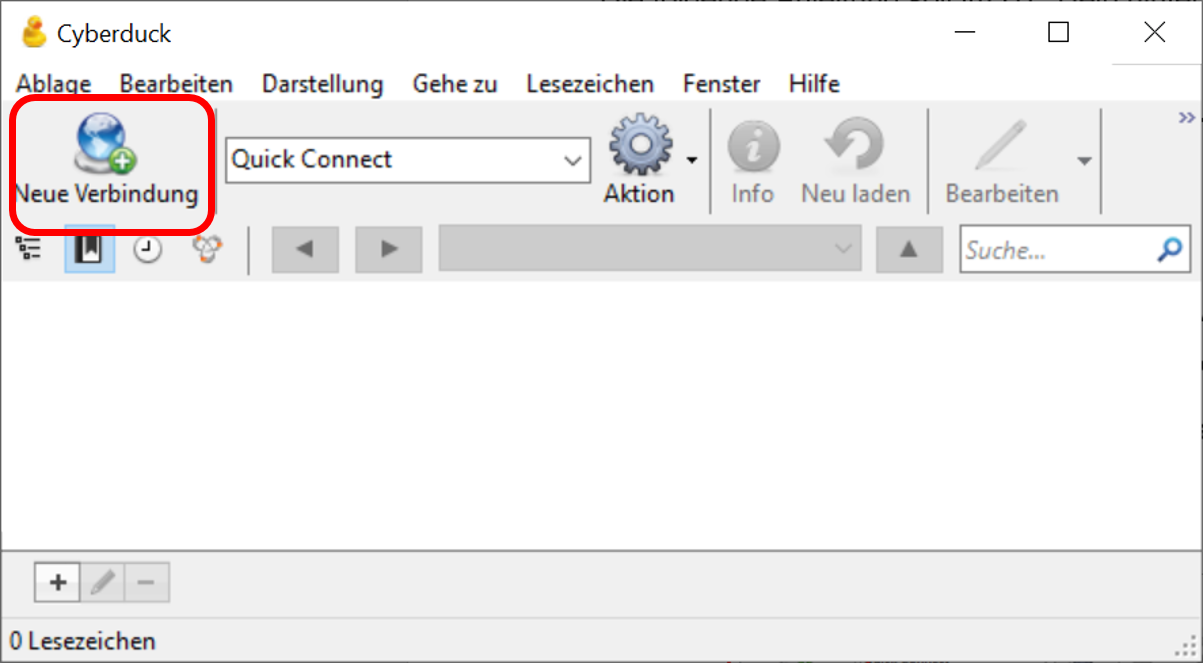
Create a new connection by clicking on the New Connection (Neue Verbindung) button.
Step 2
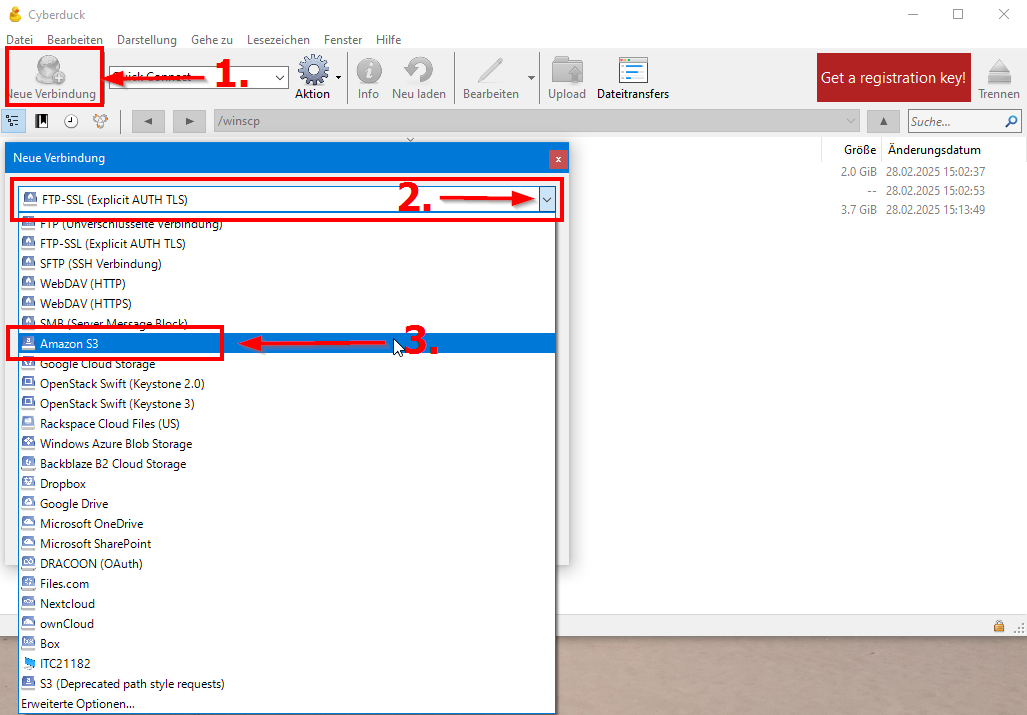
In the connection configuration, you must now enter your access data for your data.
Step 3
Next, you must specify your access data.
A total of five input fields need to be filled out – please refer to the information from the Digital Archive for the corresponding values. Note that in Cyberduck, the Server field corresponds to the Entry Point in the Digital Archive.
Before establishing the connection, you must specify the bucket name as the path in the format /bucketname.
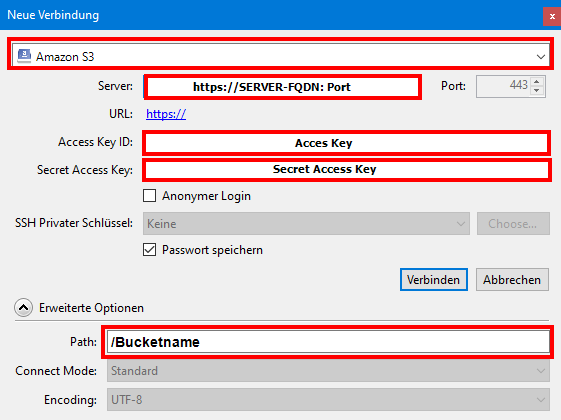
When entering the server (digitalarchiv.hcp-carl-s3.dasi.rwth-aachen.de), you must also specify the port directly if it differs from the standard port 443. Changing the port afterwards is not possible!
For use with port 8483, the following entry is necessary: https://digitalarchiv.hcp-carl-s3.dasi.rwth-aachen.de:8483
Connection Parameters
Please note the different settings depending on the system:
| Für IPv4-only Systeme | ||
| Server: | digitalarchiv.hcp-carl-s3.dasi.rwth-aachen.de | |
| Port: | 8483 | |
| C & P | https:// digitalarchiv.hcp-carl-s3.dasi.rwth-aachen.de:8483 | |
| Für IPv6-only Systeme | ||
| Server: | digitalarchiv.hcp-carl-s3.dasi.rwth-aachen.de | |
| Port: | 443 | |
| C & P | https:// digitalarchiv.hcp-carl-s3.dasi.rwth-aachen.de:443 | |
| Für IP DualStack | ||
| Server: | digitalarchiv.hcp-carl-s3.dasi.rwth-aachen.de | |
| Port: | 443 | |
| C & P | https:// digitalarchiv.hcp-carl-s3.dasi.rwth-aachen.de:443 | |
| Weitere benötigte Angaben | ||
| Access Key: | Ihr persönlicher Access Key | |
| Secret Access Key: | Ihr persönlicher Secret Key | |
After entering all relevant data, your input mask should look like this, with the port and access keys potentially differing:

Establishing a Connection
Once you have entered all the access data, you can establish a connection. To do this, click on the "Connect" button.
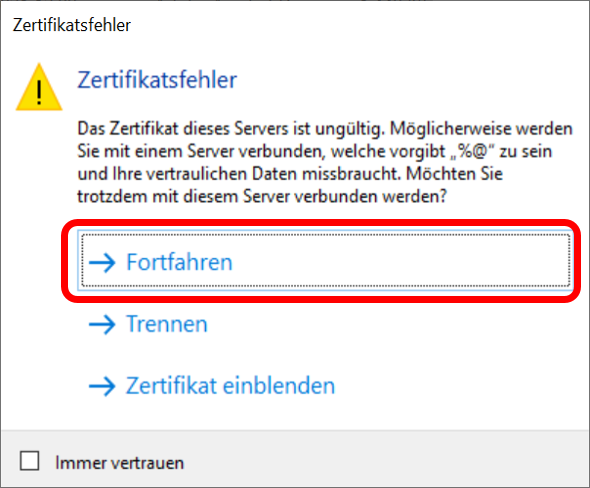
If a certificate error occurs, you can safely ignore it. Select "Continue" to proceed with establishing the connection.
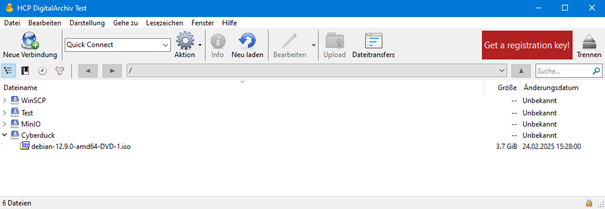
If all access data has been entered correctly, you should now see the list of files contained in the bucket.
Downloading Files
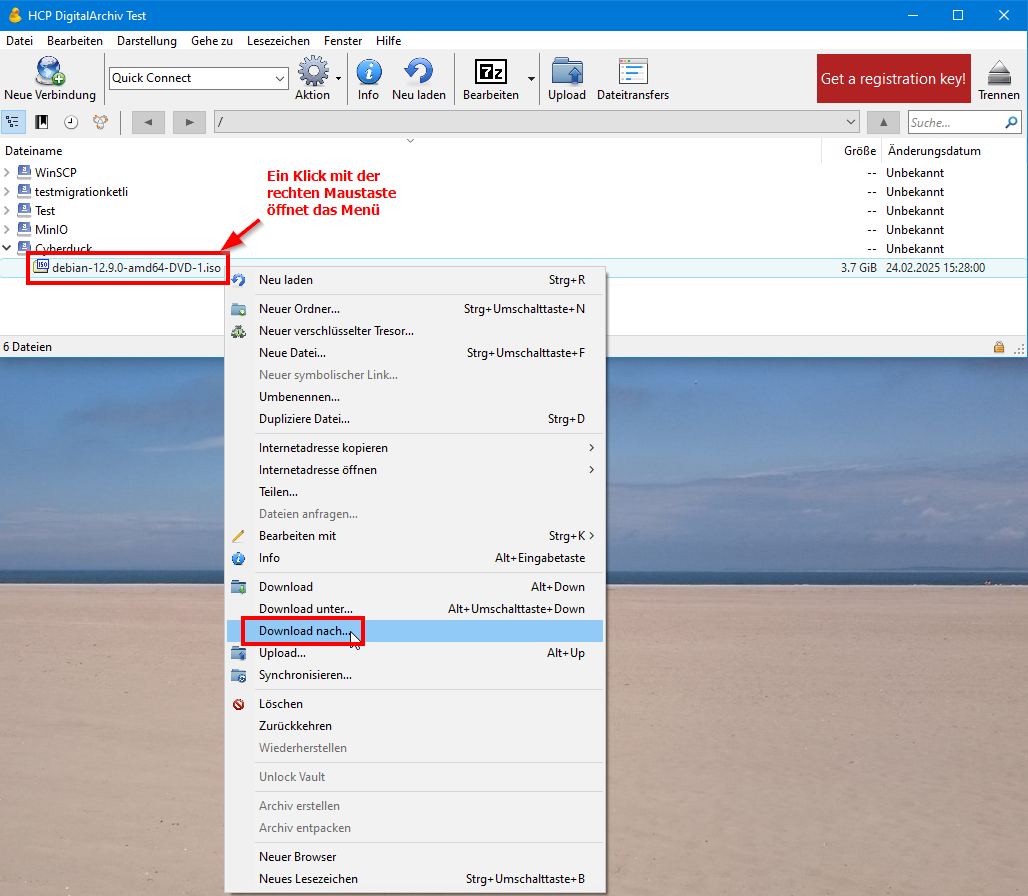
Select the files you want to download by clicking on them. Then choose "Download to..." from the "Action" menu. If a certificate error occurs, proceed as described in Step 3.
Uploading Files
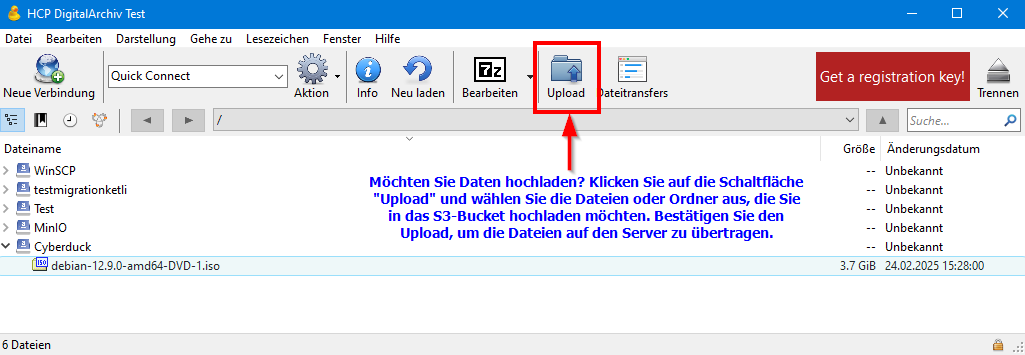
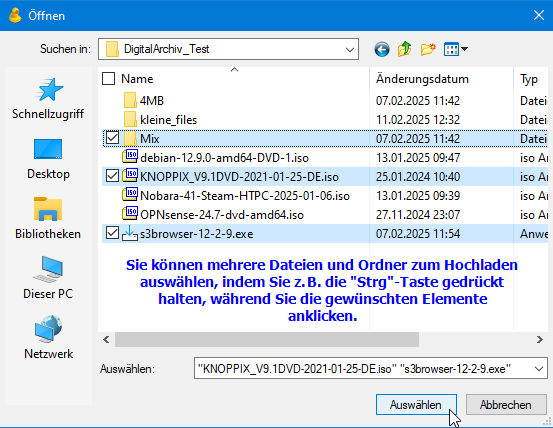
To upload items, first click on the "Upload" button. Then select the files or folders you want to upload to the S3 bucket by clicking on them. Confirm the upload to transfer the files to the server. If a certificate error occurs, proceed as described in Step 3.
Transfer Optimization

With these settings, CyberDuck can utilize the maximum available bandwidth and number of connections for the fastest file transfers:
Step 1
Click on File Transfers in the upper menu bar (see marking 1 in the screenshot). This will open the file transfer window.
Step 2
In the opened window, there is an option for bandwidth limiting (see marking 2). Make sure this is set to "Unlimited" to allow for maximum speed.
Step 3
Click on the dropdown menu for connection count (see marking 3) and select the highest available option (20 connections). This allows more parallel connections to be used, leading to faster file transfers.
