s3 connection using Cyberduck (macOS)

If you want to connect via Cyberduck on macOS, the following steps are necessary:
Installation
Download the client software and install it on your computer:https://cyberduck.io/download/
Alternatively, you can compile your own version (if you have the necessary know-how). You can find the source code at https://github.com/iterate-ch/cyberduck.
Configure new connection
Create a new connection by clicking on the “+” button in the bottom left corner. Do not use the button in the top menu bar!

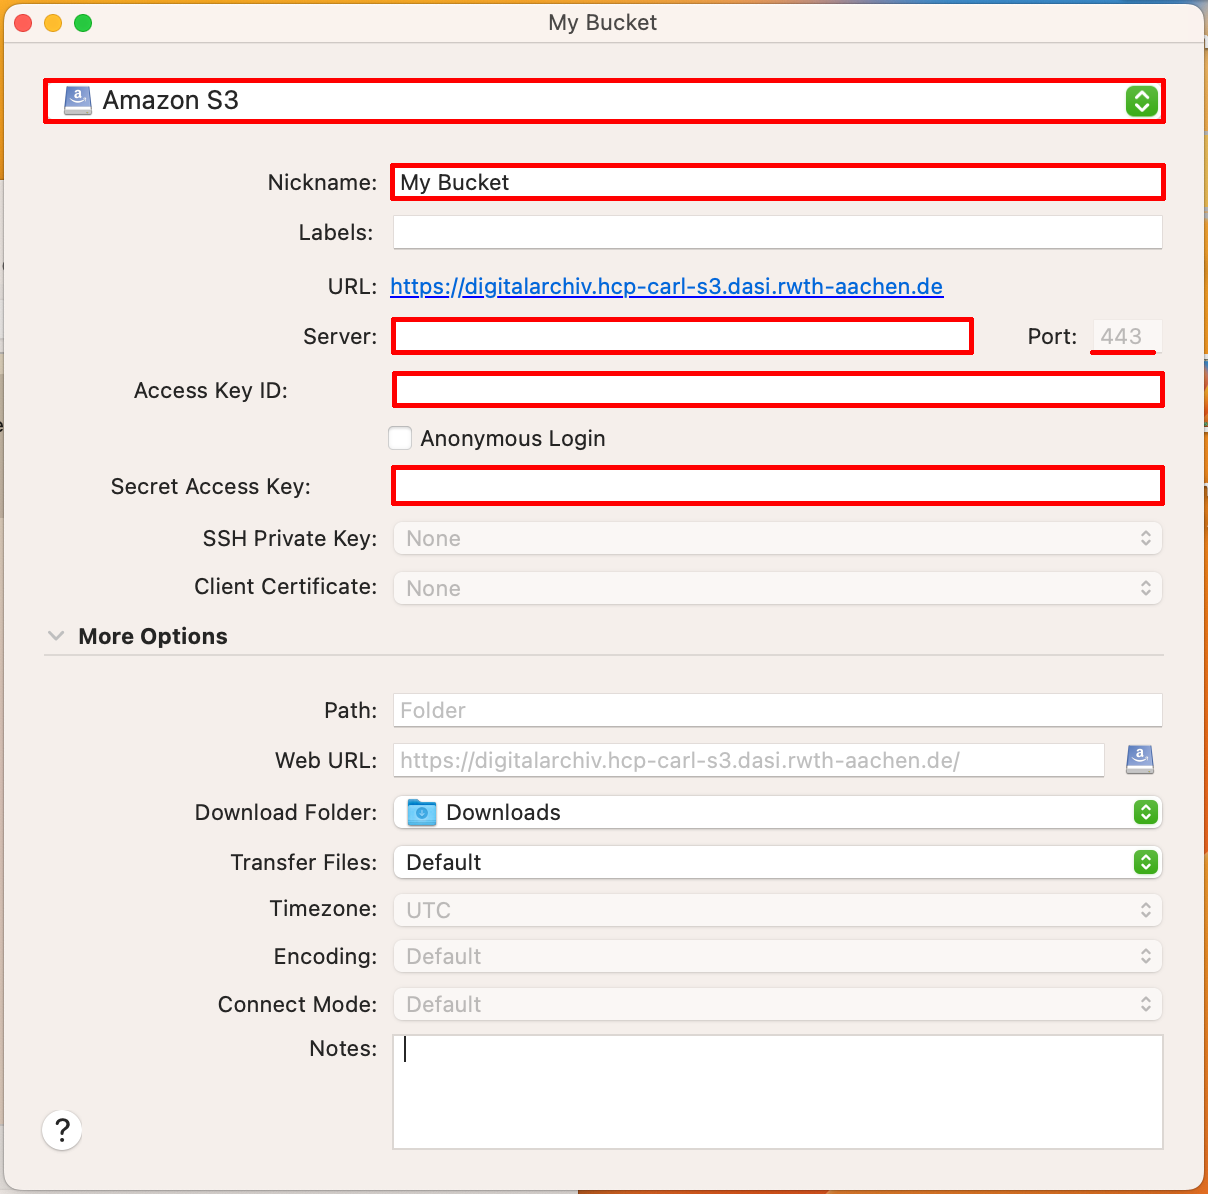
You must now enter the access data for your data in the connection configuration. A total of five input fields must be completed - the corresponding values can be found in the information from the DigitalArchive. Please note that the Server field in Cyberduck corresponds to the Entry Point in the DigitalArchive.
- Connection:
- Amazon S3
- Nickname:
- Can be chosen freely
- Server:
- For IPv4-only systems: digitalarchiv.hcp-carl-s3.dasi.rwth-aachen.de:8483
- For DualStack and IPv6-only systems: digitalarchiv.hcp-carl-s3.dasi.rwth-aachen.de (443 is already the standard port)
- Access Key ID:
- Your access key ID
- Secret Access Key:
- Your secret access key

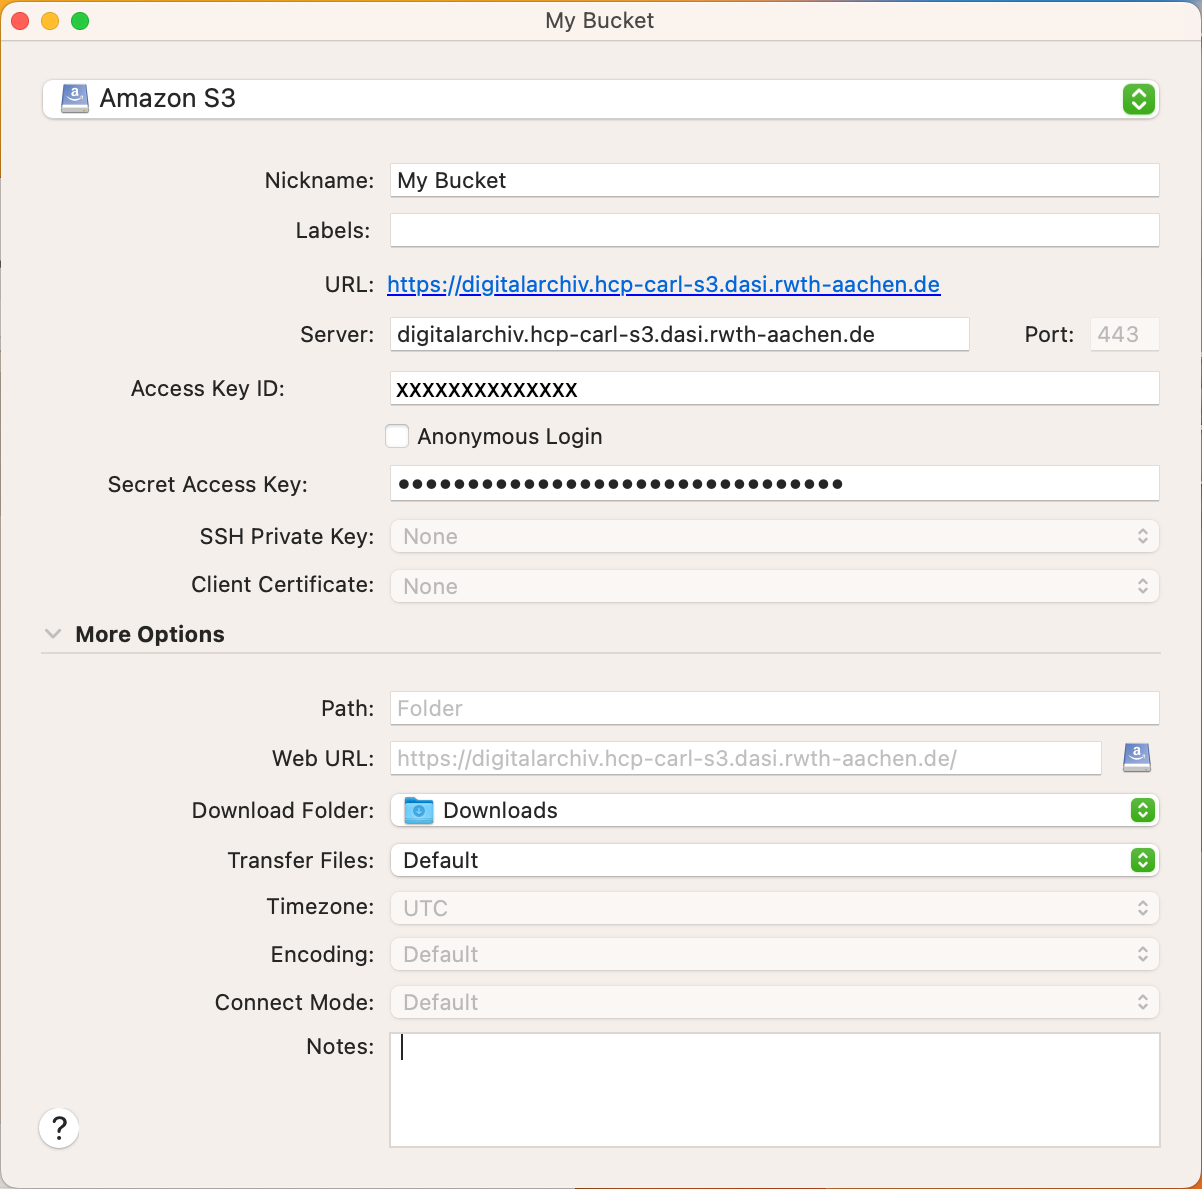
After entering all the relevant data, your input screen should look like this. A DualStack system is used in this example:

Establish connection
Once you have entered all the access data, you can establish a connection. To do this, first close the input window to save the connection as a bookmark. Then establish a connection by double-clicking the bookmark.
If a certificate error occurs in the following, you can safely ignore it. This is due to the pilot operation. In this case, select “Continue” to continue establishing the connection.

If all access data has been entered correctly, you should now see the list of files contained in the bucket.

Downloading files
Select the files to be downloaded by clicking on them. Then open the “File” menu and select “Download To...”. If a certificate error occurs, proceed as in step 3.

Uploading files
You can also upload files. Select “Upload...” from the “File” menu.


