

Image generation
On this page you will learn how to use image generation via RWTHgpt.
By selecting an image generation model, you can create images and graphics using RWTHgpt.
Before using the service, please ensure that you have thoroughly read the Checklist for legally compliant use of image-, audio-, and video-generating AI services and have familiarized yourself with the guidelines and regulations.
You can find the checklist in the AI:connect web interface by clicking the question mark icon in the lower right corner of the screen and selecting the menu item Checklist for Legally Compliant AI Media Use.
Depending on the selected image generation model, there are limitations on the number of interactions or the total duration of interactions. These are displayed in the model selection.
Depending on whether you have the status RWTH Student or RWTH Employee / FB10 Affiliate, the limitations may vary.
To generate images, please follow the steps below:
Step 1
Log in to the KI:connect web interface (opens in new tab) via RWTH Single Sign-On.
Step 2
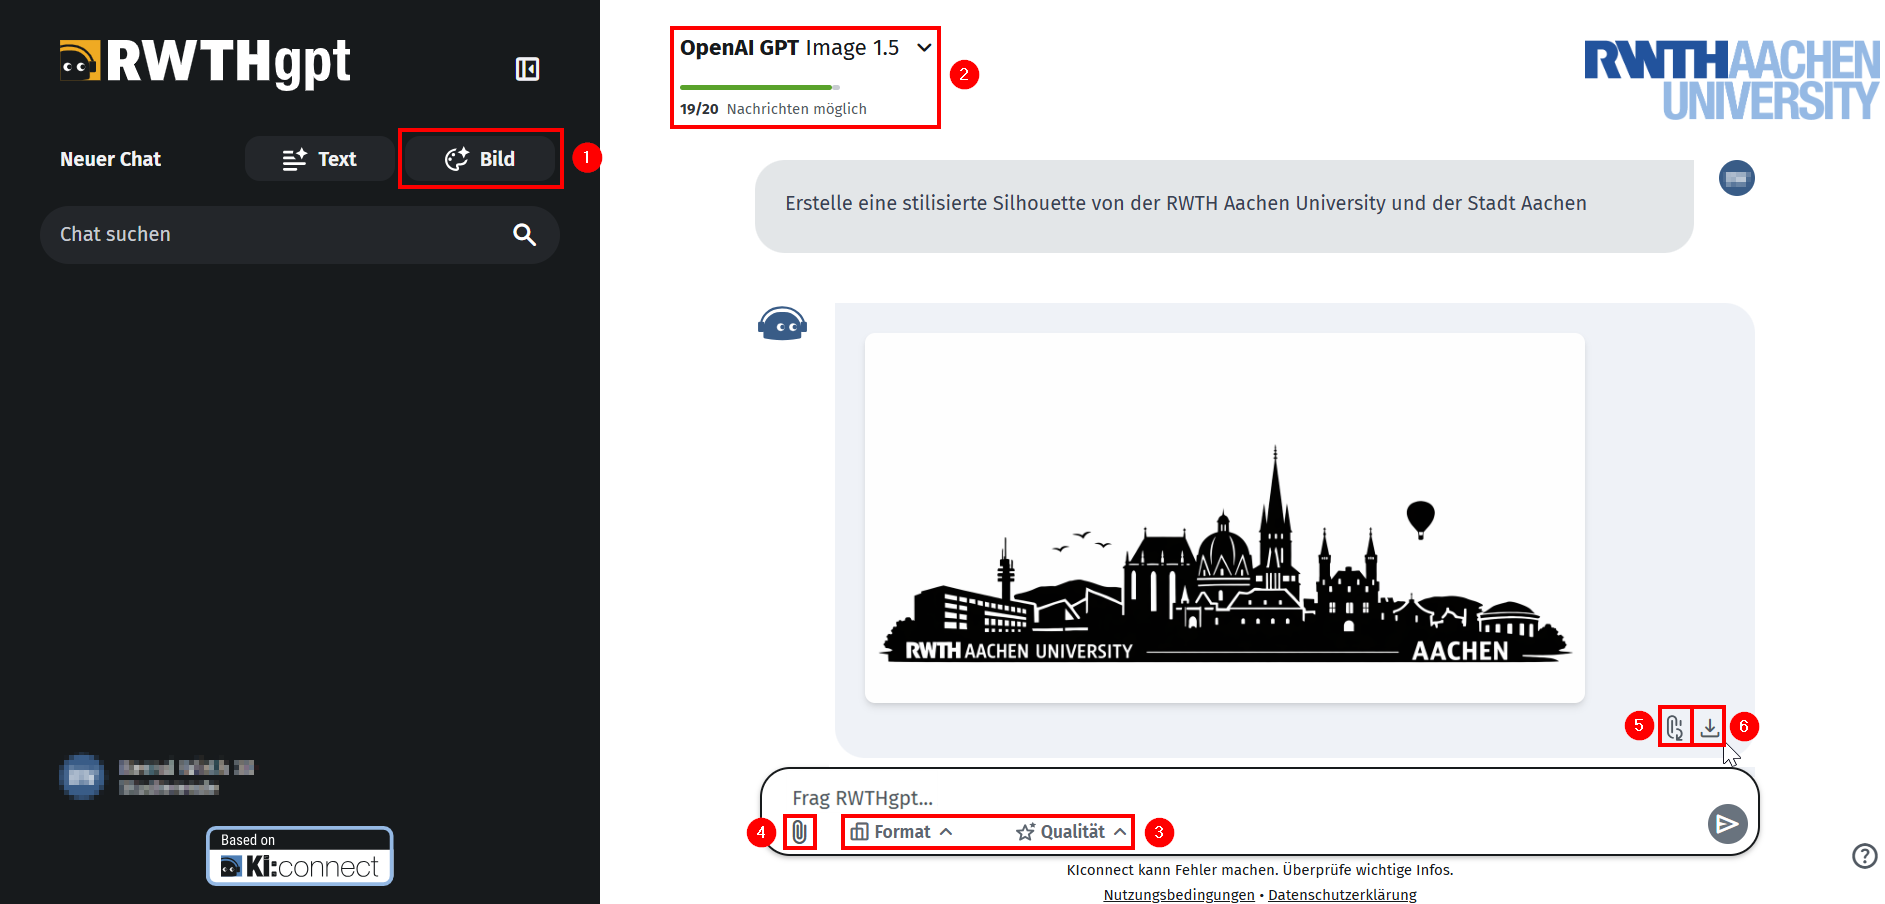
Click on New Chat: Image (1) at the top left of the screen, below the RWTHgpt logo.
The default image generation model will now be selected. You can change this by clicking on the model (2) on the left.
For more information, see the article Language Model Selection.
You can now enter instructions for the model in the chat input window to specify what should be generated. The more precise the instructions, the more accurate the generated image will be.
Steps 3–5 are optional but may help improve the image.
Step 3
Below the chat input window, you can also adjust the image format and quality (3).
The larger the selected format and the higher the selected quality, the longer the image generation process may take.
Step 4
As with the RWTHgpt language models, you can attach files as references for the AI. To do this, click the paperclip icon (4) to the left of the text input field.
For more information, see the article Chat Functions.
Step 5
Once you have generated an image, you can use it as a reference for a new prompt. This allows you to start an iterative editing process.
To do this, hover your mouse pointer over the message containing the image you want to edit further and click the paperclip icon with an arrow (5).
You can then write a new instruction in the chat input window specifying what should be changed in the image. It cannot be guaranteed that other aspects of the image will not also be adjusted.
Step 6
To download a generated image, hover your mouse pointer over the message containing the image and click the download icon (6).