


Activate Administration Account

On this page you will learn, how to complete and activate your administrator account with Cisco after it has been created in the Cisco Secure Endpoint Console.
The following steps are necessary for this:
Activate the account
Step 1
After your account has been created in the Cisco Secure Endpoint Console, you will receive an invitation e-mail to the e-mail address specified in the creation process
- sender: no-reply@amp.cisco.com
- subject: Welcome to Cisco Secure Endpoint
In the e-mail, click on the link under Step 1 Create a Security Cloud Sign On account here.

Step 2
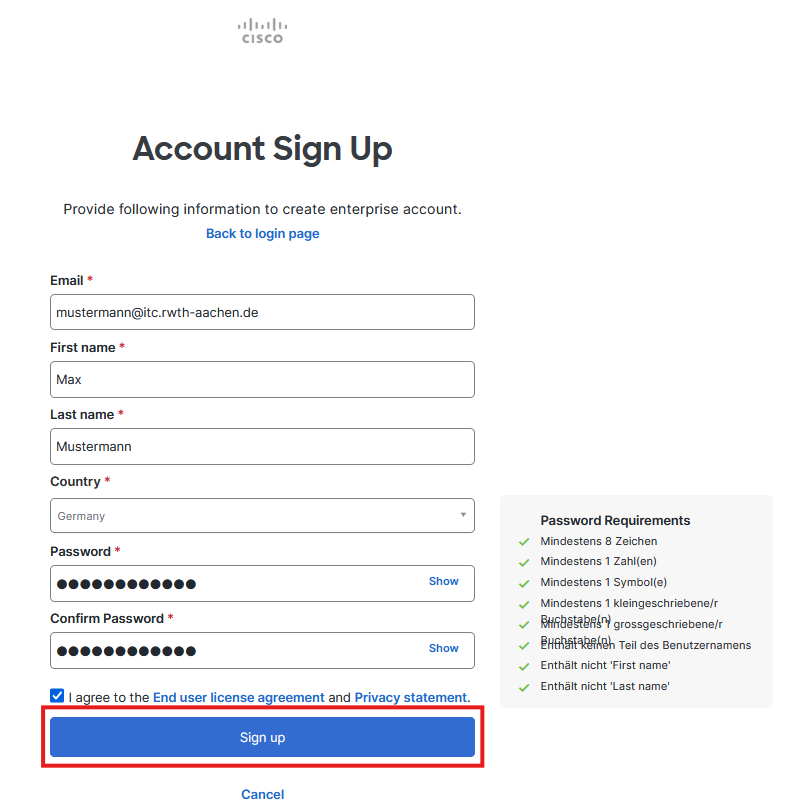
You will be redirected to the website with a registration form. Complete the form and then click on Sign Up.
Note: Some special characters ((e.g. +=-() ) are prohibited in the password. If you use these characters, you will receive a message that the guidelines are not met.
Step 3
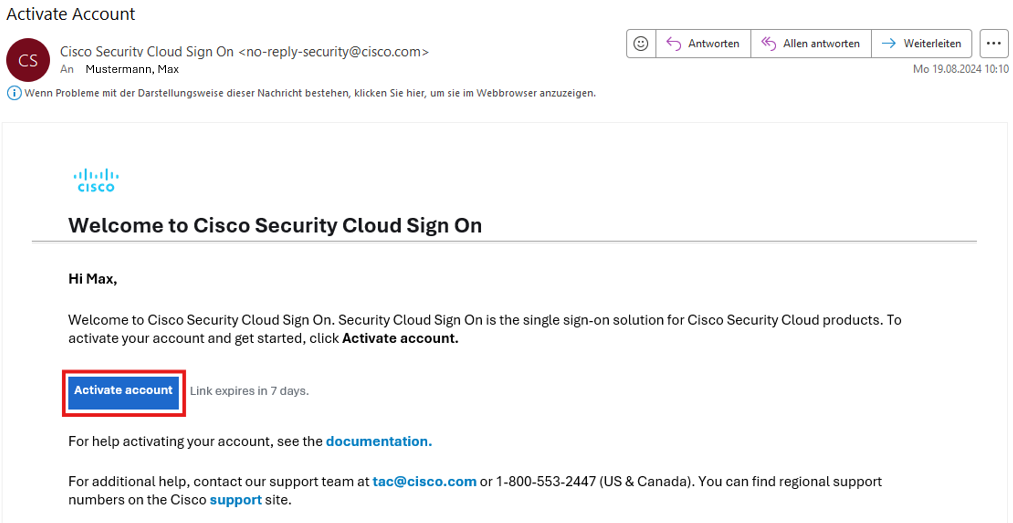
You will then receive another e-mail:
- sender: Cisco Security Cloud Sign On <no-reply-security@cisco.com>
- subject: Activate Account
Click on the Activate Account link in the e-mail.
Step 4
You will be redirected to a website. Click here on Activate Account.

Step 5
Your account will be activated. In the meantime, several redirects can be observed in the address bar of the browser. This is not an error! Wait until the page is fully loaded and the message Welcome to Duo Security appears.
Click on Erste Schritte (Get started) on the page.

Set up multi-factor authentication
You have three options for multi-factor authentication:
- Duo Mobile: With this option, you can use a telephone number as a second factor. This can either be a cell phone number or your work phone number.
- Security key: Here you can use a USB key that supports WebAuth as a second factor, e.g. a YubiKey
Duo Mobile
Step 1
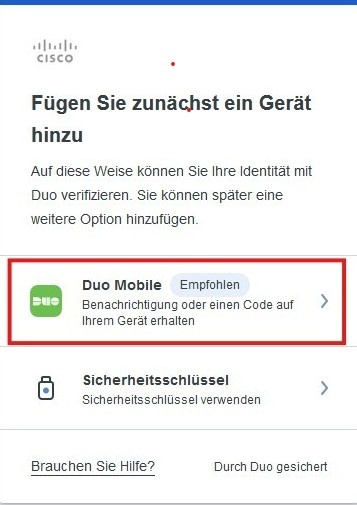
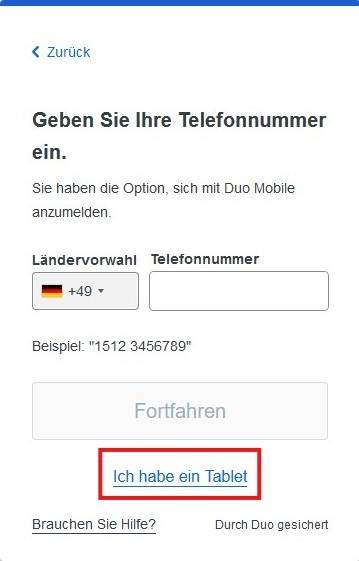
Click on Duo mobile, then click on the “I have a tablet” link.
Step 2
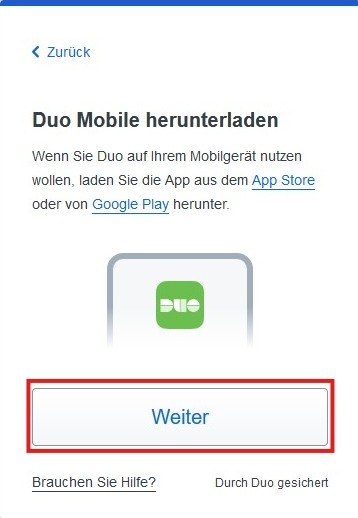
Install the Duo Mobile app on your smartphone, then click Next (Weiter).
Step 3
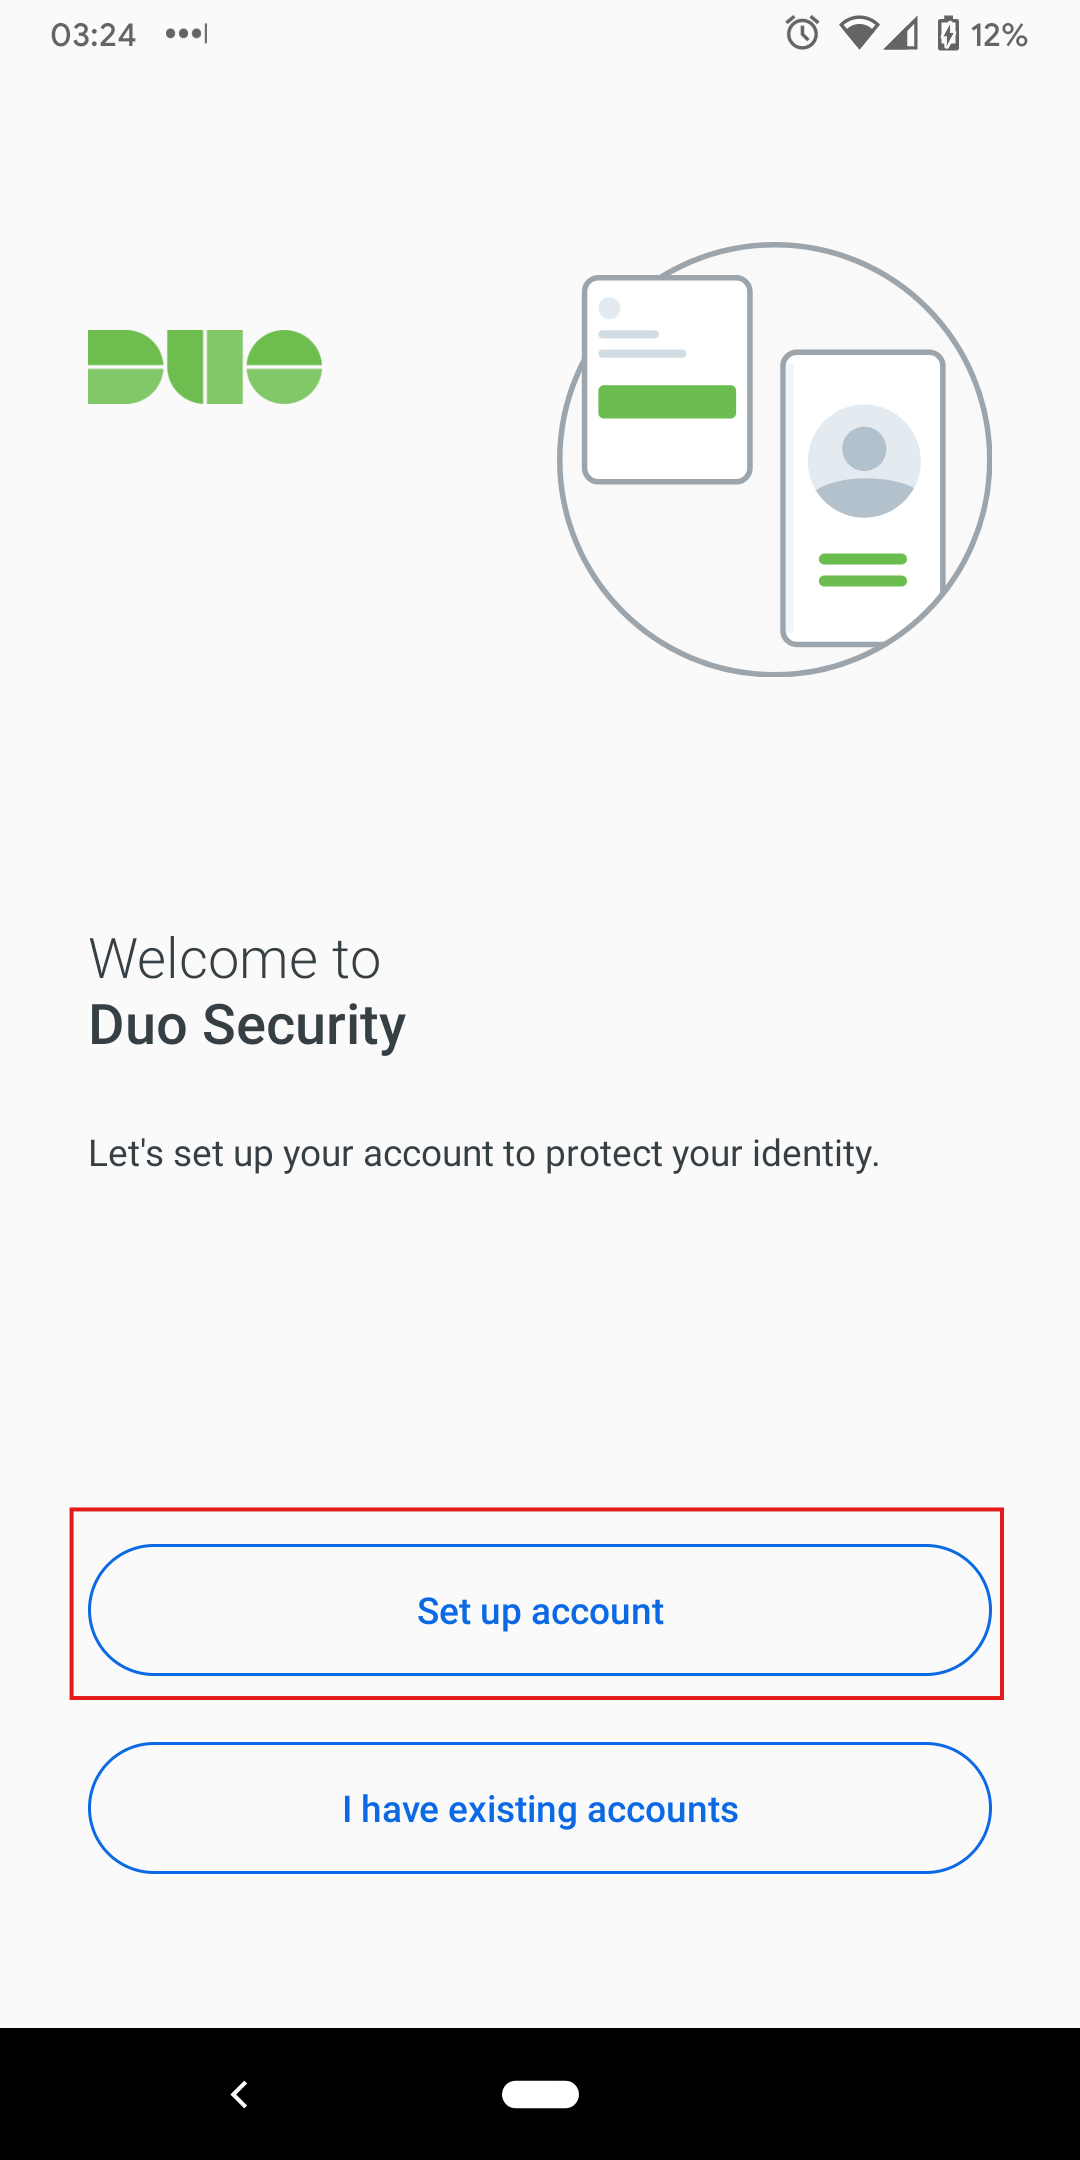
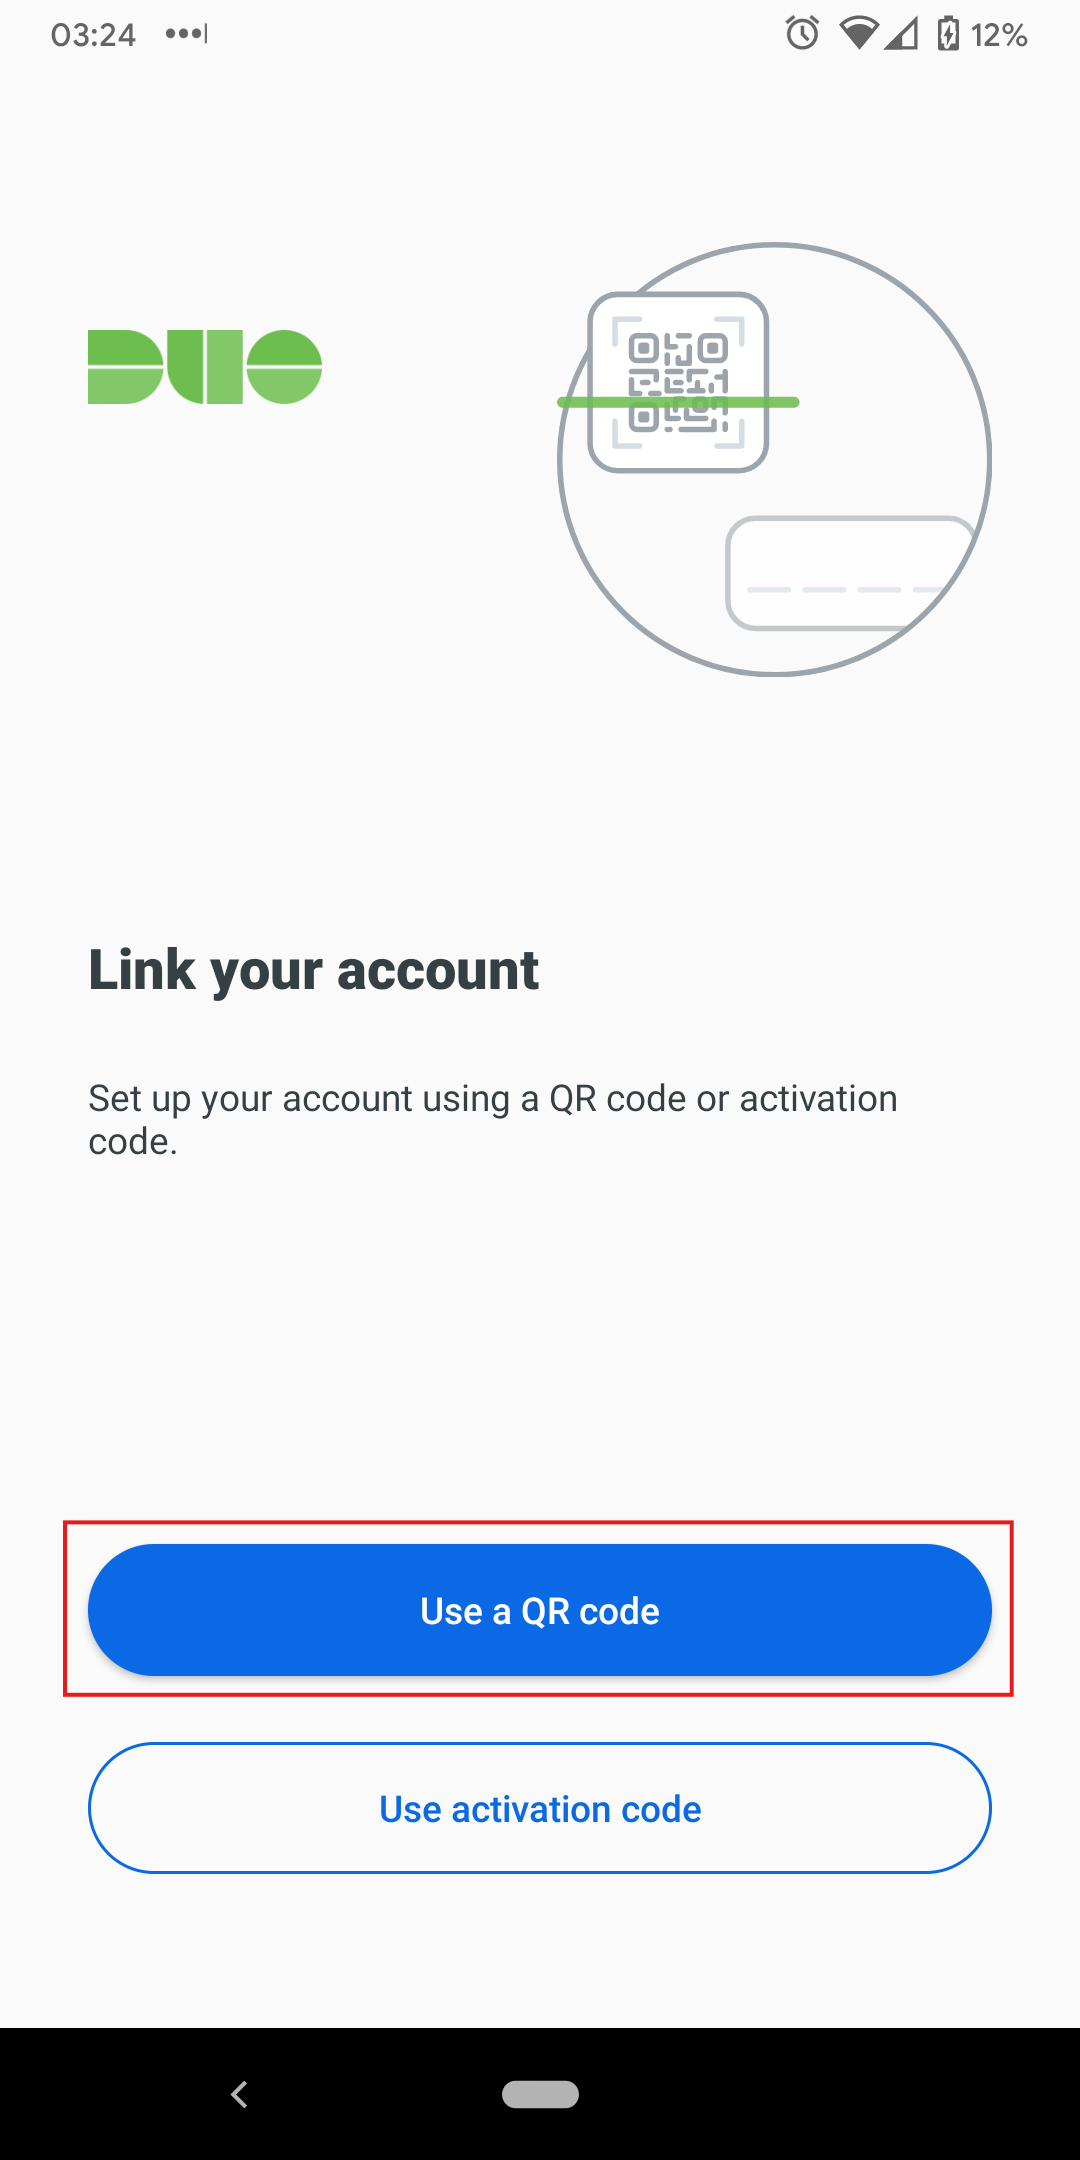
Open the Duo app on your smartphone, select Set up account, and choose the Use a QR code option to link your account.
Step 4
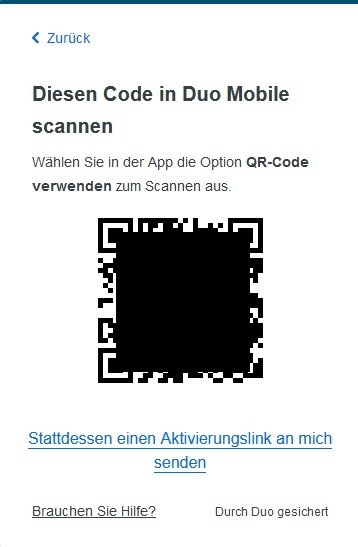
Scan the QR code that appears in your browser.
Step 5
Once the QR code has been scanned, you will be automatically logged in through your browser, and the setup of Cisco Duo Mobile is complete.
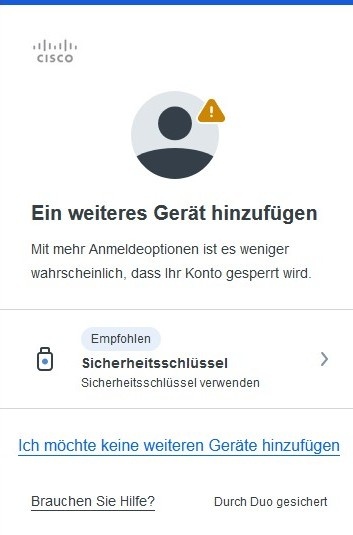
You can now optionally configure a security key as a second factor, or finish the setup by selecting I don't want to add any more devices.
Note: After successful activation, the Cisco Application Portal website opens. Here you will see the message “You're not assigned to any Enterprise”. This message is normal in our deployment and can be ignored!
To access the Secure Endpoint Cloud Console, please use the following direct link: https://console.eu.amp.cisco.com/ (opens in new tab)
Security key option (Using a USB key as an example)
Step 1
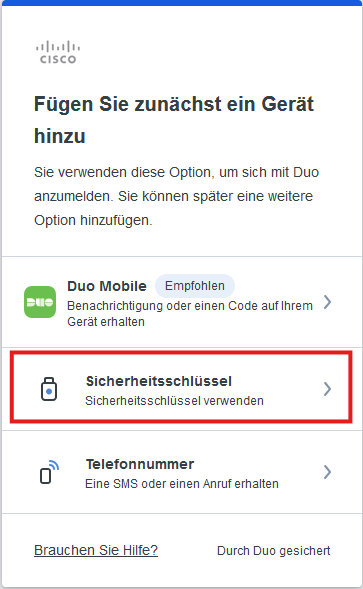
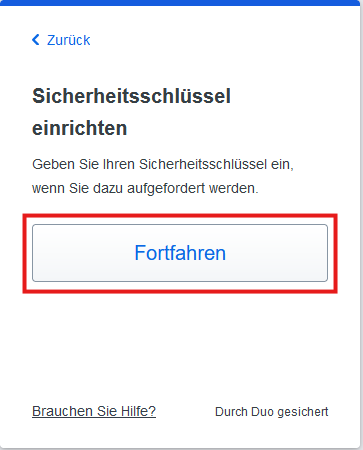
Select Security key, make sure your USB key is inserted and click Continue.
Step 2
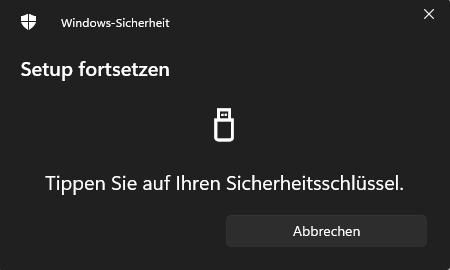
A Windows pop-up appears in which you can select the device on which the key is to be saved. Select the Security key option here.

You will then be prompted to tap on your USB key.

Step 3
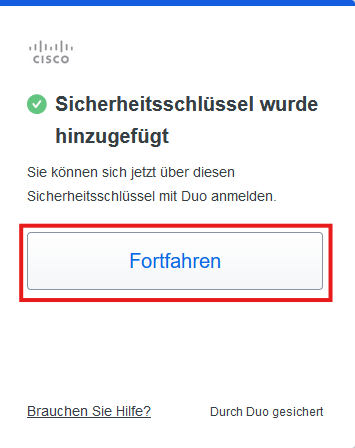
After the master key has been saved, a corresponding success message appears in the browser. Click on Continue.
Step 4
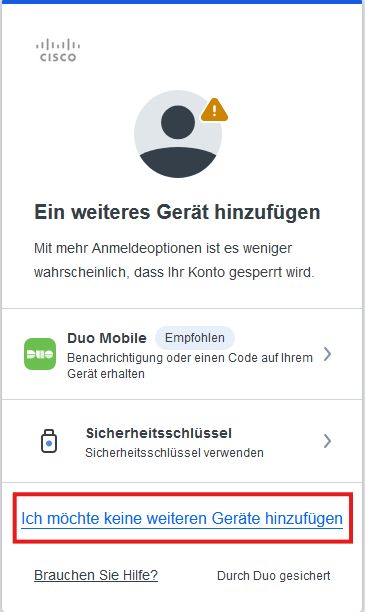
Finish setting up the second factor by clicking on I don't want to add any more devices and in the next window click on Log in with Duo.
Note: After successful activation, the Cisco Application Portal website opens. Here you will see the message “You're not assigned to any Enterprise”. This message is normal in our deployment and can be ignored!
To access the Secure Endpoint Cloud Console, please use the following direct link: https://console.eu.amp.cisco.com/ (opens in new tab)
Step 5
Click Finish to complete the setup.

