


First steps in Ionos

On this page, you’ll find information to get started with Ionos.
- Create a user account
- Enable two-factor authentication for the user
- Log in and set up MFA
- Change initial password
- Groups and permissions
- Ressource overview
- Additional documentation
Create a user account
A user account is required to use IONOS Cloud. This account is created by your institution’s designated Ionos contact person. As the IONOS contact person, follow these steps:
- Open the Management section in the top-right corner.
- Select Users & Groups.
- Switch to the Users tab.
- Click + Create.
- Enter the first name, last name, email address, and an initial password.
- Confirm the entry by clicking on Create.

Enable two-factor authentication for the user
After creating the user account, two-factor authentication must be enabled for the user. As an IONOS contact person, follow these steps:
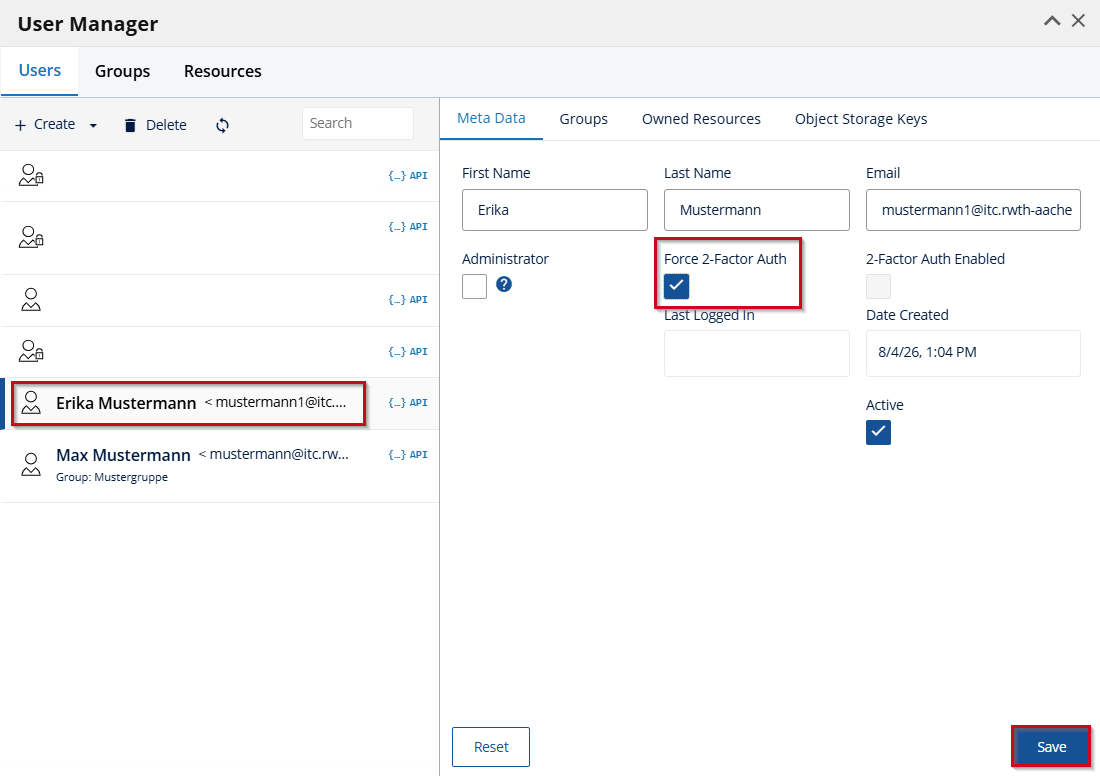
- Select the newly created user from the user list.
- Open the Metadata tab.
- Enable the Enforce 2-Factor Authentication option. This setting will require the user to set up two-factor authentication the next time they log in.
- Click on Save.
Log in and set up MFA
Once the IONOS contact person has completed setting up the user account, the user can log in to the IONOS Data Center Designer using the registered email address and initial password as follows:
- Open the IONOS Data Center Designer.
- Log in using the email address and initial password.
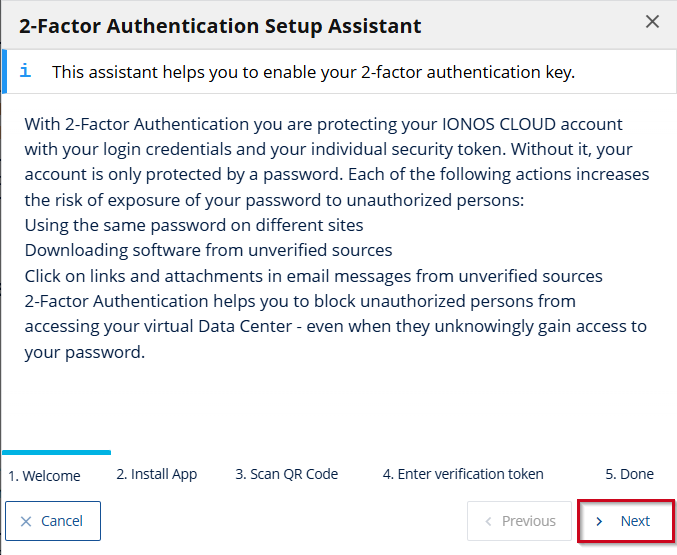
- After logging in, the setup wizard for two-factor authentication opens.
- Follow the steps in the wizard.
- Scan the displayed QR code with an authenticator app.
- Enter the security code.
- Complete the setup.
The setup wizard guides you through the process of setting up two-factor authentication. Once setup is complete, you’ll be prompted to enter an authentication code each time you log in.
Note: The setup wizard may reappear even after setup has already been completed. If two-factor authentication has already been set up, you can close the window by clicking the X in the upper-right corner.
Change initial password
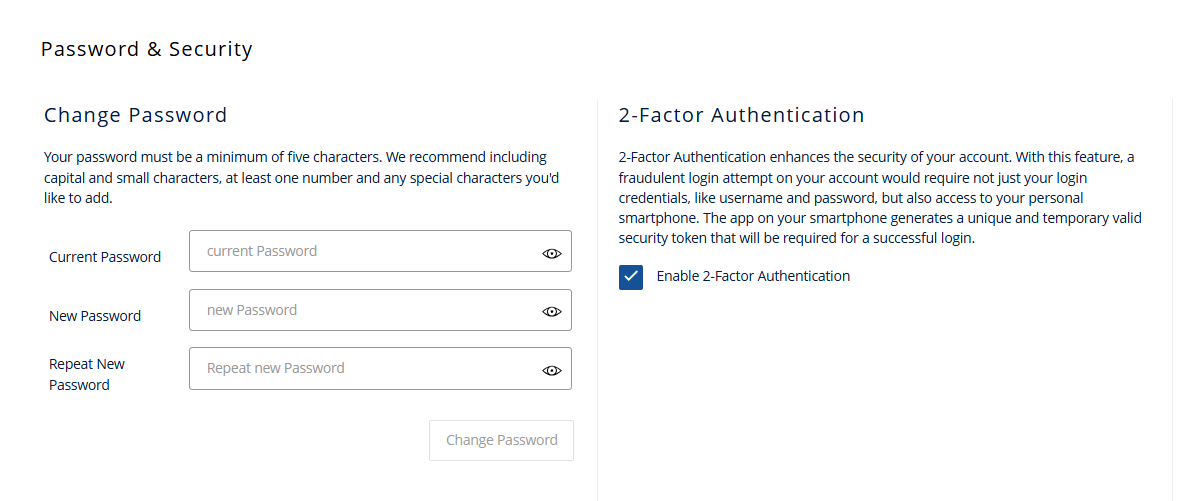
After logging in for the first time, you should change your initial password. To do so, follow these steps:
- Open your user profile in the upper-right corner.
- Select the Account Security section.
- Change the initial password.
- Click Change Password to save the change.
Groups and permissions
In IONOS Cloud, permissions are managed via groups. Users are granted the permissions of the group to which they are assigned. Additionally, groups can be used to specify which resources members have access to.
Create a group
To create a group, follow these steps:
- Open Management > Users & Groups.
- Switch to the Groups tab.
- Click Create.
- Enter a group name.
- Confirm your entry by clicking Create.

Assign Group permissions
To assign group permissions, follow these steps:
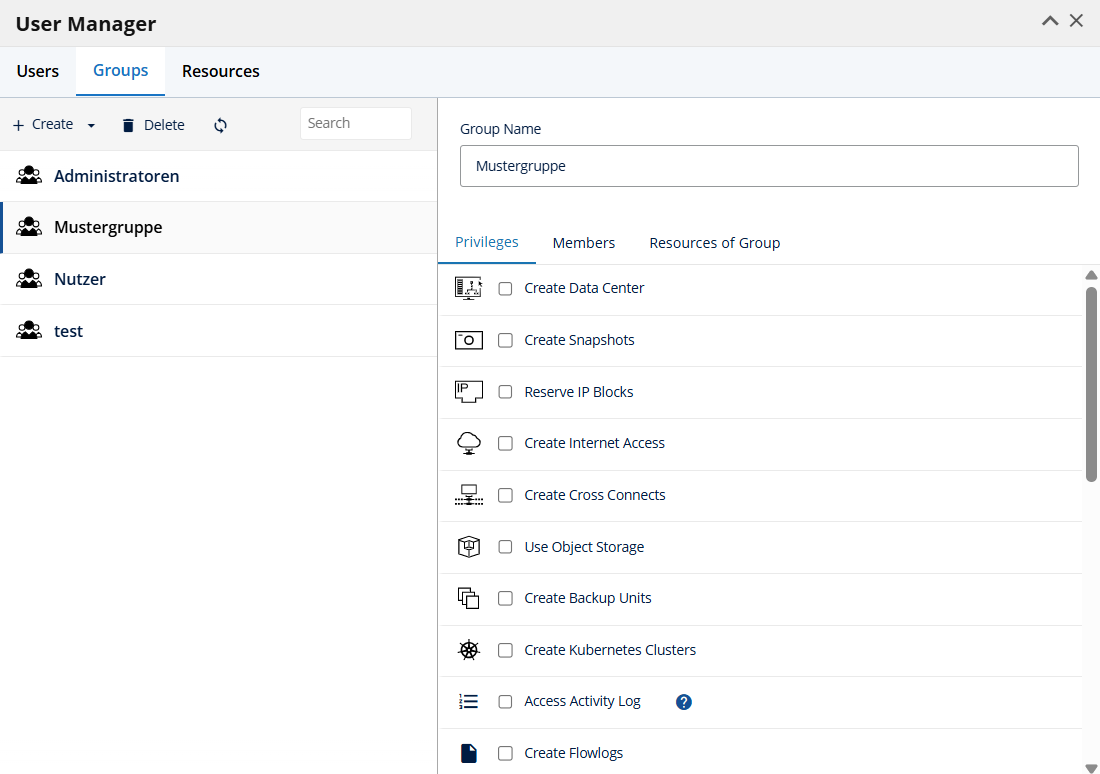
- Select the desired group.
- Open the Group Permissions tab.
- Enable the required permissions.
Note: The selected permissions apply to all members of this group. All changes to permissions are saved automatically.
Important permissions include:
- Create Data Center: Allows you to create new data centers in Canvas.
- Create Snapshots / Backup Units: Important for data backup.
- Reserve IPs / Set Up Internet Access: For network configurations.
- Access to Activity Log / Monitoring: Allows viewing of system logs and performance data.
Add users to a group
To add users to a group, proceed as follows:
- Select the desired group.
- Open the Members tab.
- Click Add User.
- Select the desired user.
- The user is added to the group and receives the corresponding group permissions.

Ressource overview
The Resource Overview under Management > Resource Overview displays current usage and available resource limits. Please notify the IT Service Desk of any requests to change resource quotas or limits.

Additional documentation
Further help on using IONOS resources, an overview of all available cloud resources, and preconfigured applications can be found in the IONOS Cloud Documentation (opens in new tab).
For use cases where resources need to be accessed via scripts or other interfaces, there is also a guide (opens in new tab) on the various application APIs.
