Guide: Setting up local Open WebUI
This page describes how to install and configure Open WebUI with Docker Desktop.
- Installing Docker Desktop
- Installing the Open WebUI Extension
- Configuring the LLM API Base URL
- Using the Models
Installing Docker Desktop
First install Docker Desktop by following the instruction on Docker's documentation for your desired operating system:
- Install Docker Desktop on Windows (Docker Desktop can also be installed via Microsoft Store)
- Install Docker Desktop on Linux
- Install Docker Desktop on Mac
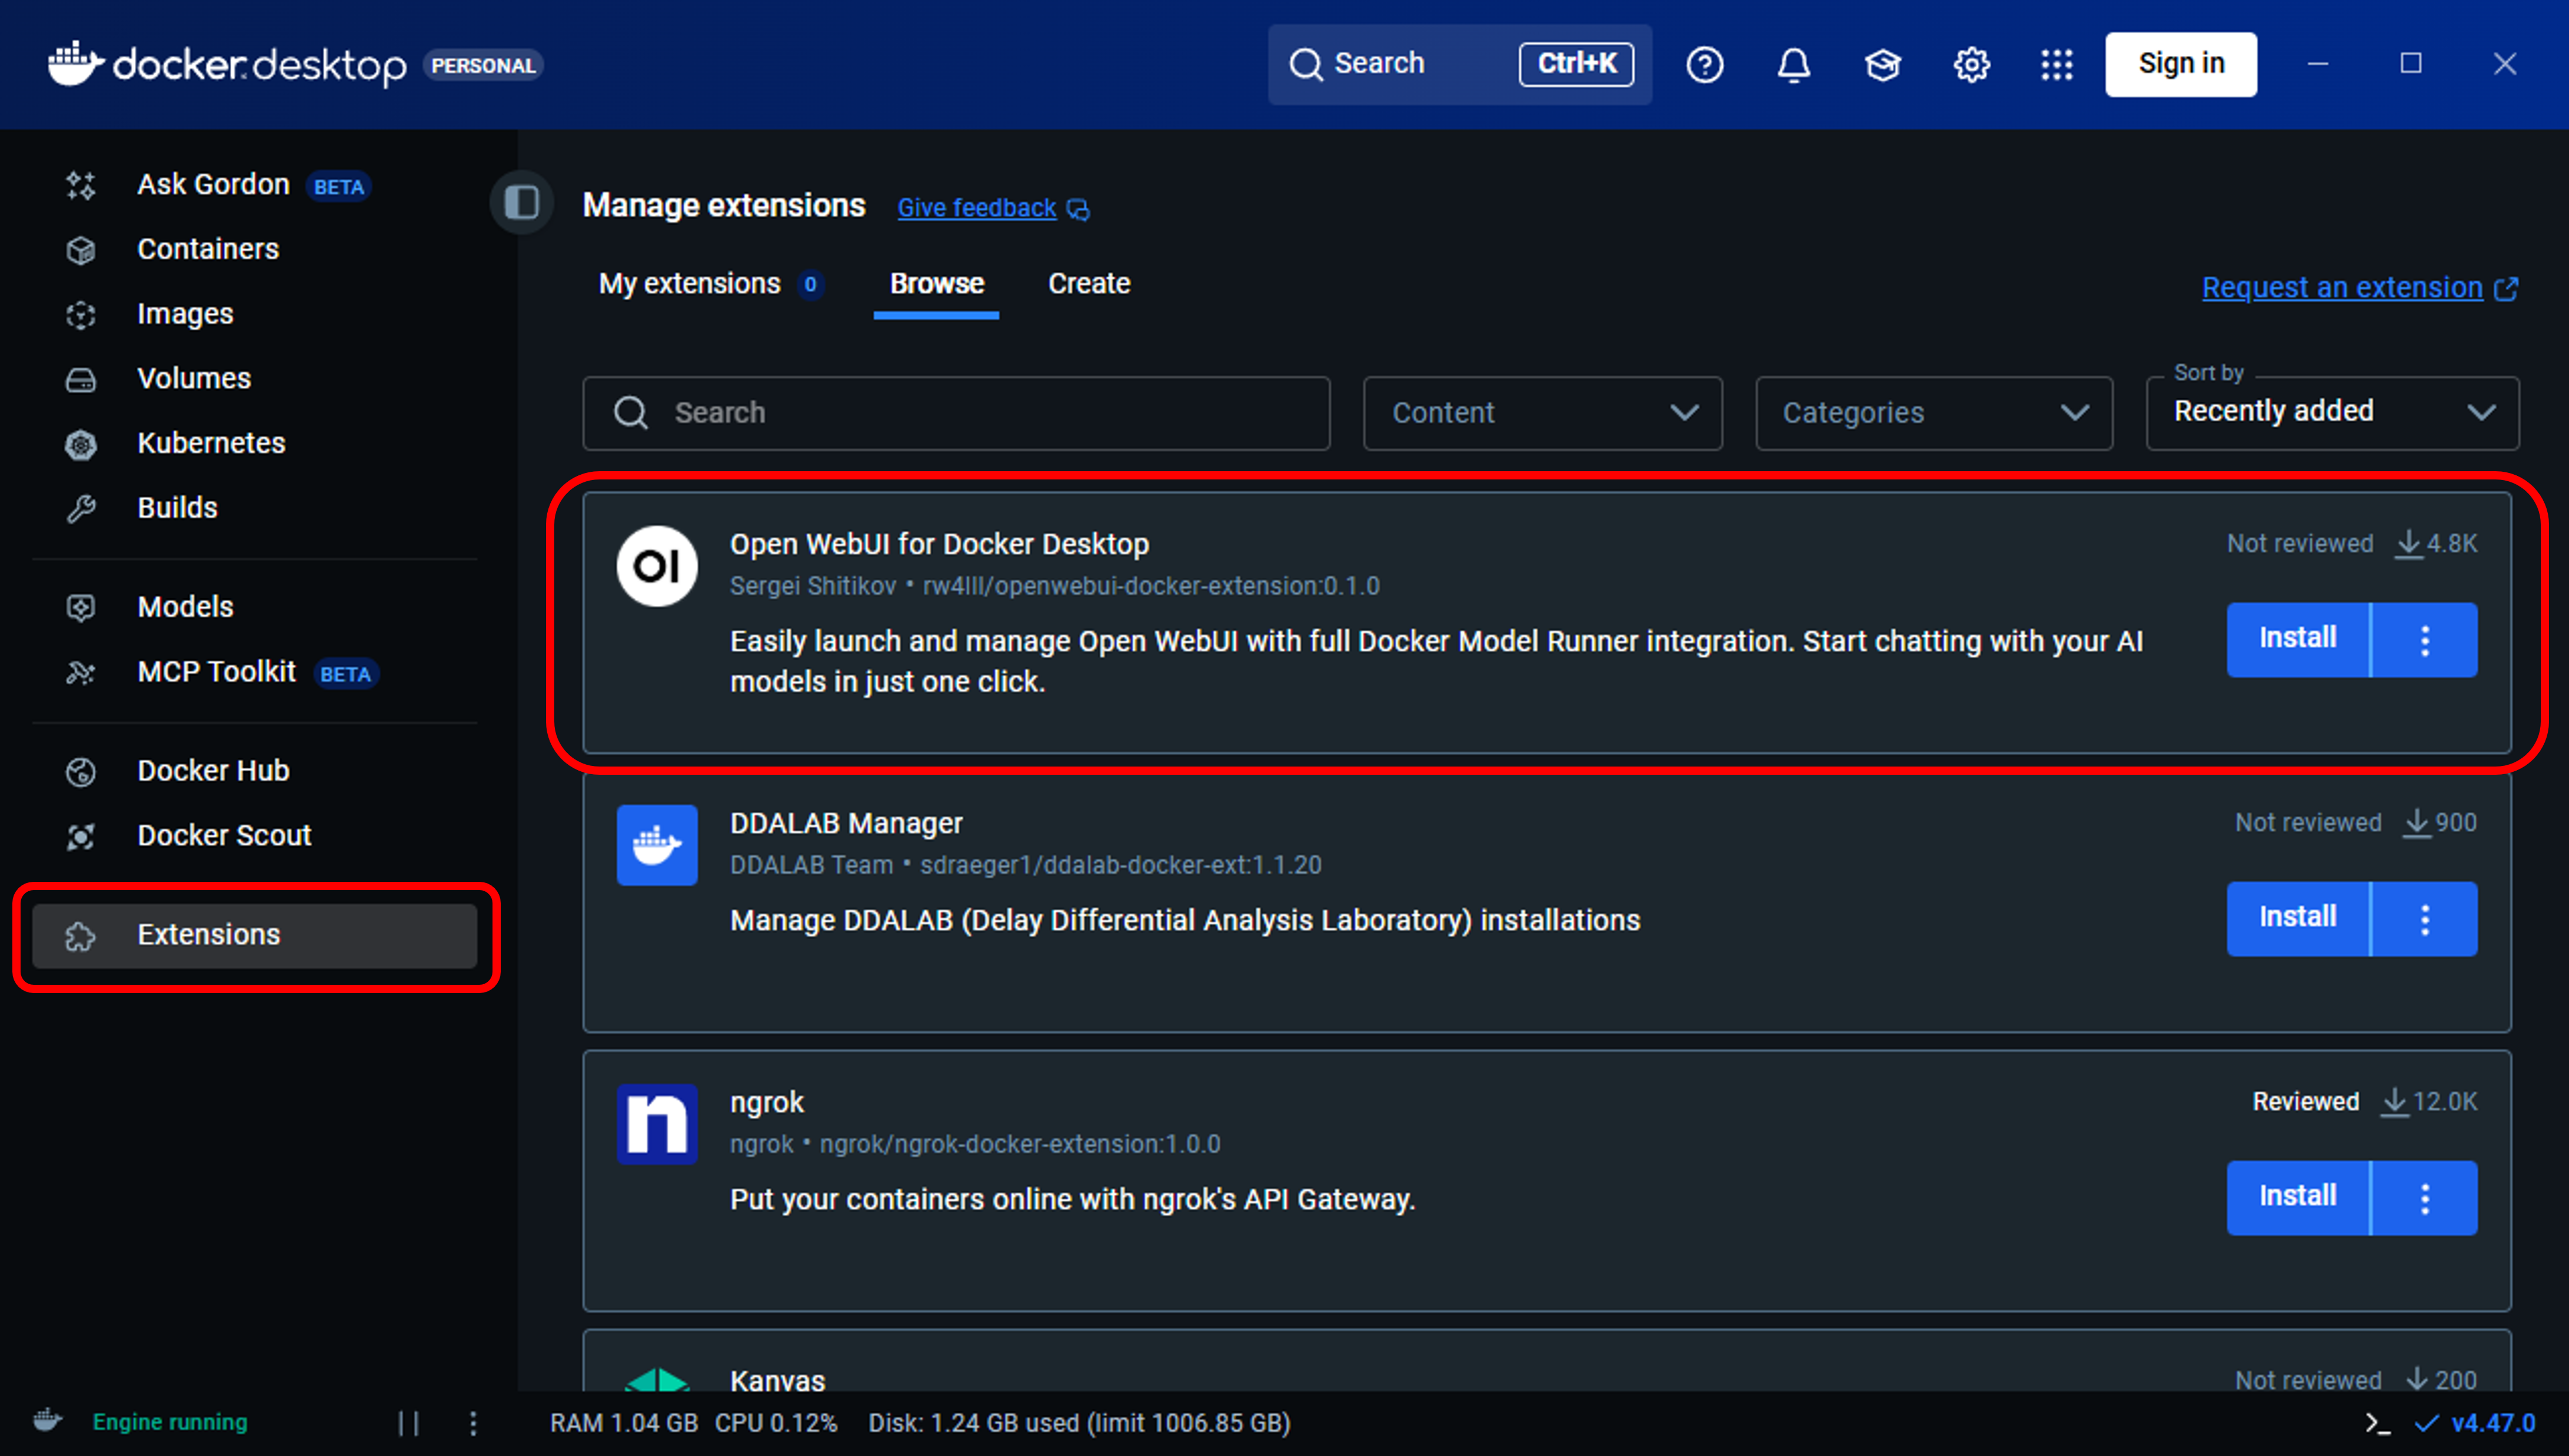
Installing the Open WebUI Extension
After the sucessful installation, open Docker Desktop, navigate to the tab "Extensions" and install the Open WebUI package as shown in the following image.
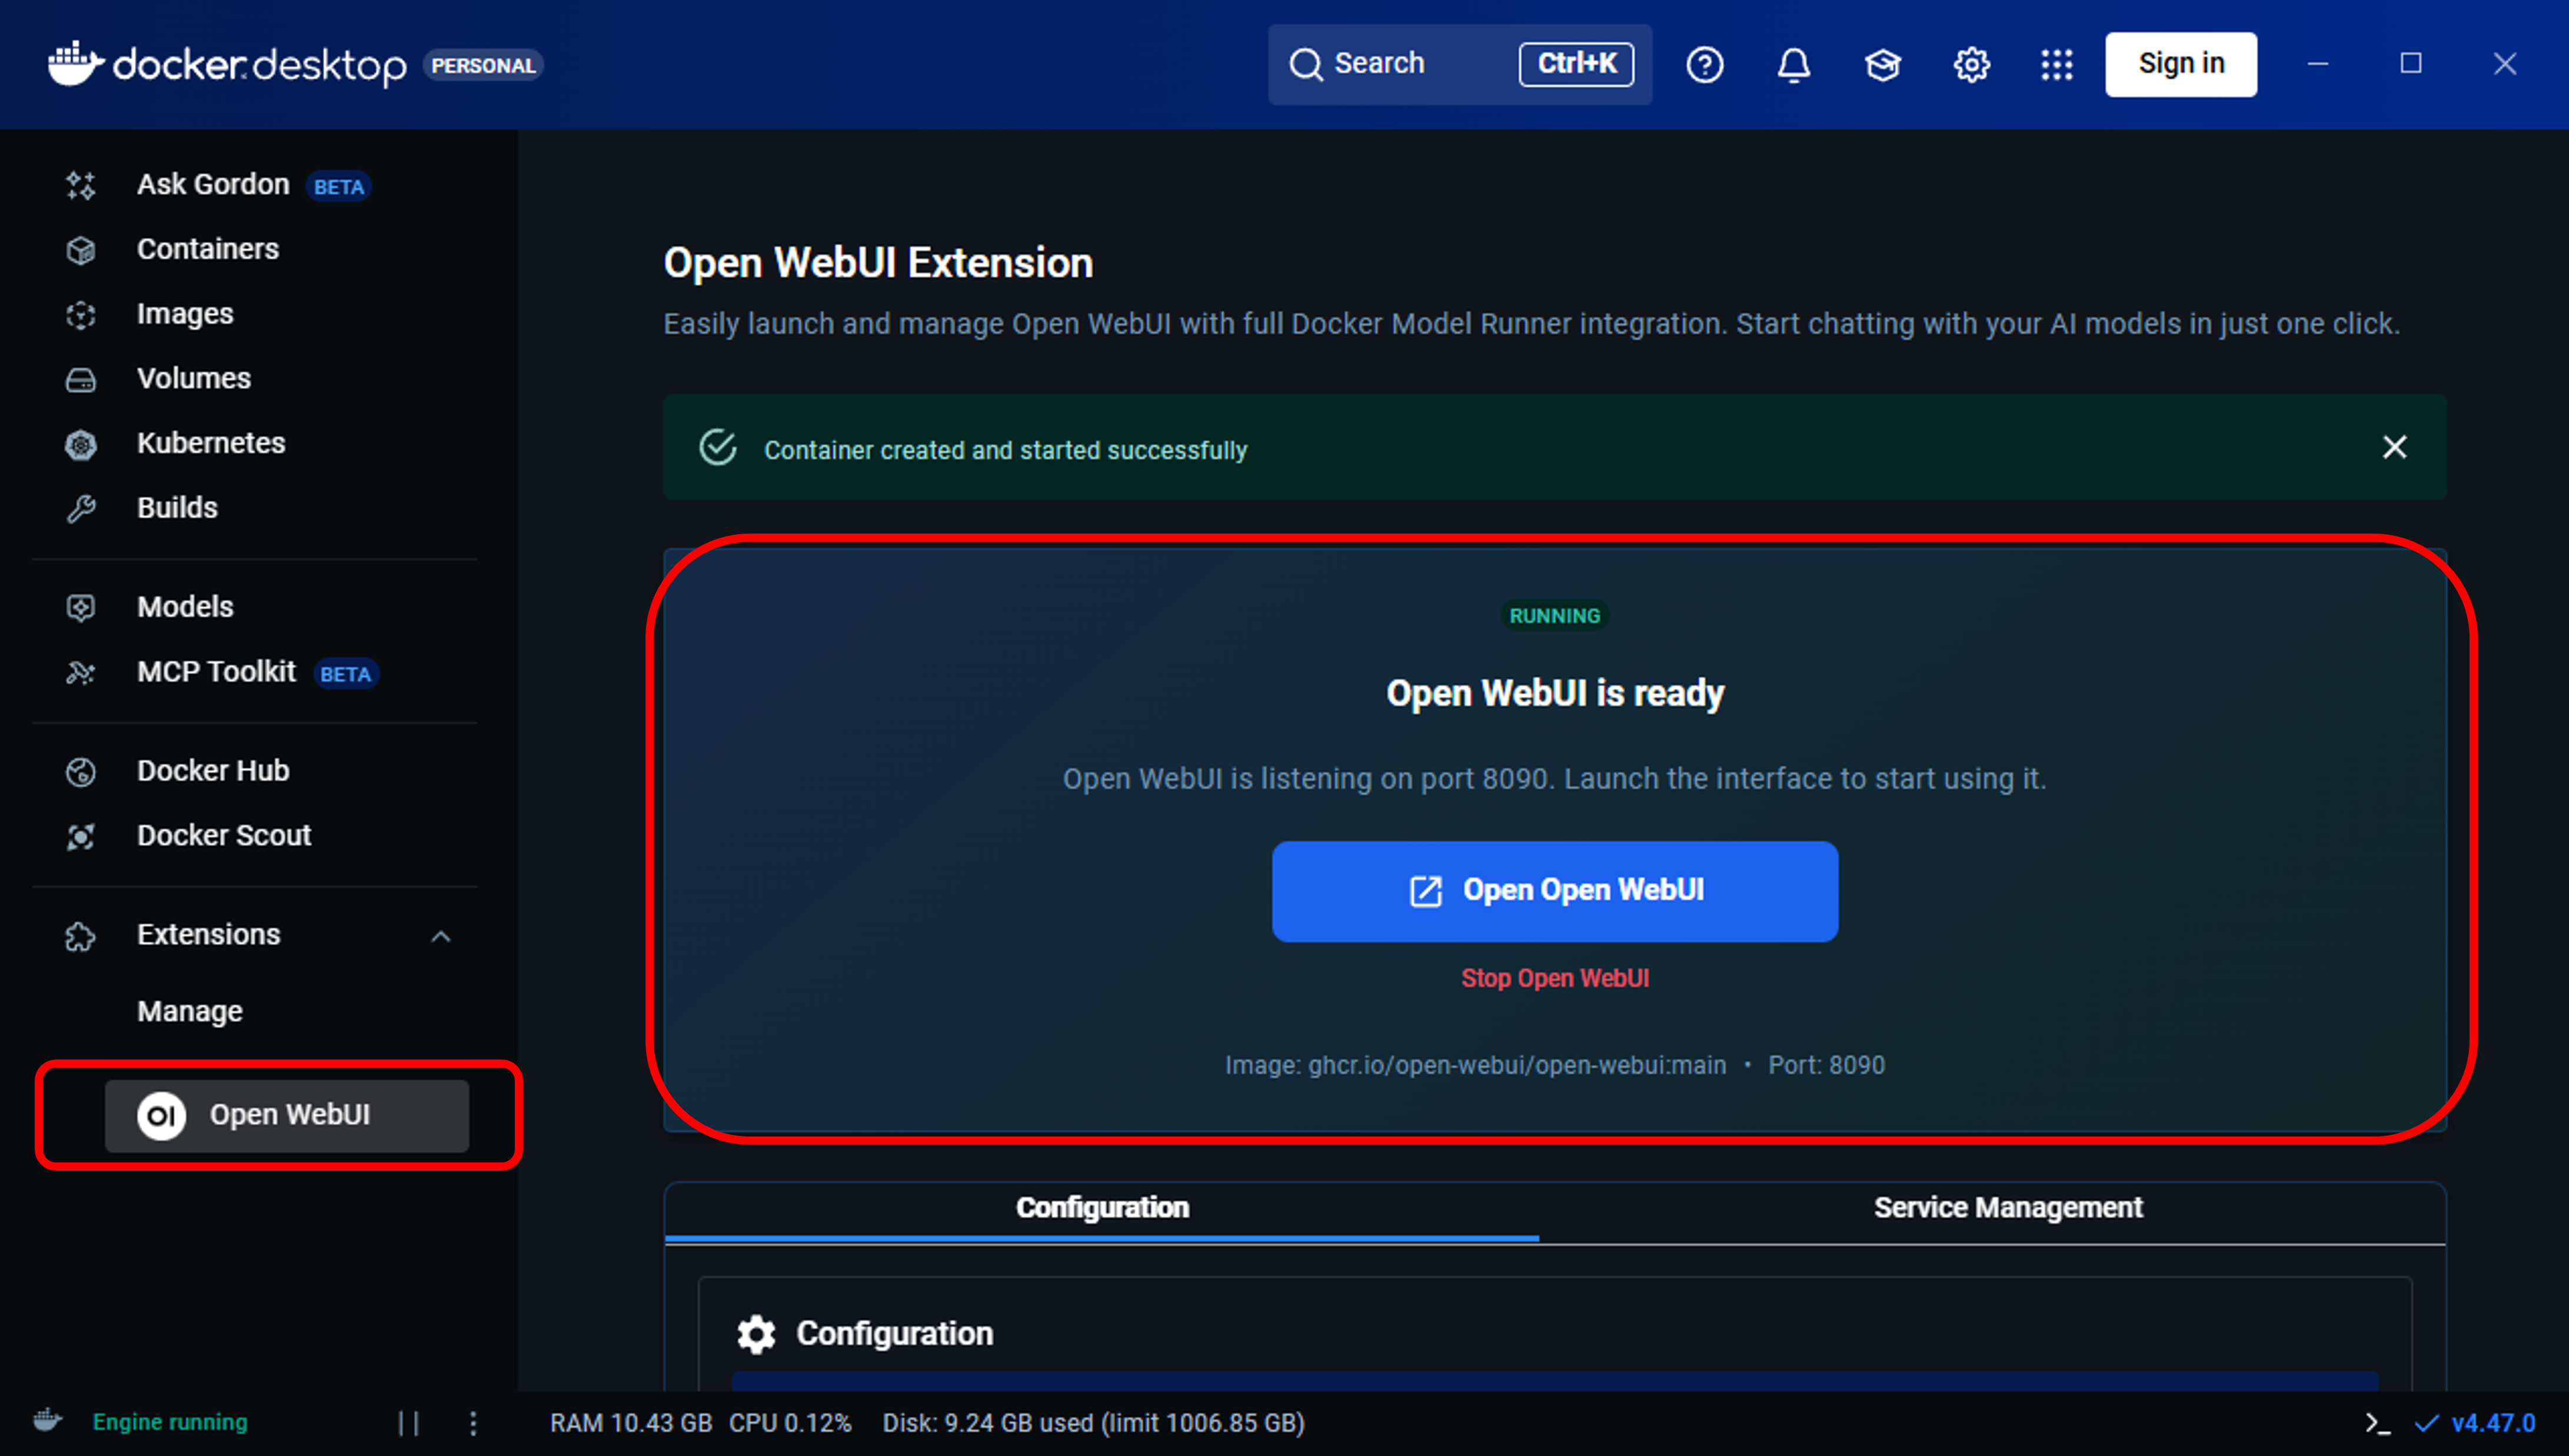
A new extension will pop up on the left hand side. The setup and installation might take several minutes. After that you can open Open Web UI as shown in the following image.
Configuring the LLM API Base URL
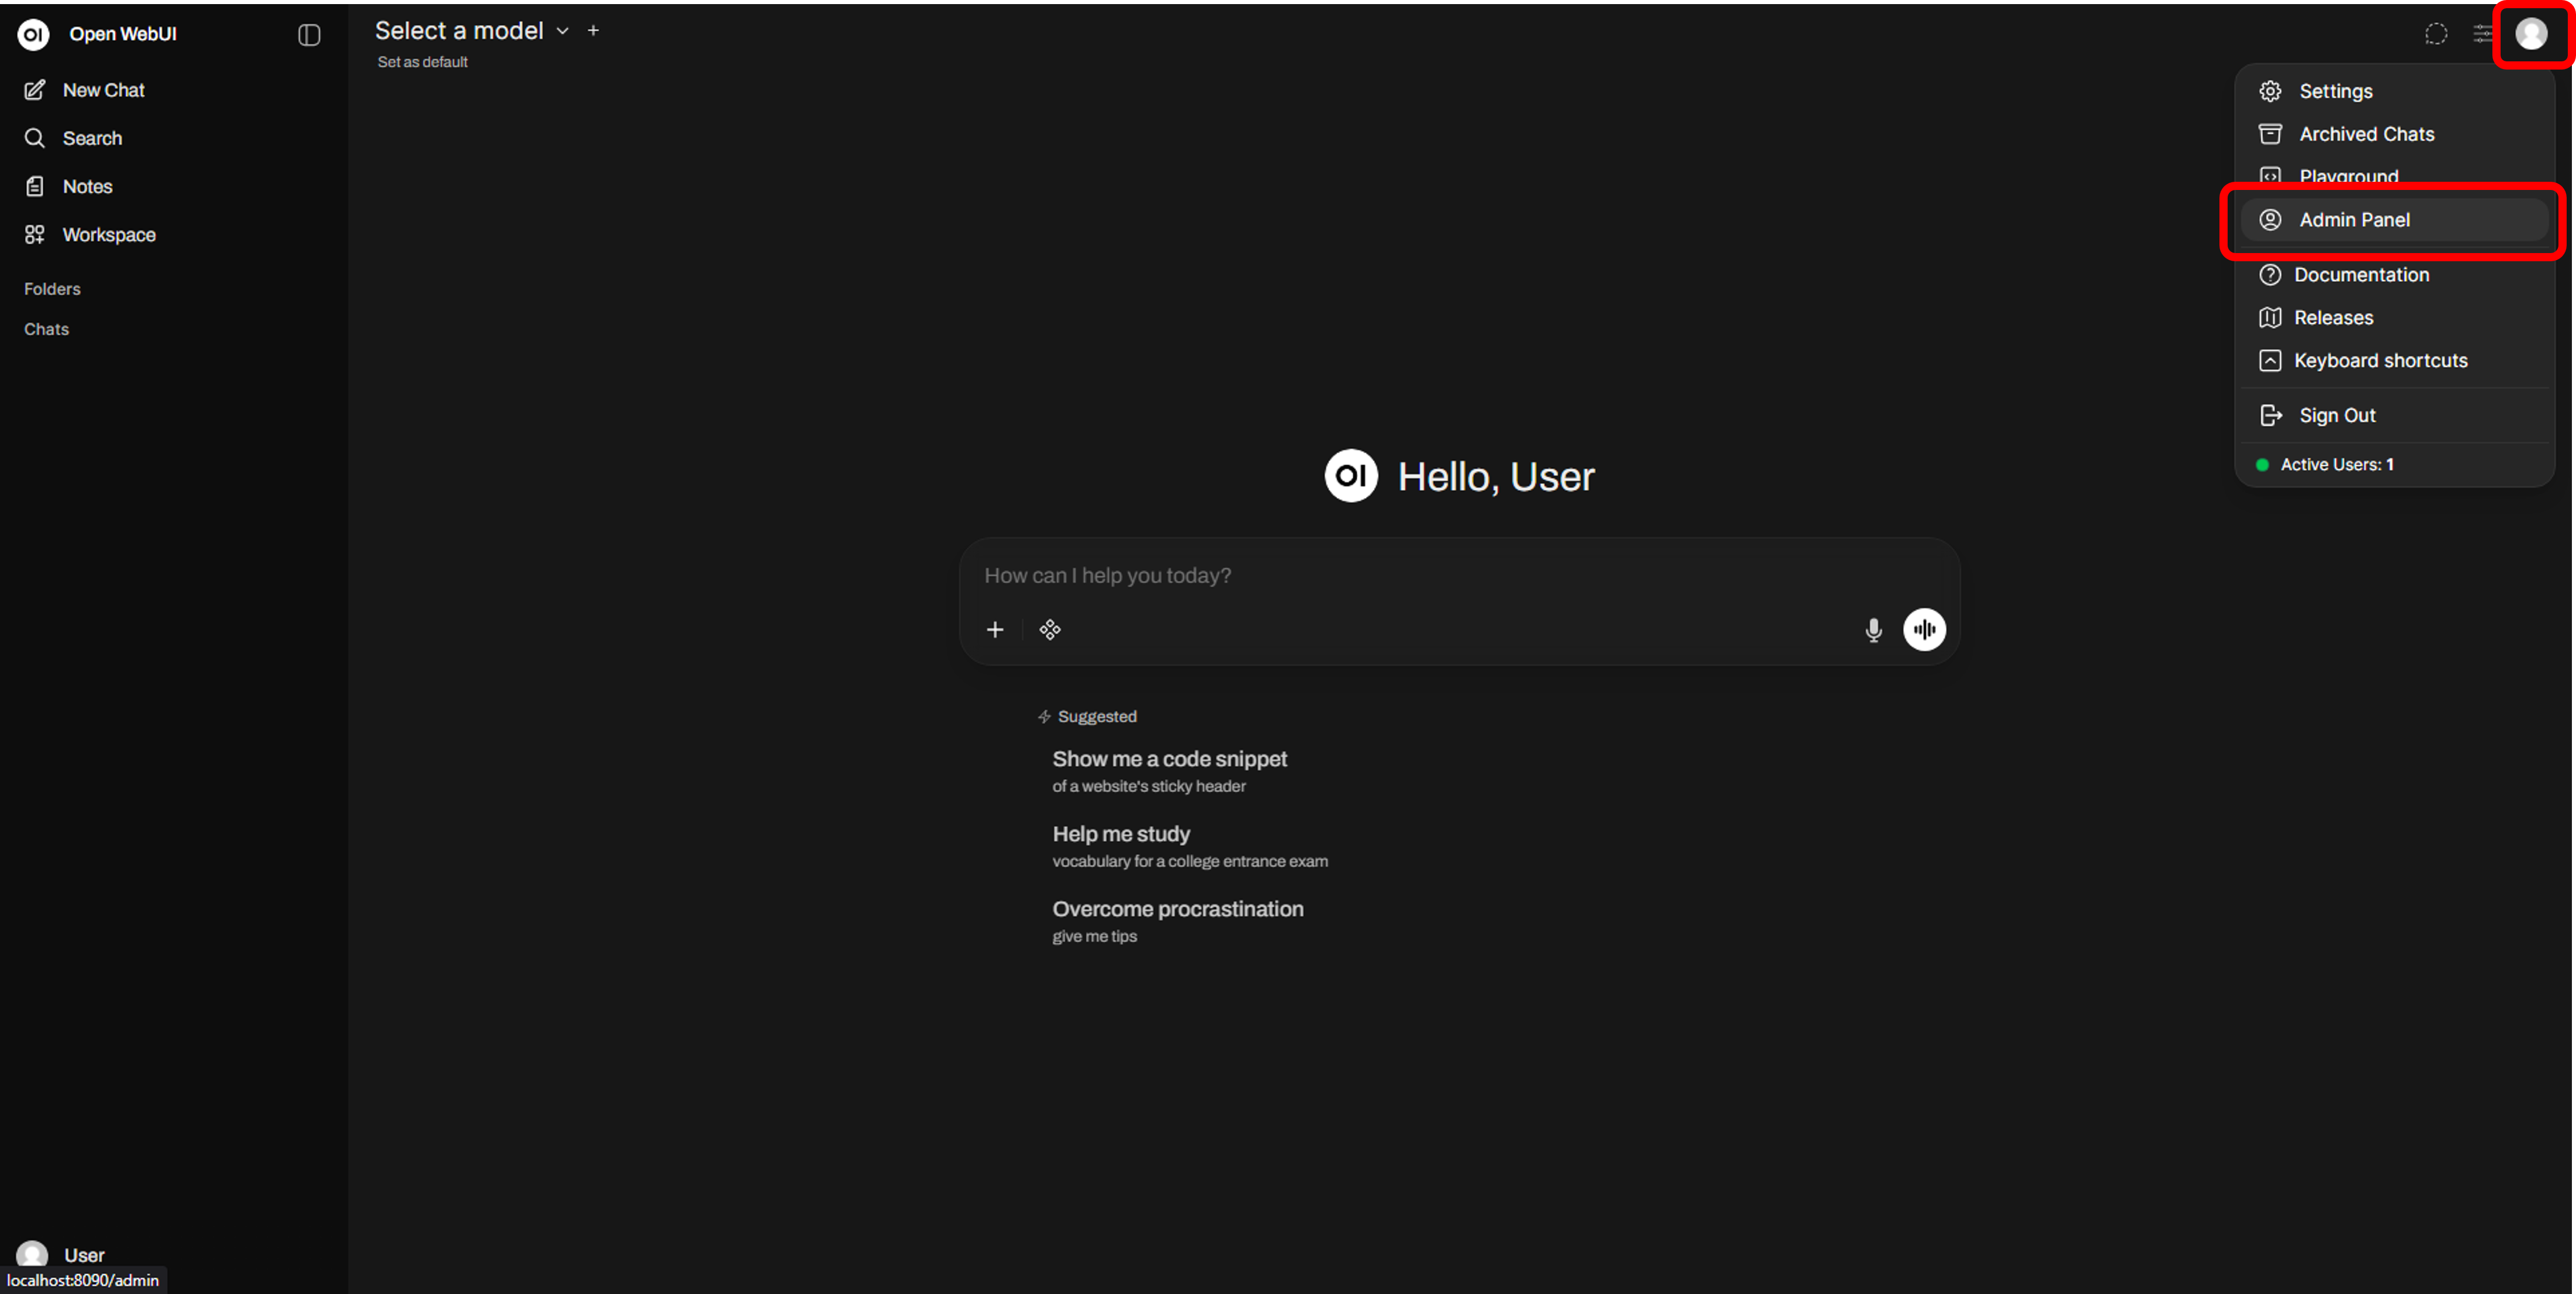
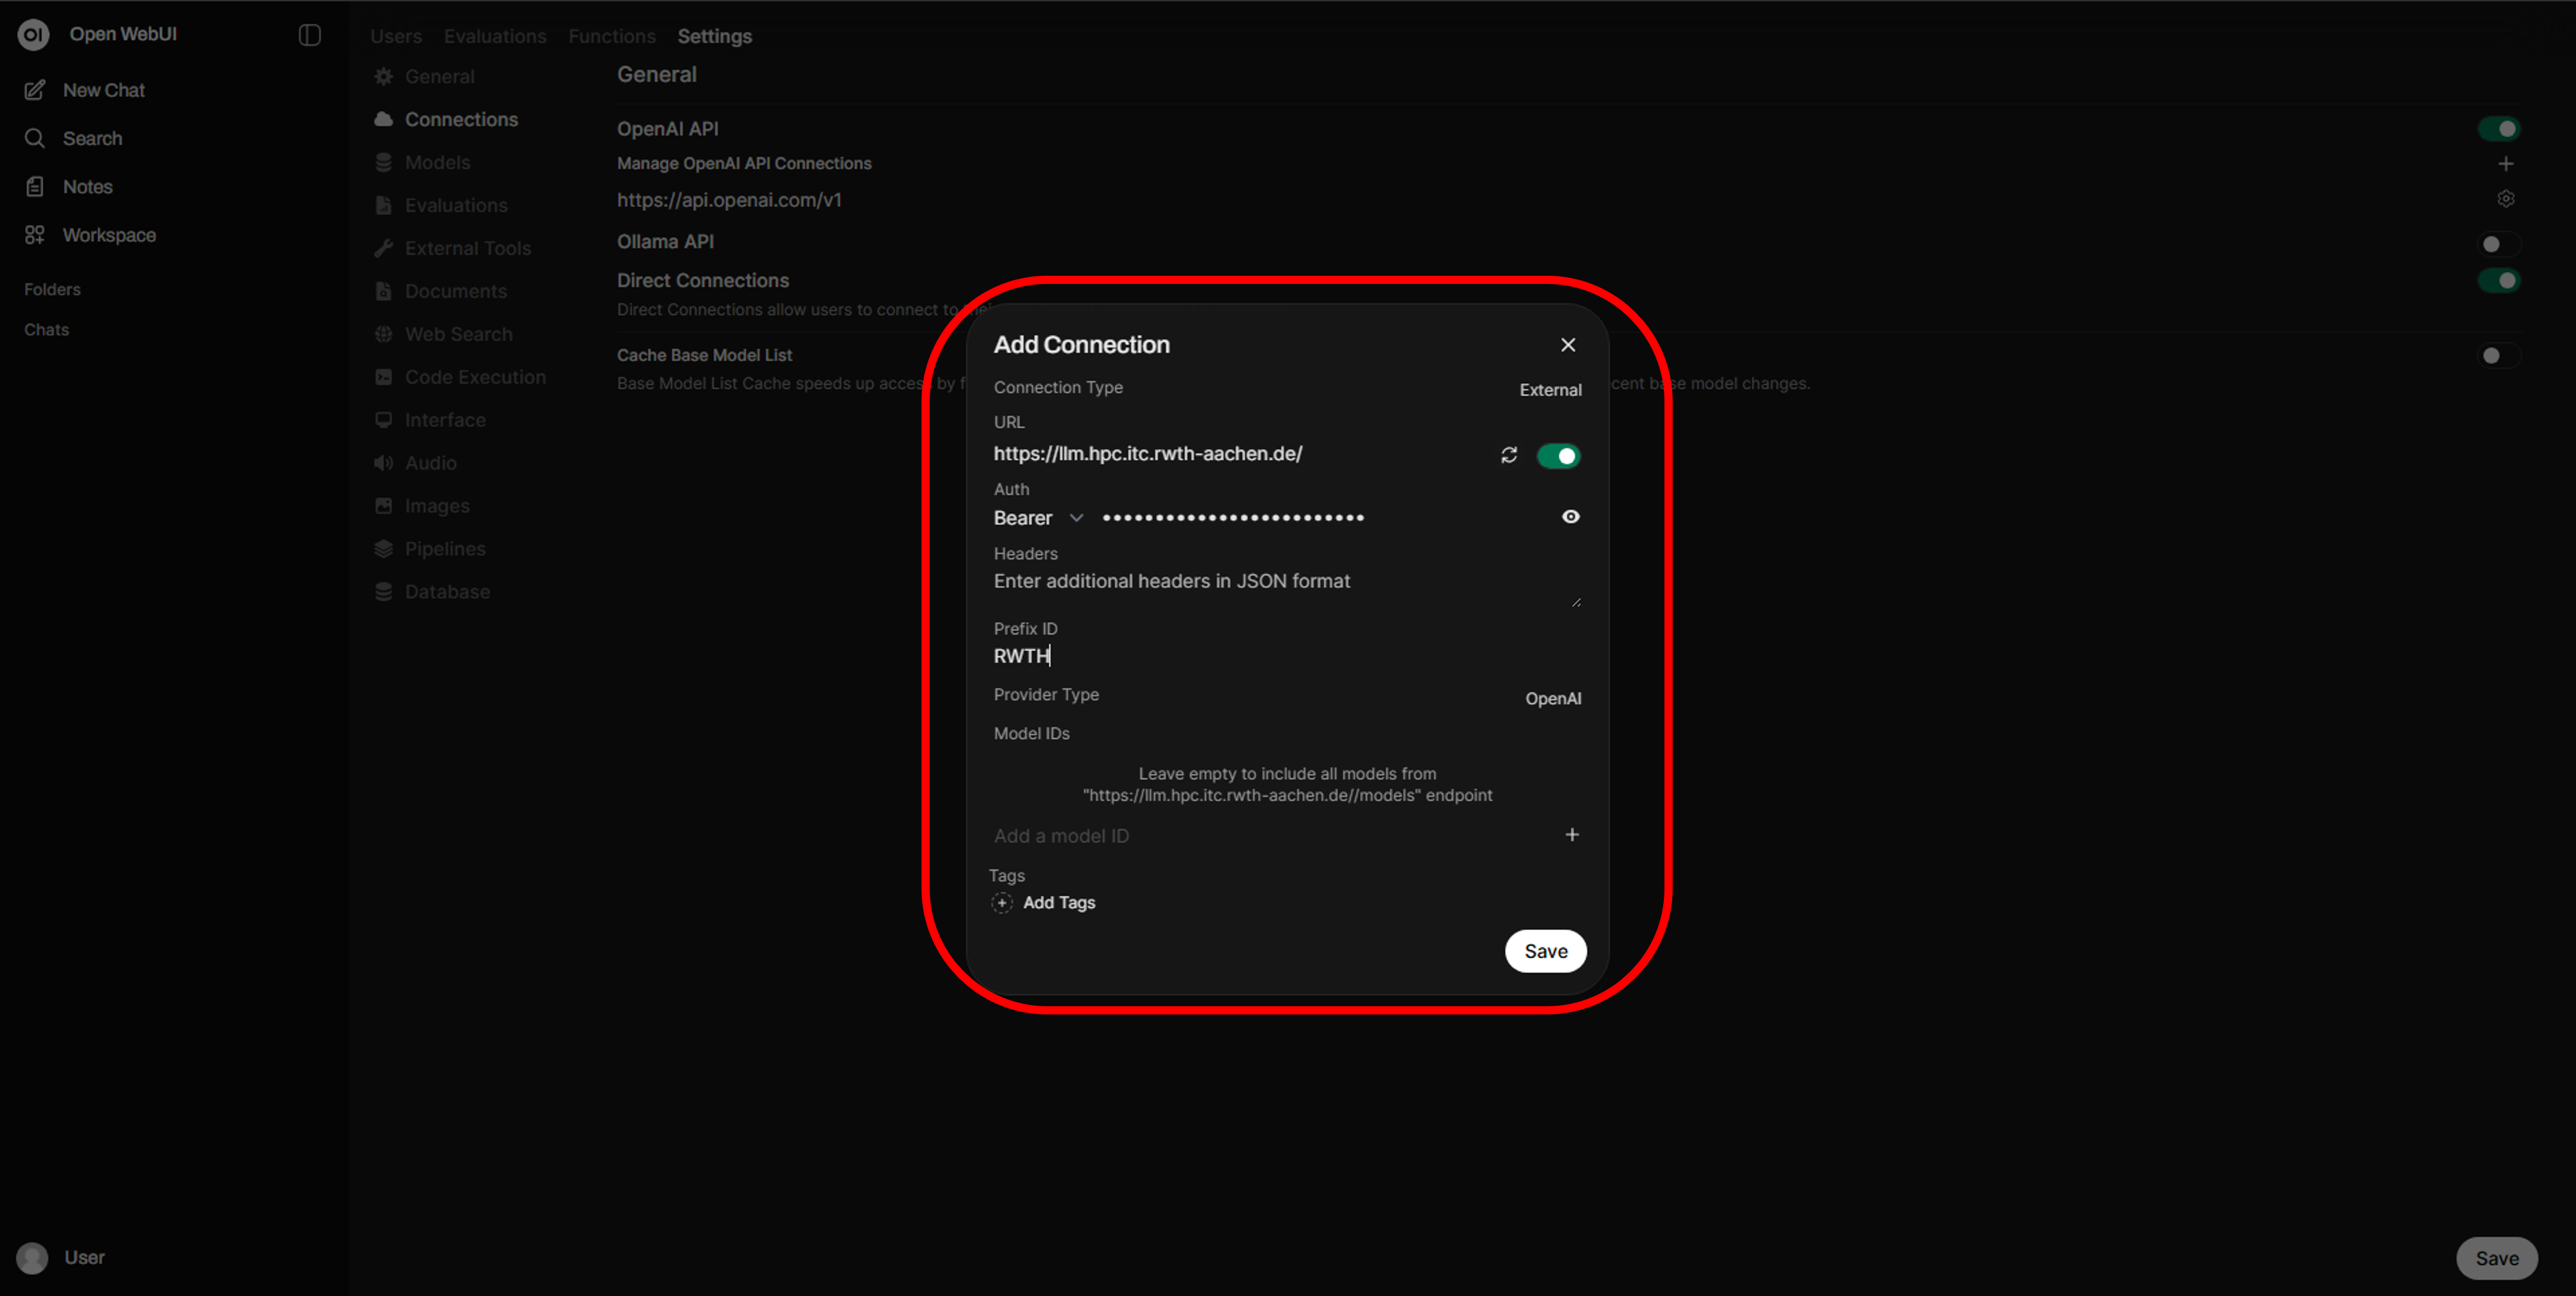
Open WebUI now opens in a new browser tab. To make our LLMs available in Open WebUI, now head to the Admin Panel -> Settings -> Connections and add a new OpenAI connection as shown below.
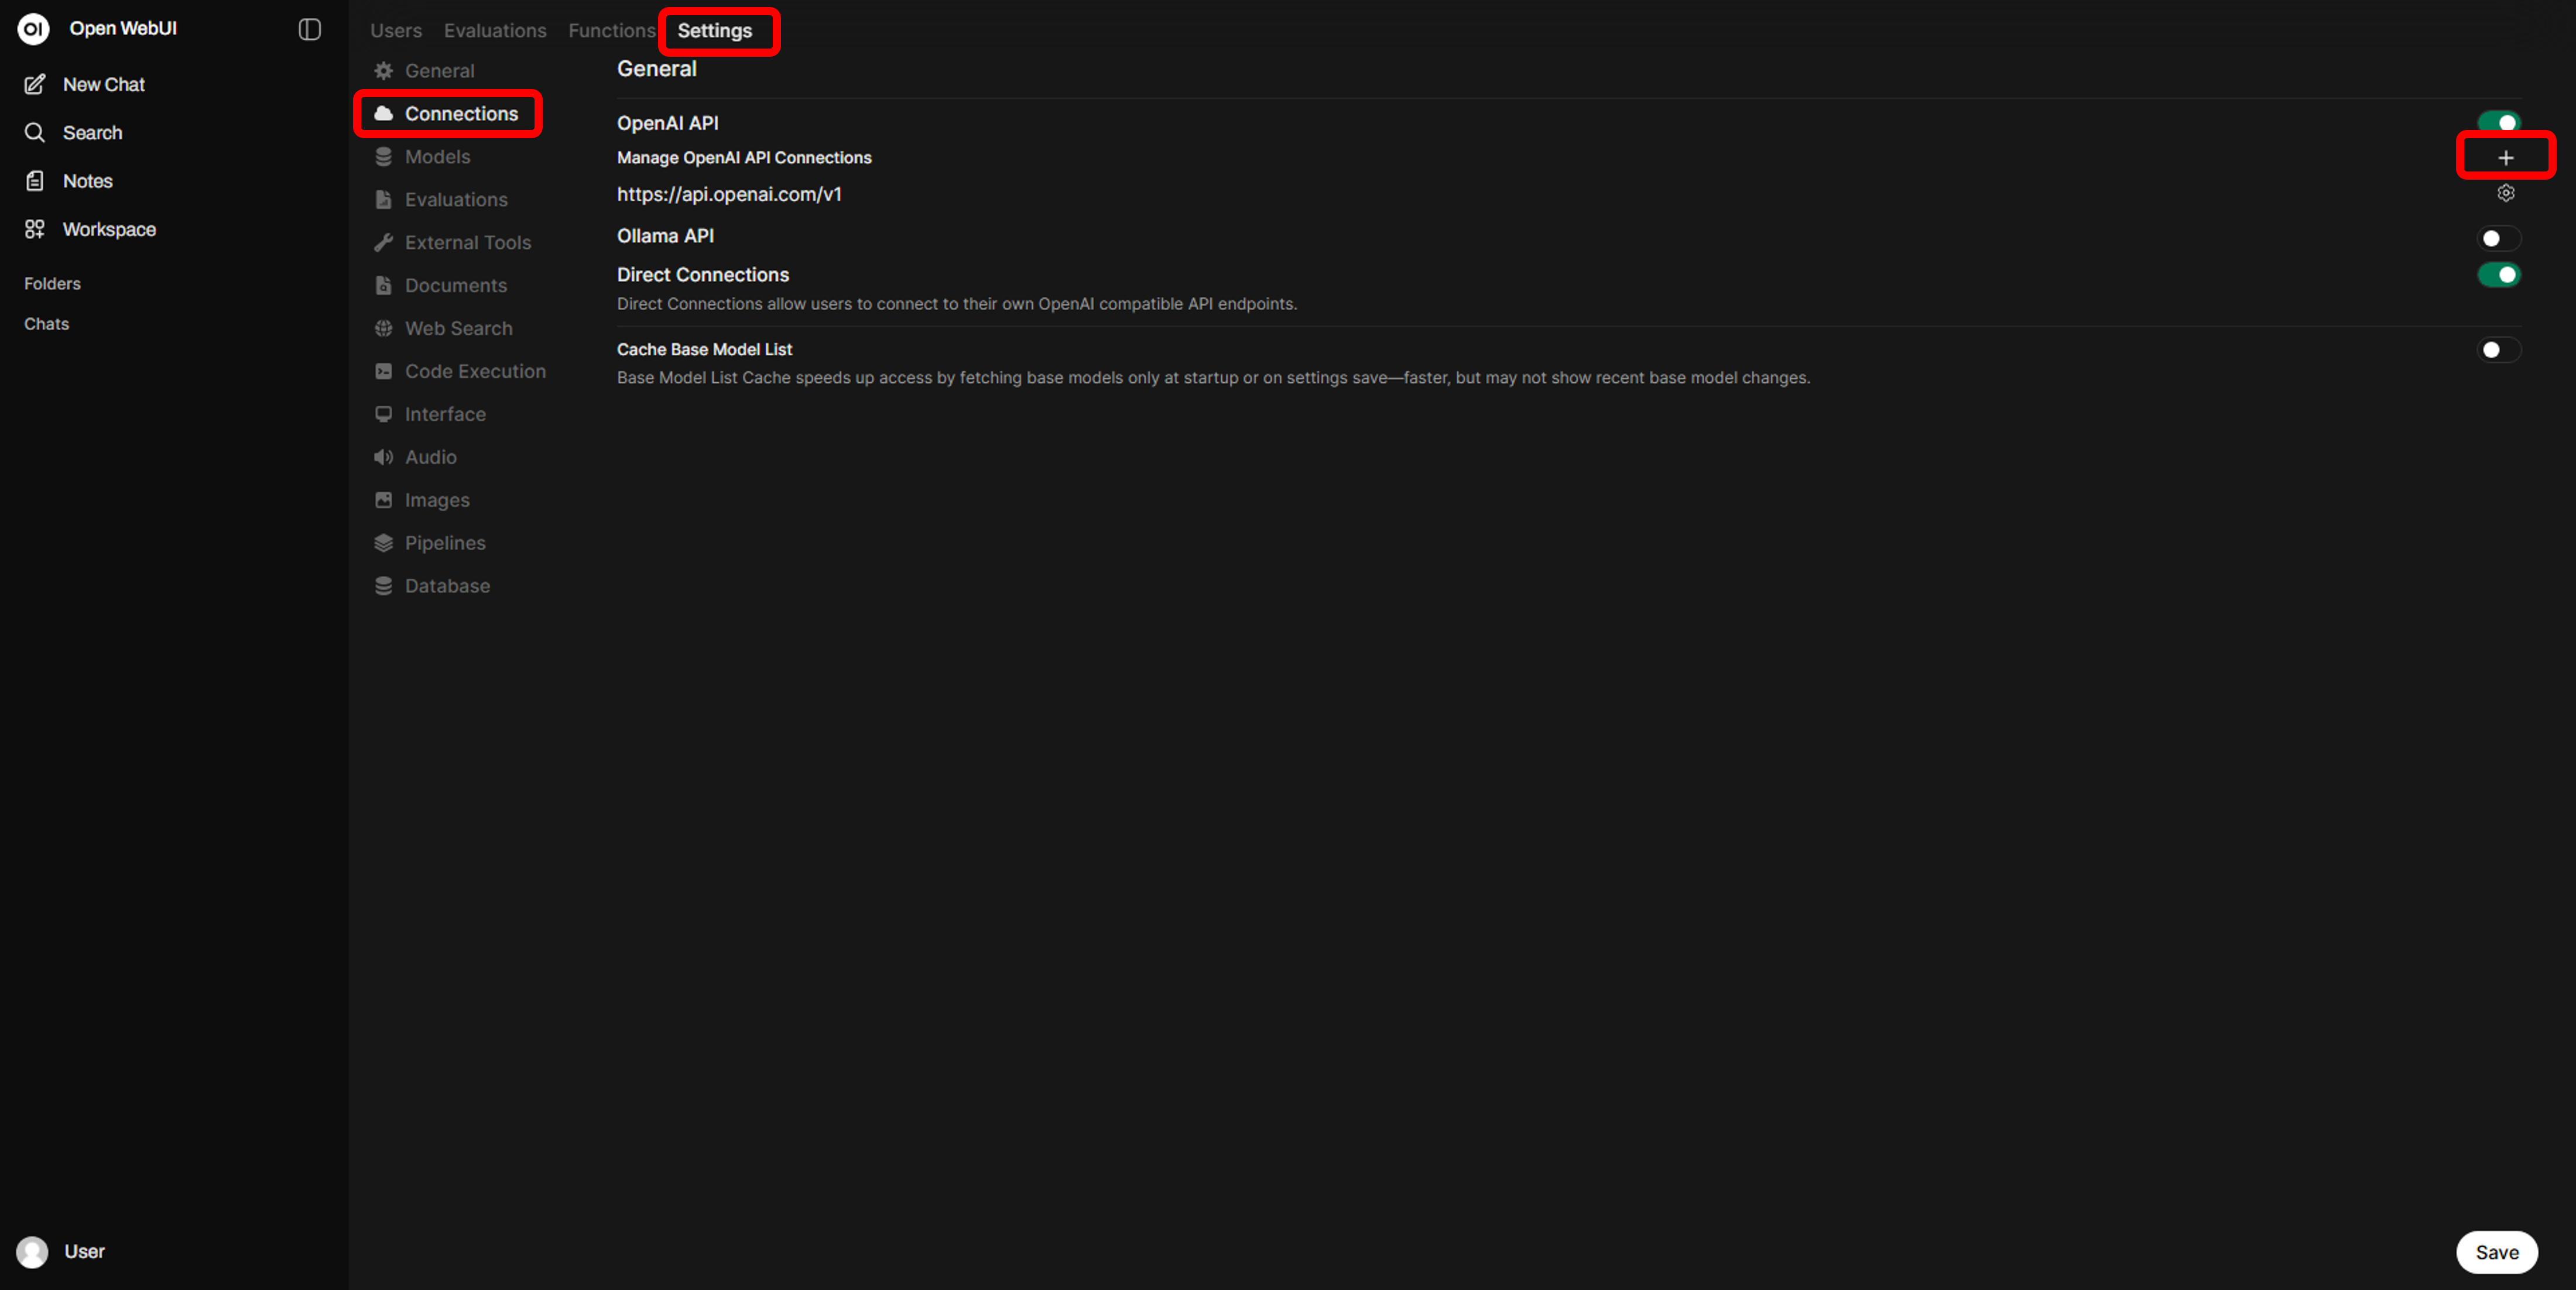
Enter the proxy base URL and your API key (Bearer Token). Additionally, you can set a prefix for the models.
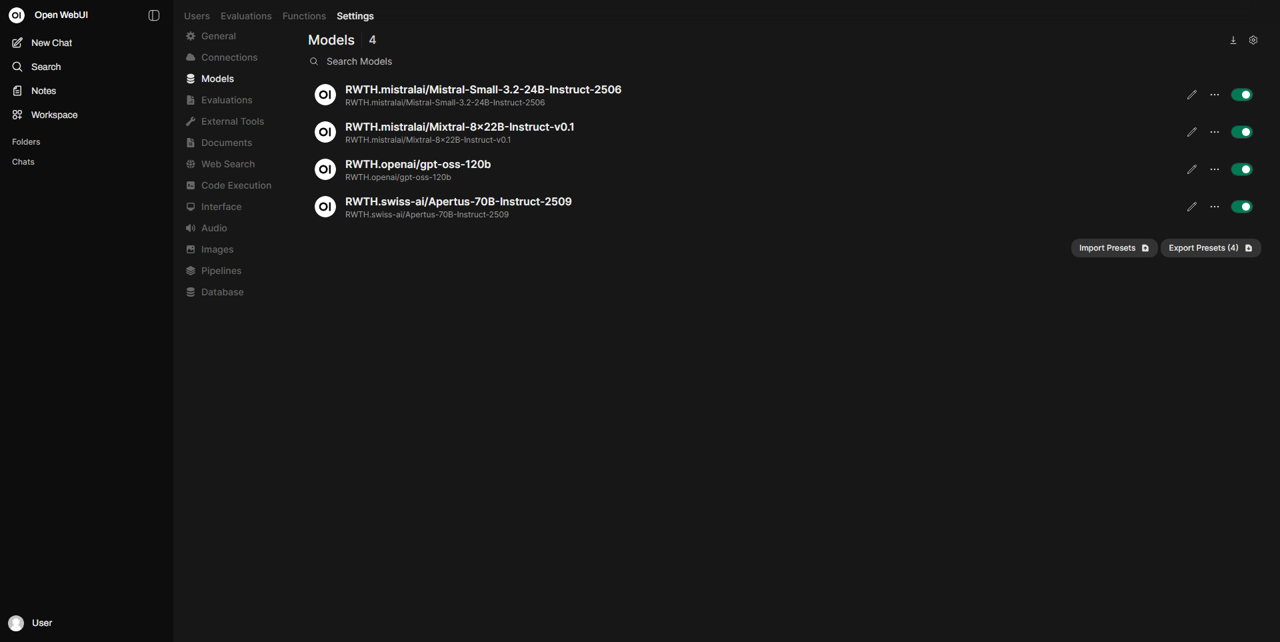
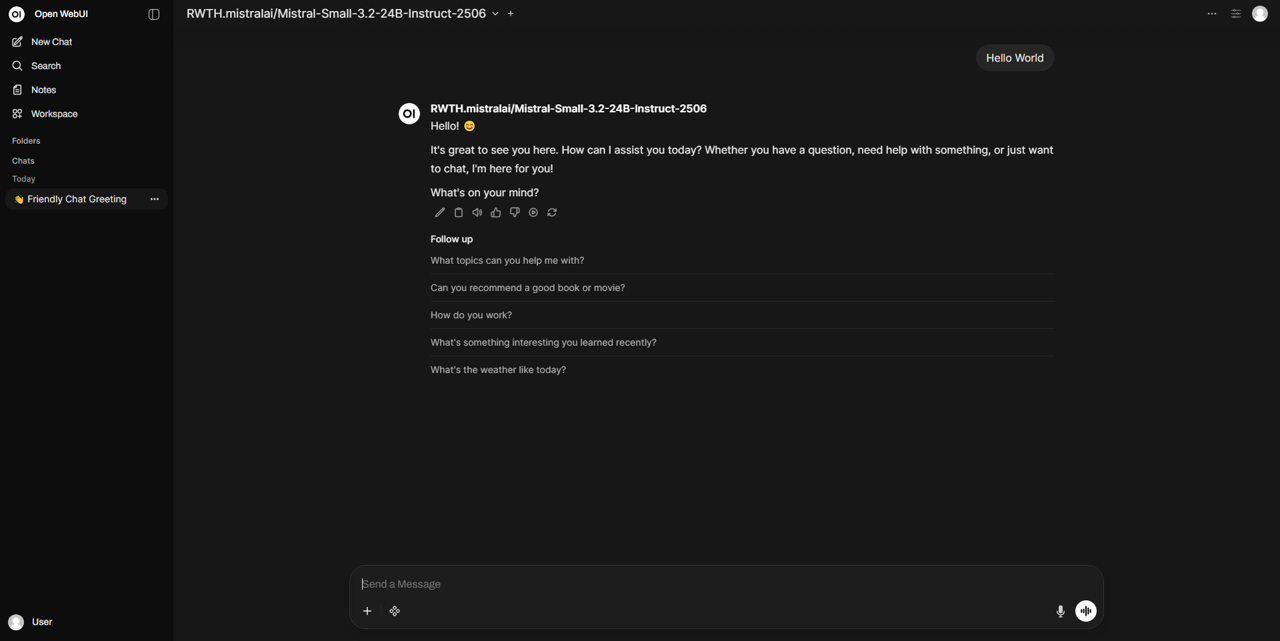
Using the Models
If everything is correct, you can see available models in Open WebUI, which can then be used for chat interaction as shown in the images below.